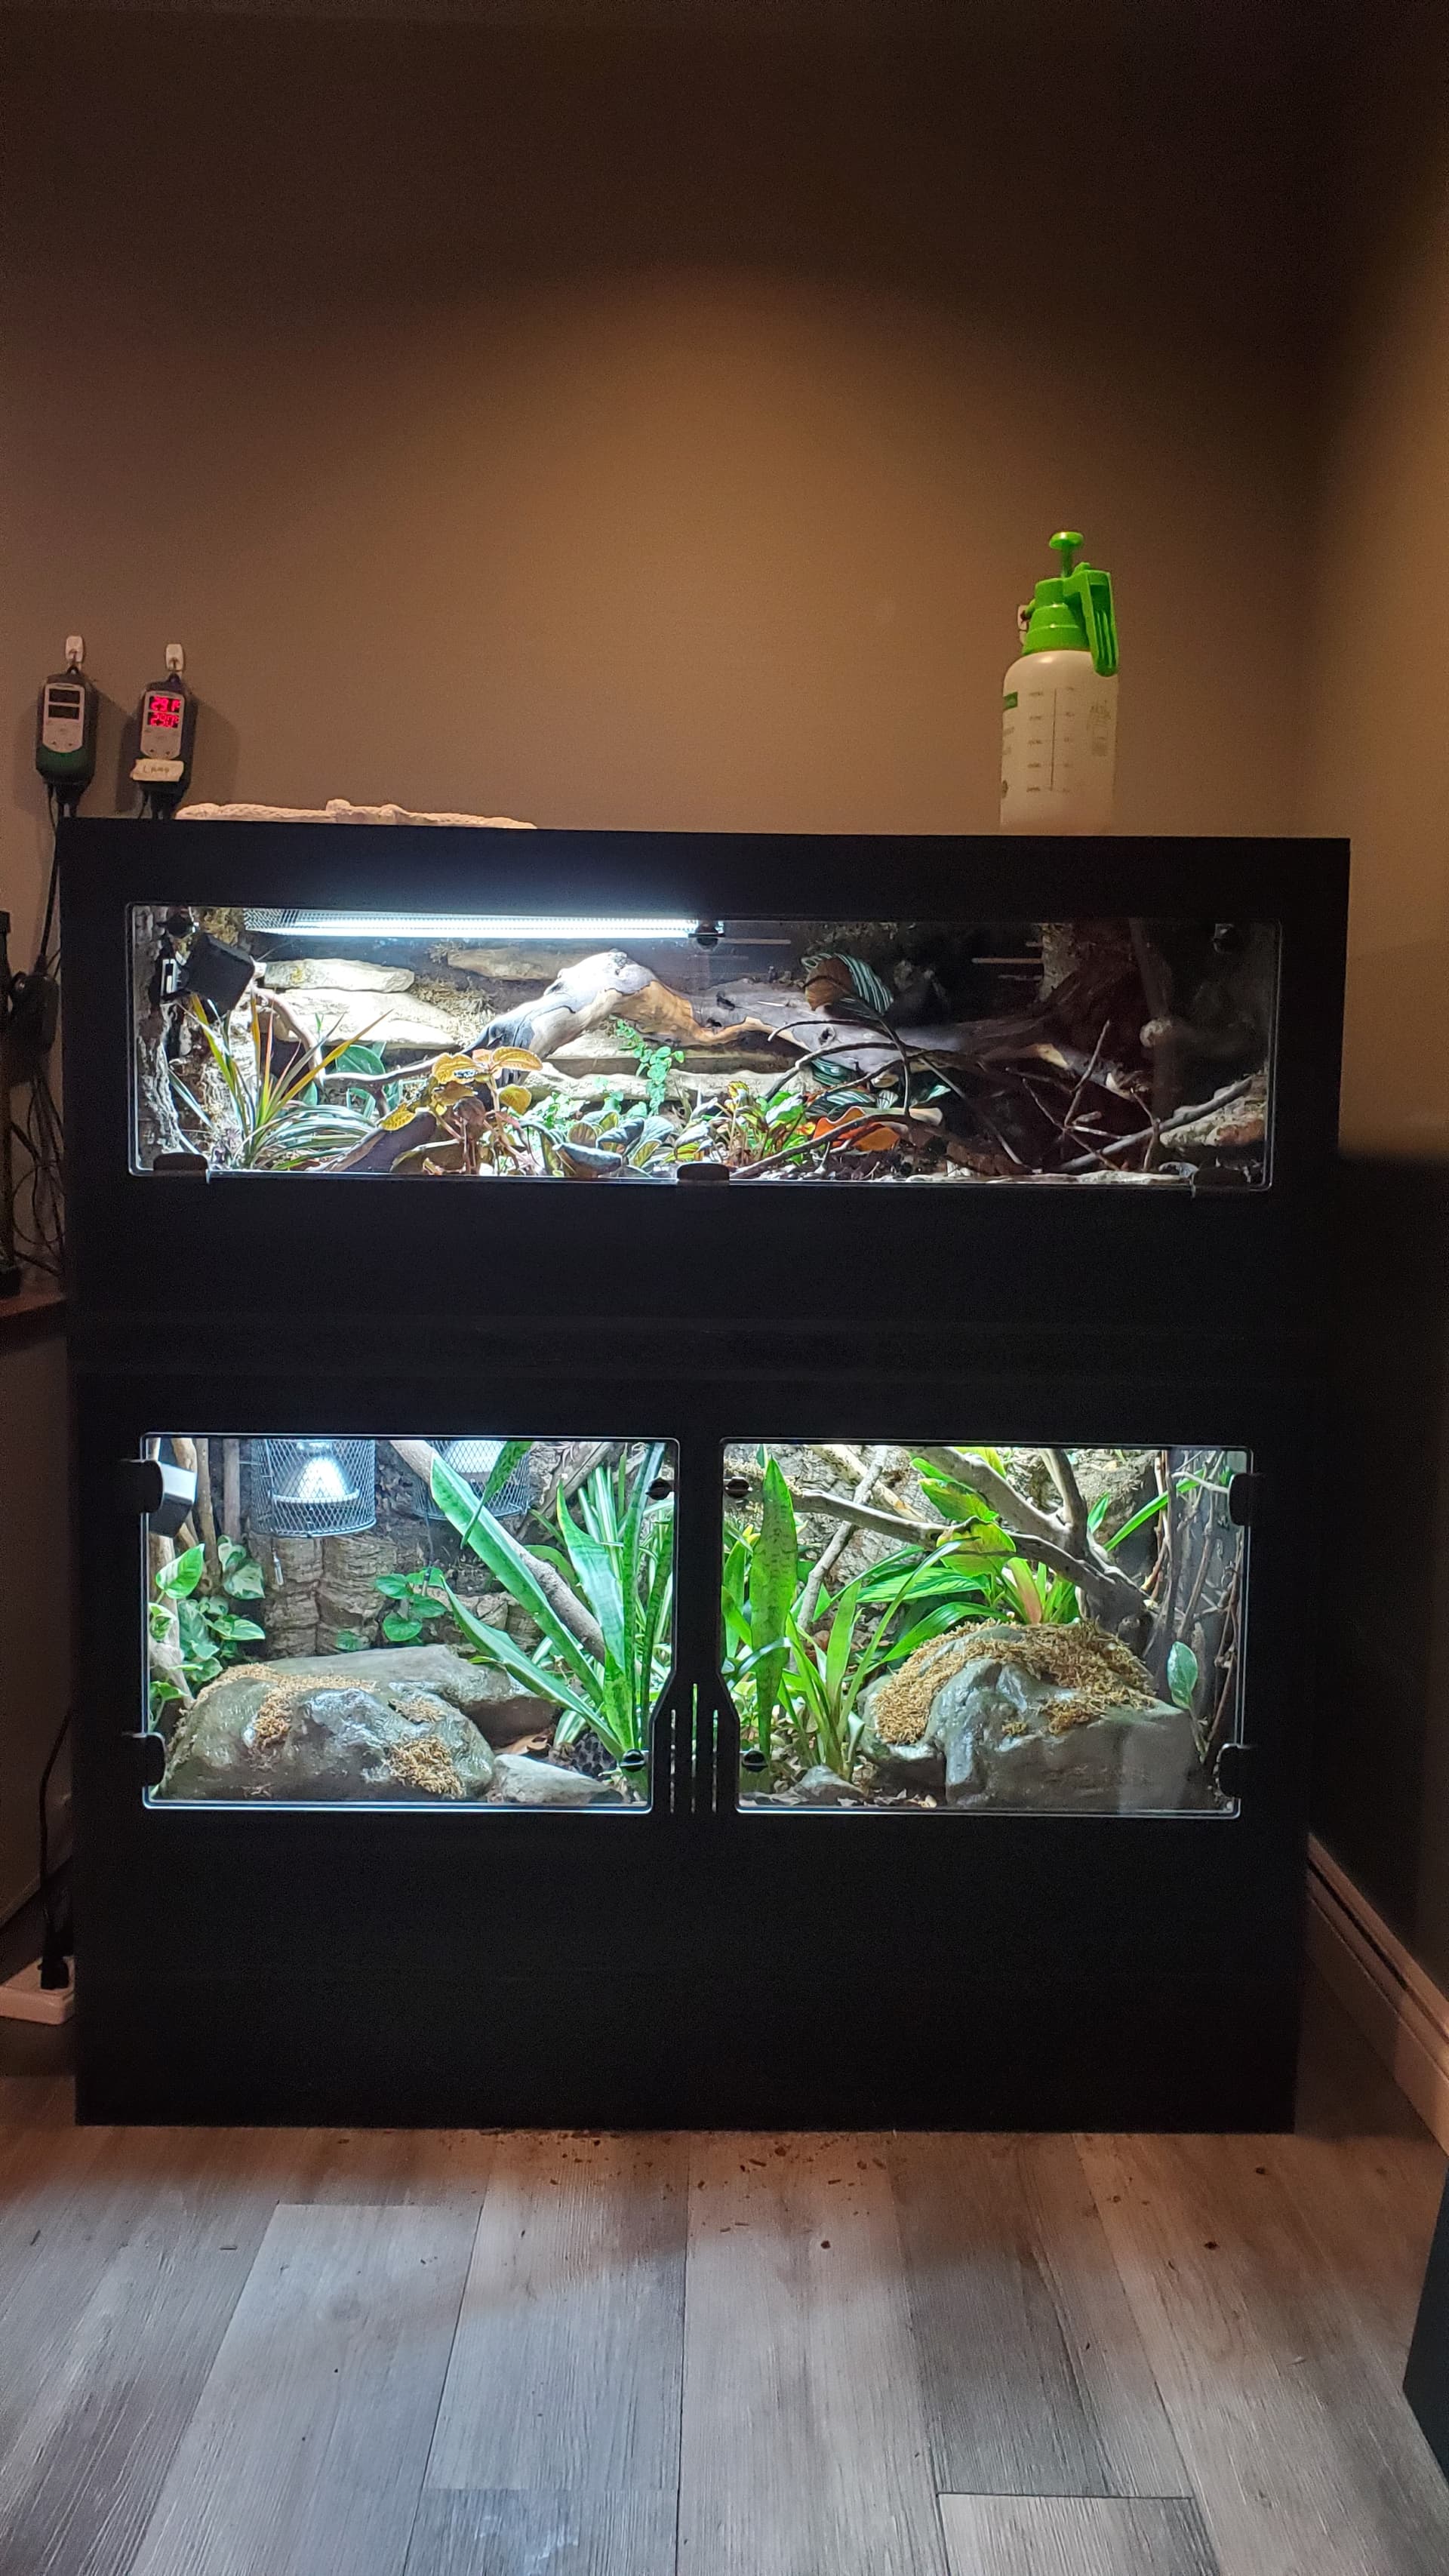
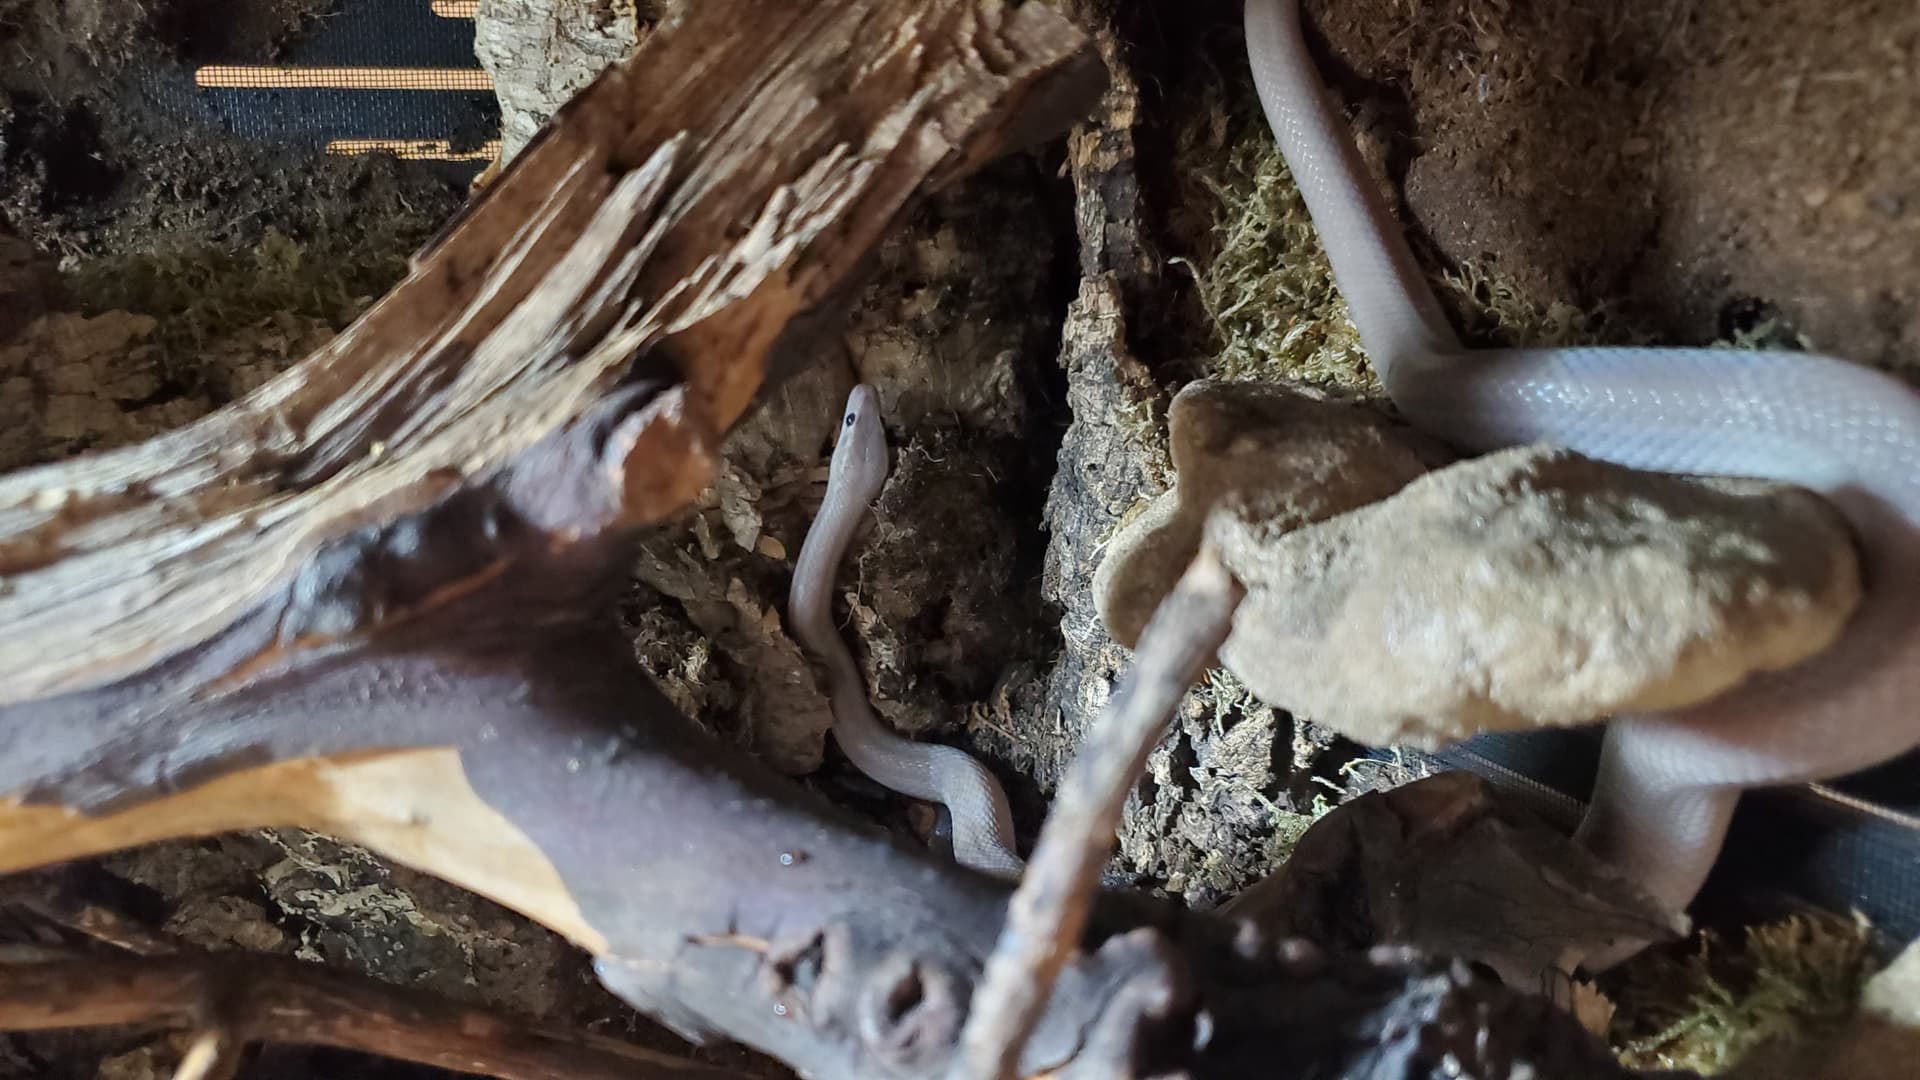
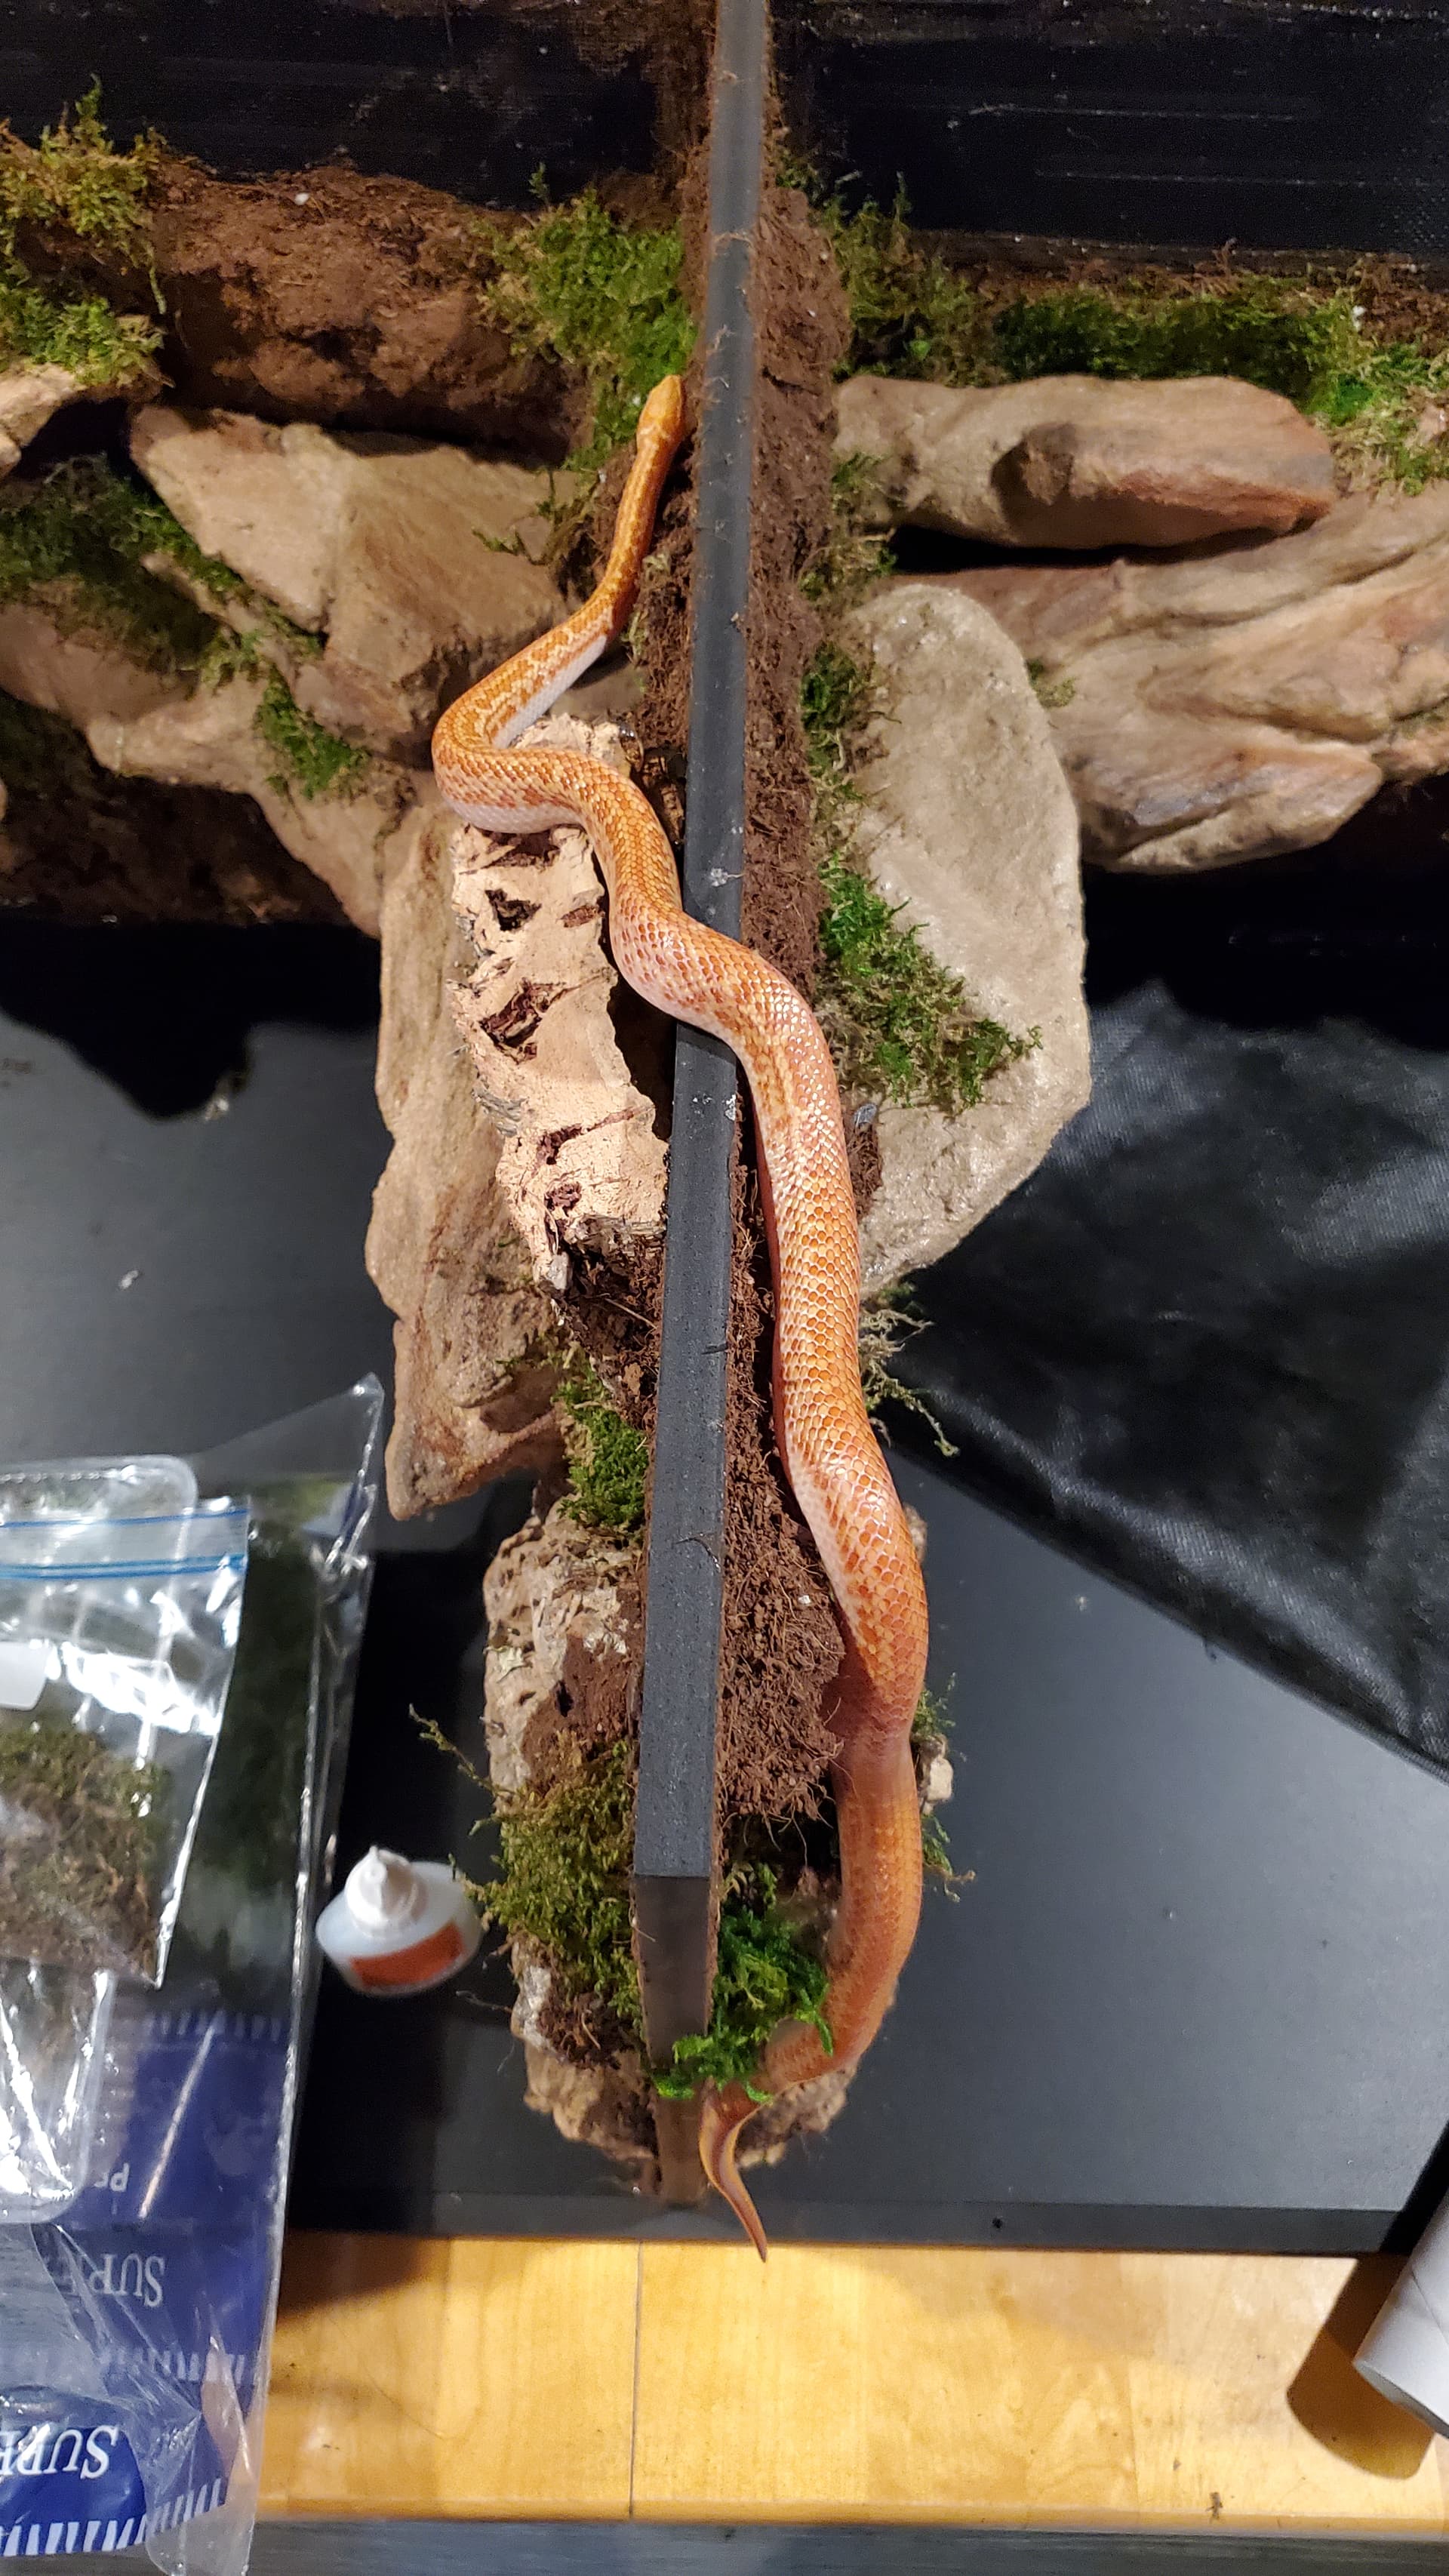
First, the beast: Andromeda, blue-eyed boaedon capensis.

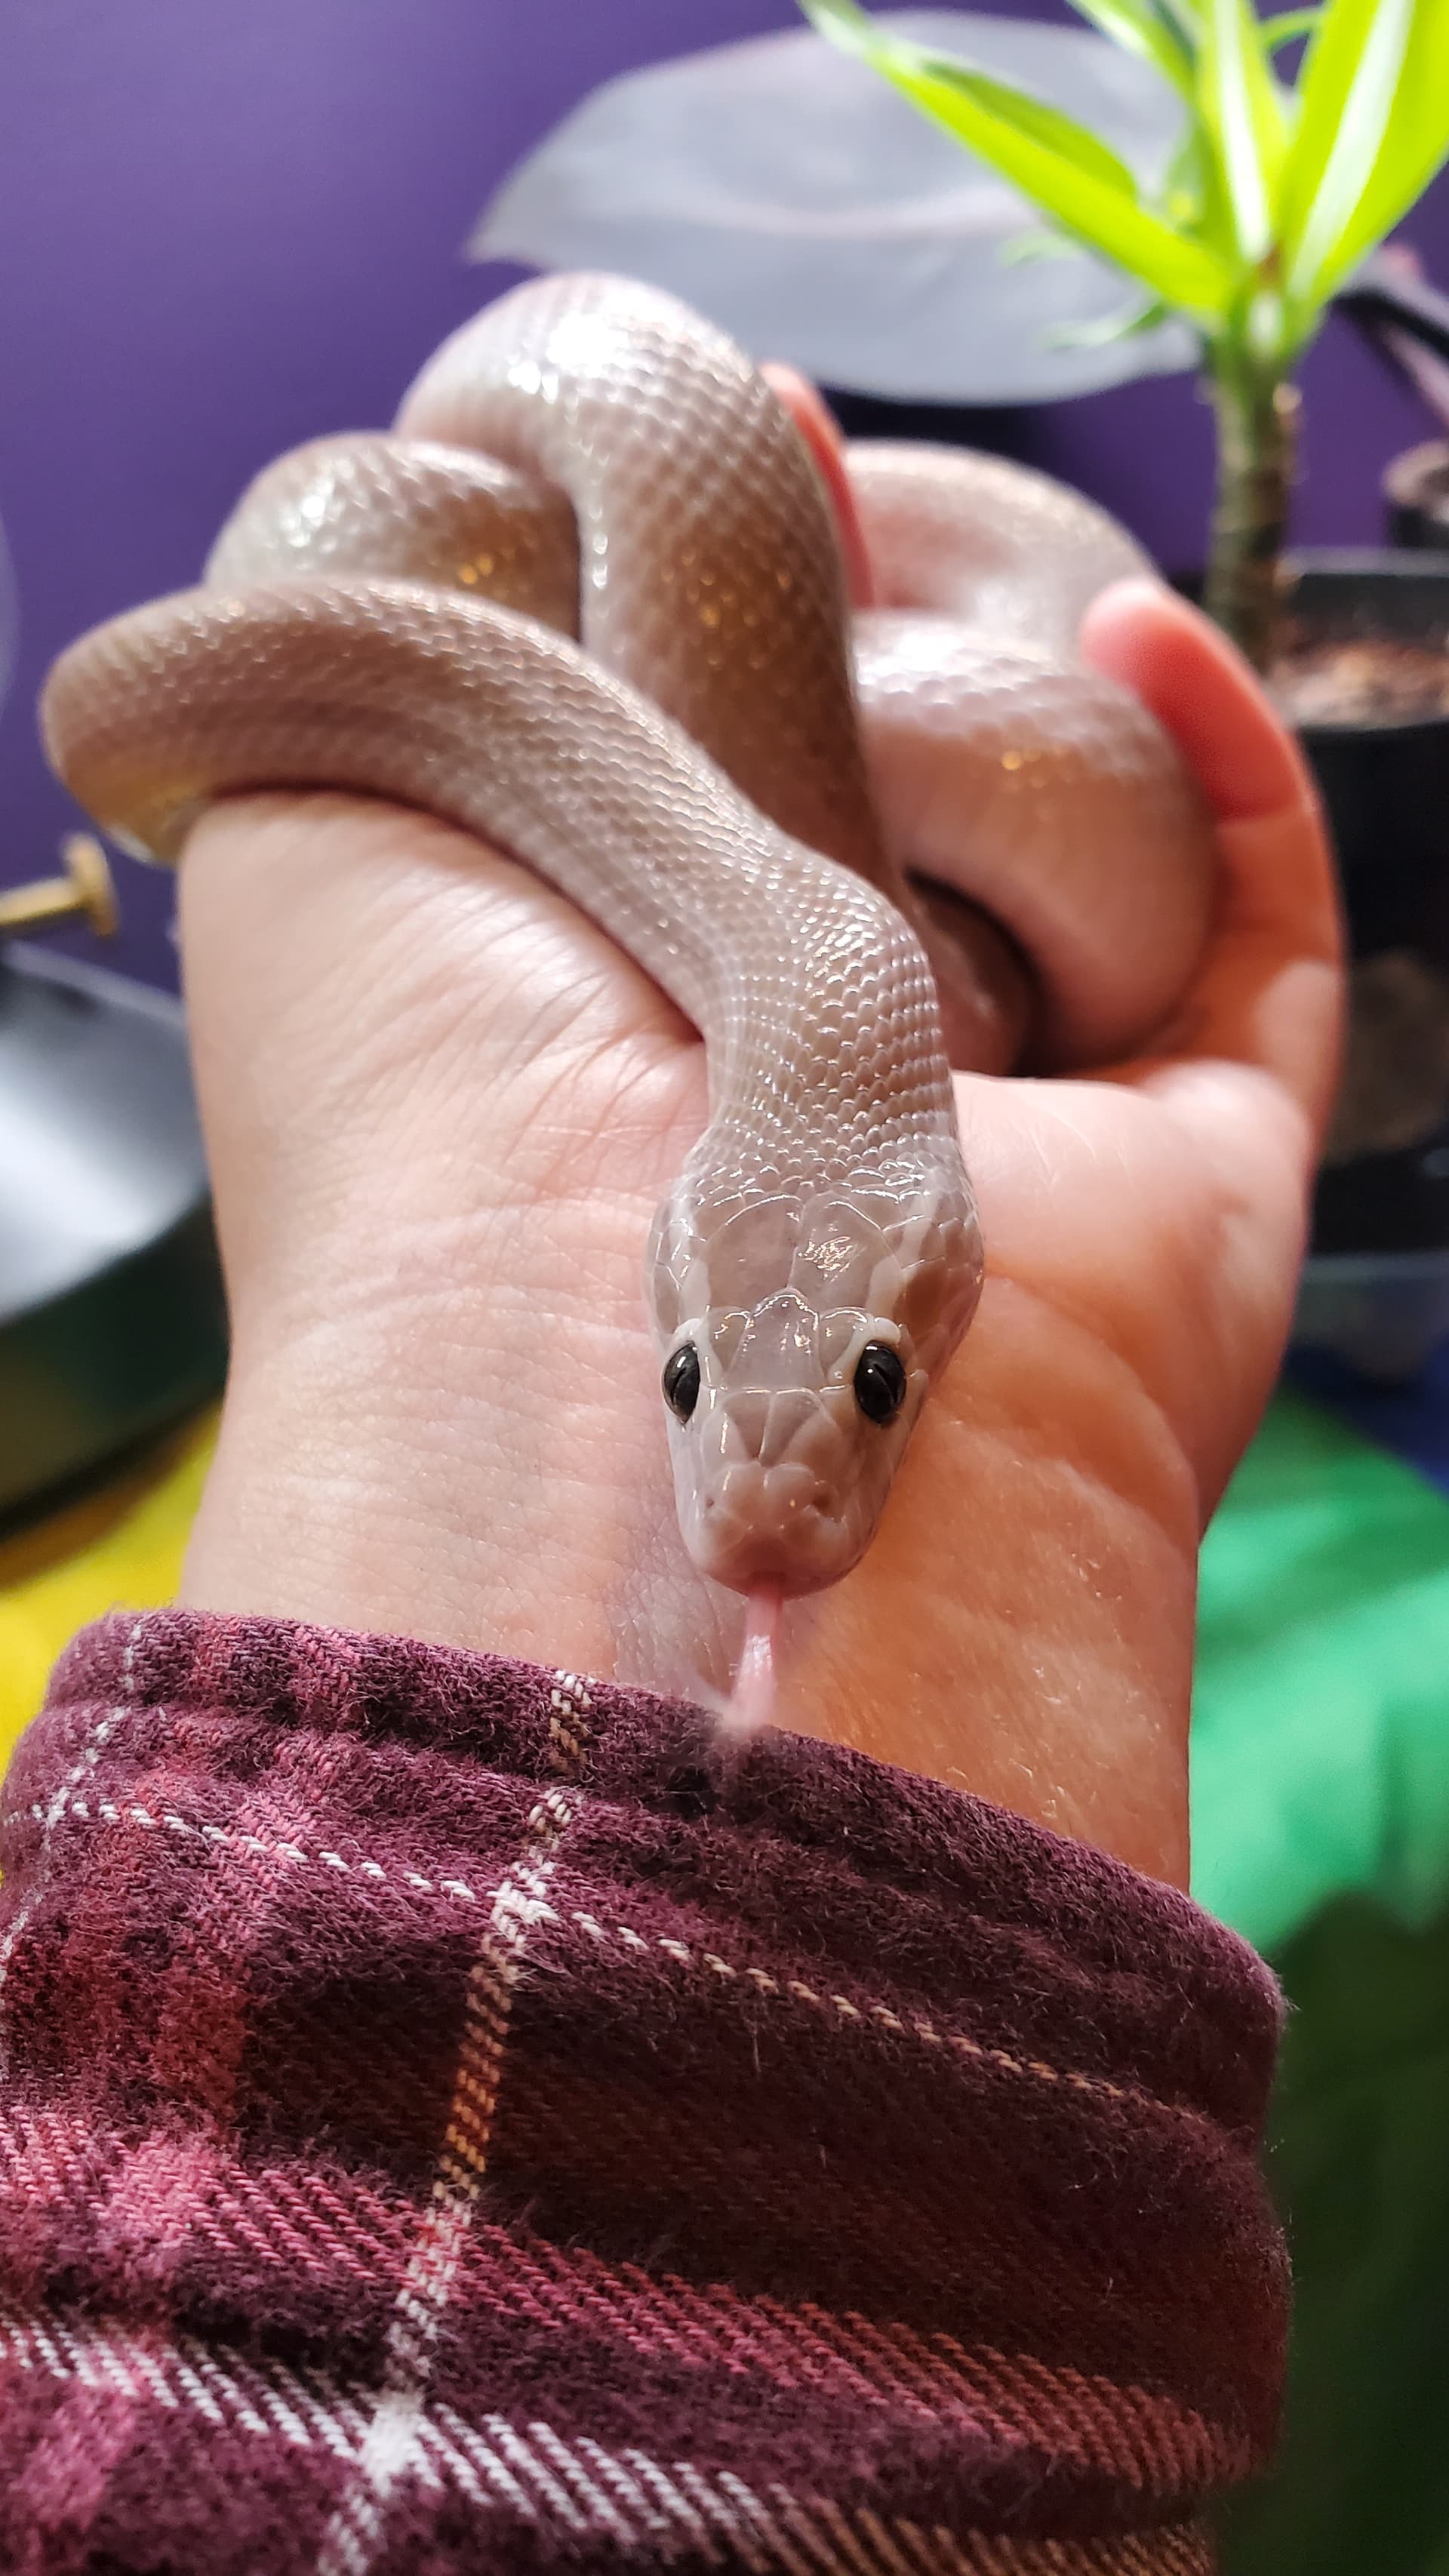
Three or four years old, a total smokeshow, endlessly nosy, a little bit jumpy, and very ready for an adult-sized enclosure where she can climb to her heart’s content. She’s been on paper her whole life – I had purchased her from a breeder who’d decided not to breed her after all, and up until now she’s been in her quarantine enclosure, waiting patiently.
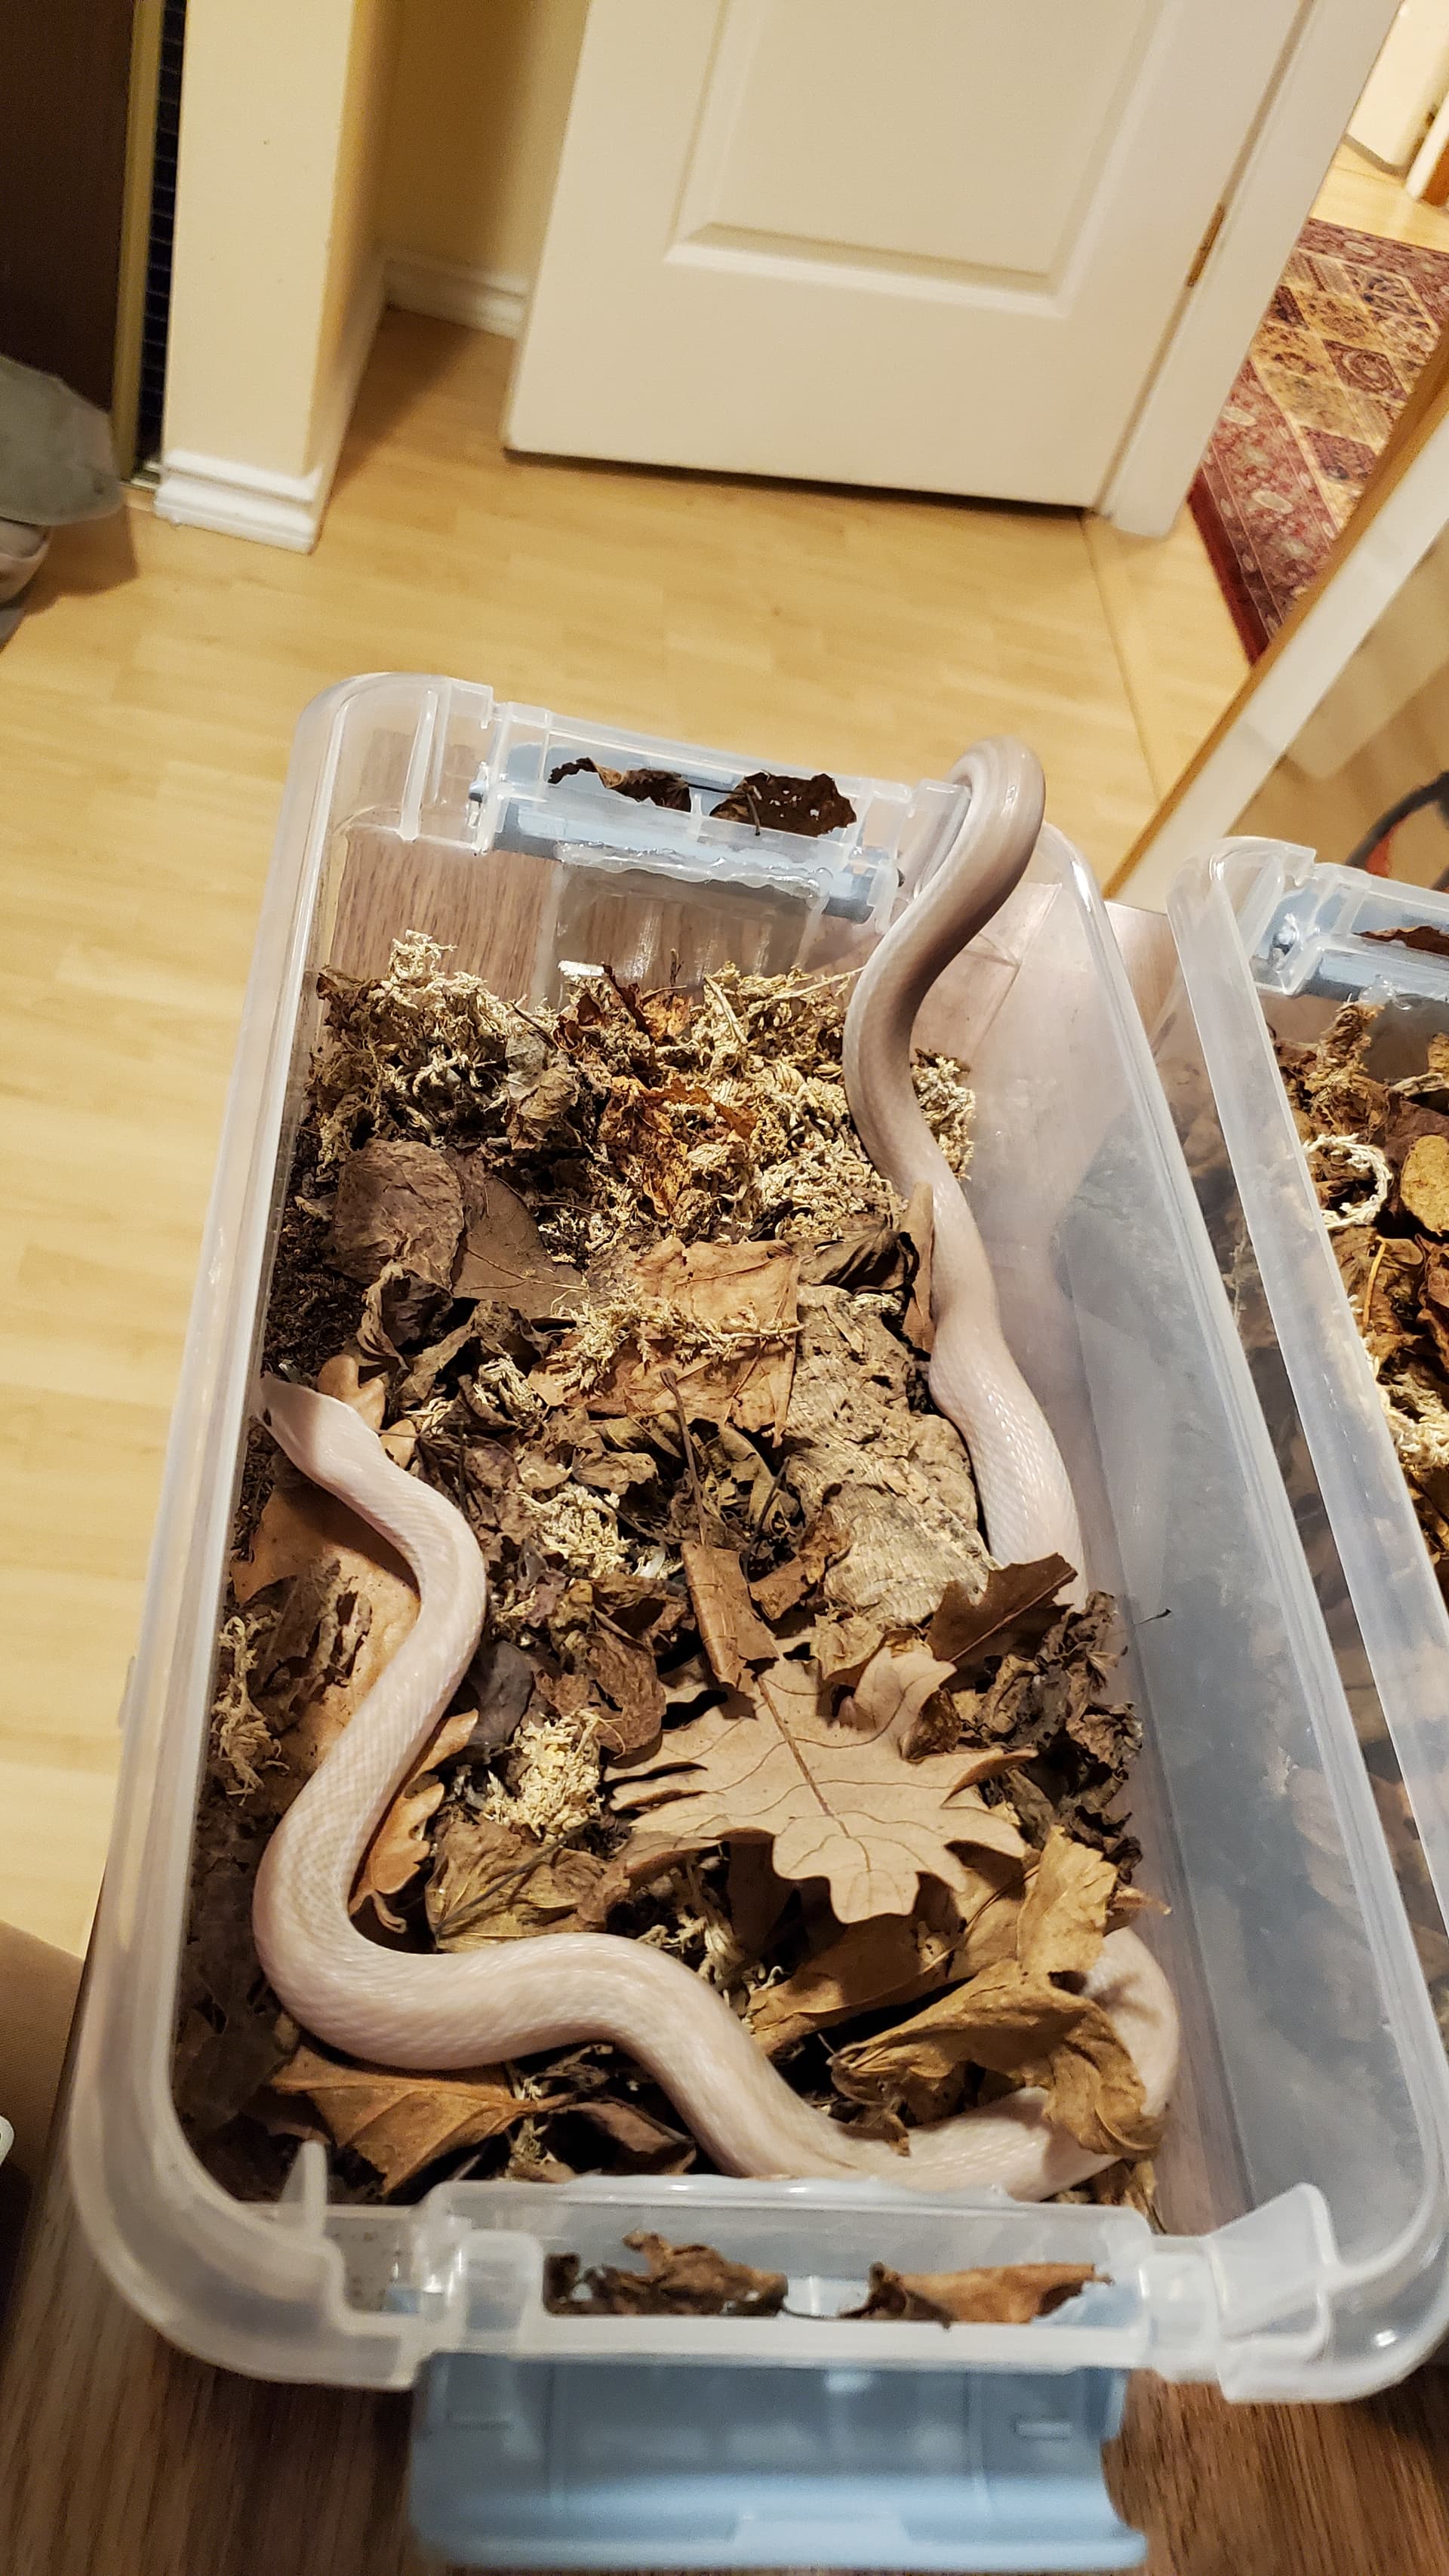
(I did introduce her to the concept of dirt by way of letting her nose around in my isopod enclosures now and then, however.)
We already have a ball python, Hestia, in a bioactive 4x2x2, so we decided to go with a 4x2x1.5 for Andromeda so they could stack. She’s much smaller than Hesty – the 4x2 footprint is a mansion, and gave me a chance to play with planting and scaping a whole new space without the destructive tendencies of ball python booty to reckon with.
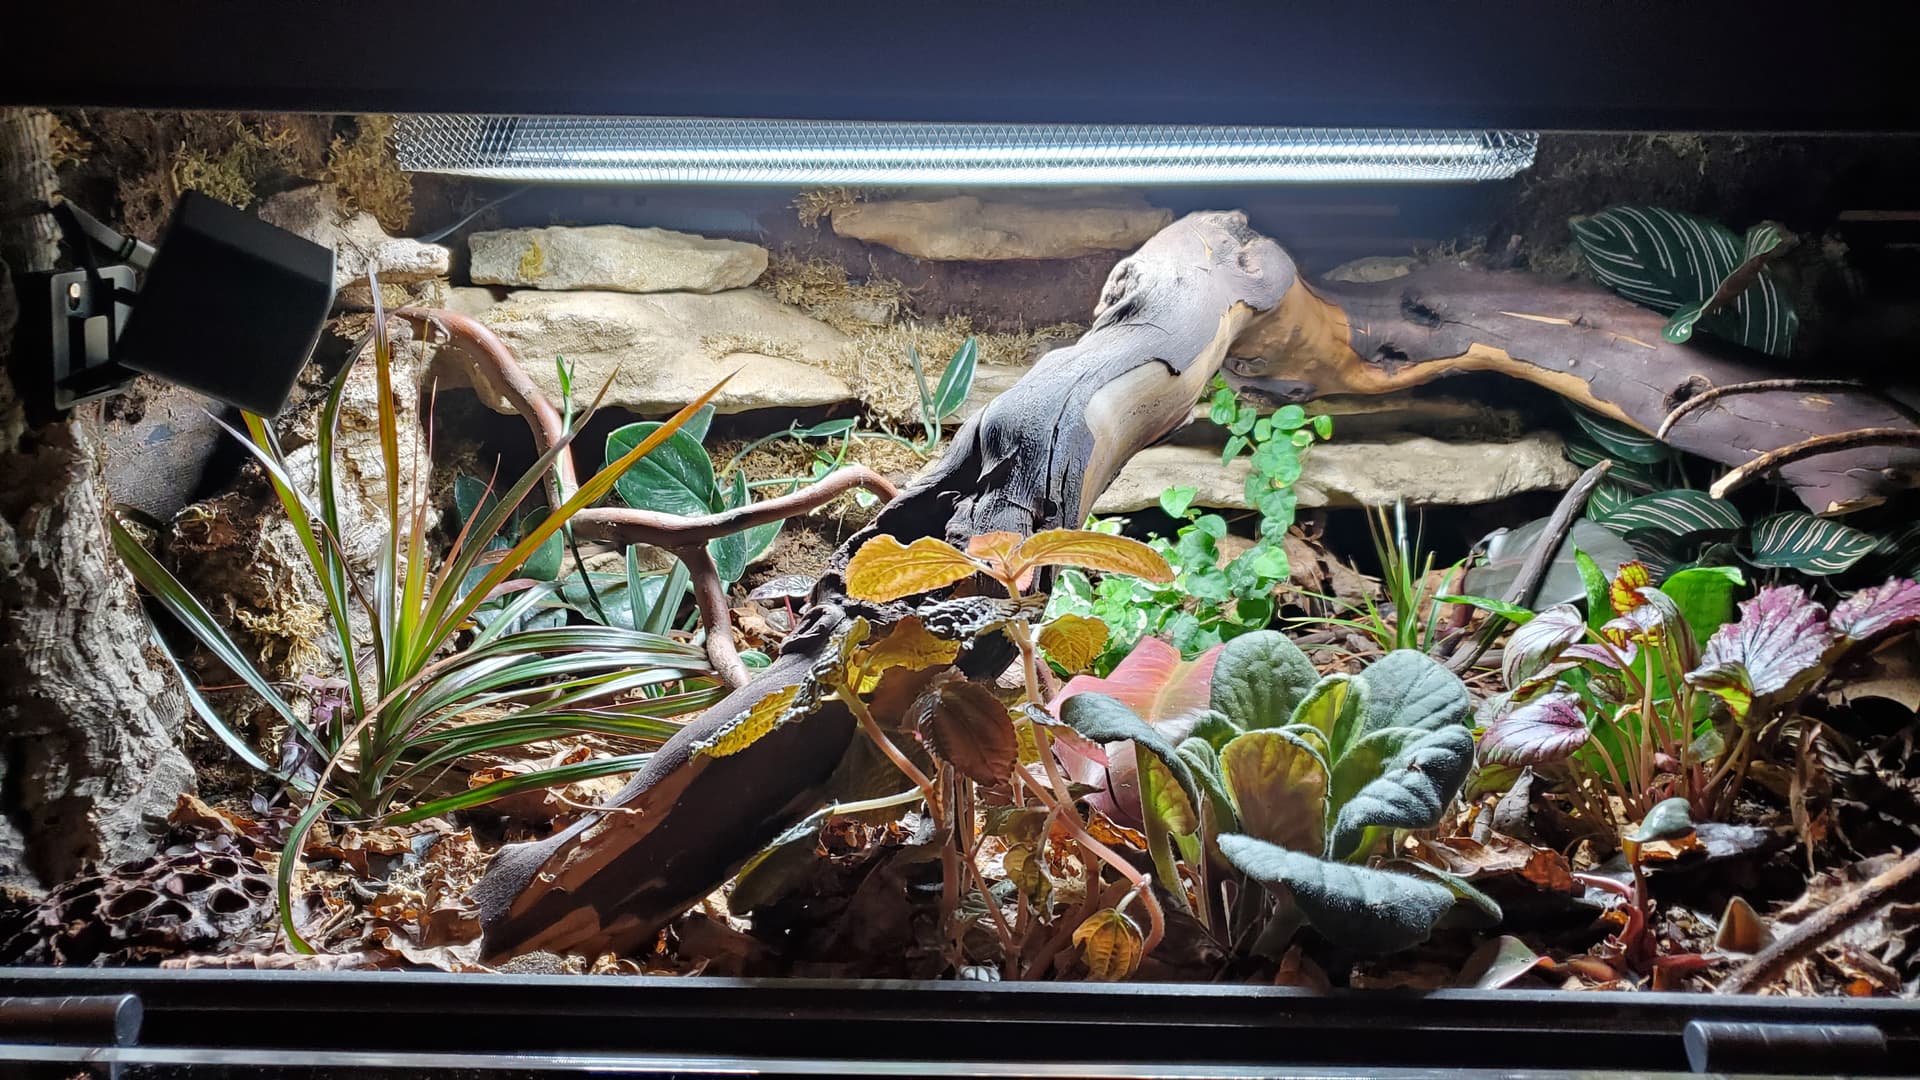
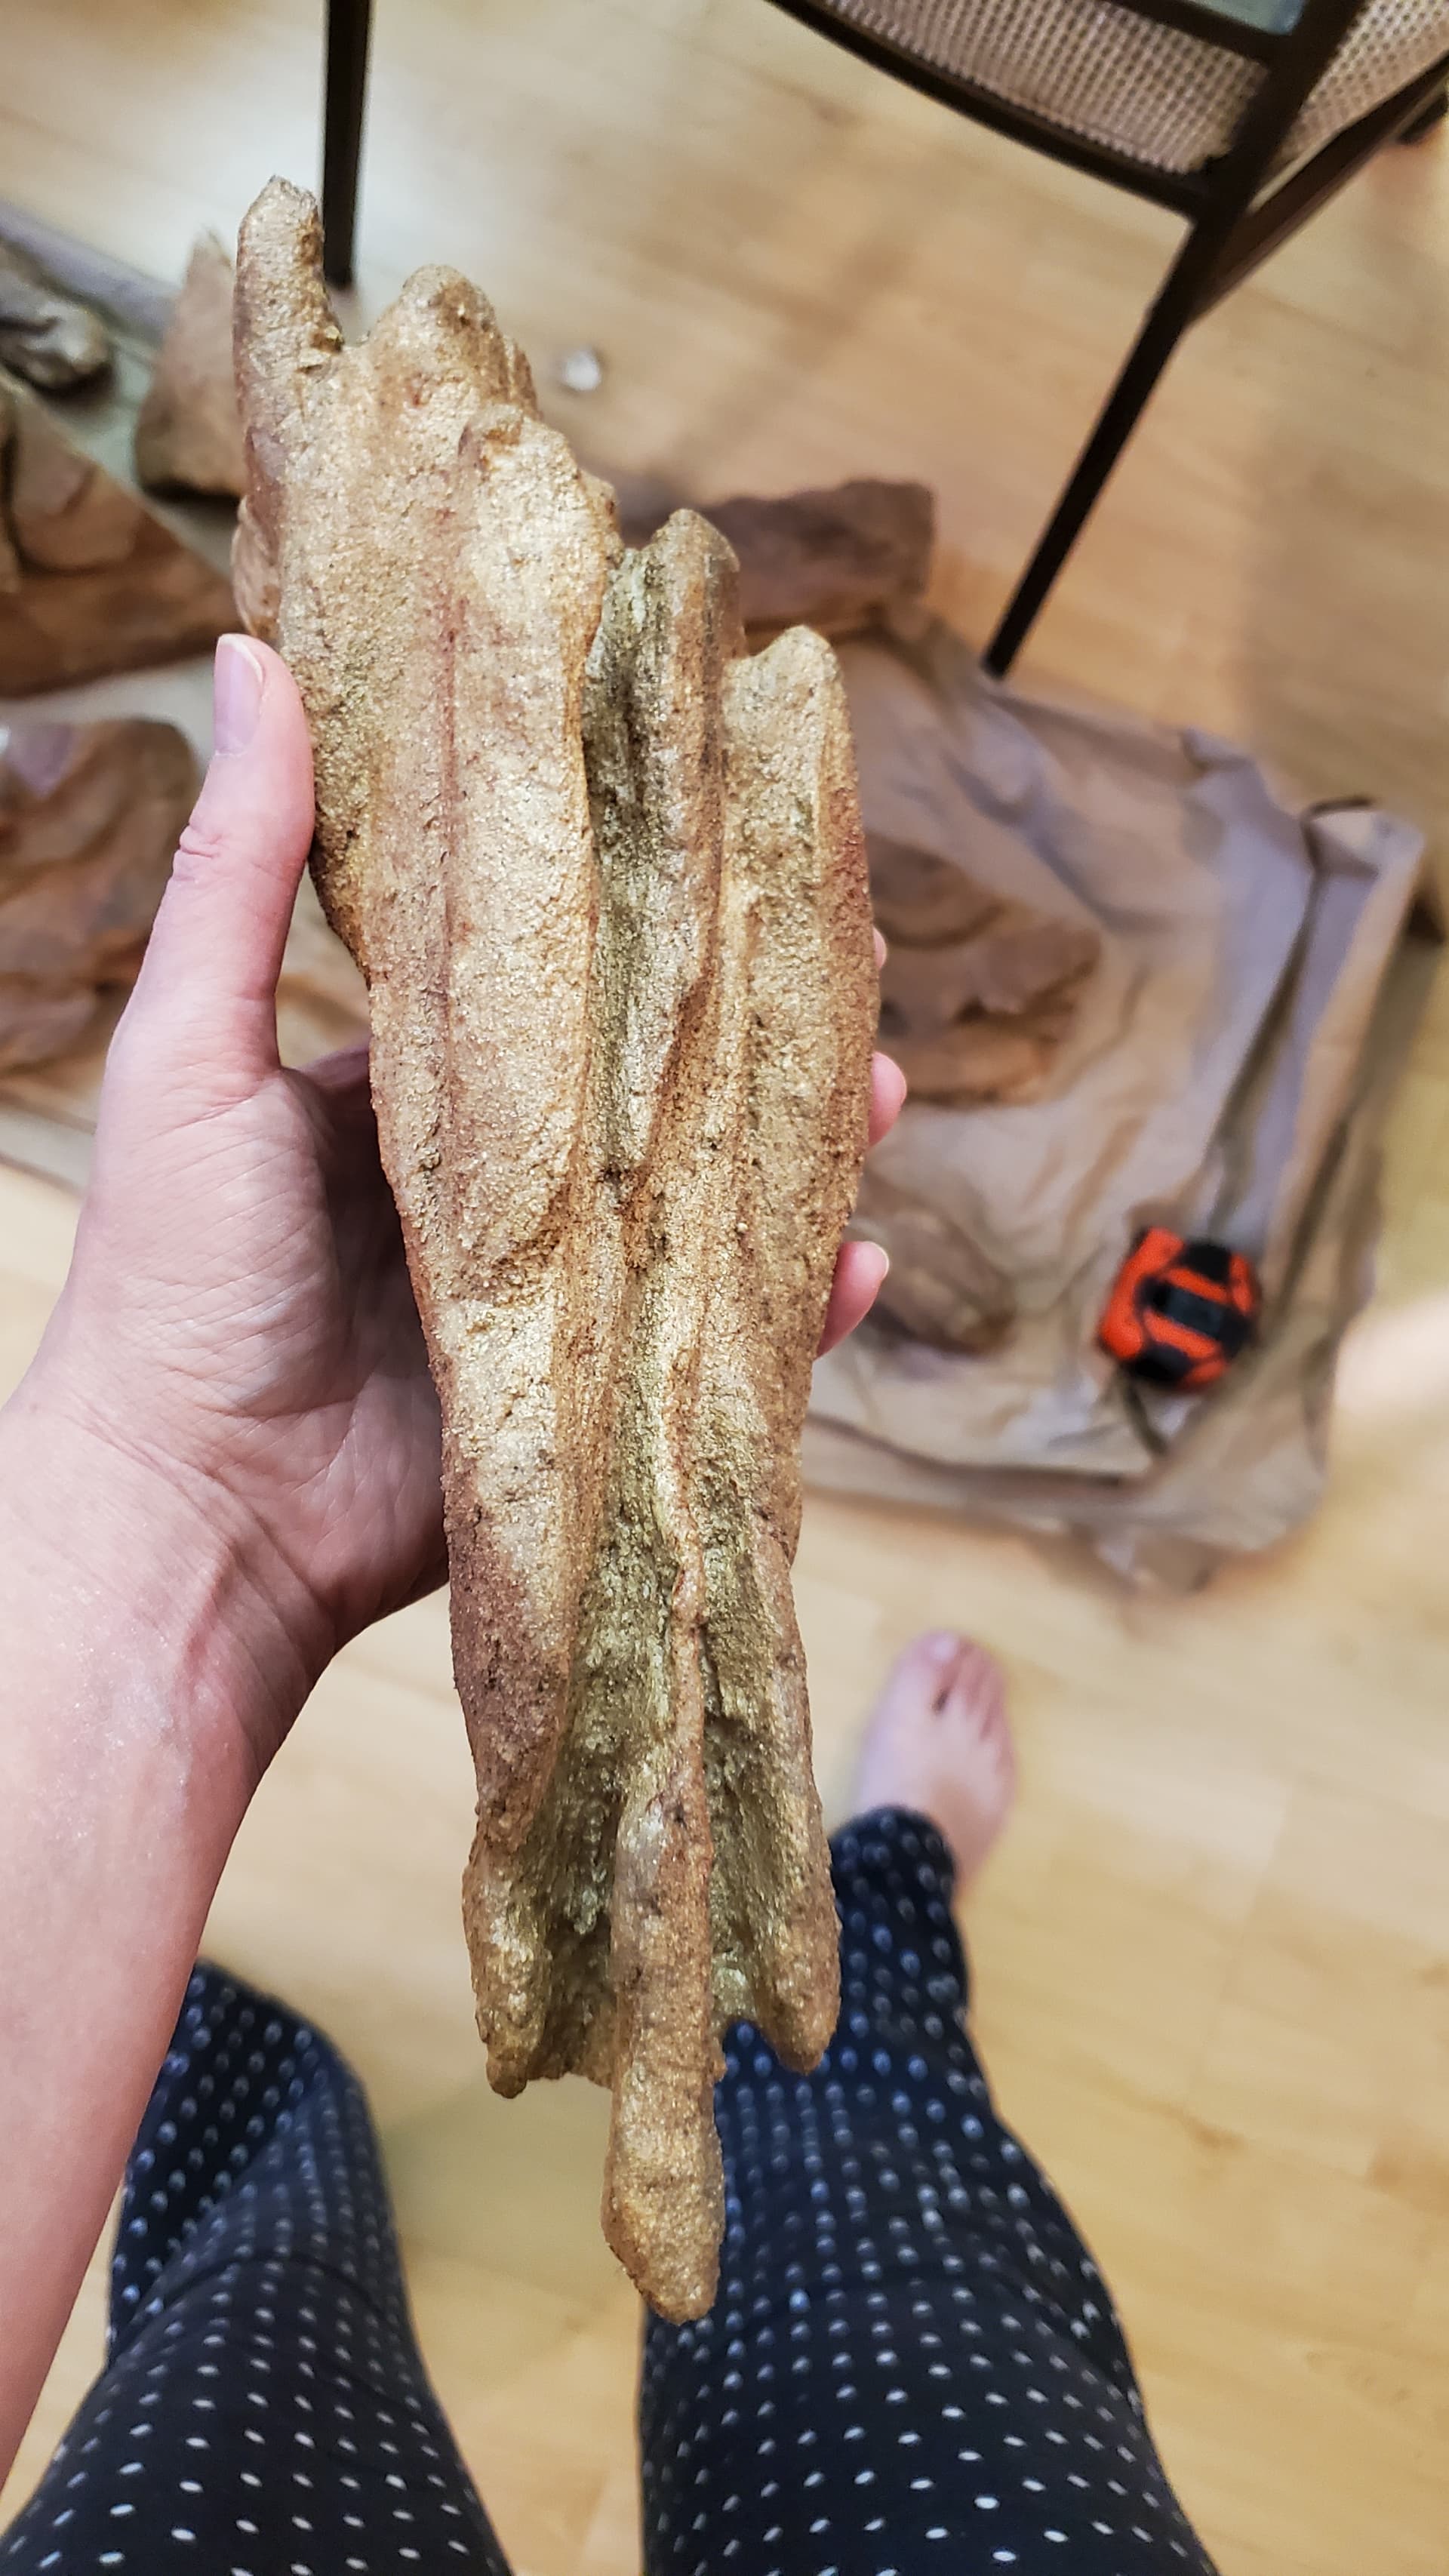
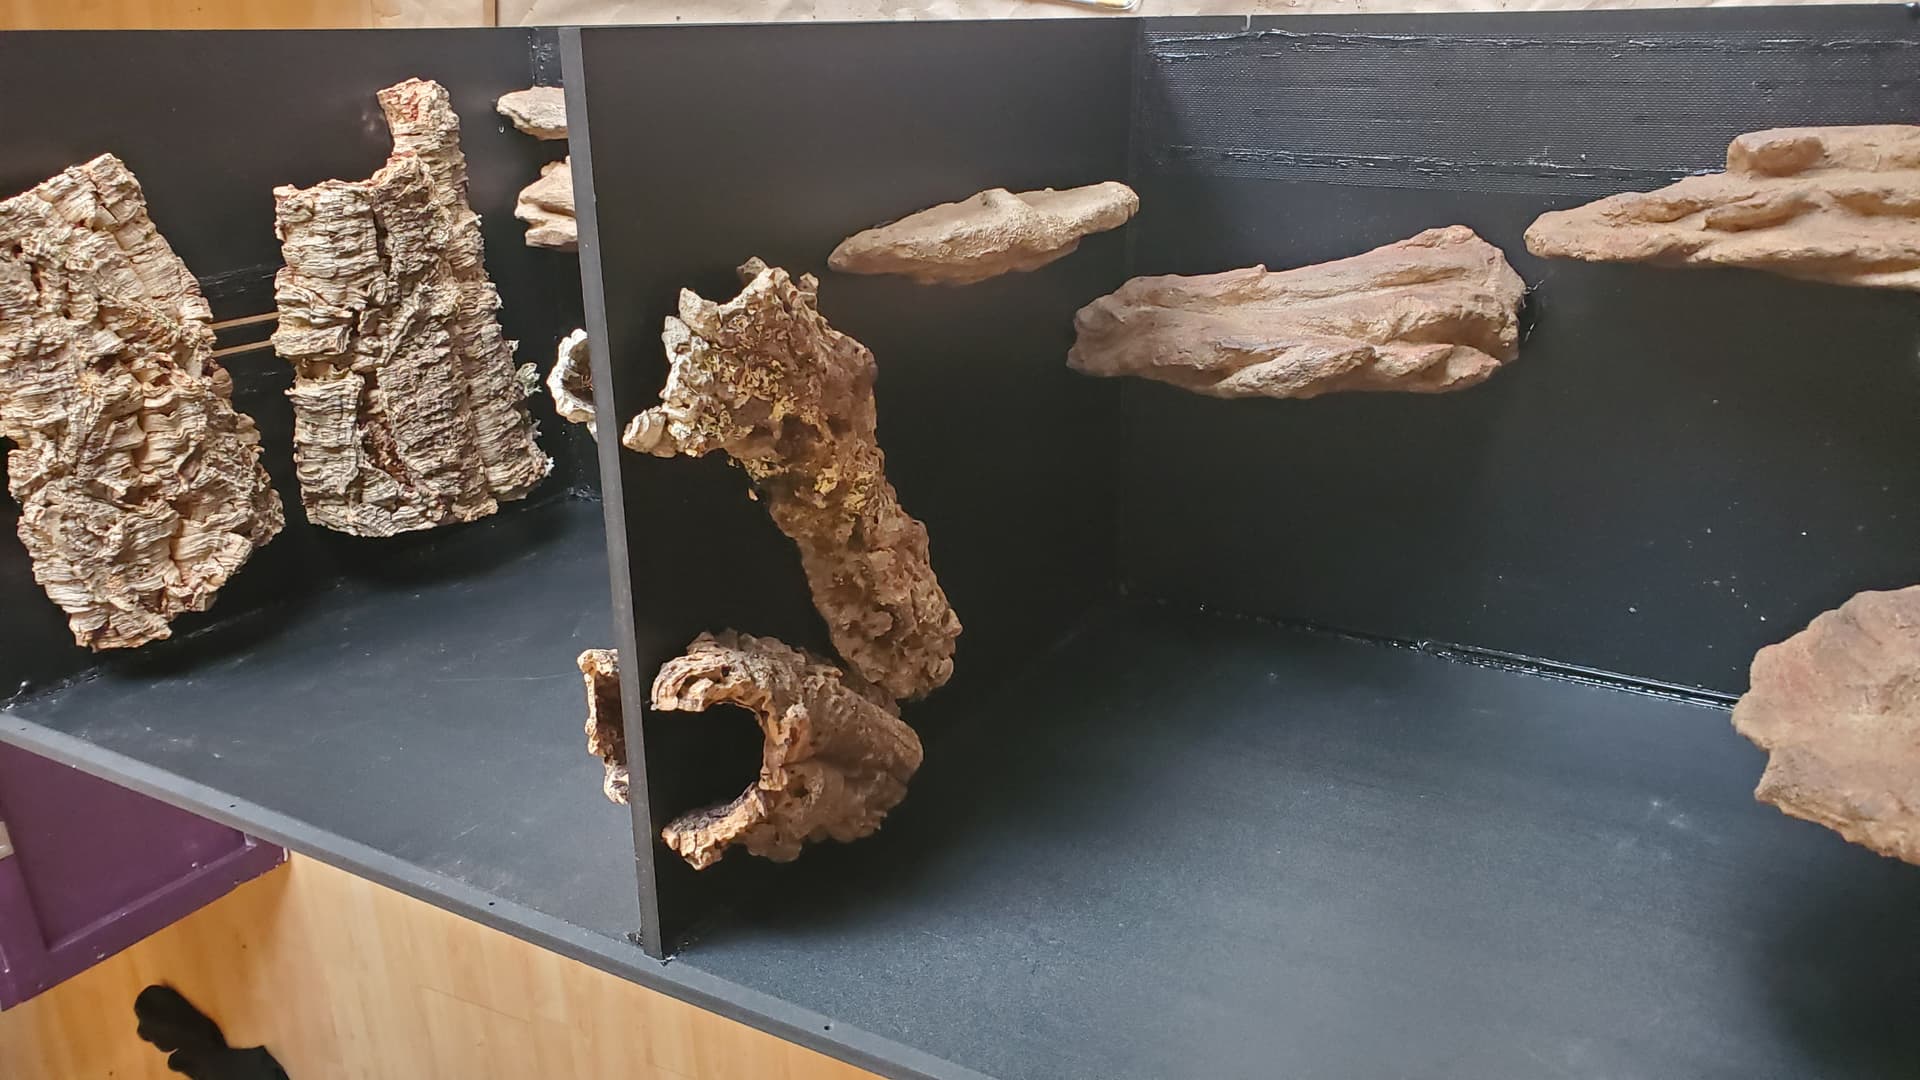
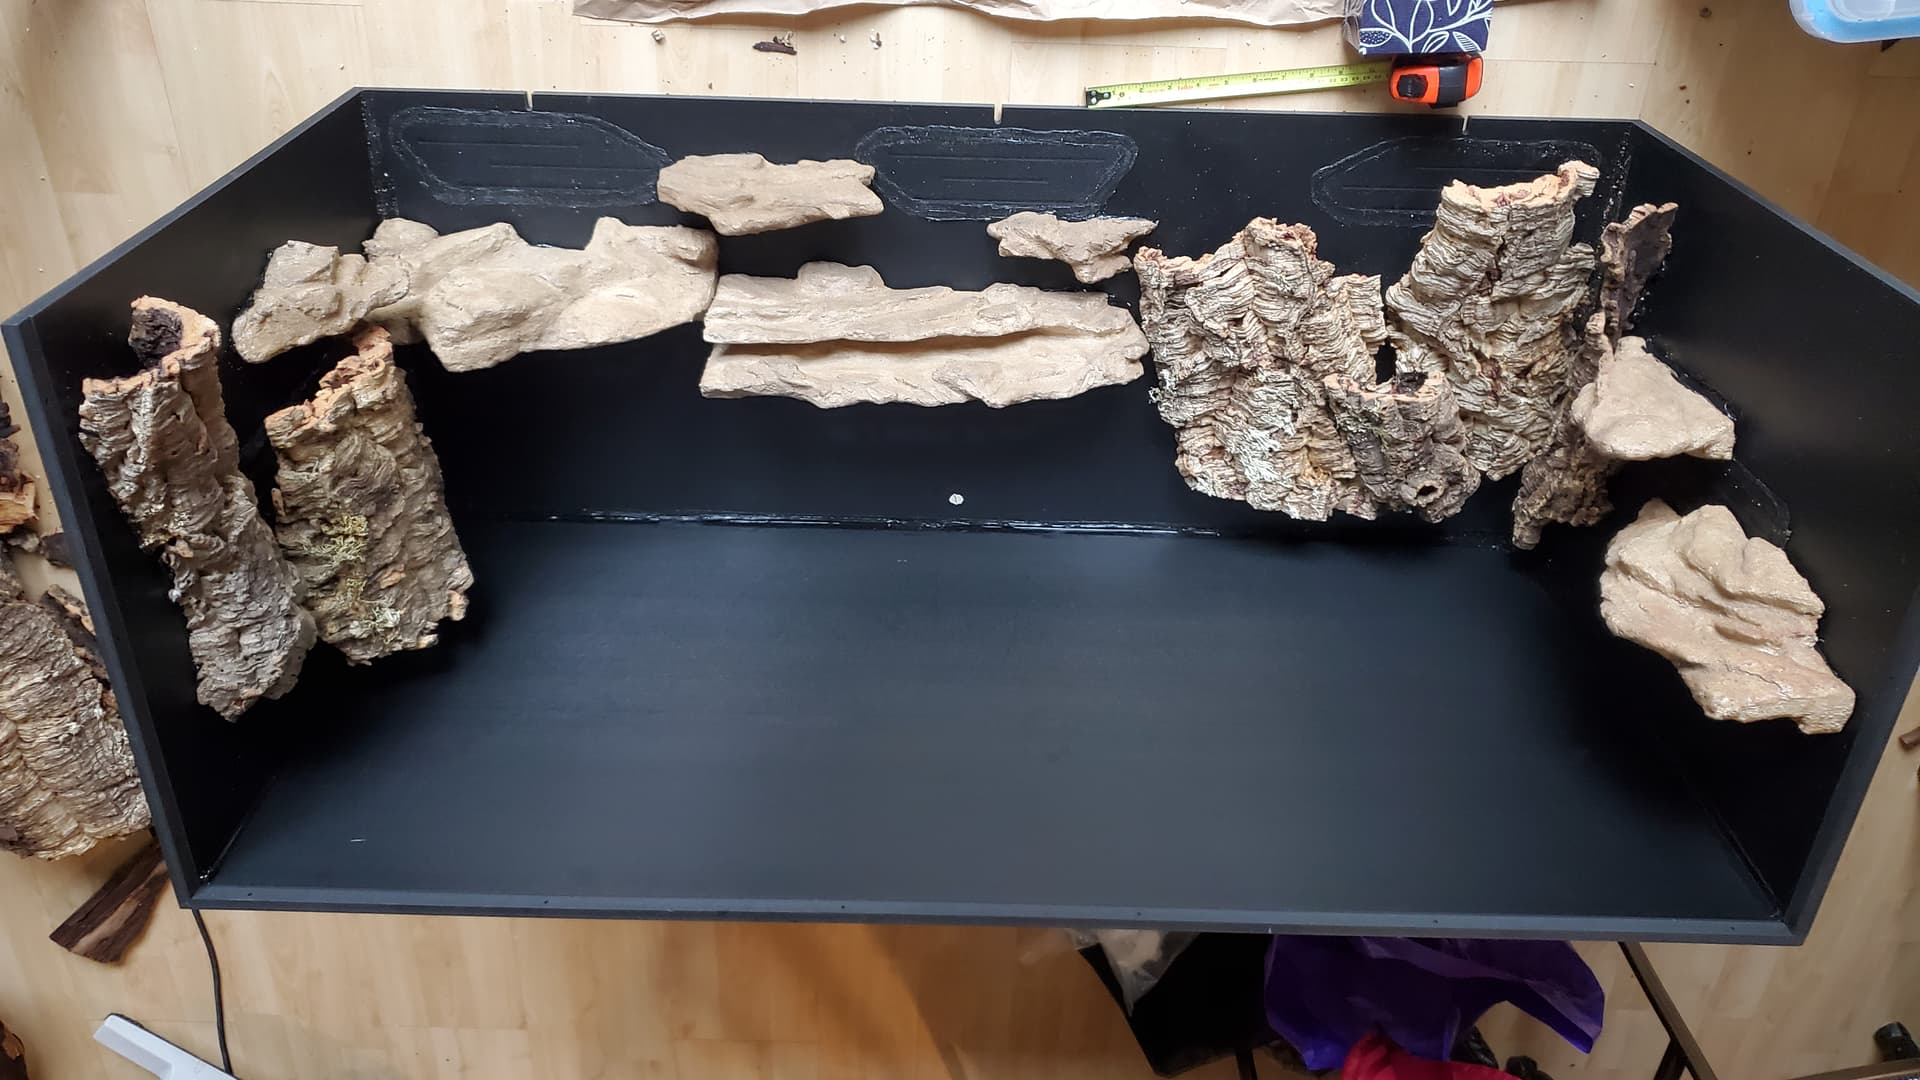
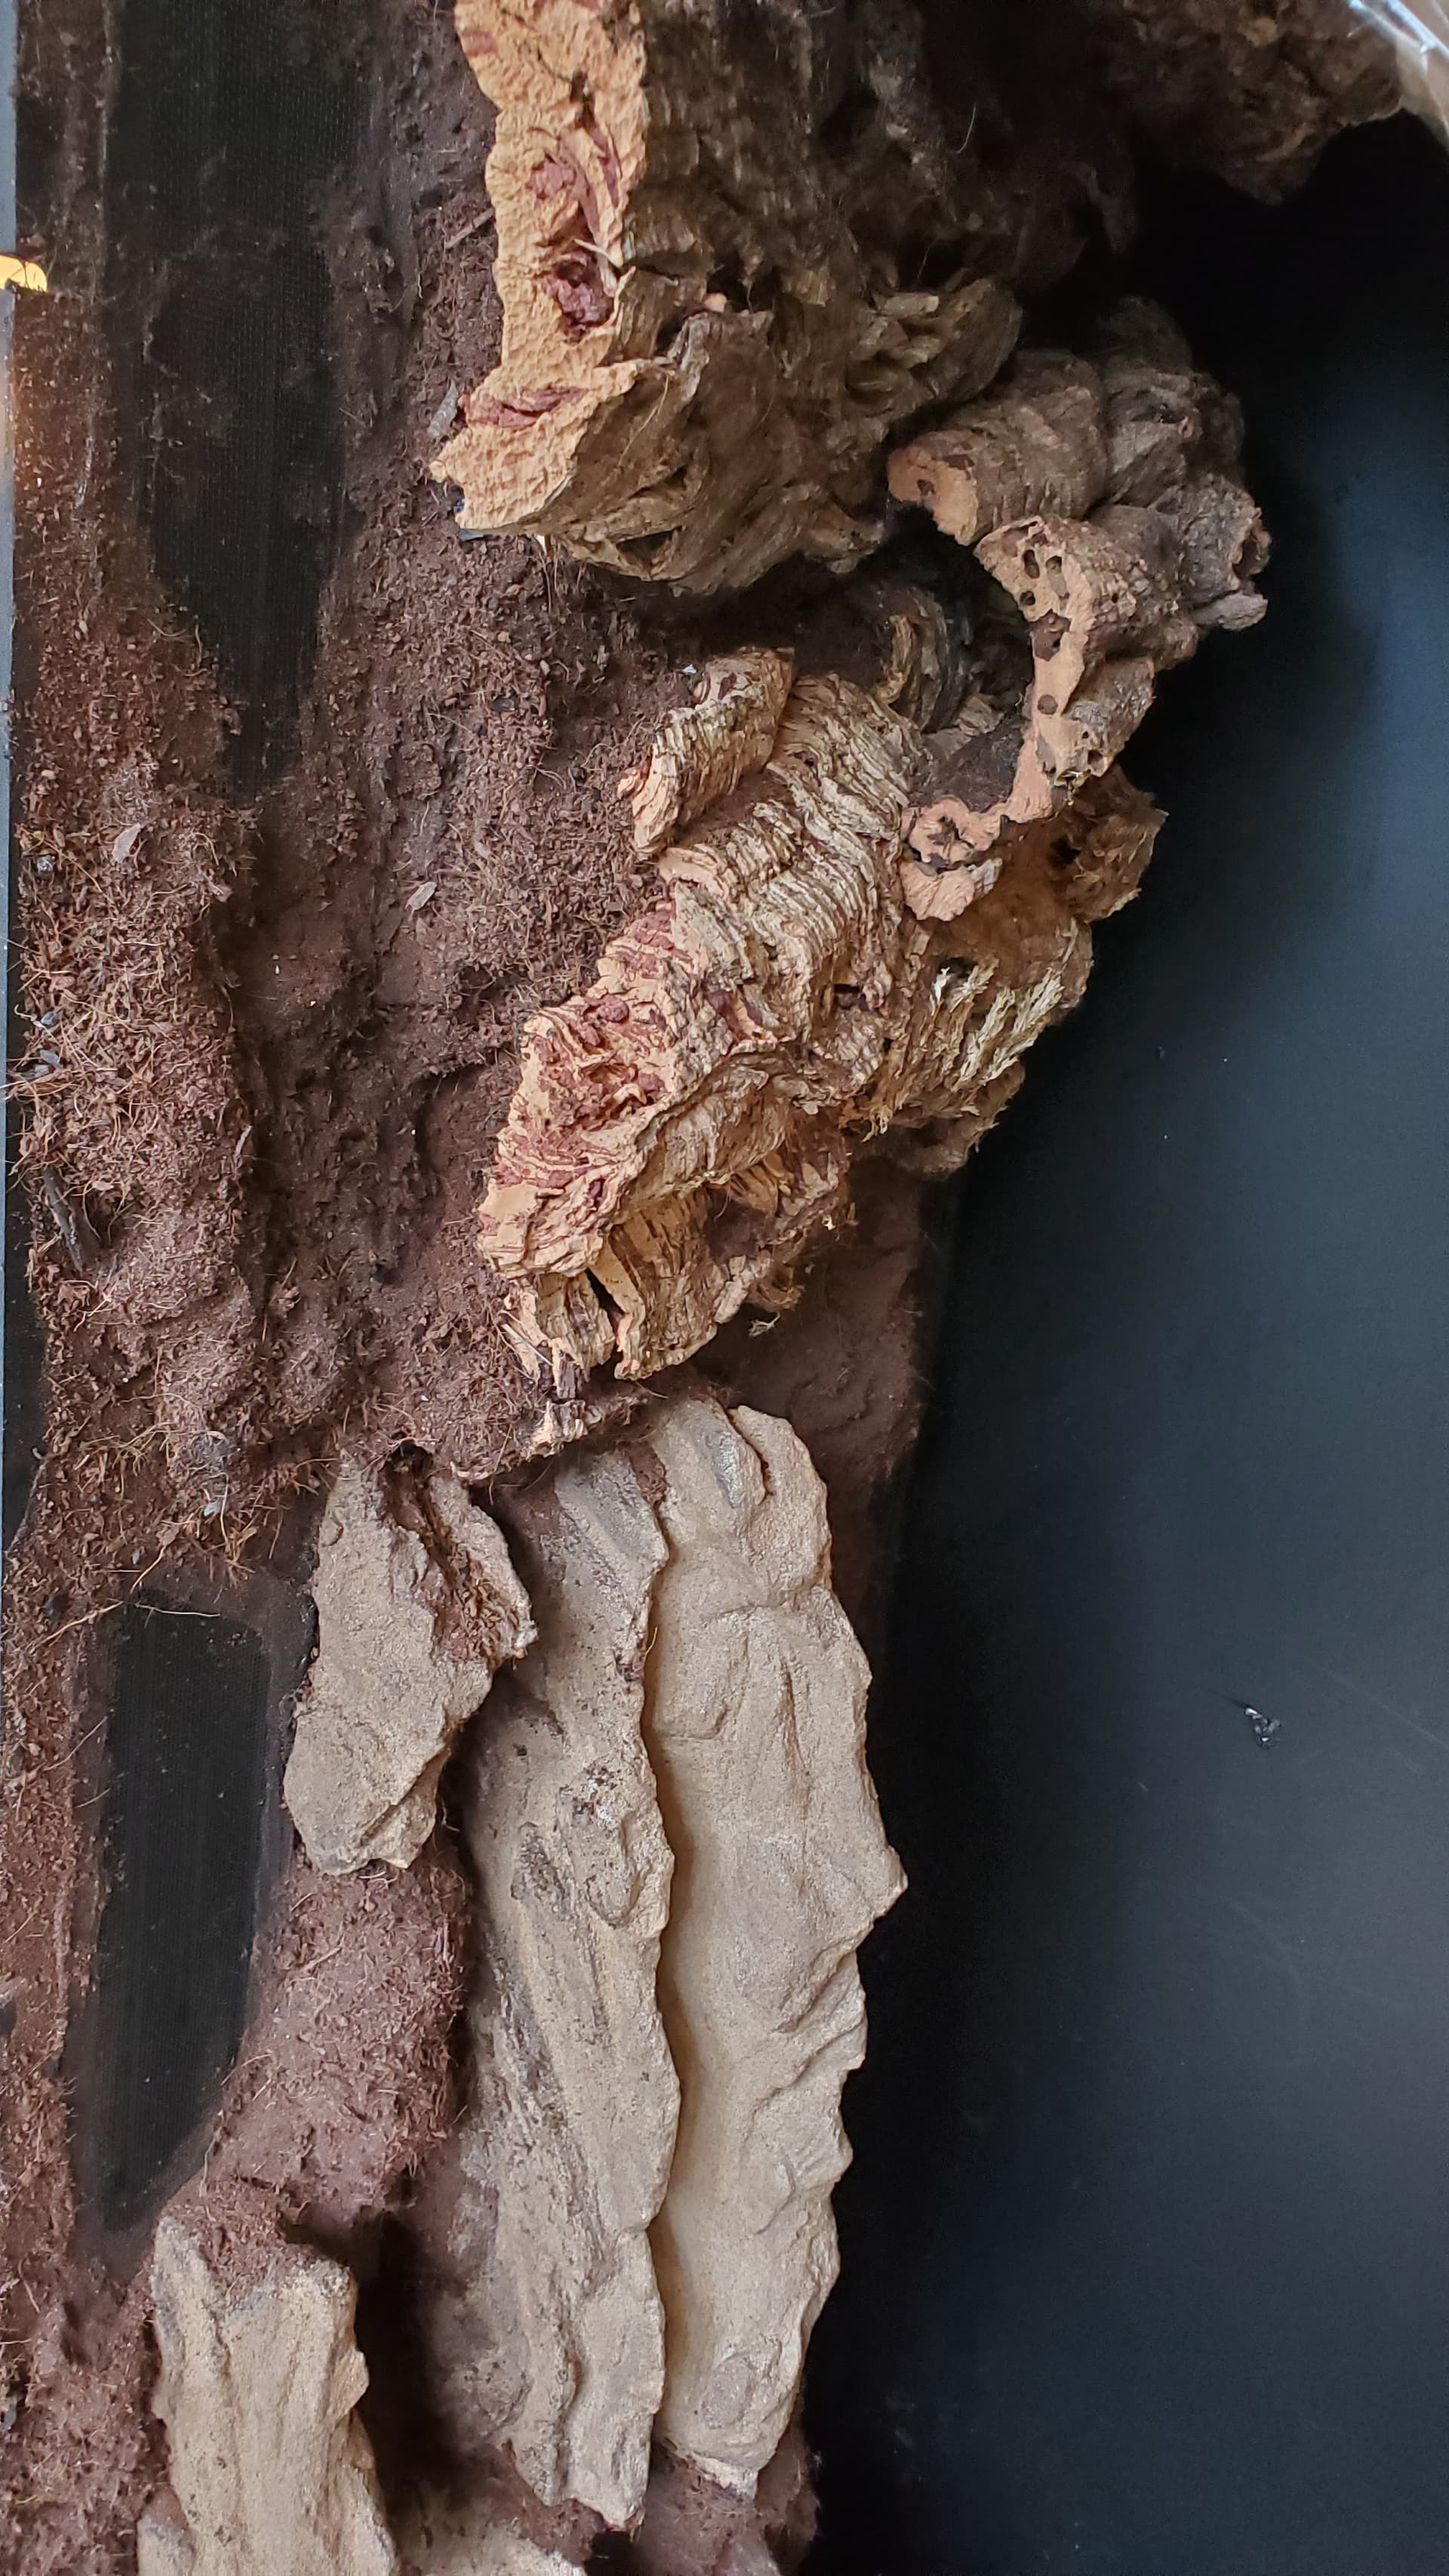
As much as I love the ease of cork bark, I knew I wanted there to be topographical features built into the backdrop in this one, but actual rocks would be too heavy. So I went a-collectin’ stones and branches and inspiration on Galiano Island, and found plenty of all of the above.

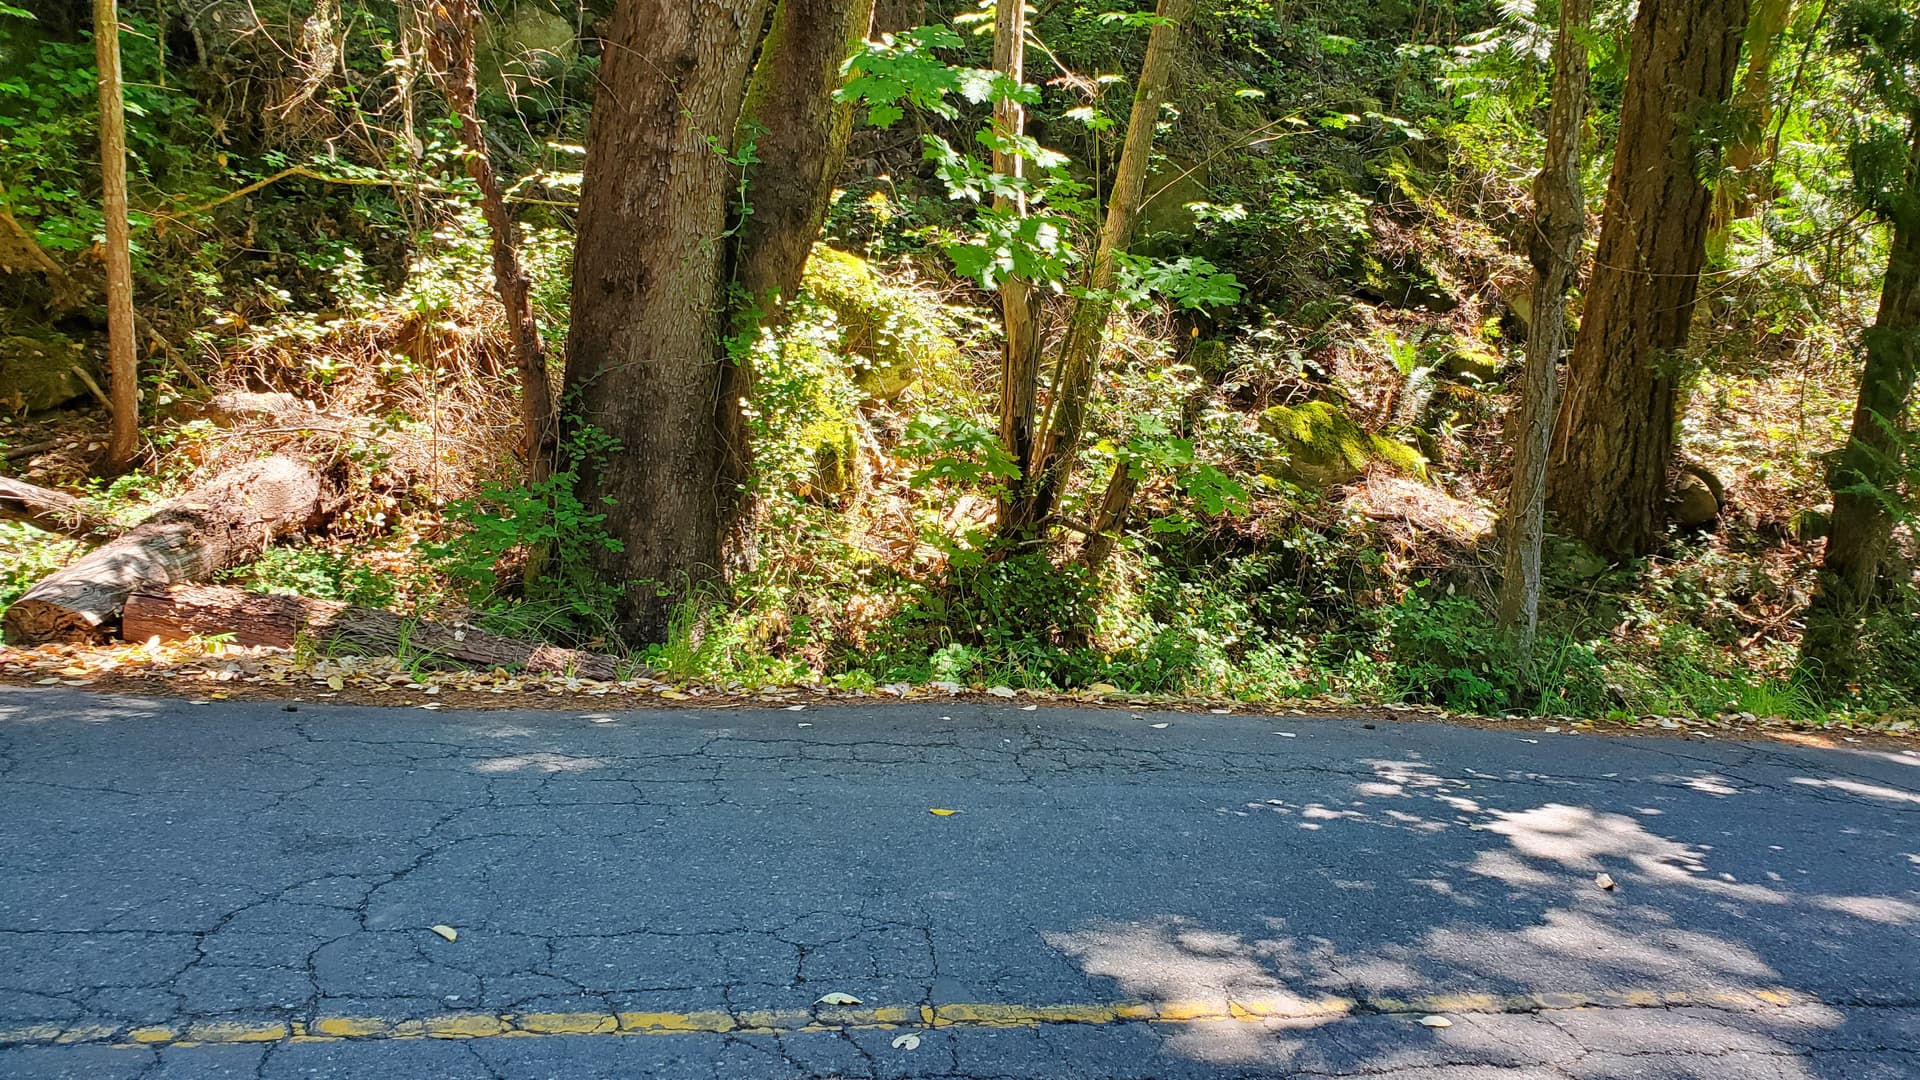
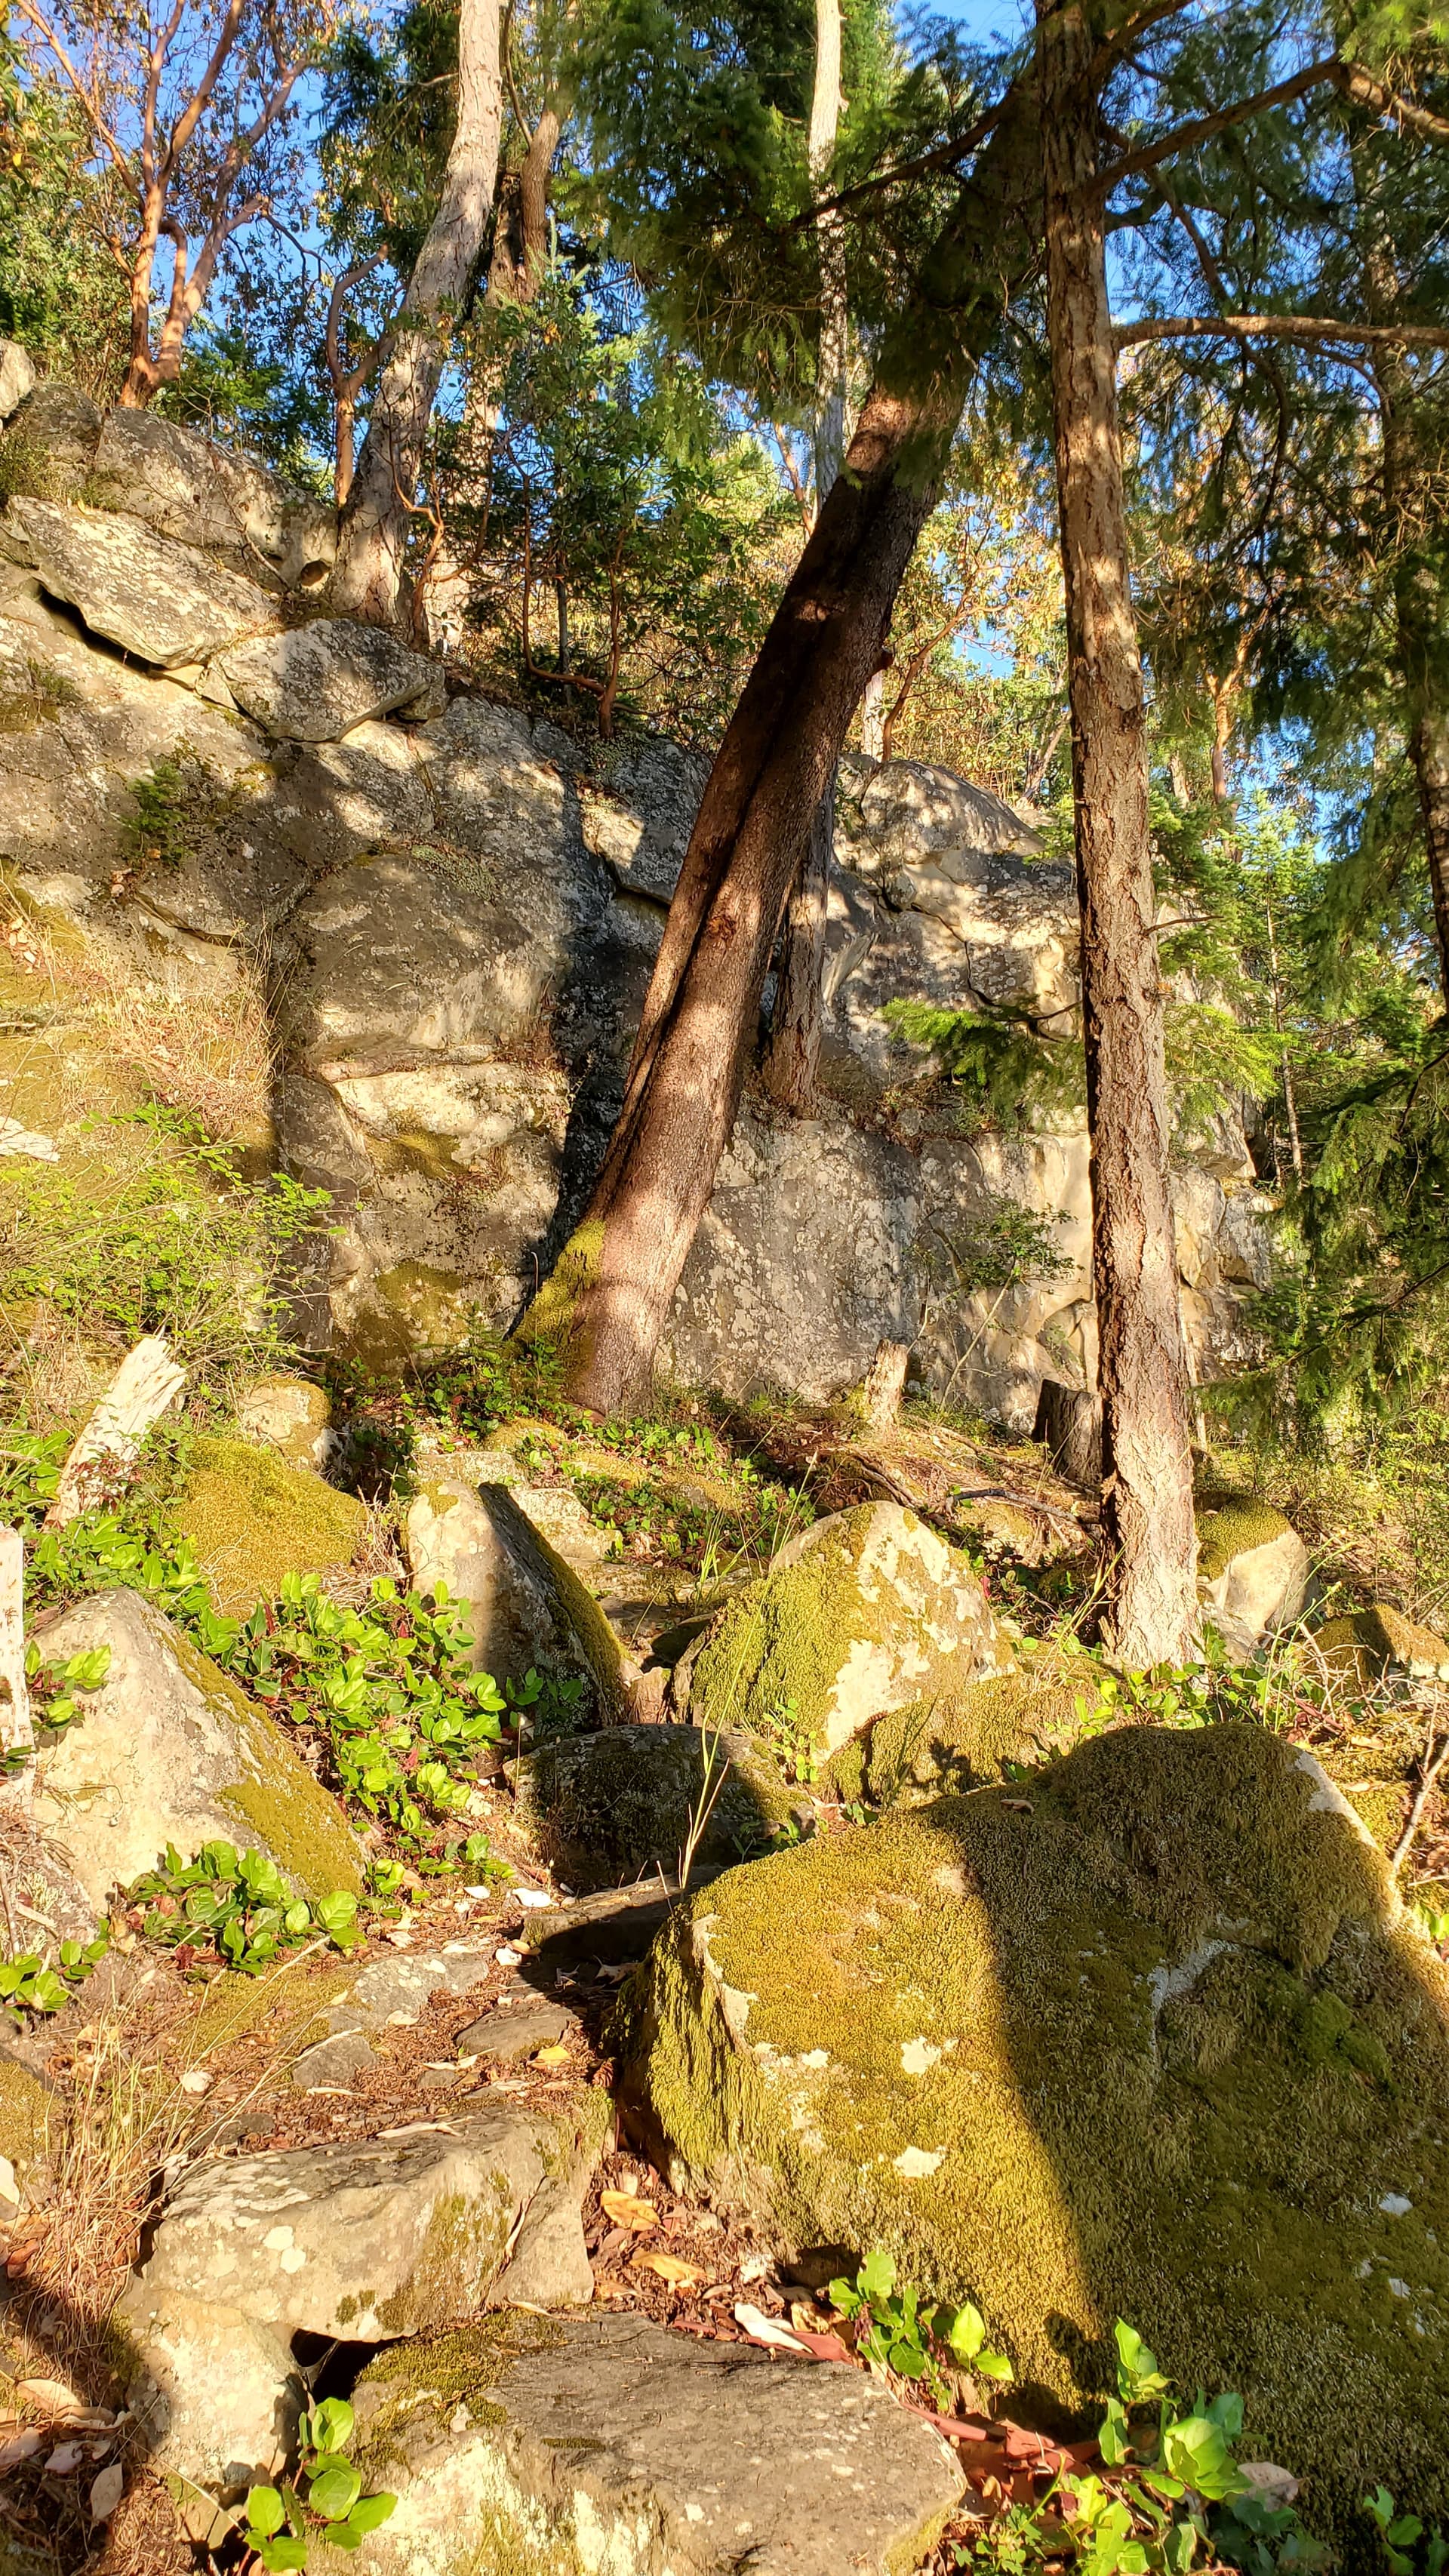
Sandstone and arbutus, mostly.
Then came the hard/fun part.
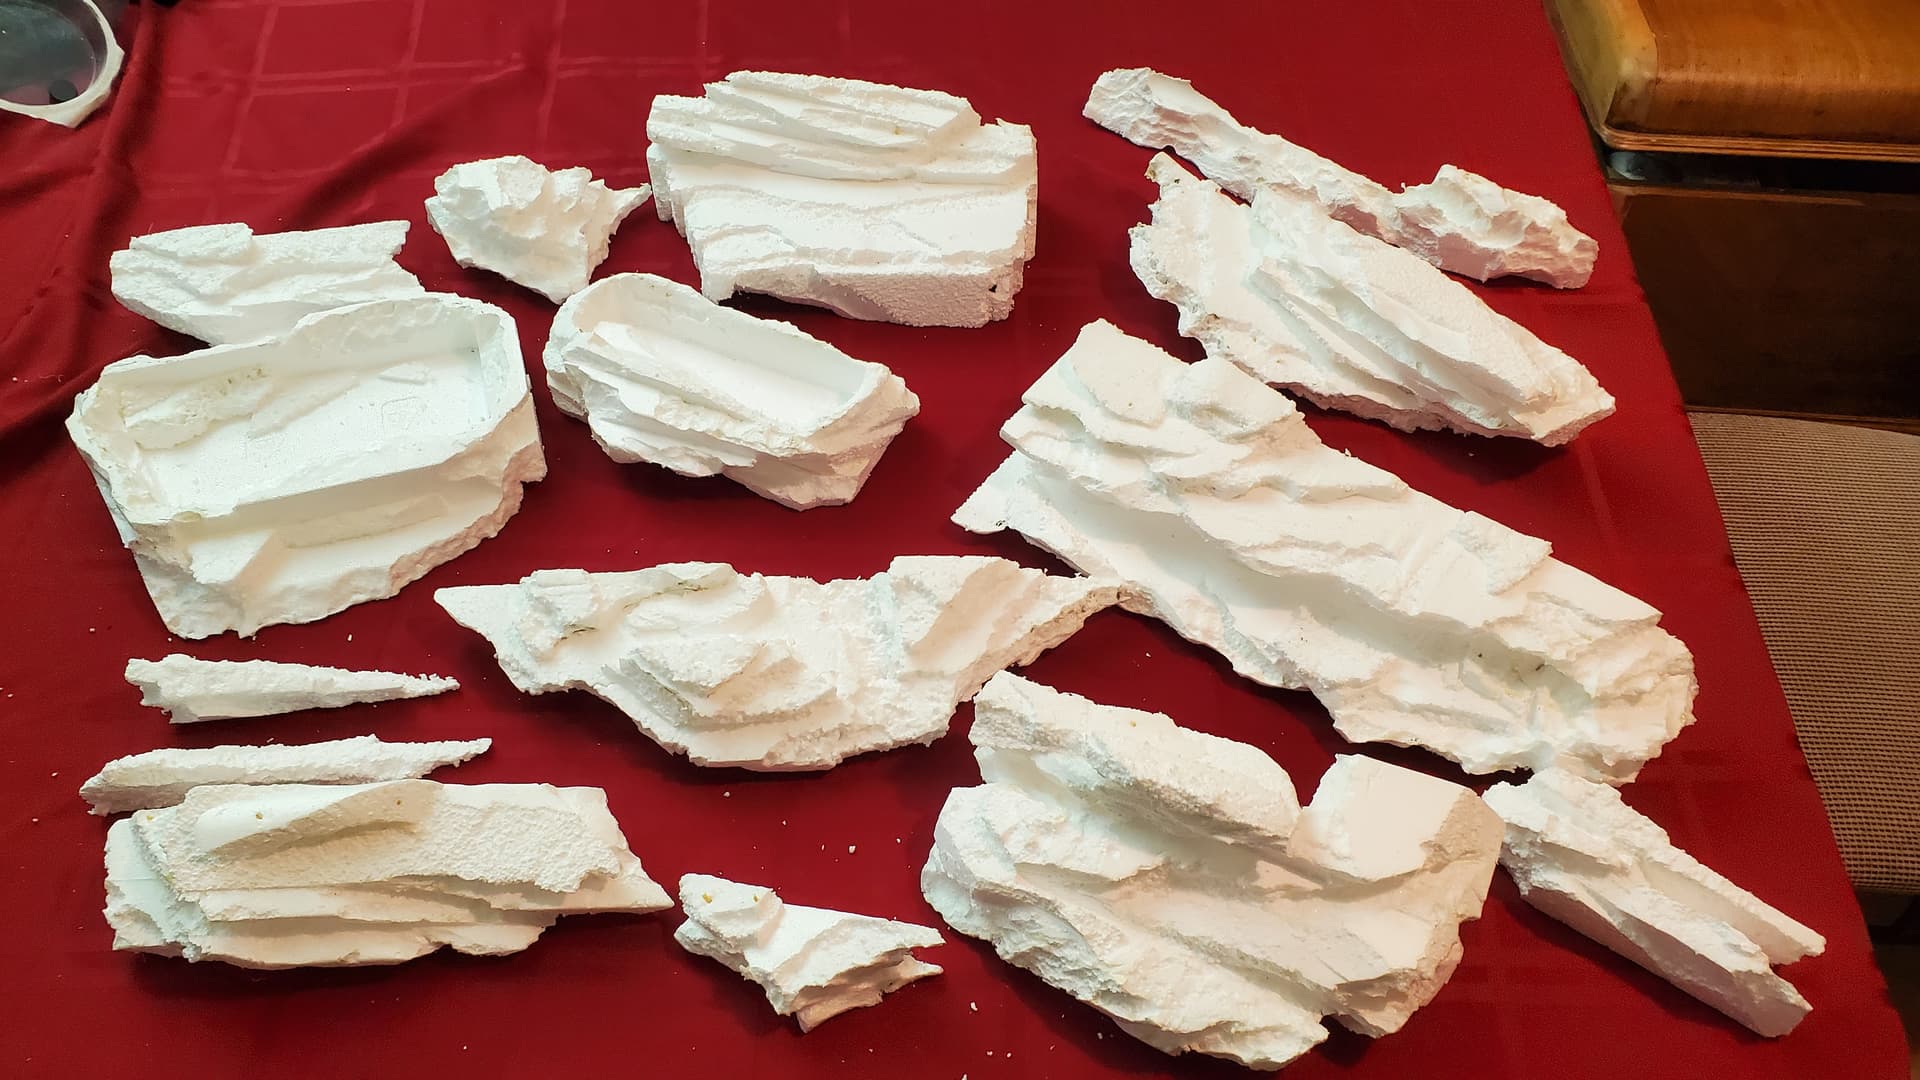
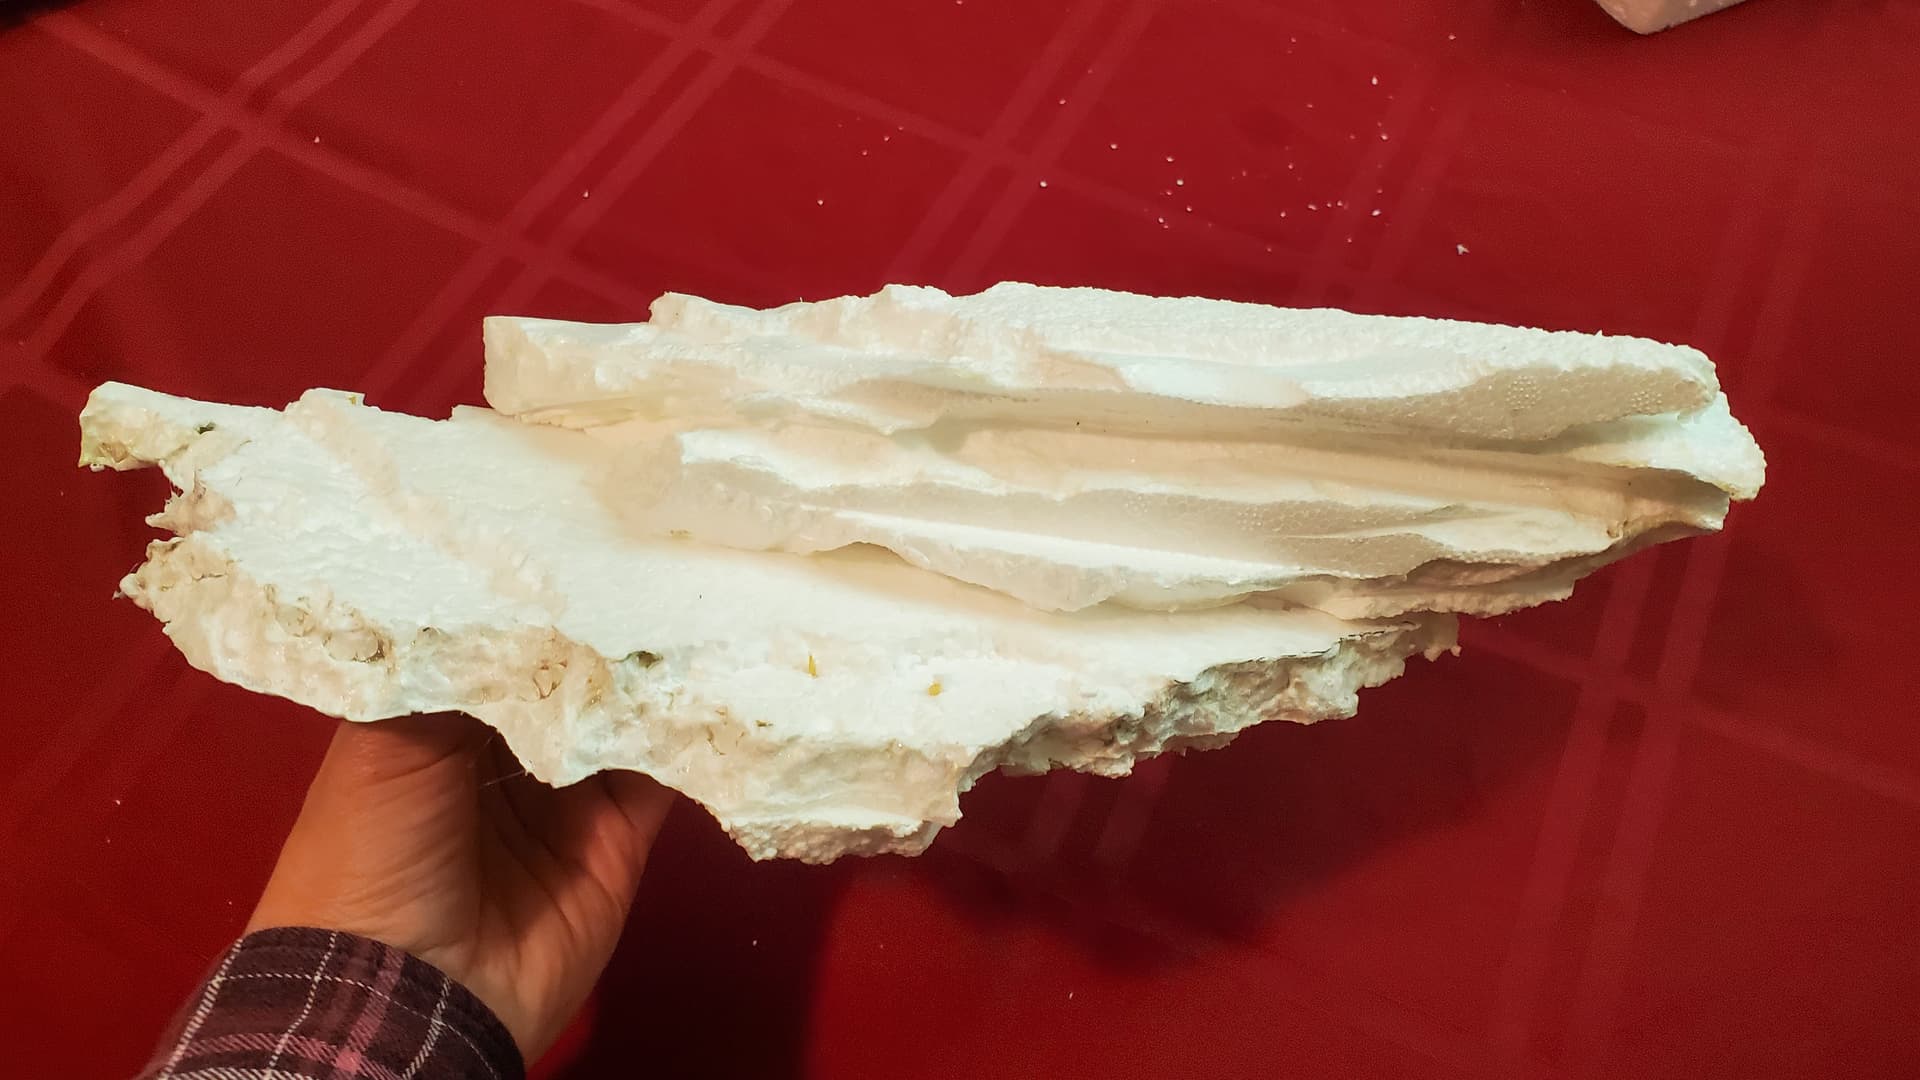
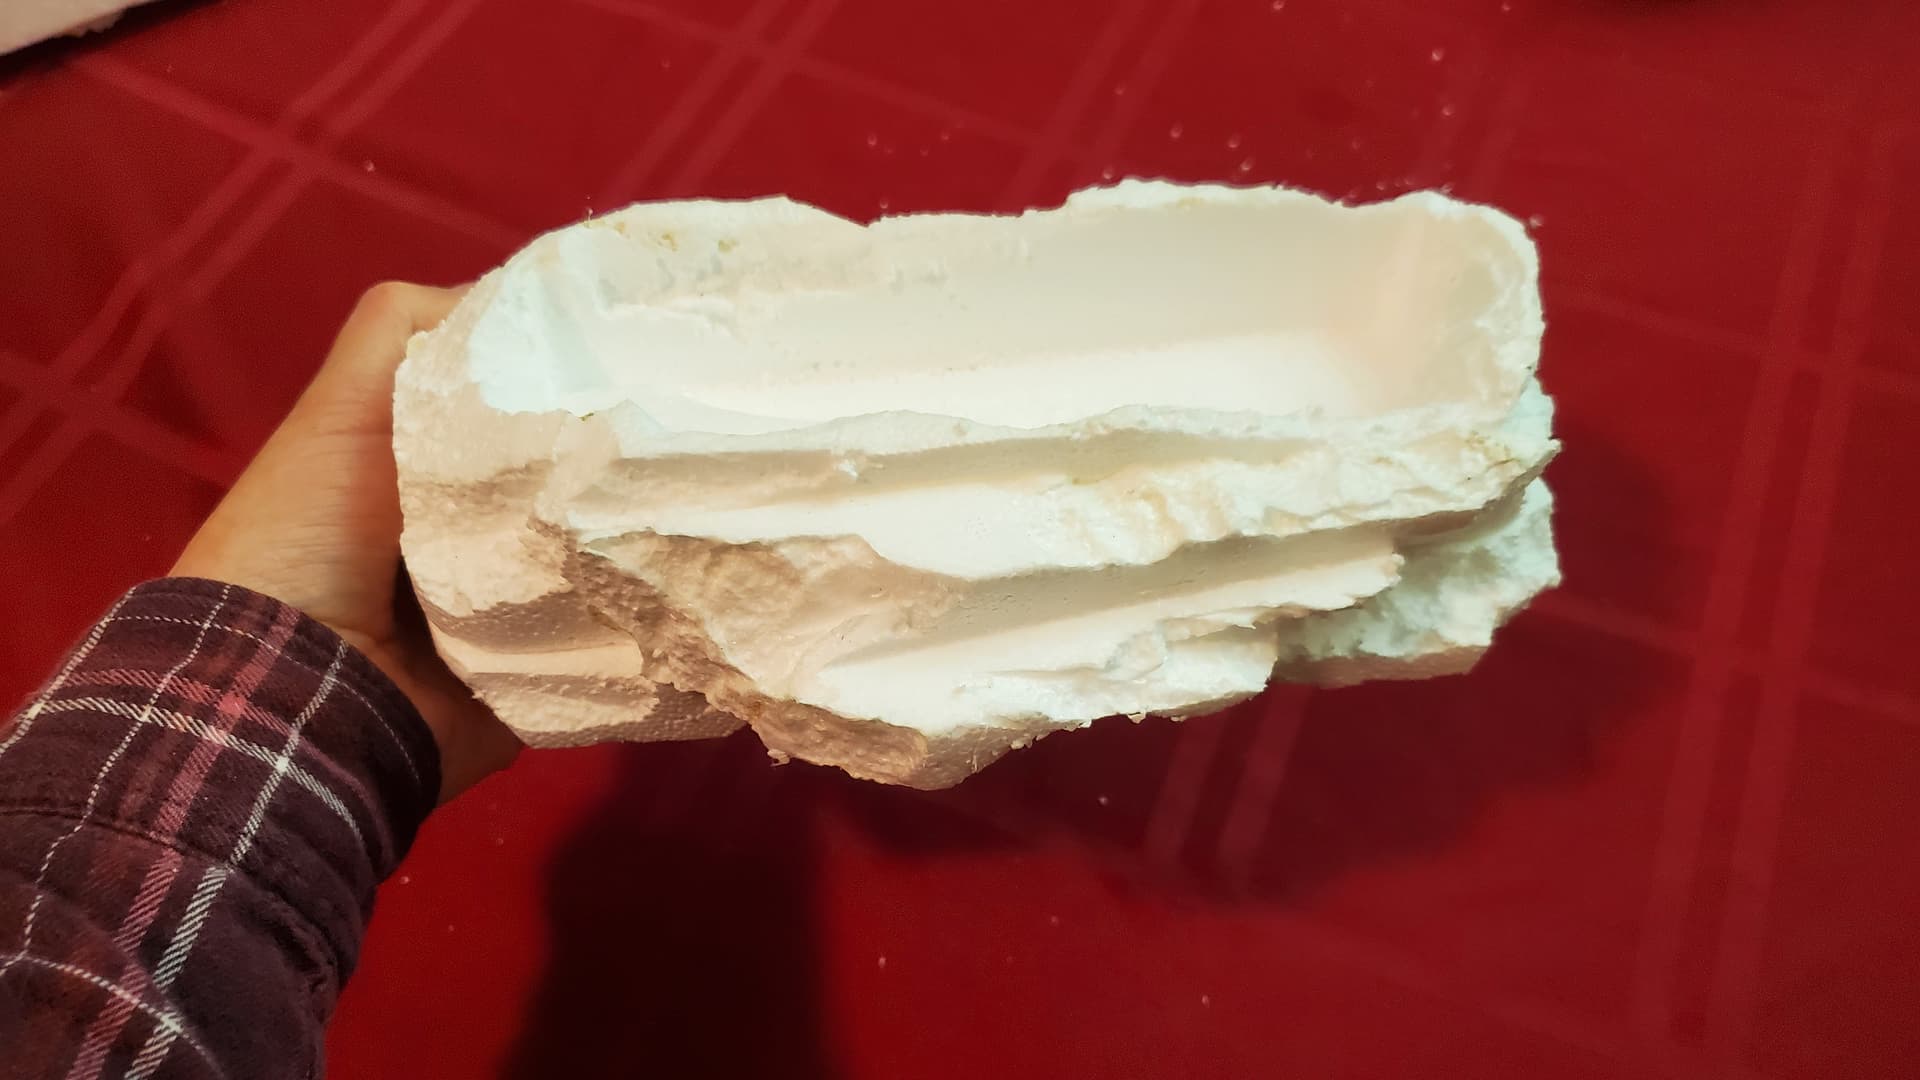
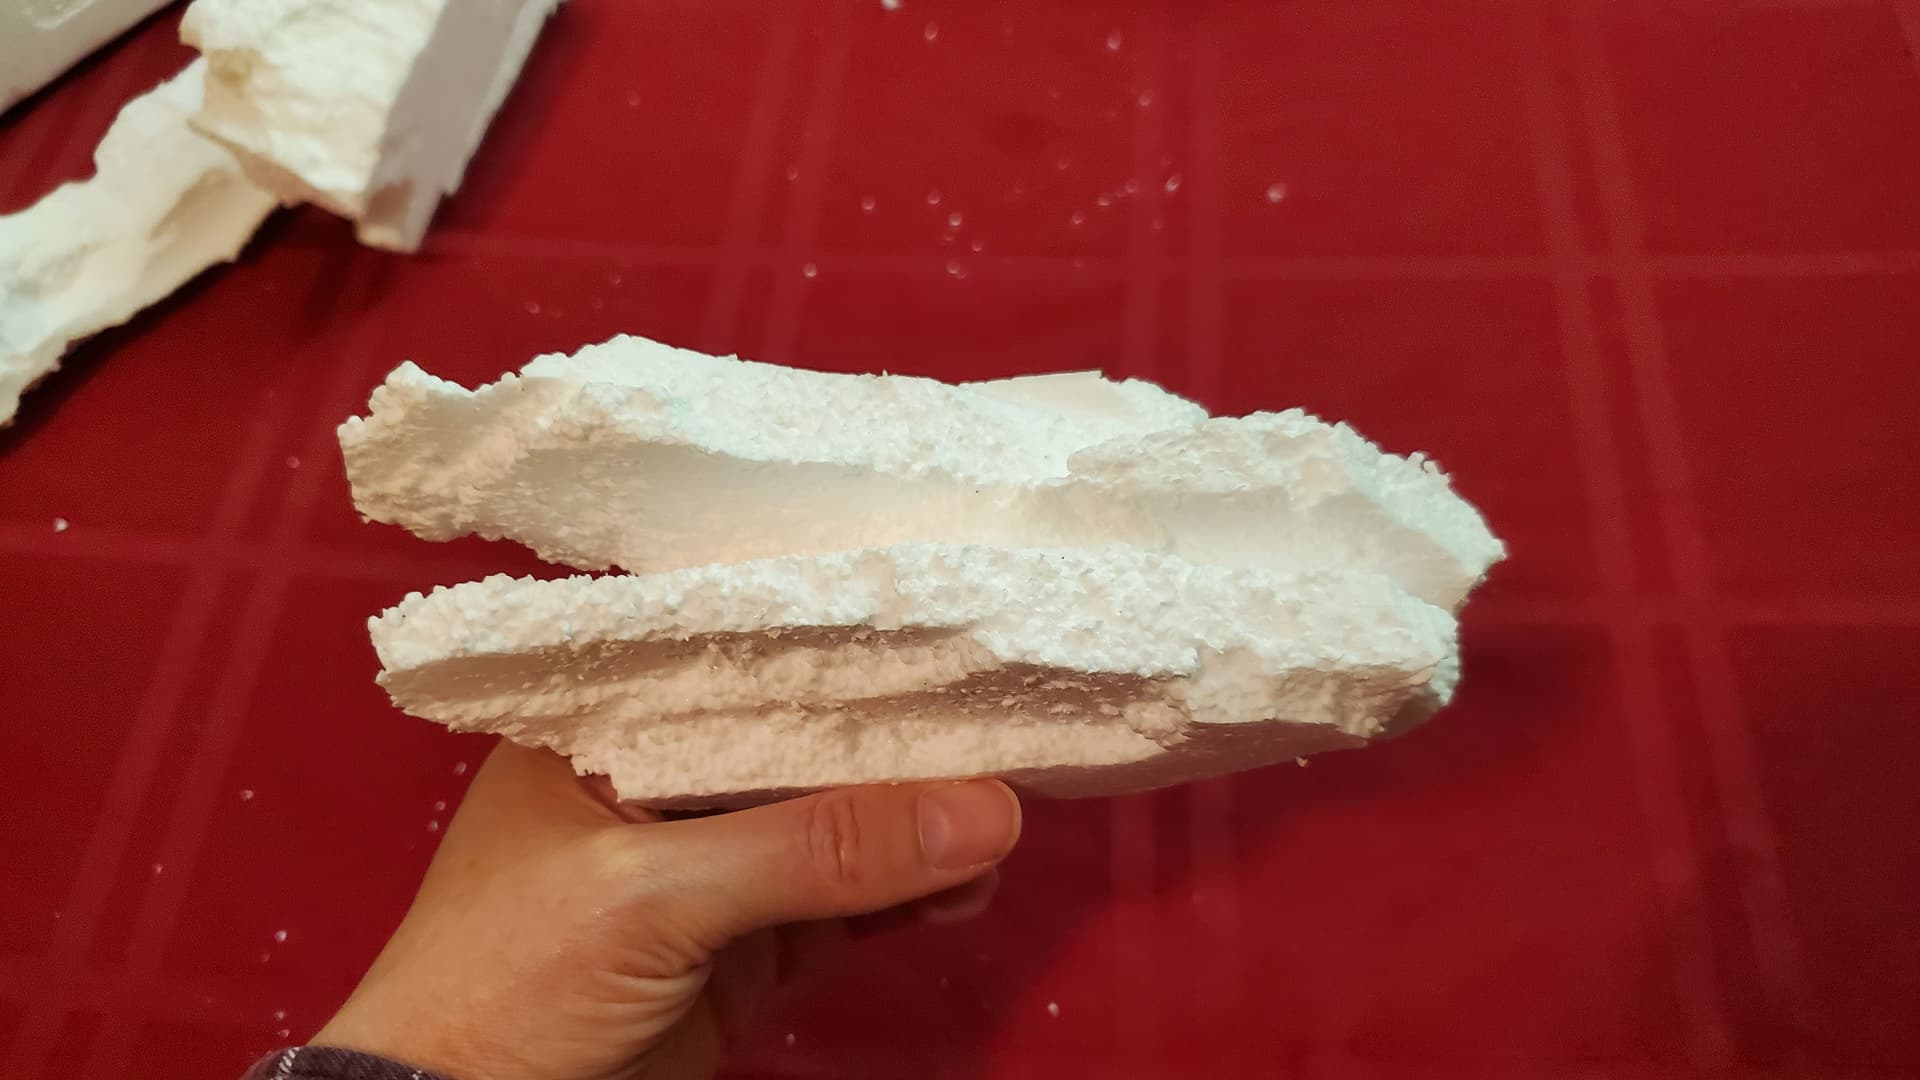
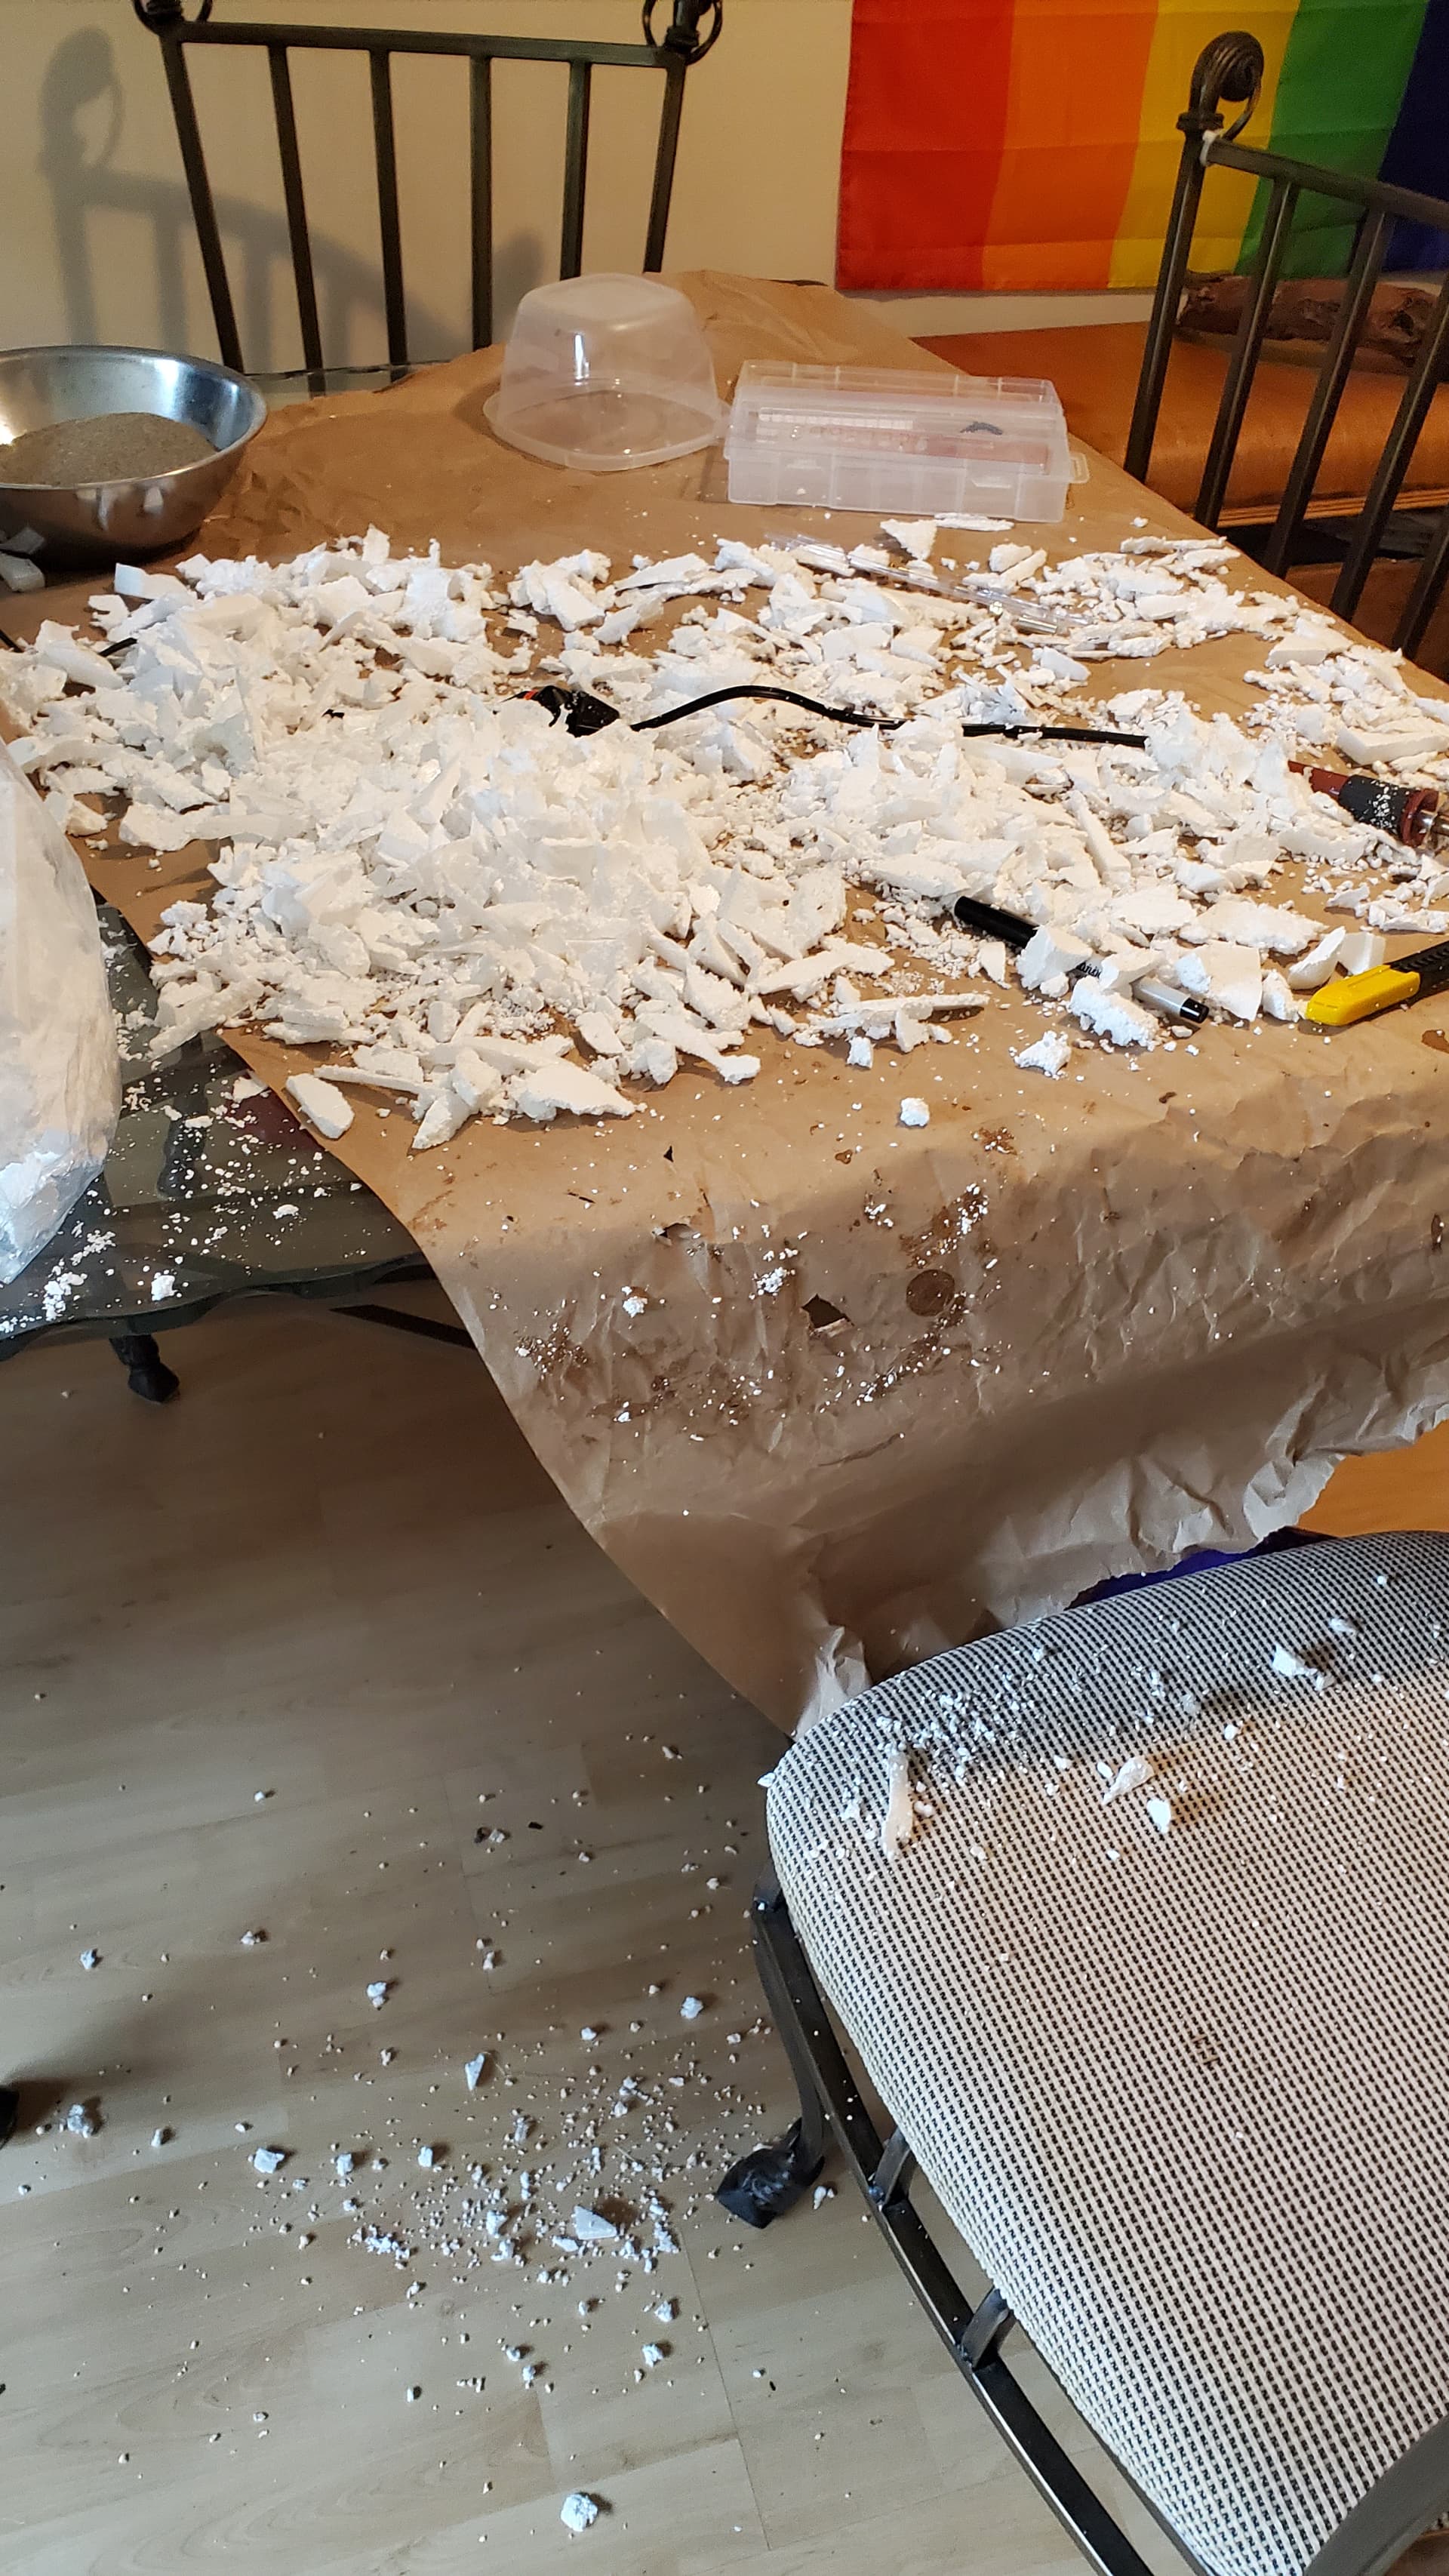
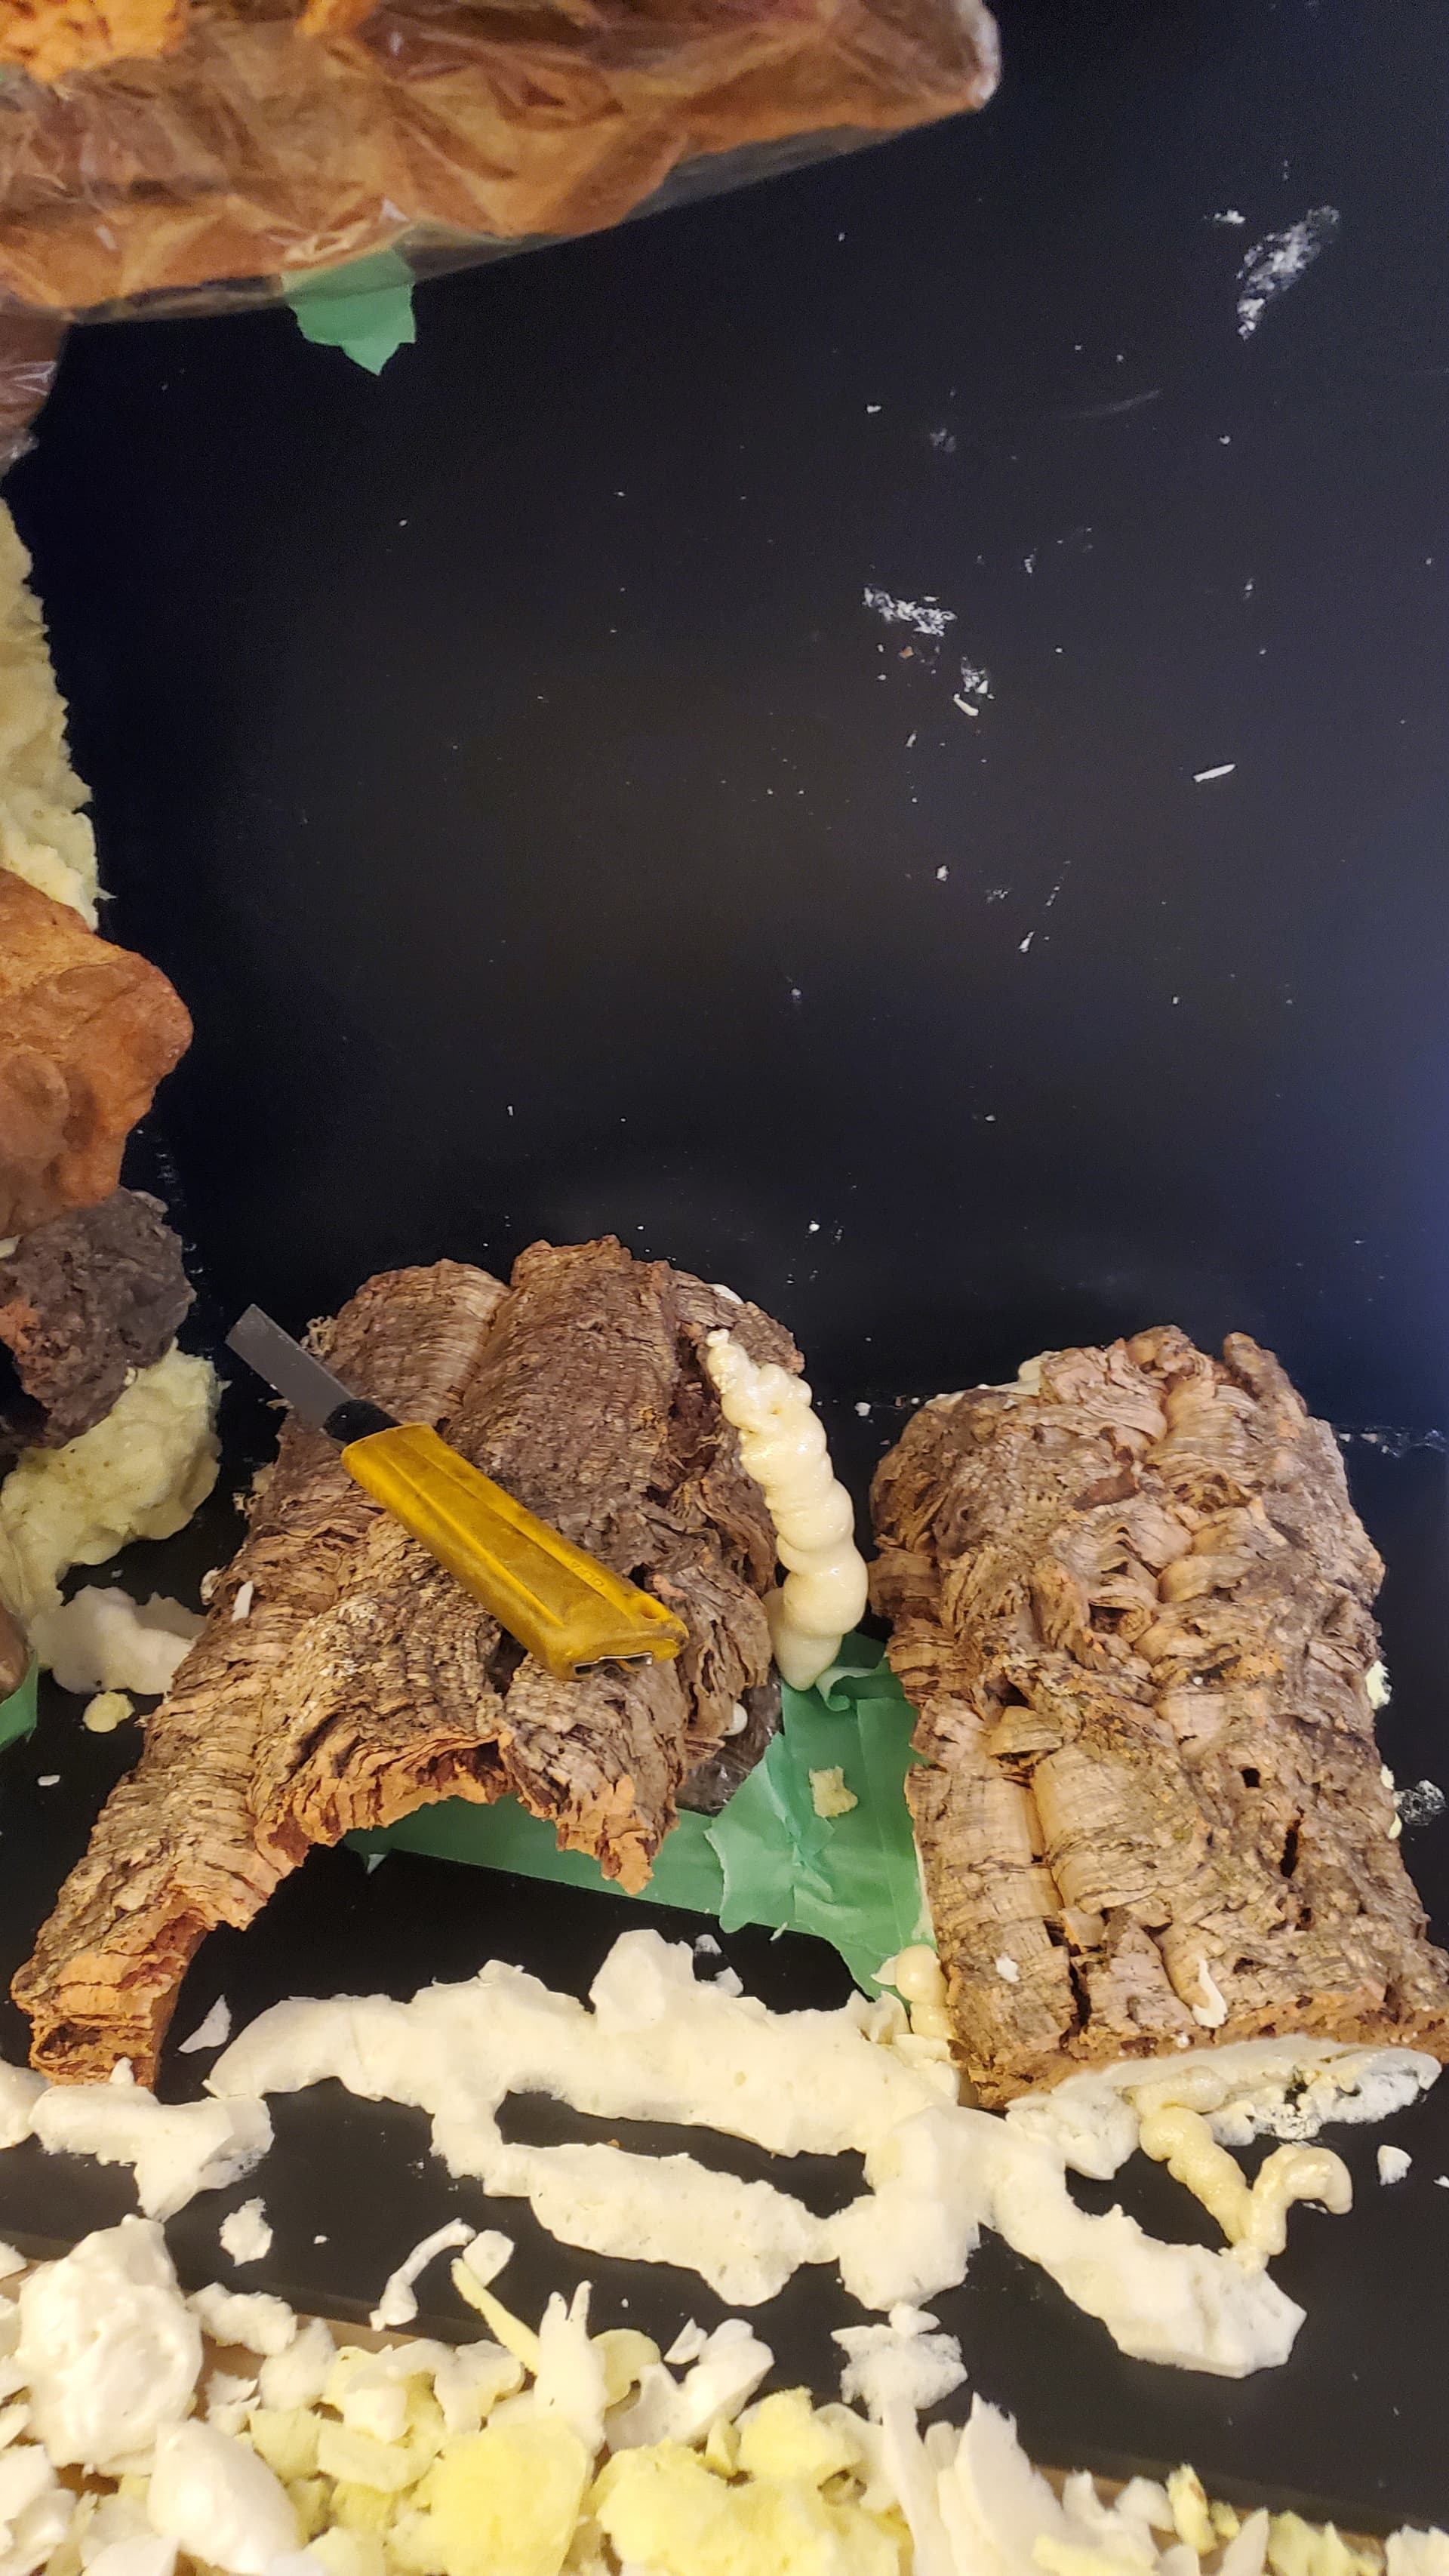
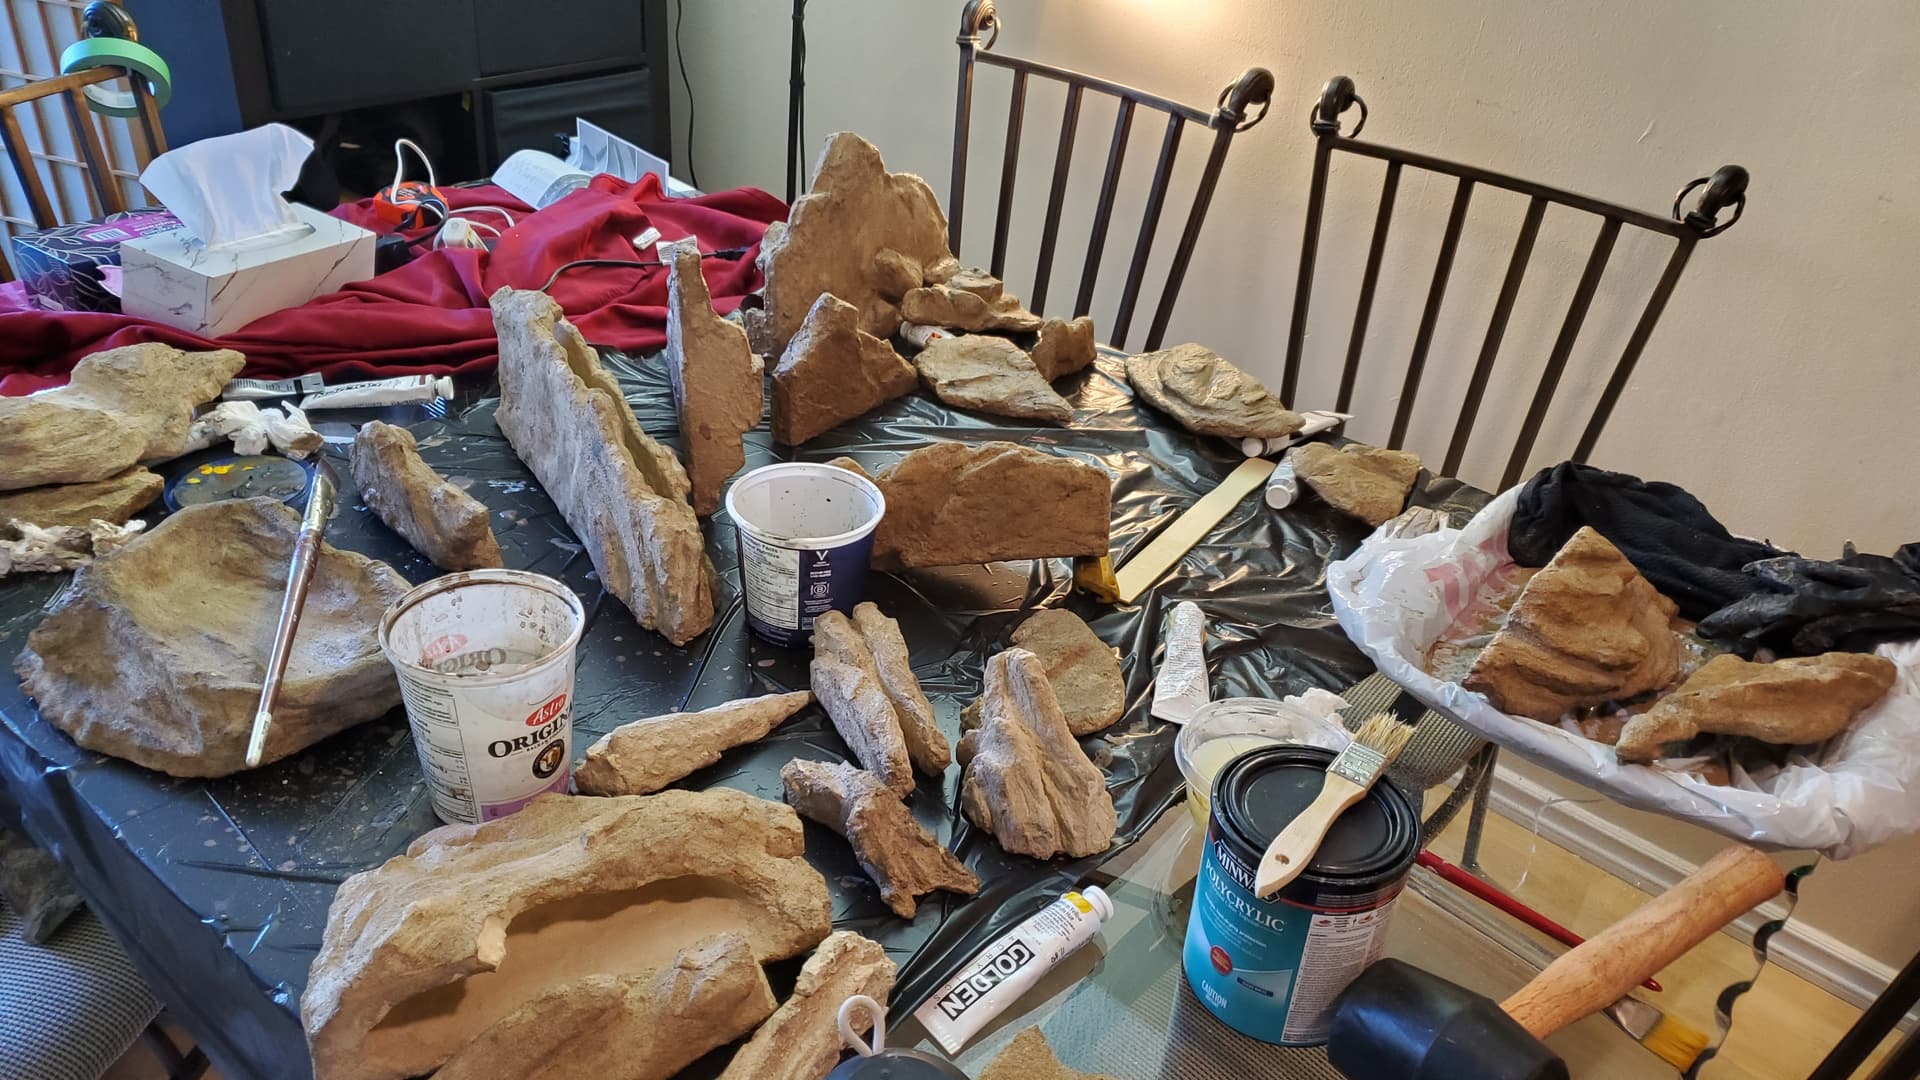
Trying to riff off of the shape of the rocks I had brought home, I carved a whole bunch – two batches, I didn’t photograph the first batch – out of styrofoam. My living room was a bit of a mess after that. (This is foreshadowing.)
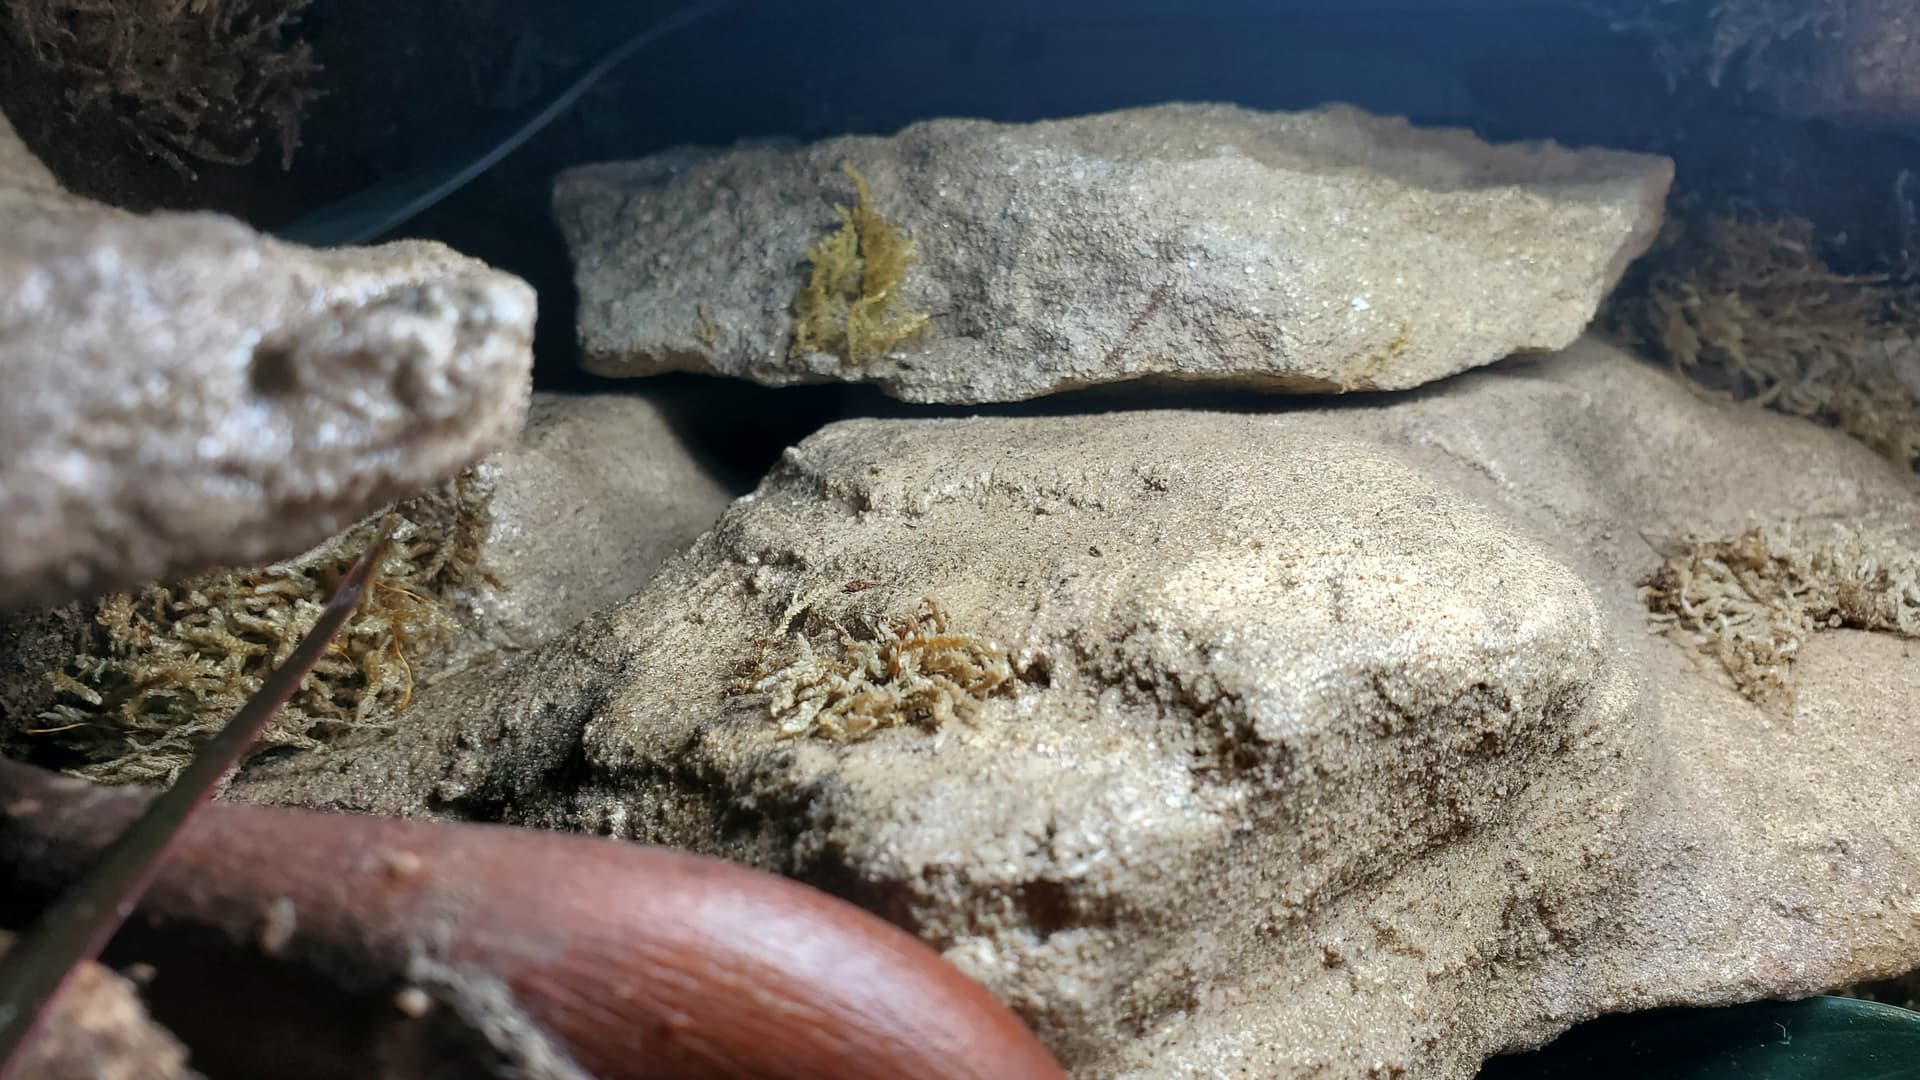
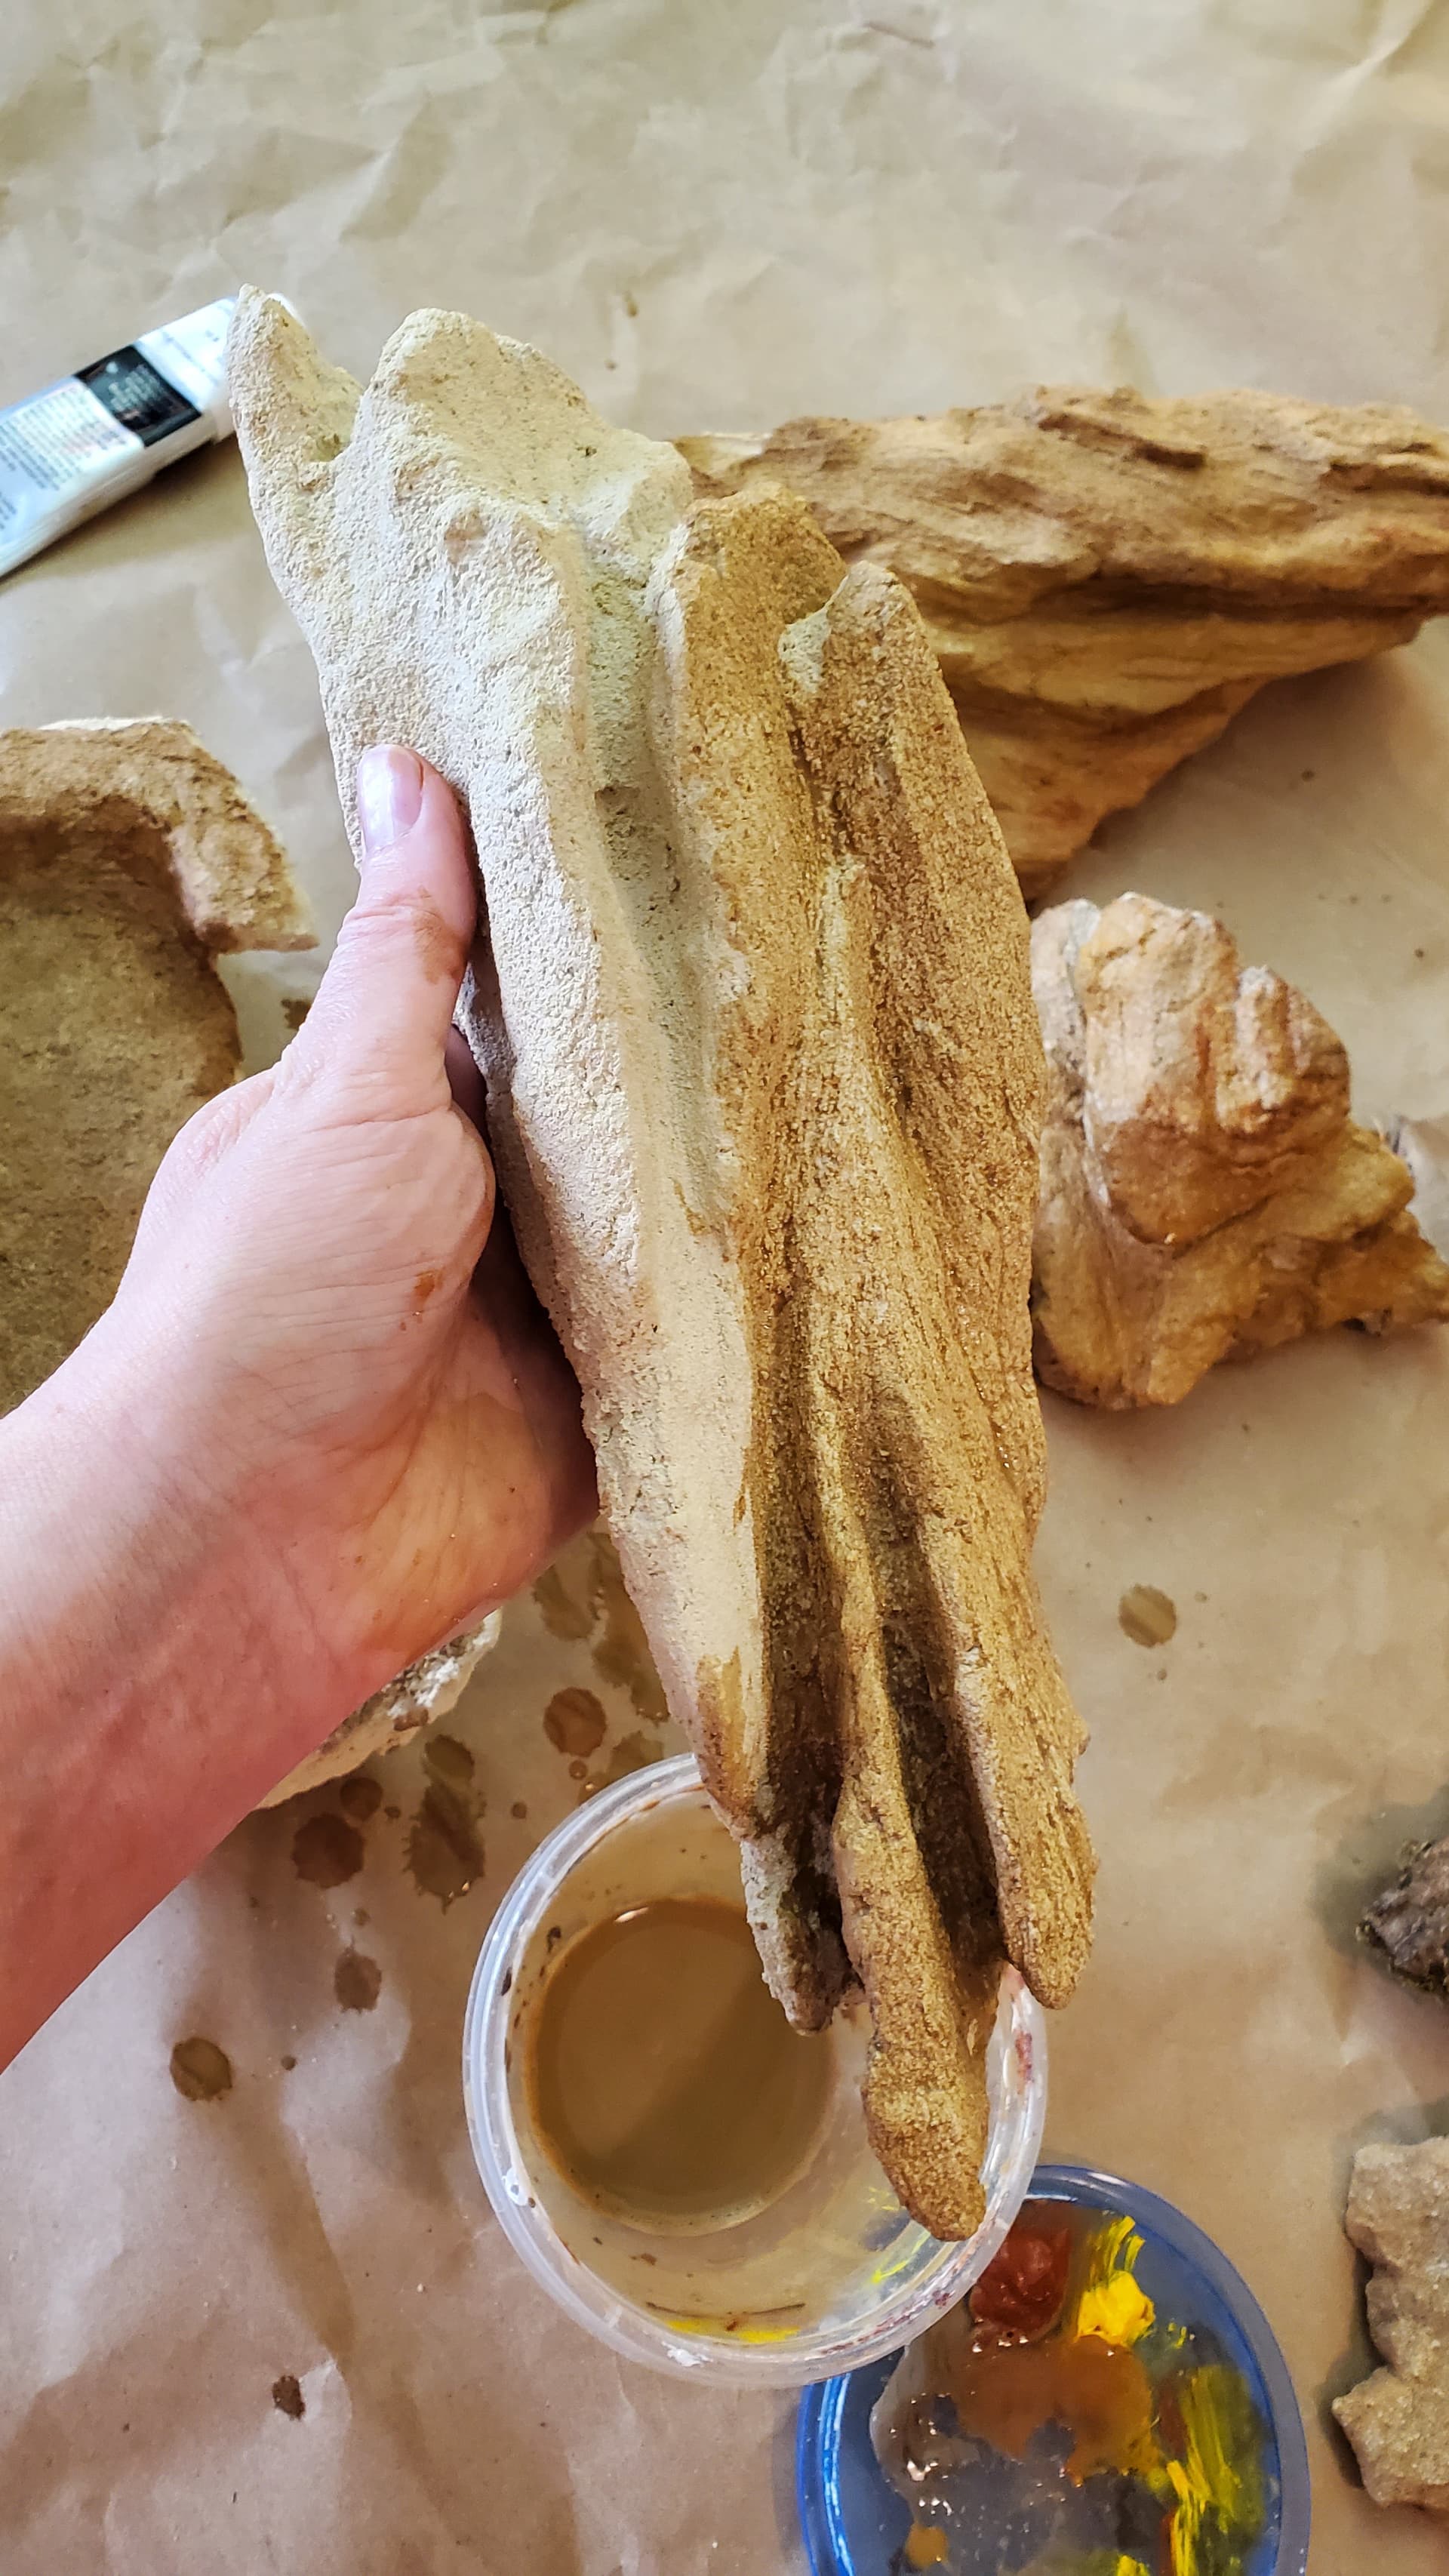
This is based on a technique I found on a cool old scaping blog – making rocks out of styrofoam and grout. The idea is to carve the rocks slightly smaller and with more exaggerated features than you intend to end up with, and then cover them in two or three layers of sanded grout, of your colour of choice. Paint them, seal them with polycrylic, and they’re light, waterproof, reptile-safe and rock-like.
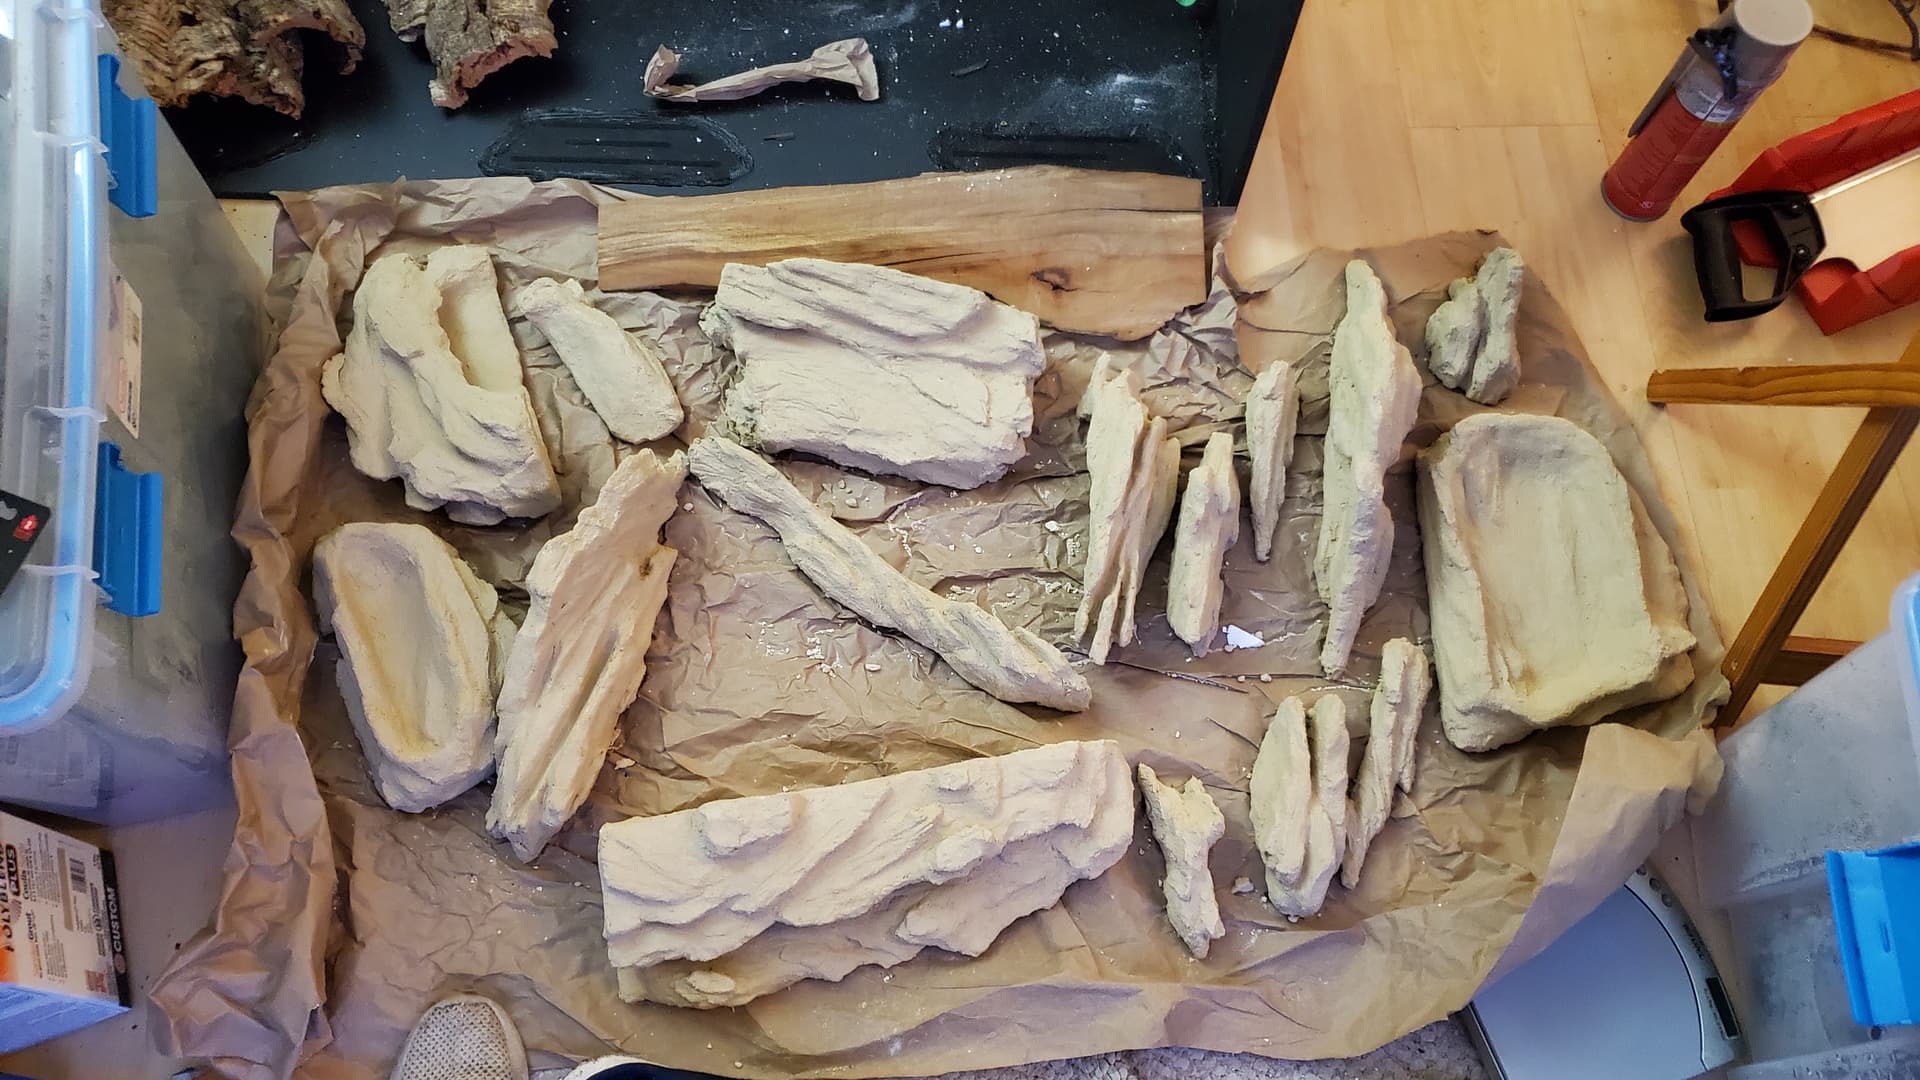
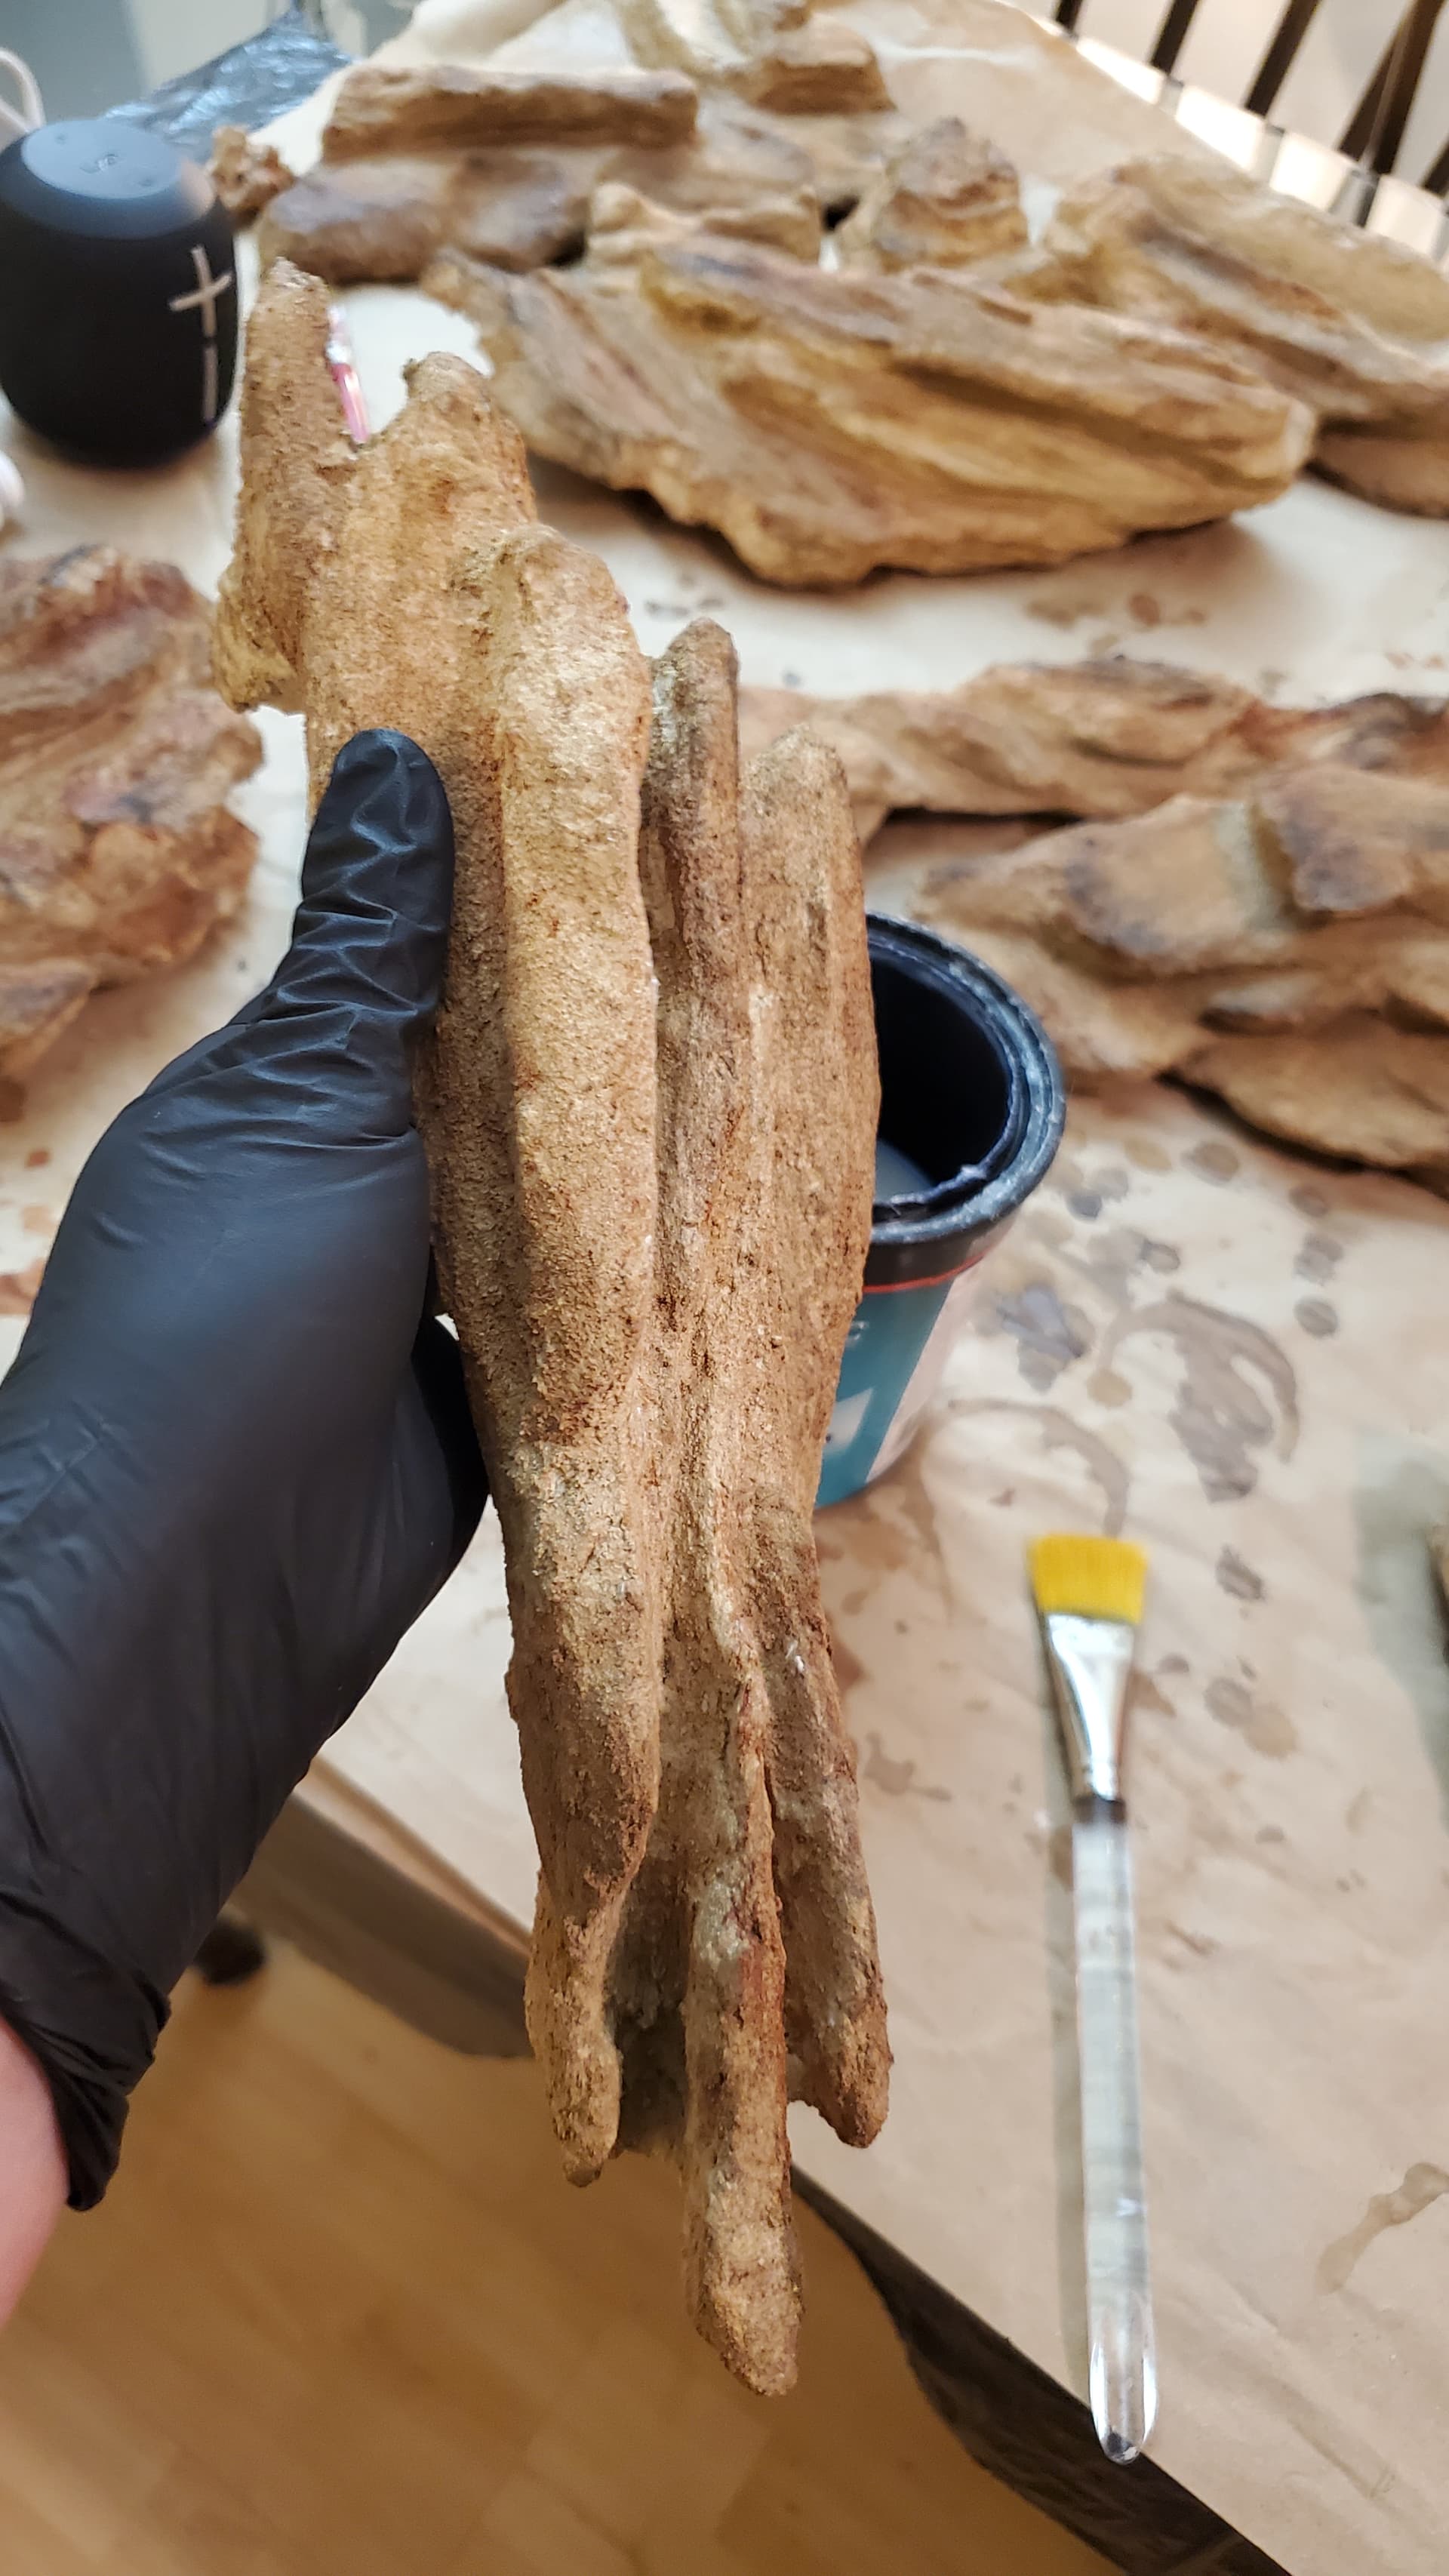
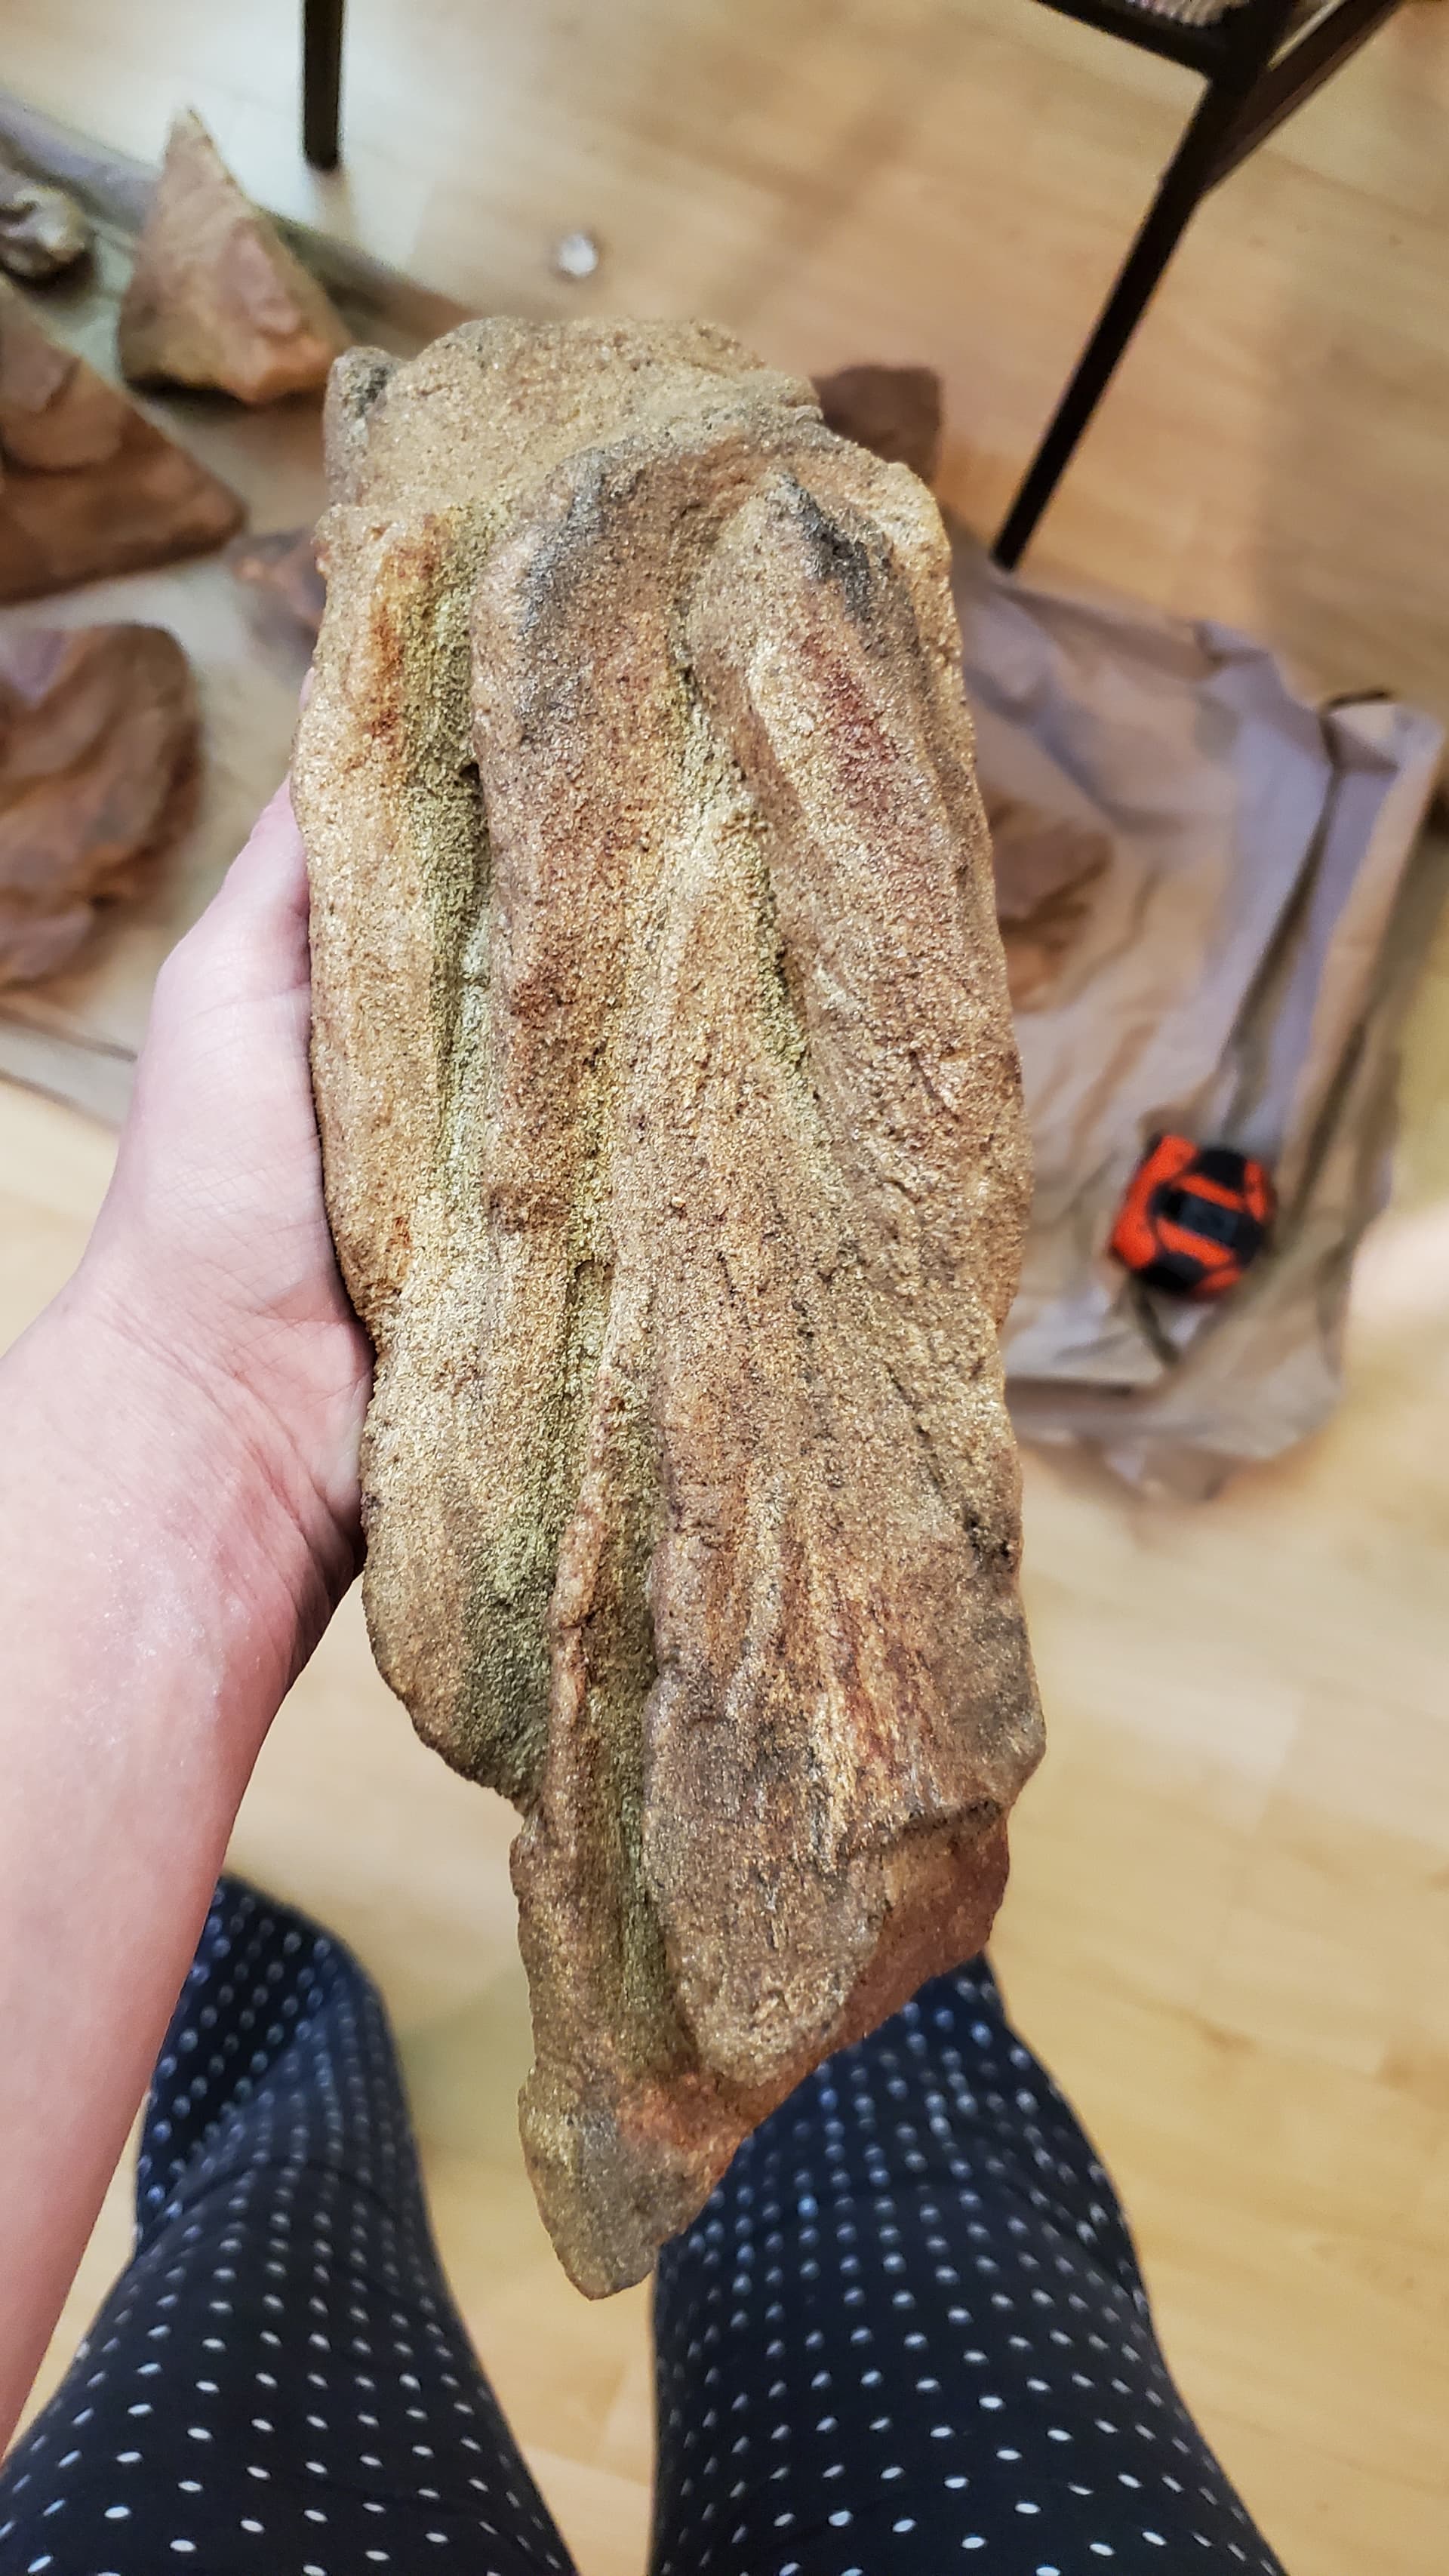
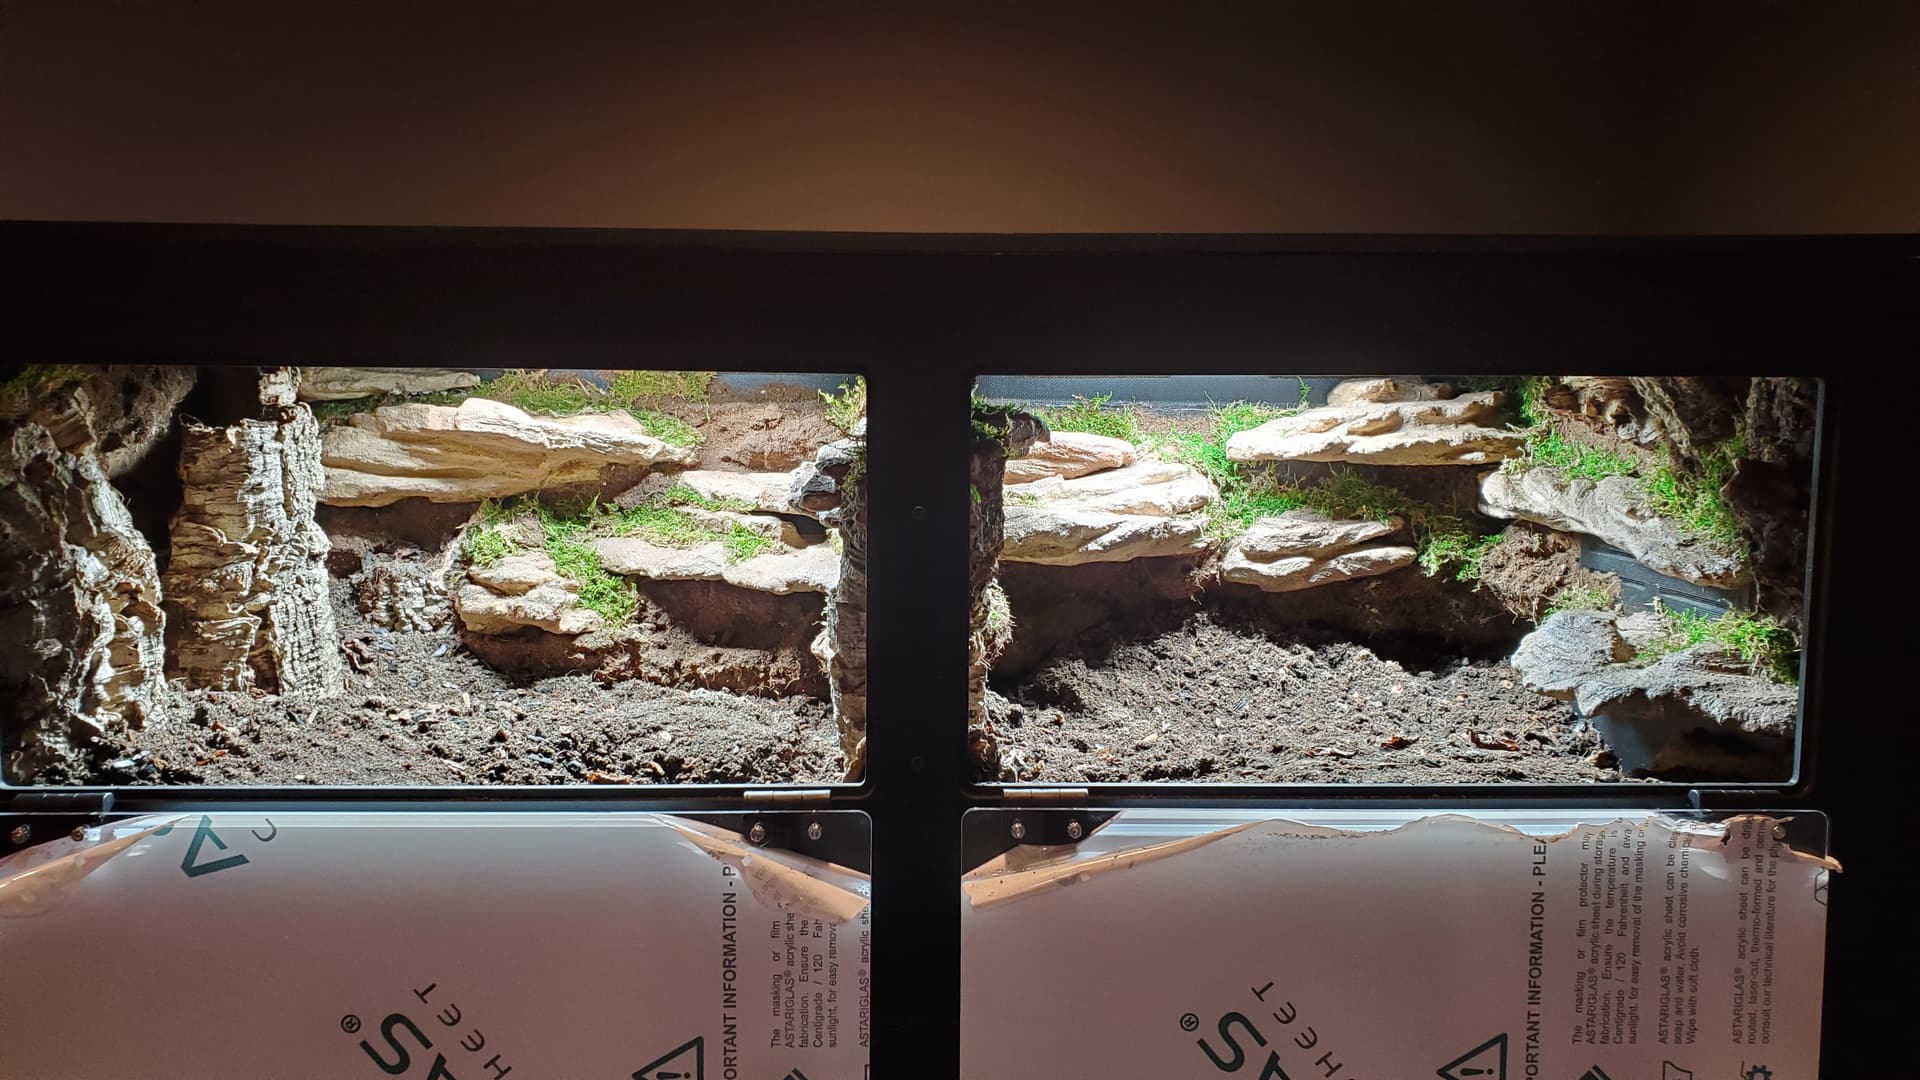
Man, I carved and grouted so many rocks. This is about half. No photos of the grouting, but I mixed the grout up in small batches and did a couple hours of grouting at a time. This was arguably the longest step in this whole process – I was getting very picky about the look of these suckers, so I spent a lot of time building up grout and then carving detail back in.
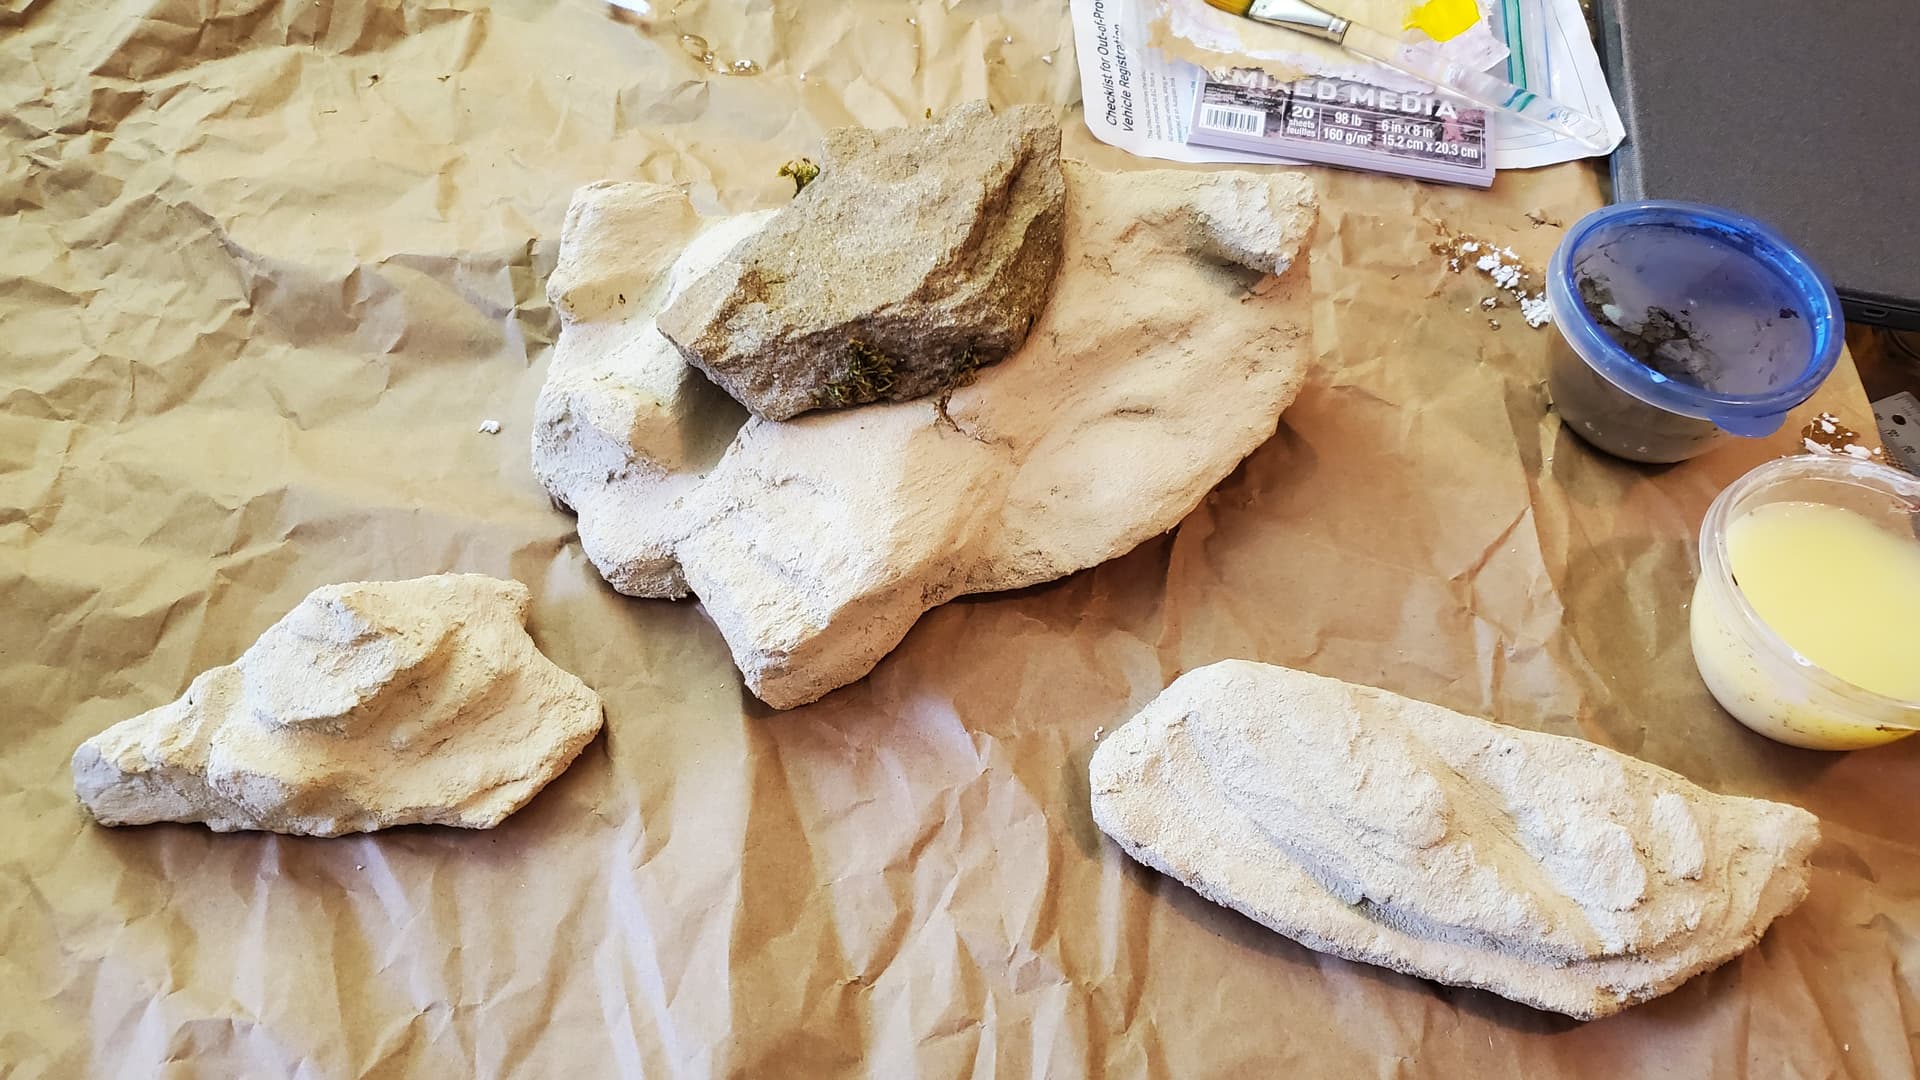
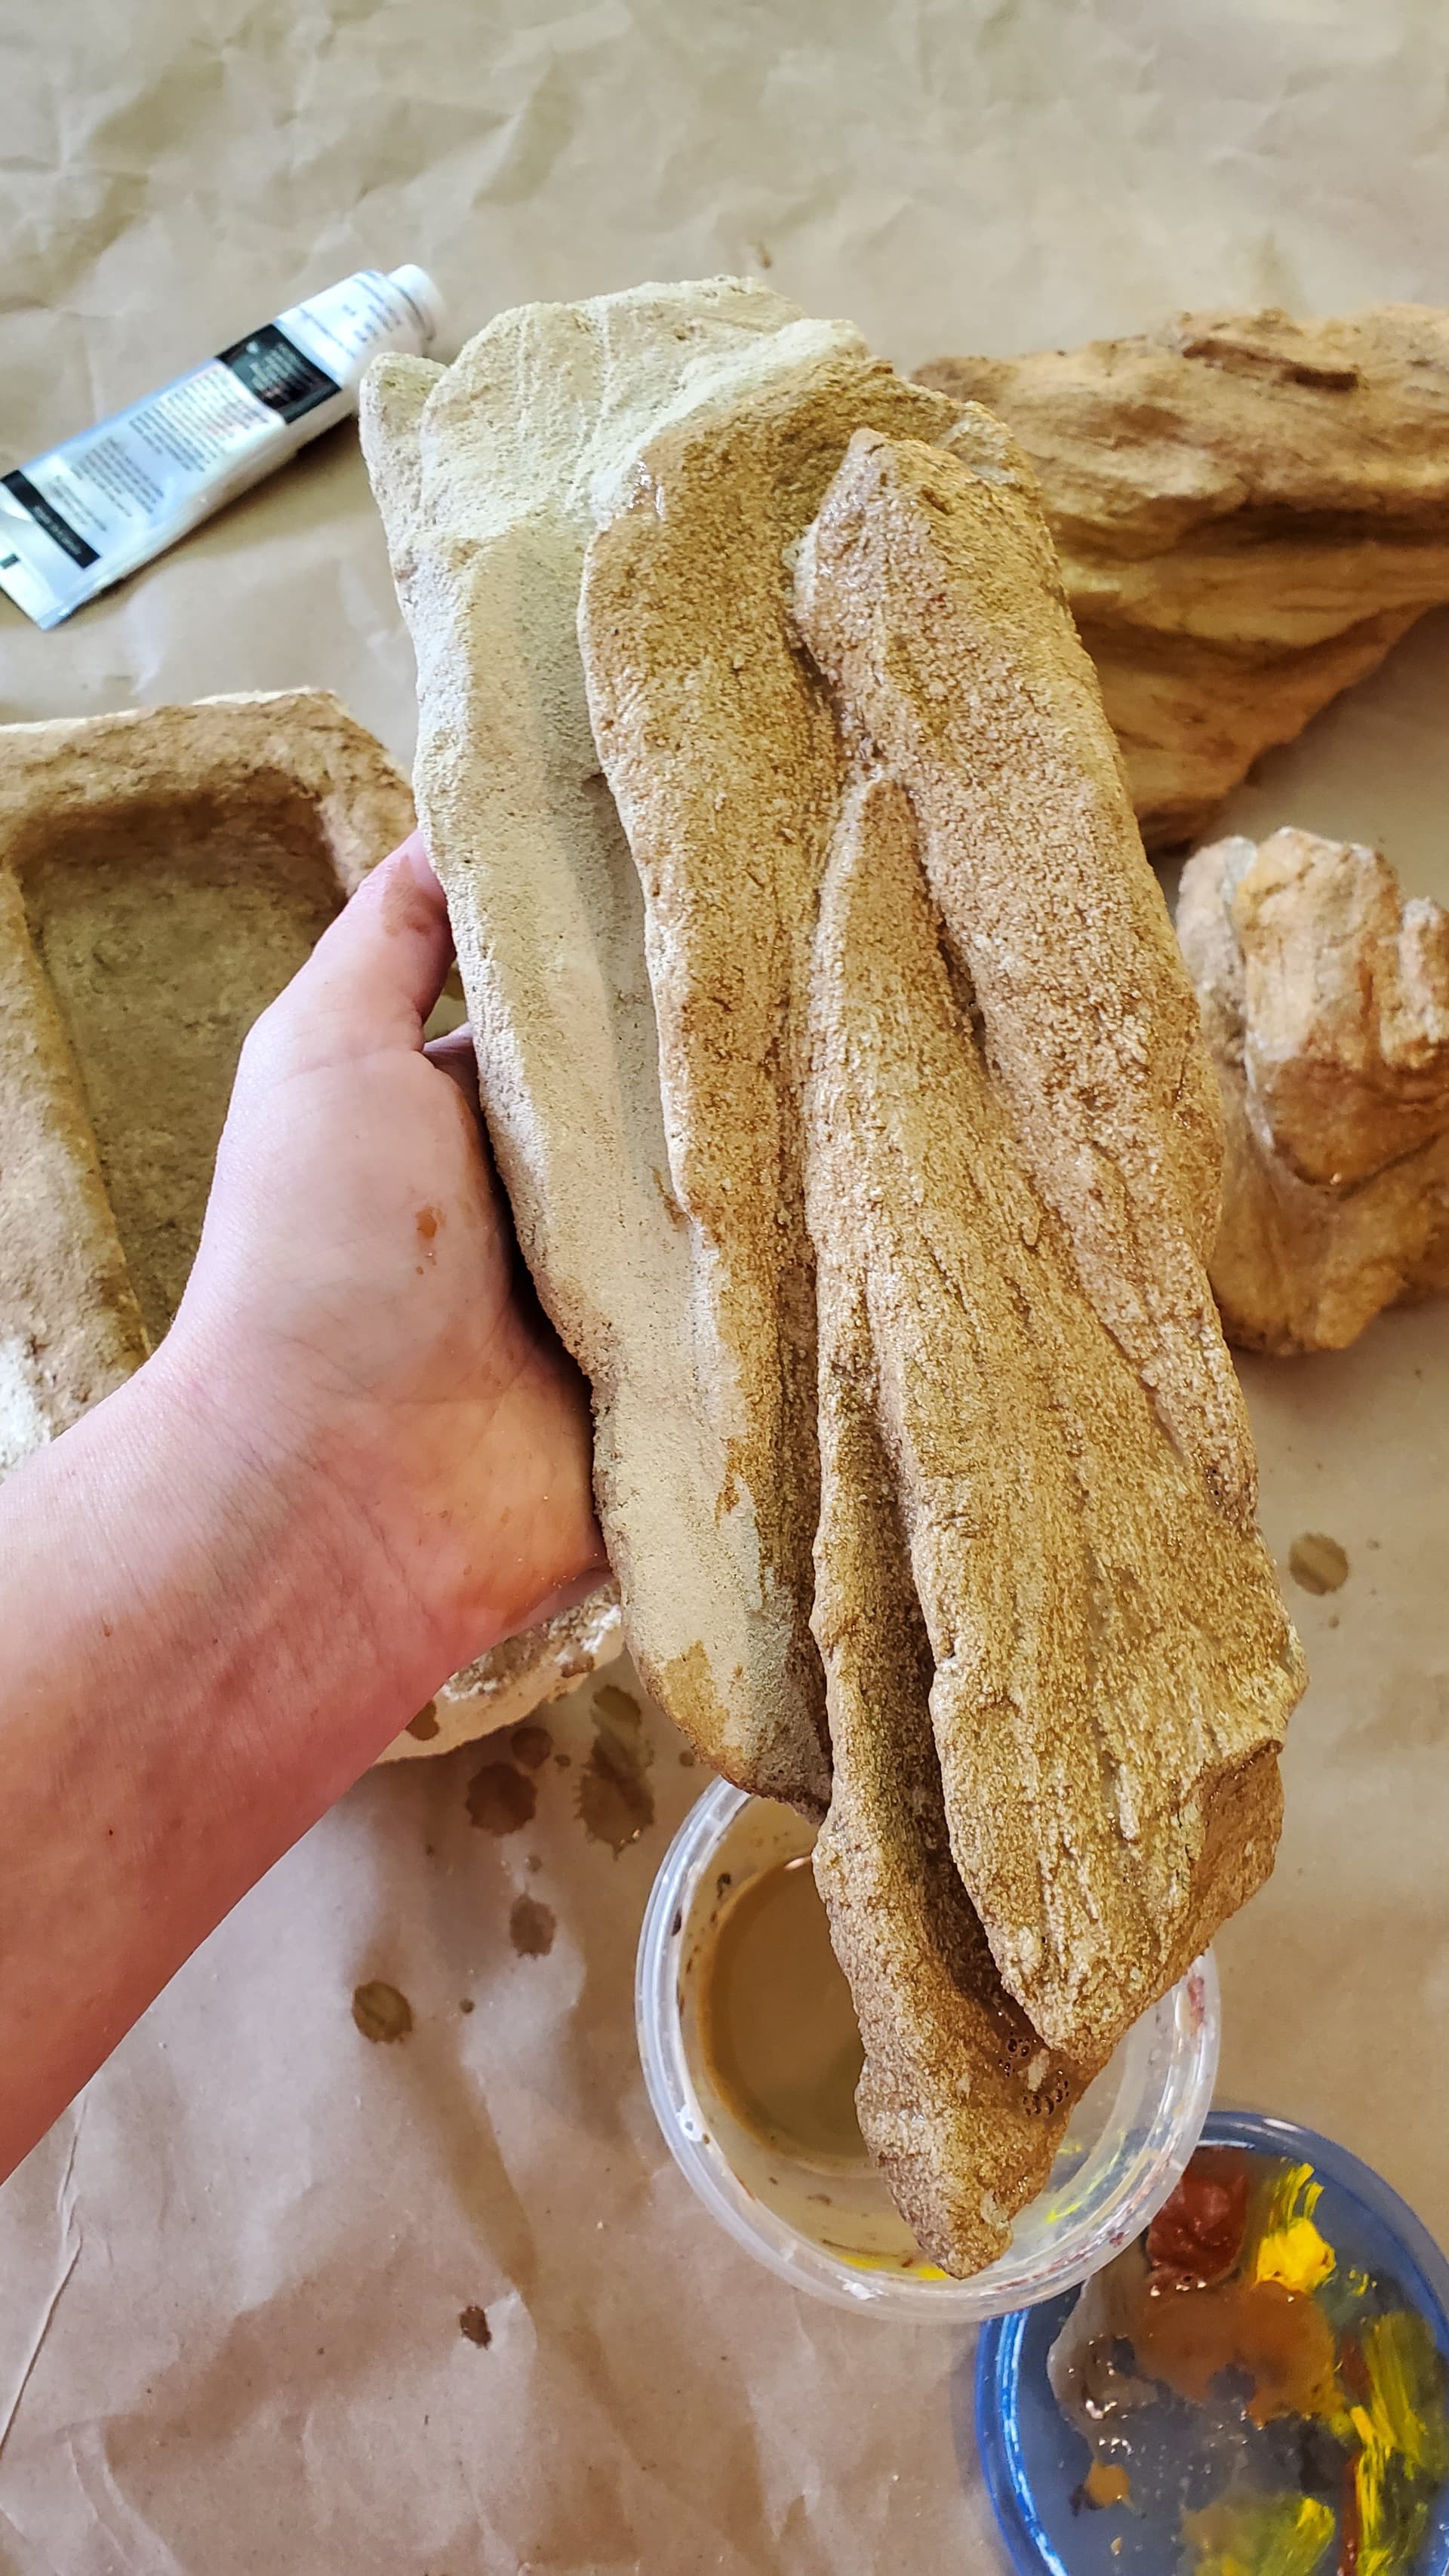
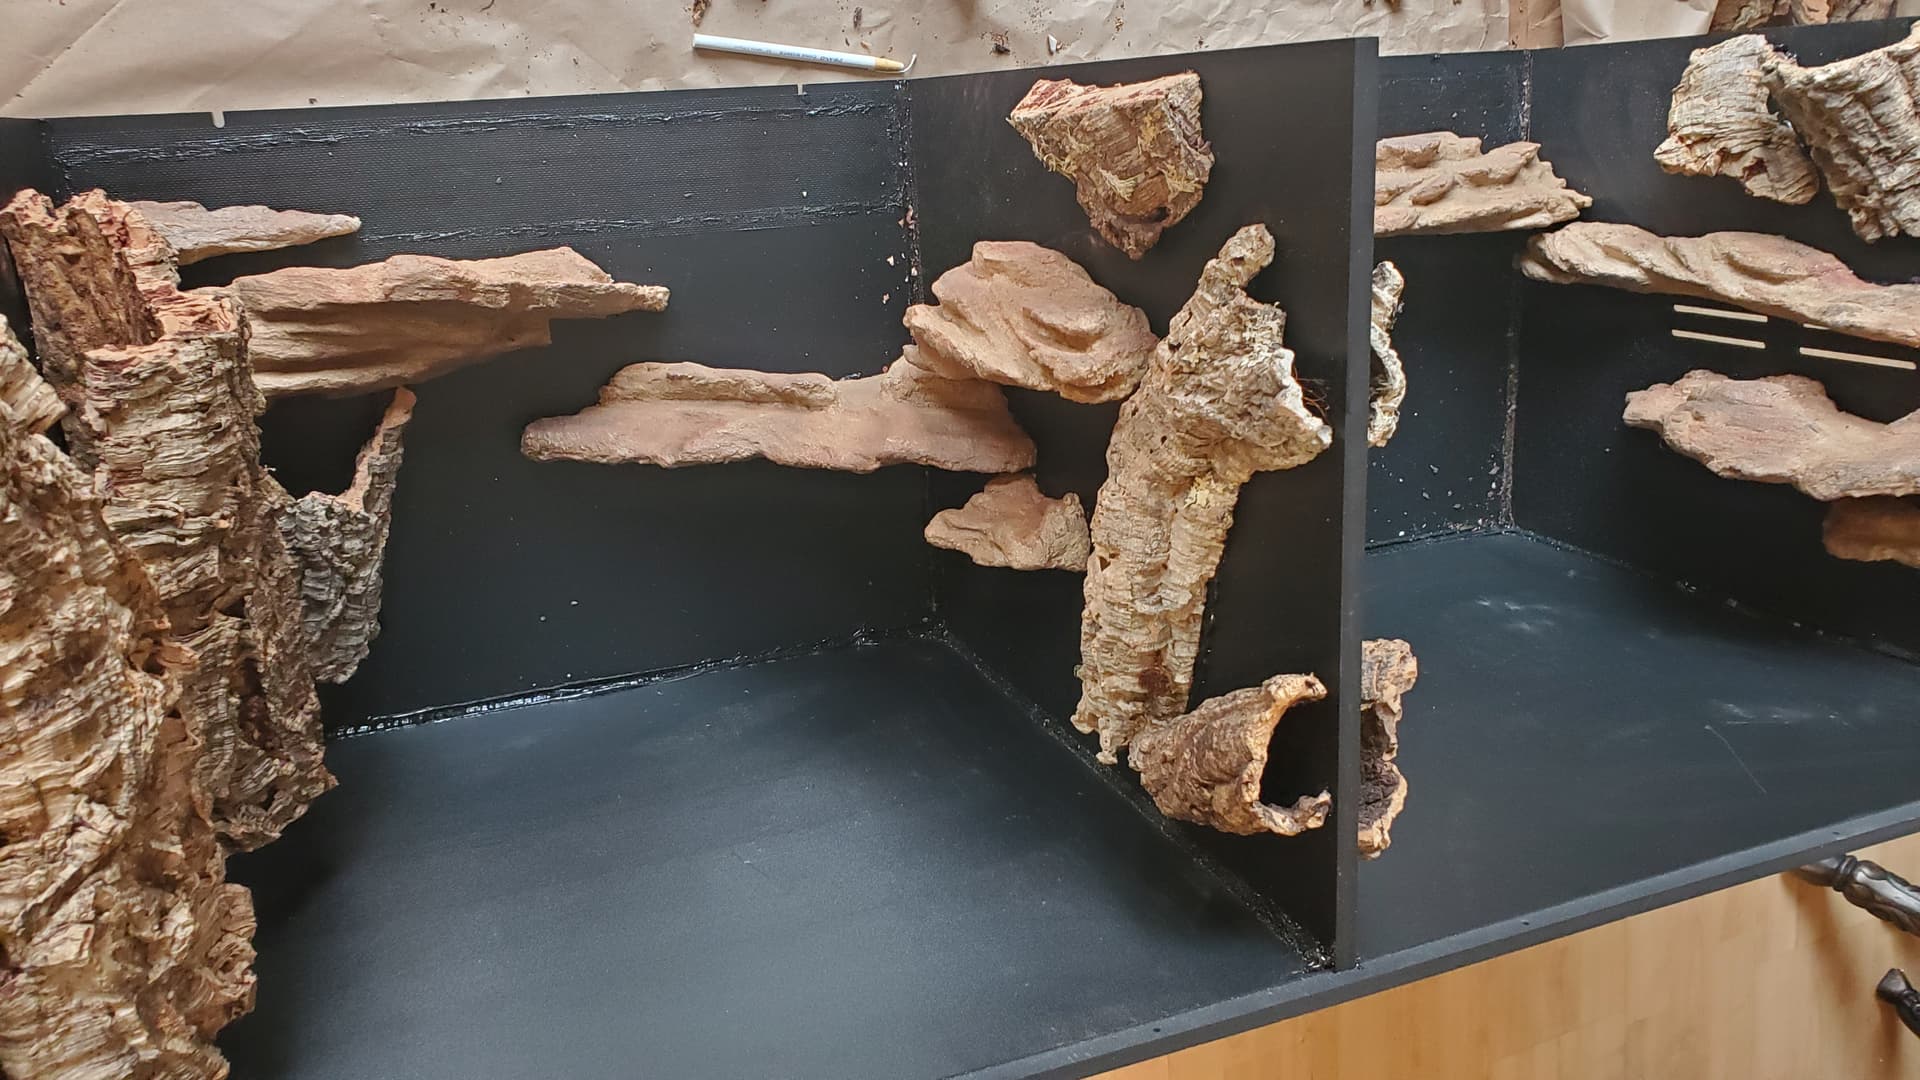
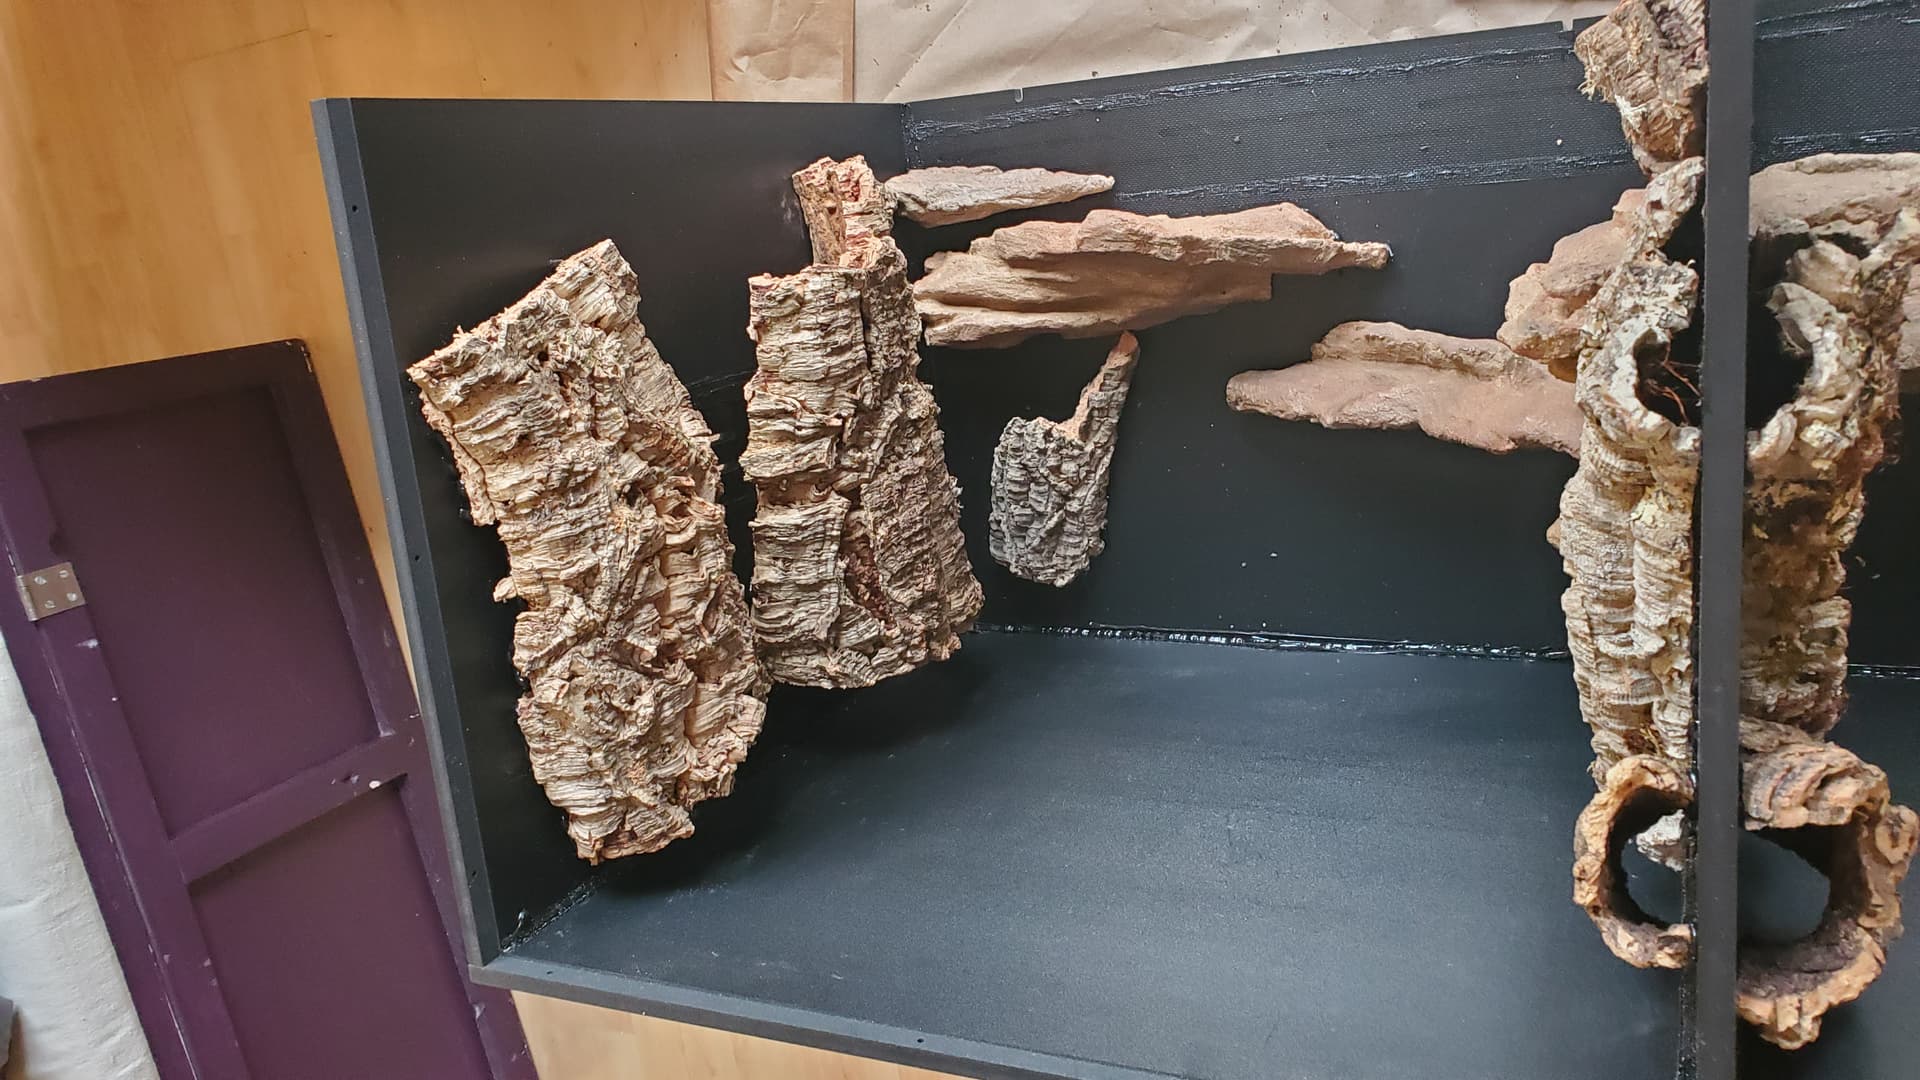
That’s one of the real, inspiration rocks on top of one of the fake, grouted rocks. So at this stage they look kinda play-doughy, yeah? The next step brings them to life quite a bit more – painting.
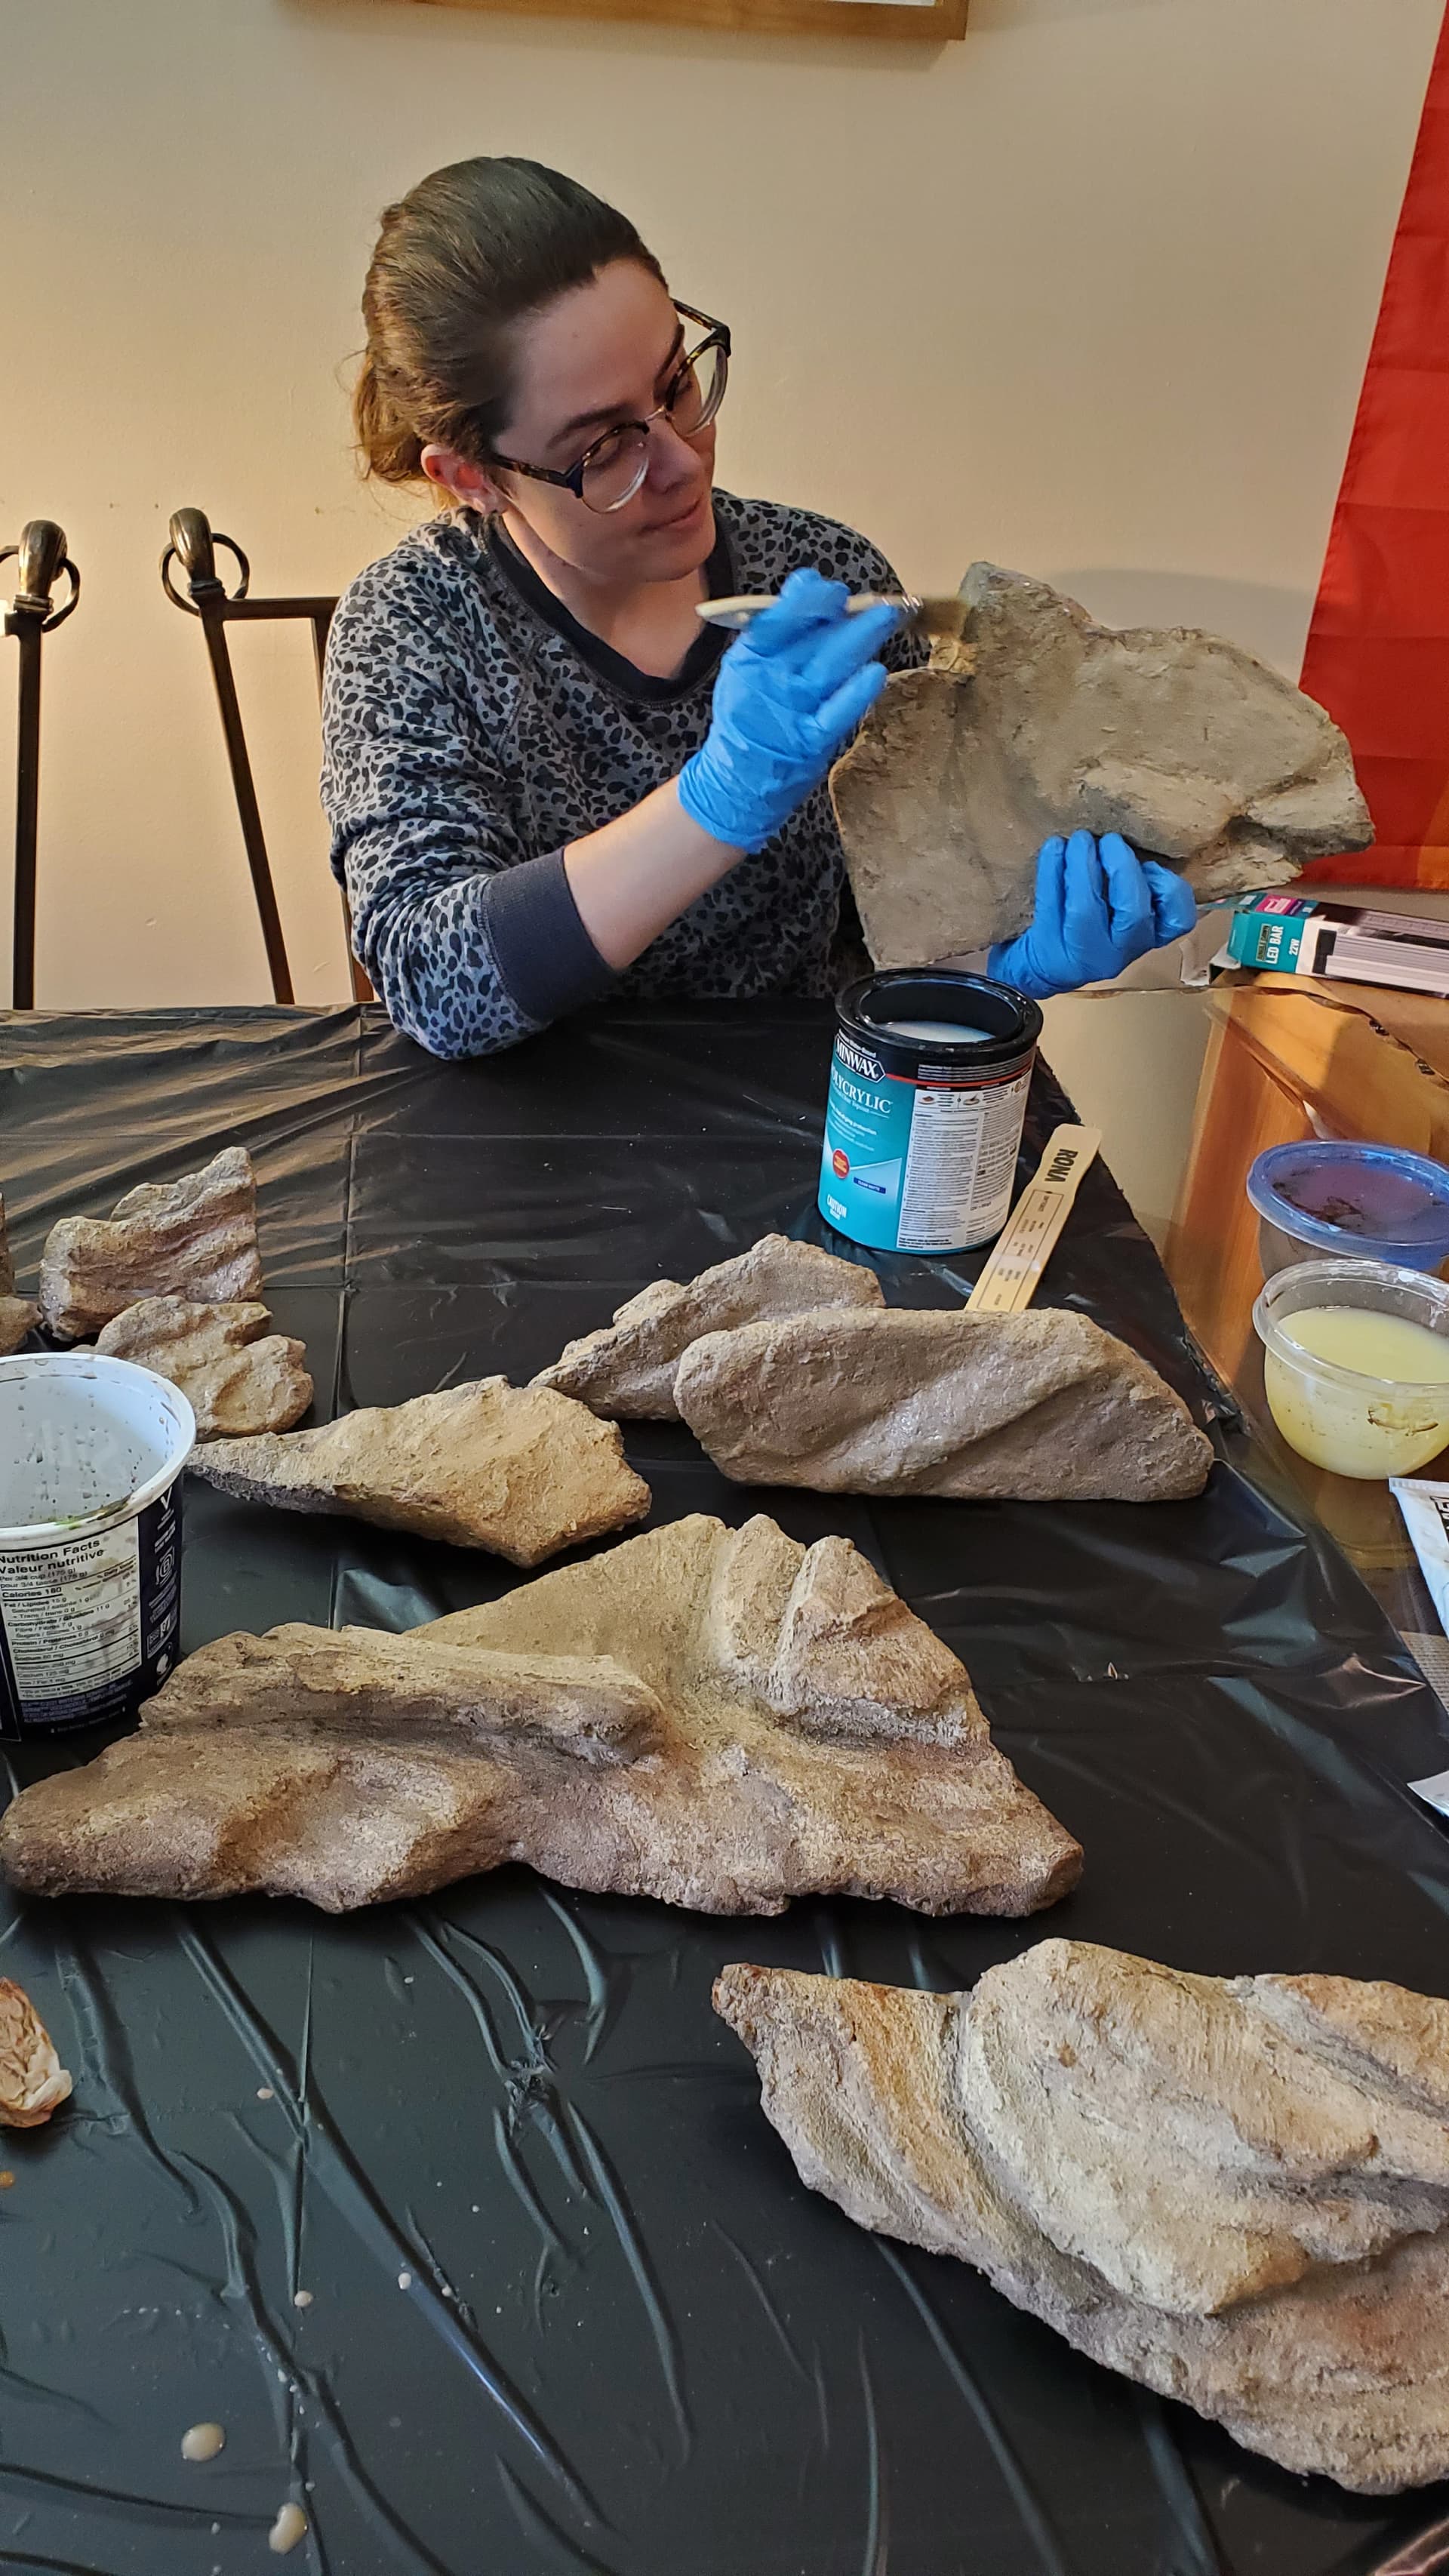
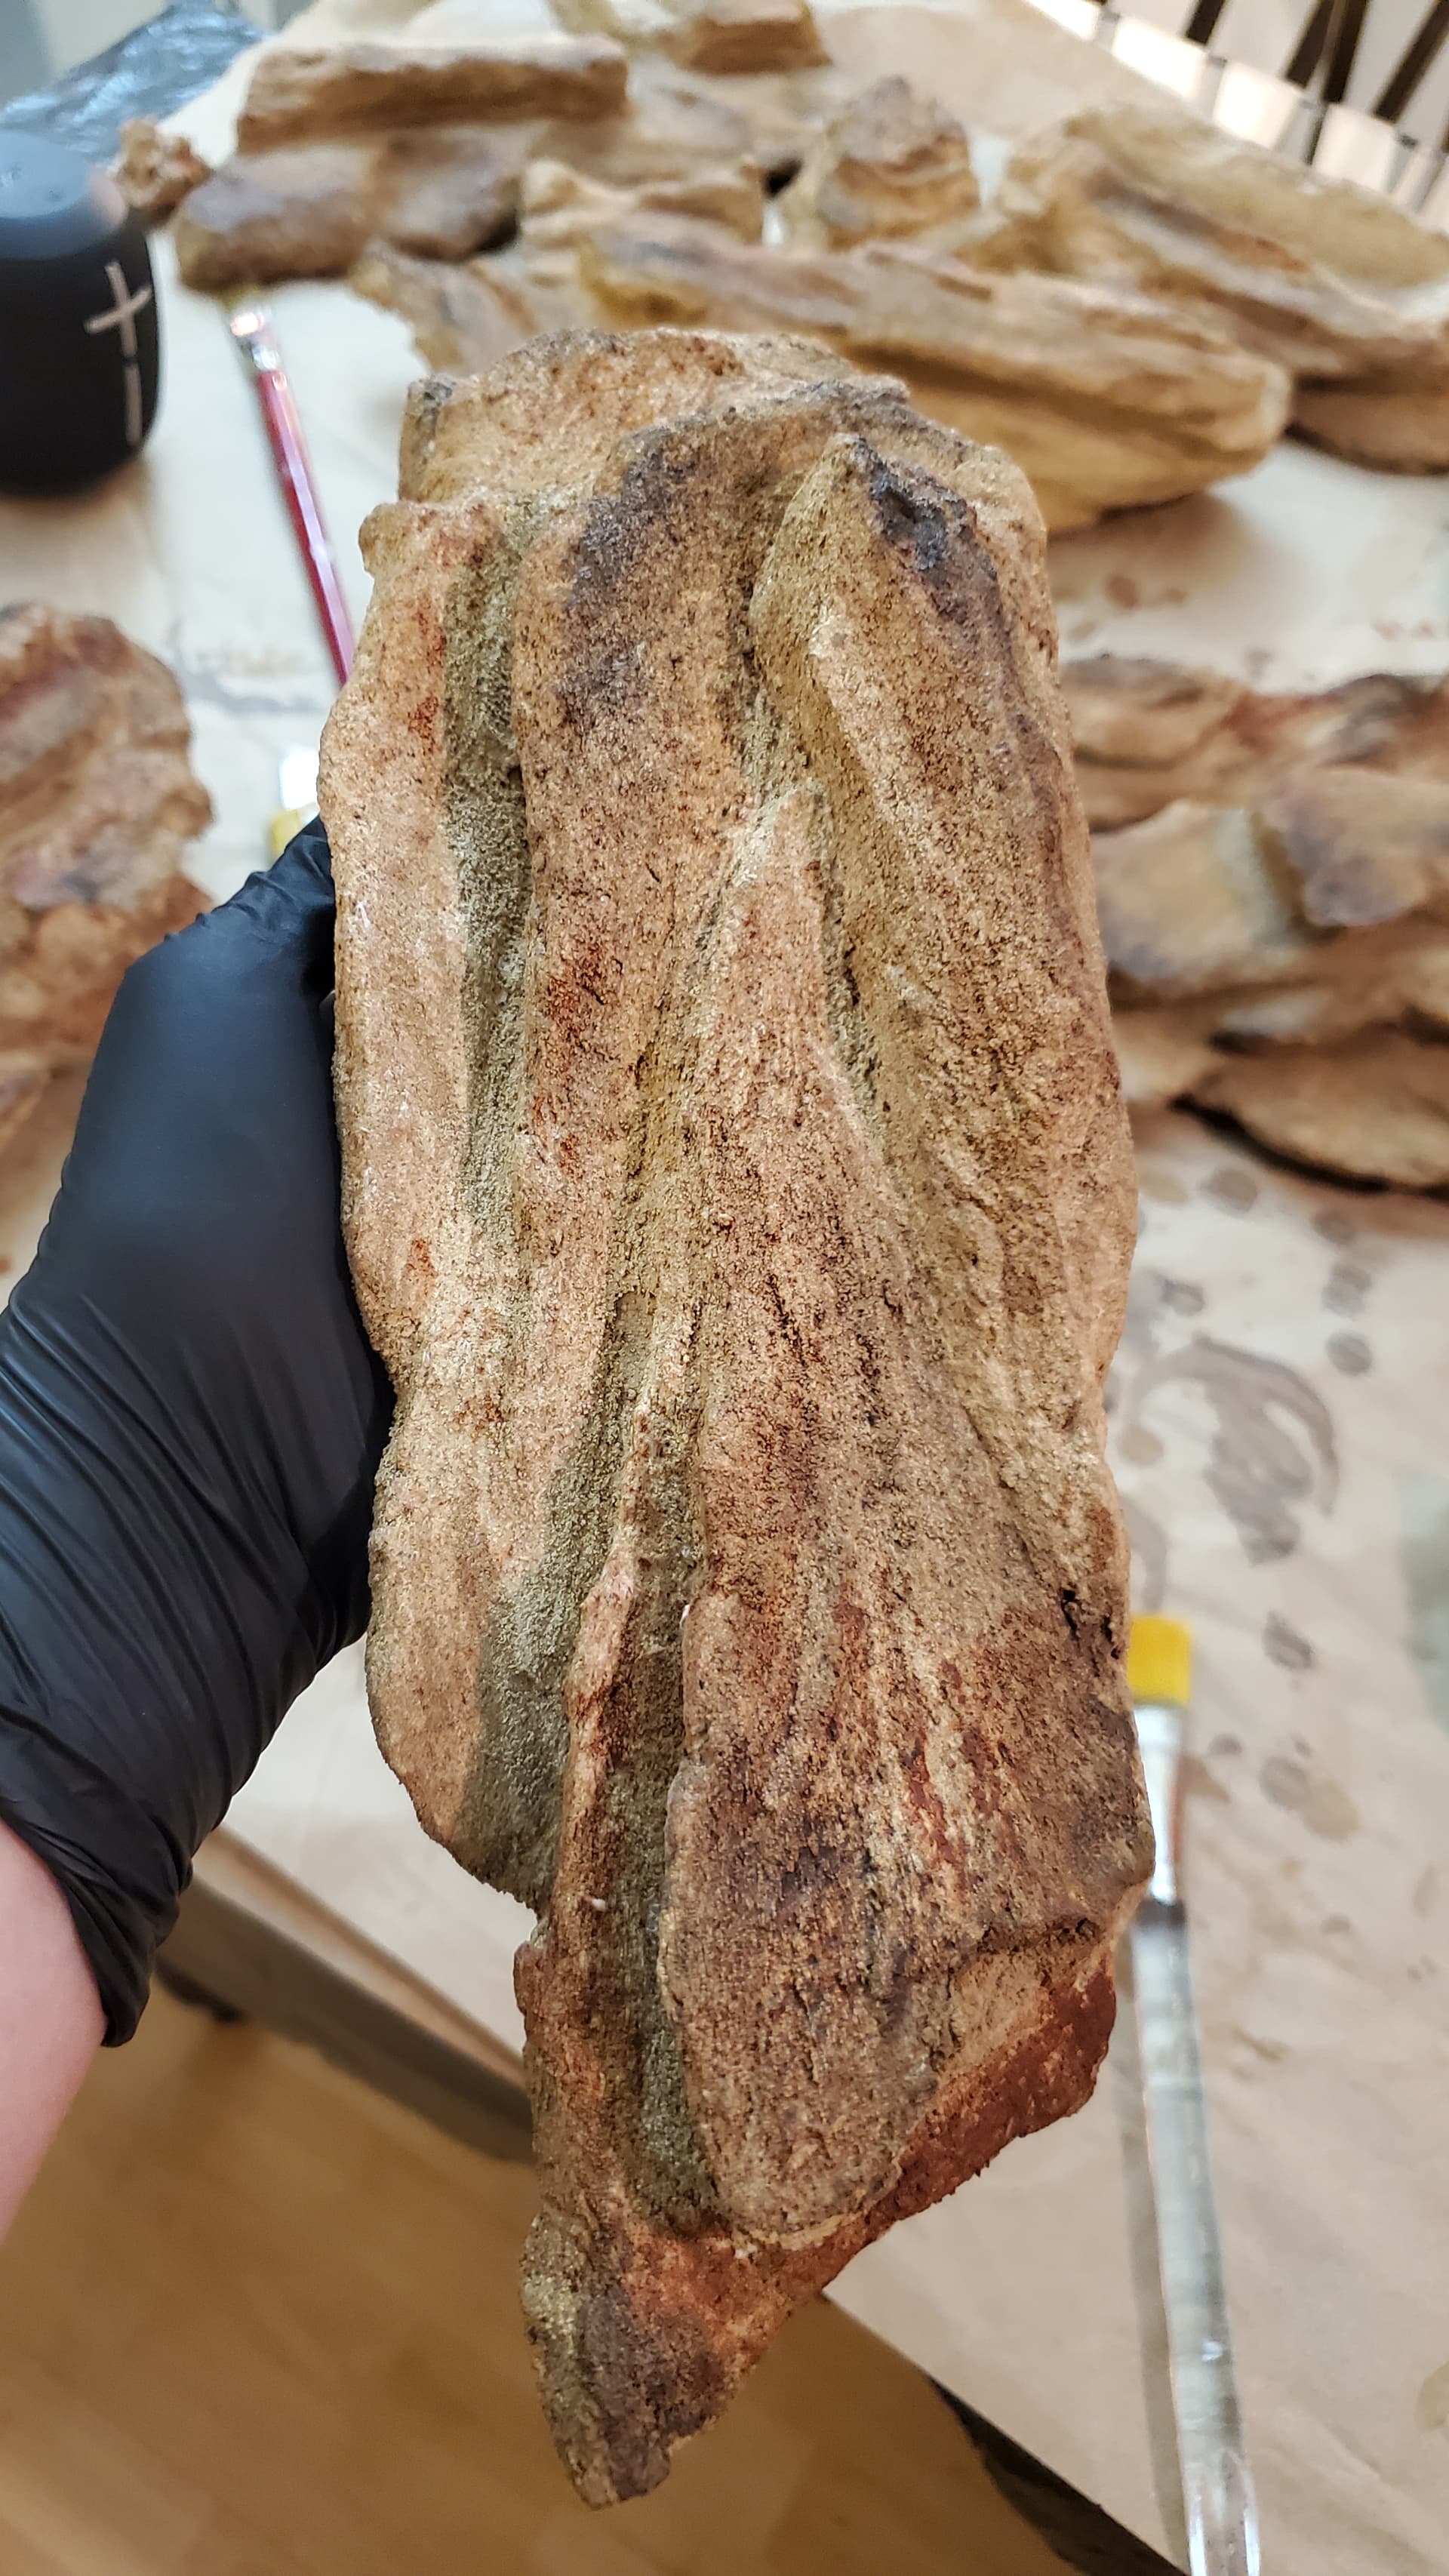
That’s my wonderful wife, helping out. The process was to build up many thin layers of acrylic wash, and then do detailing with slightly thicker paint. Now and then I’d go back in and sand the paint down to create a rougher, more speckly look on certain areas. It’s really vital to have real rocks to refer to at this step – the colouration of actual stones is so subtle, it’s very difficult to simply guess at.
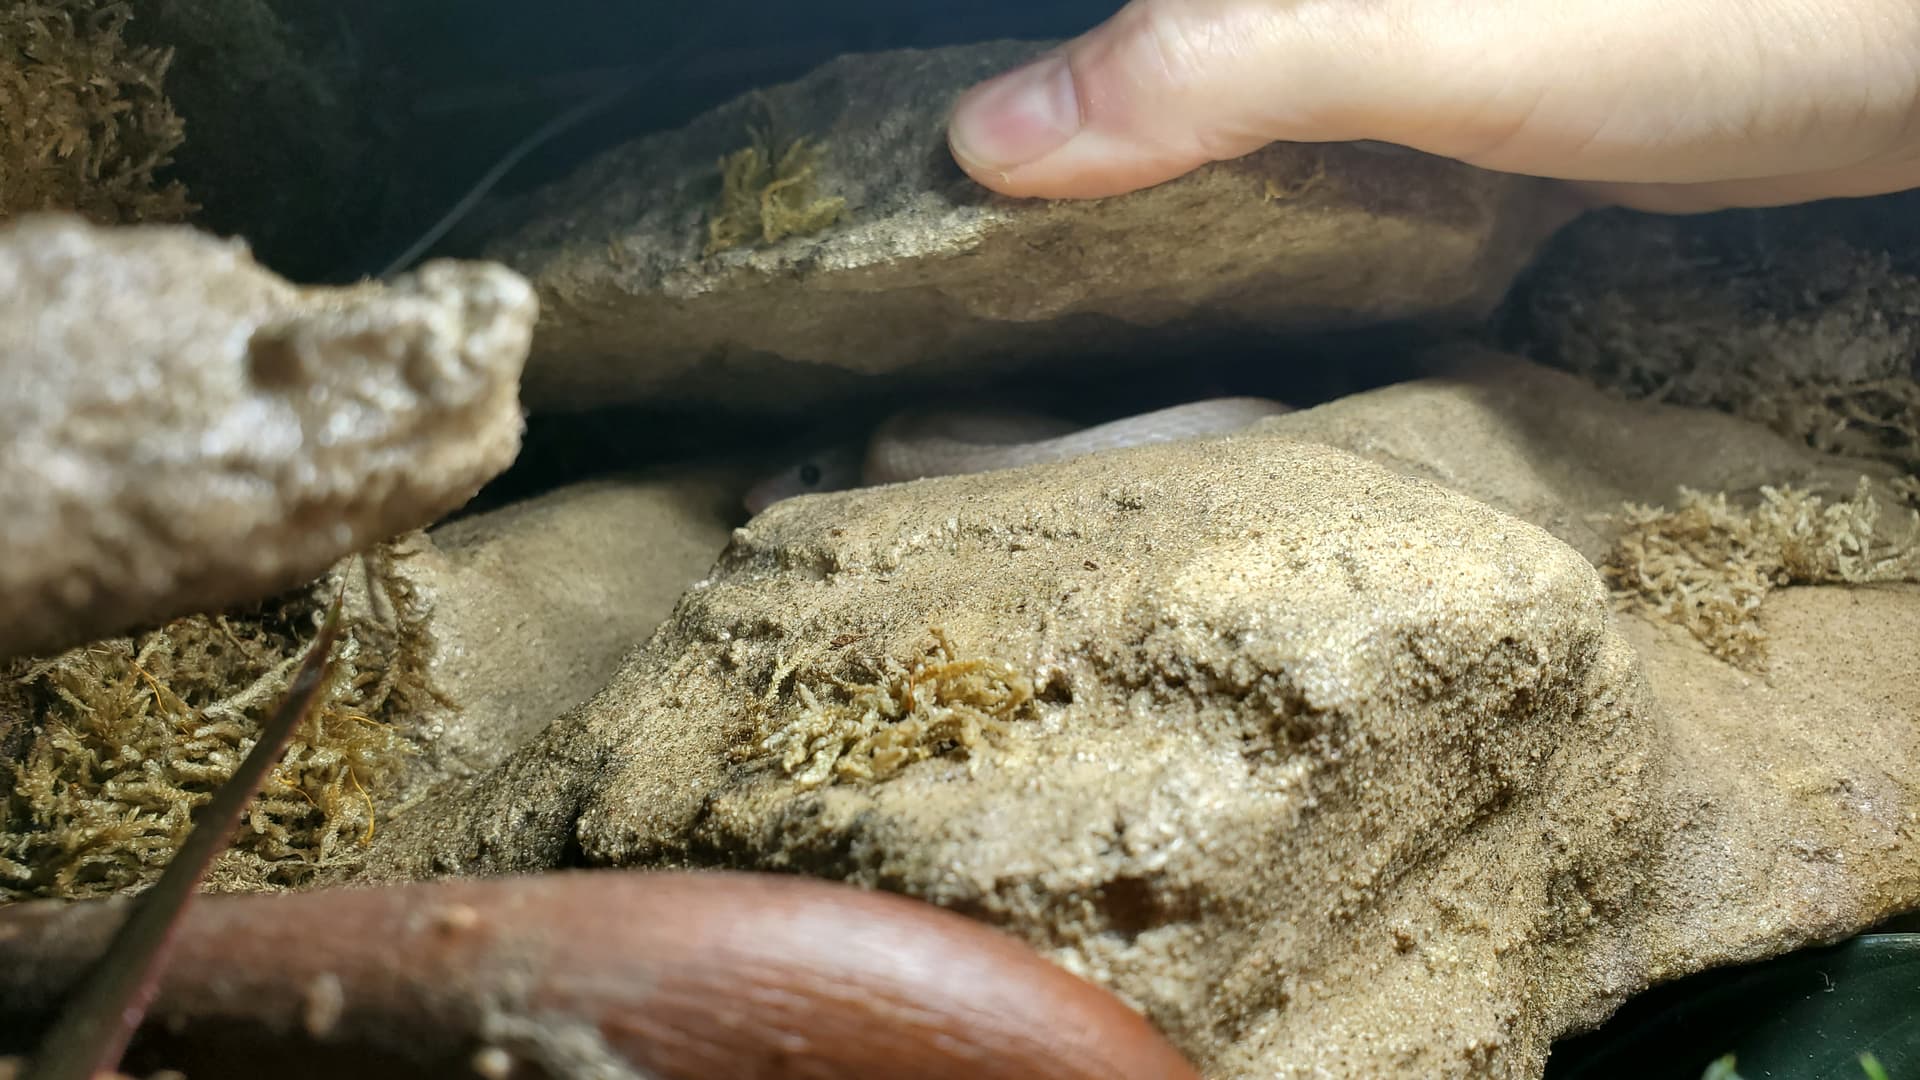
We did some of these in Hestia’s enclosure and I was mostly pleased with them, except that the polycrylic gave them this wet sheen that didn’t feel rock-like, so I decided to refine the process experimentally with this round. You can see in one of these pics that there’s a little dish with a black sock in it – that black sock is filled with superfine (actually meant for gerbil cages I think?) sand in approximately the right colour, and as we painted on the last layer of polycrylic (each rock needed three coats) we shook on a layer of this fine sand.
It worked a treat. the rocks still have a bit of dull sheen to them, but the dusty sand brings it way down and makes a very pleasing texture when you run your hands over them now.
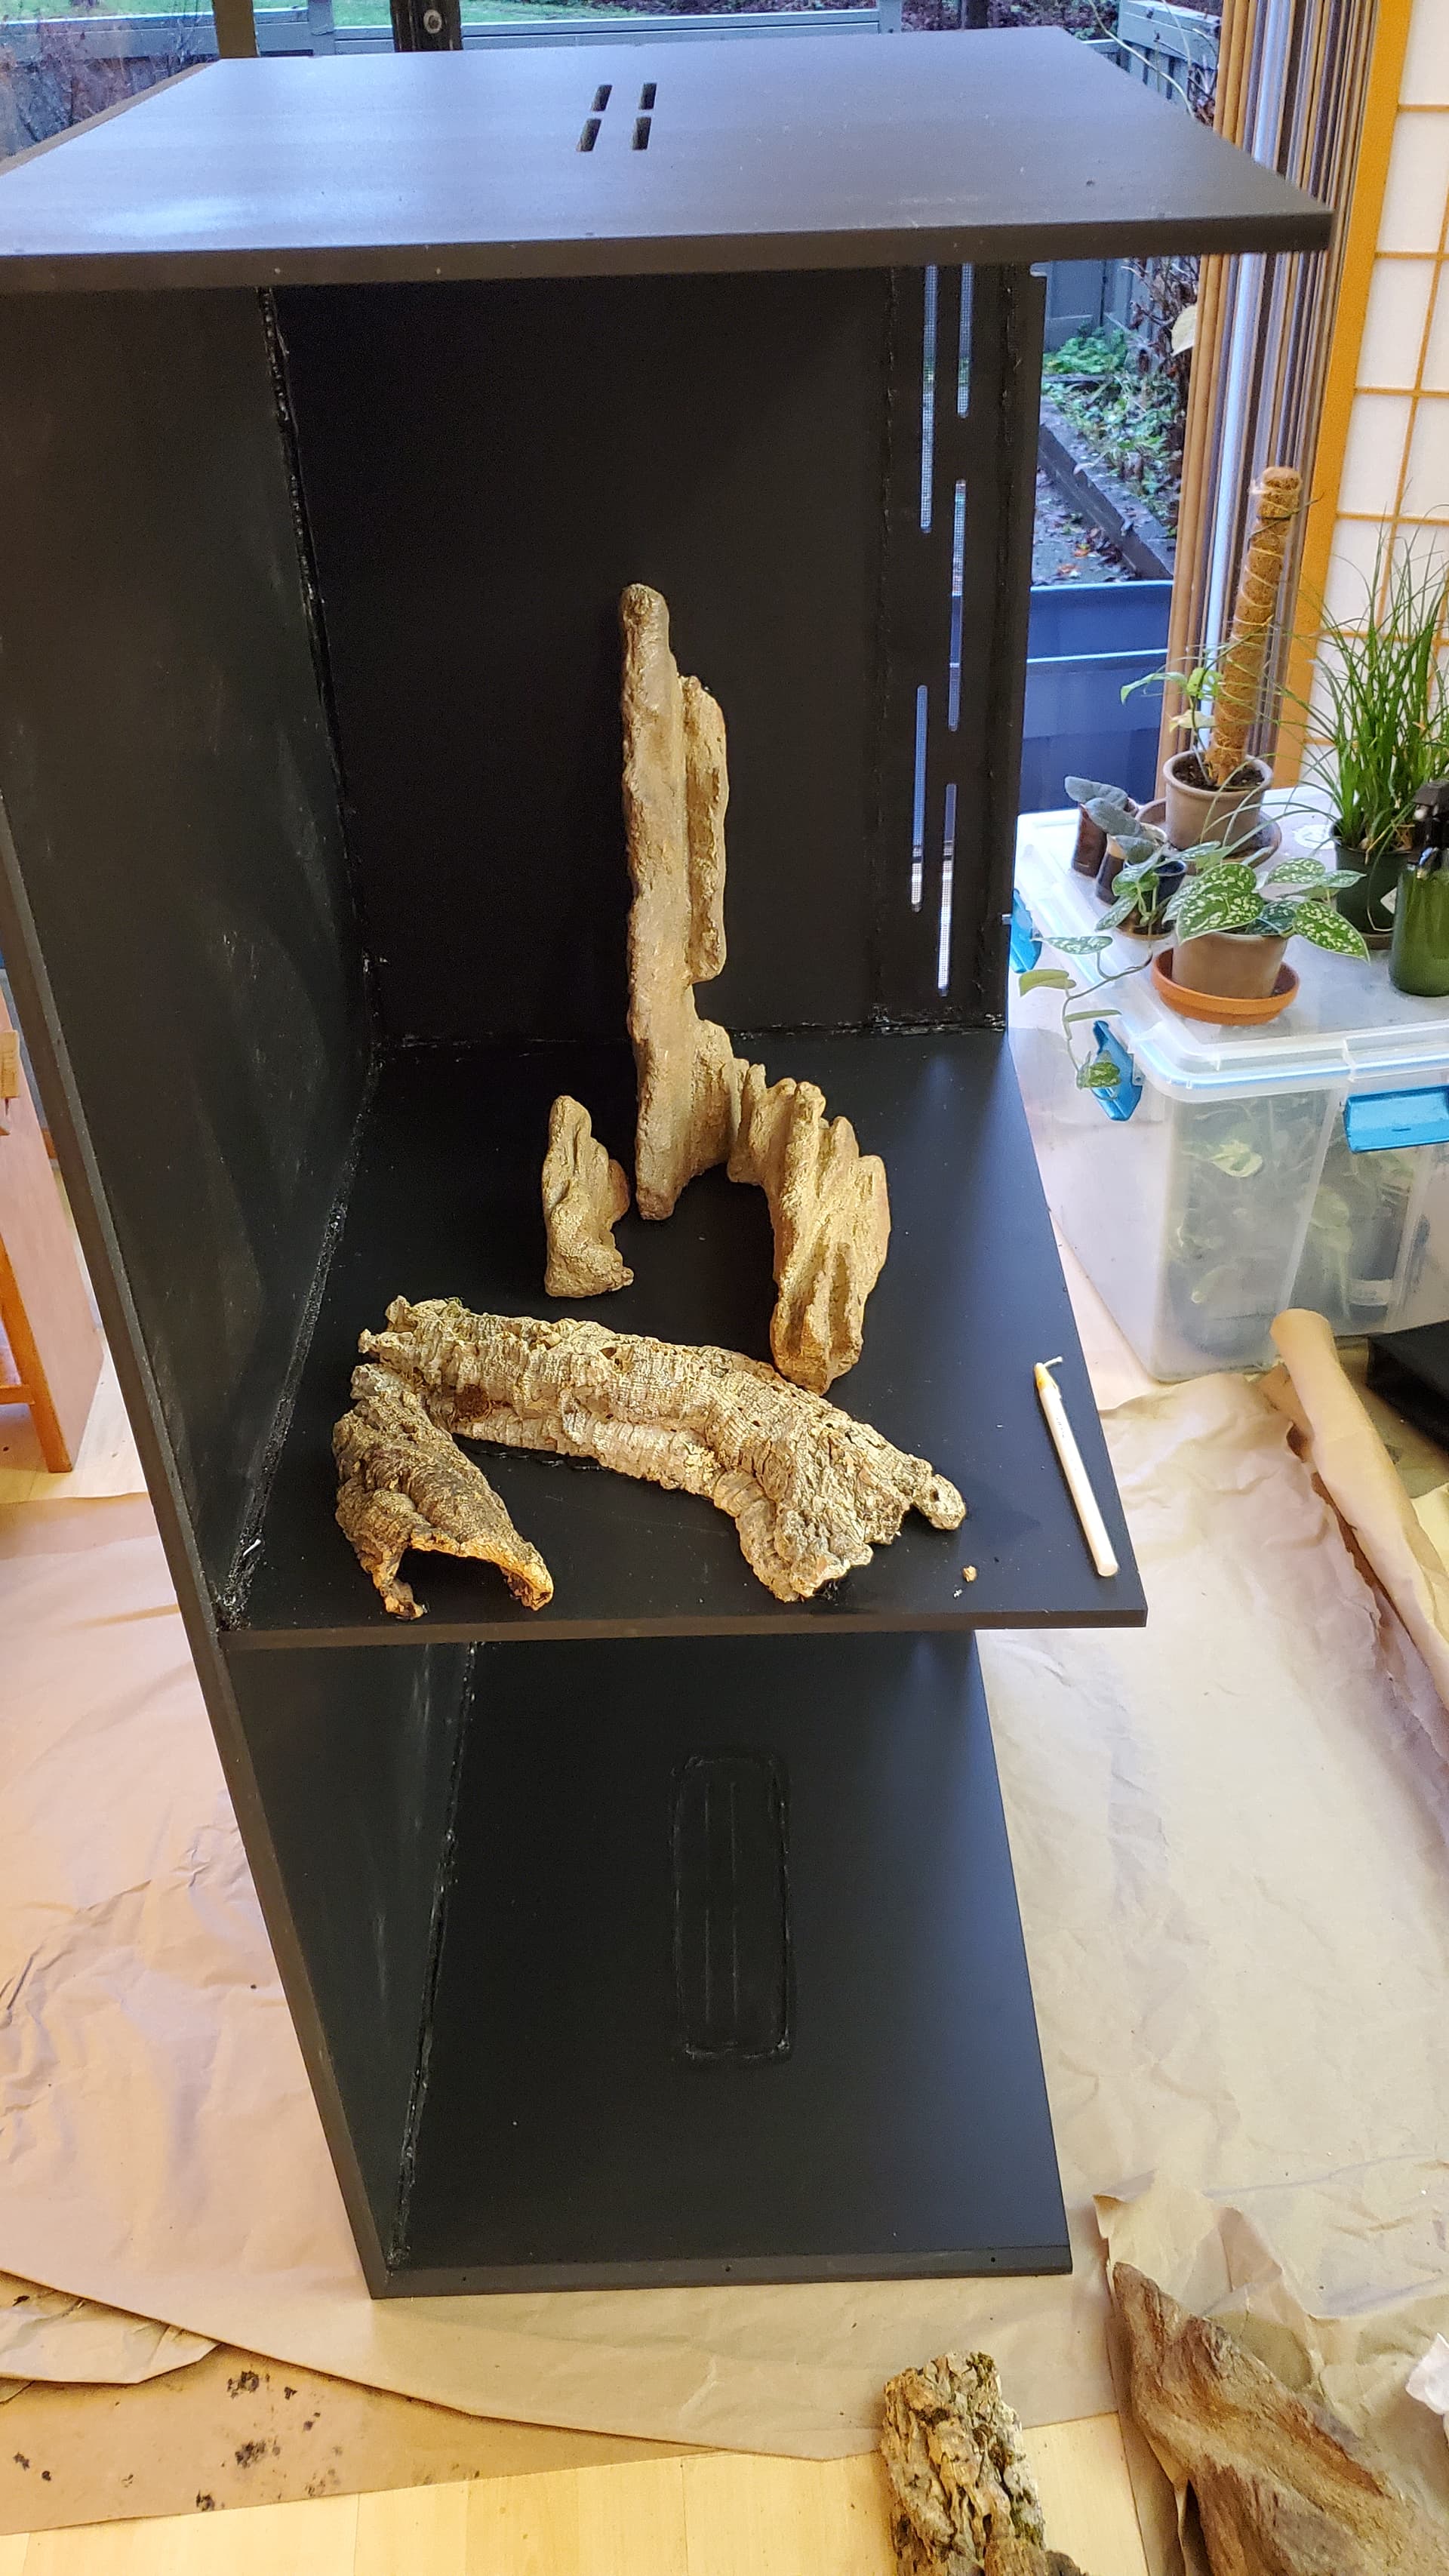
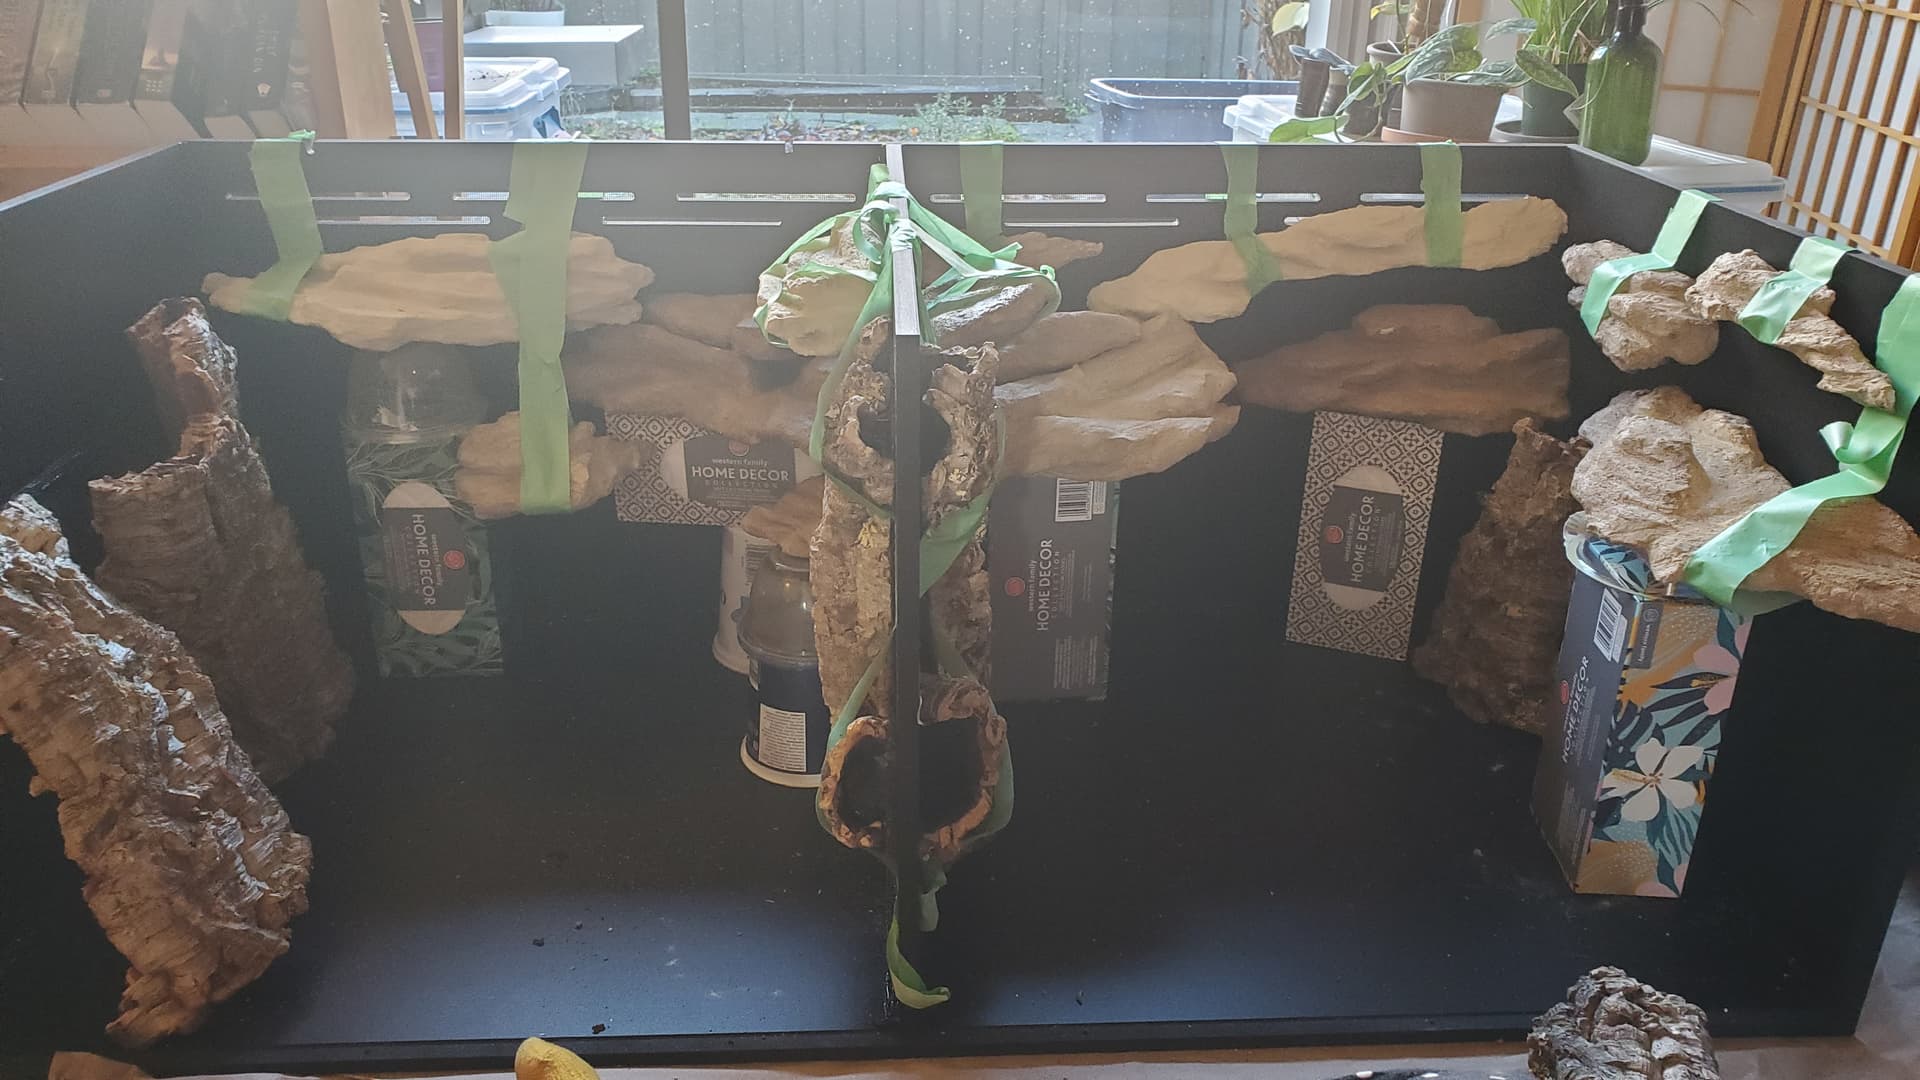
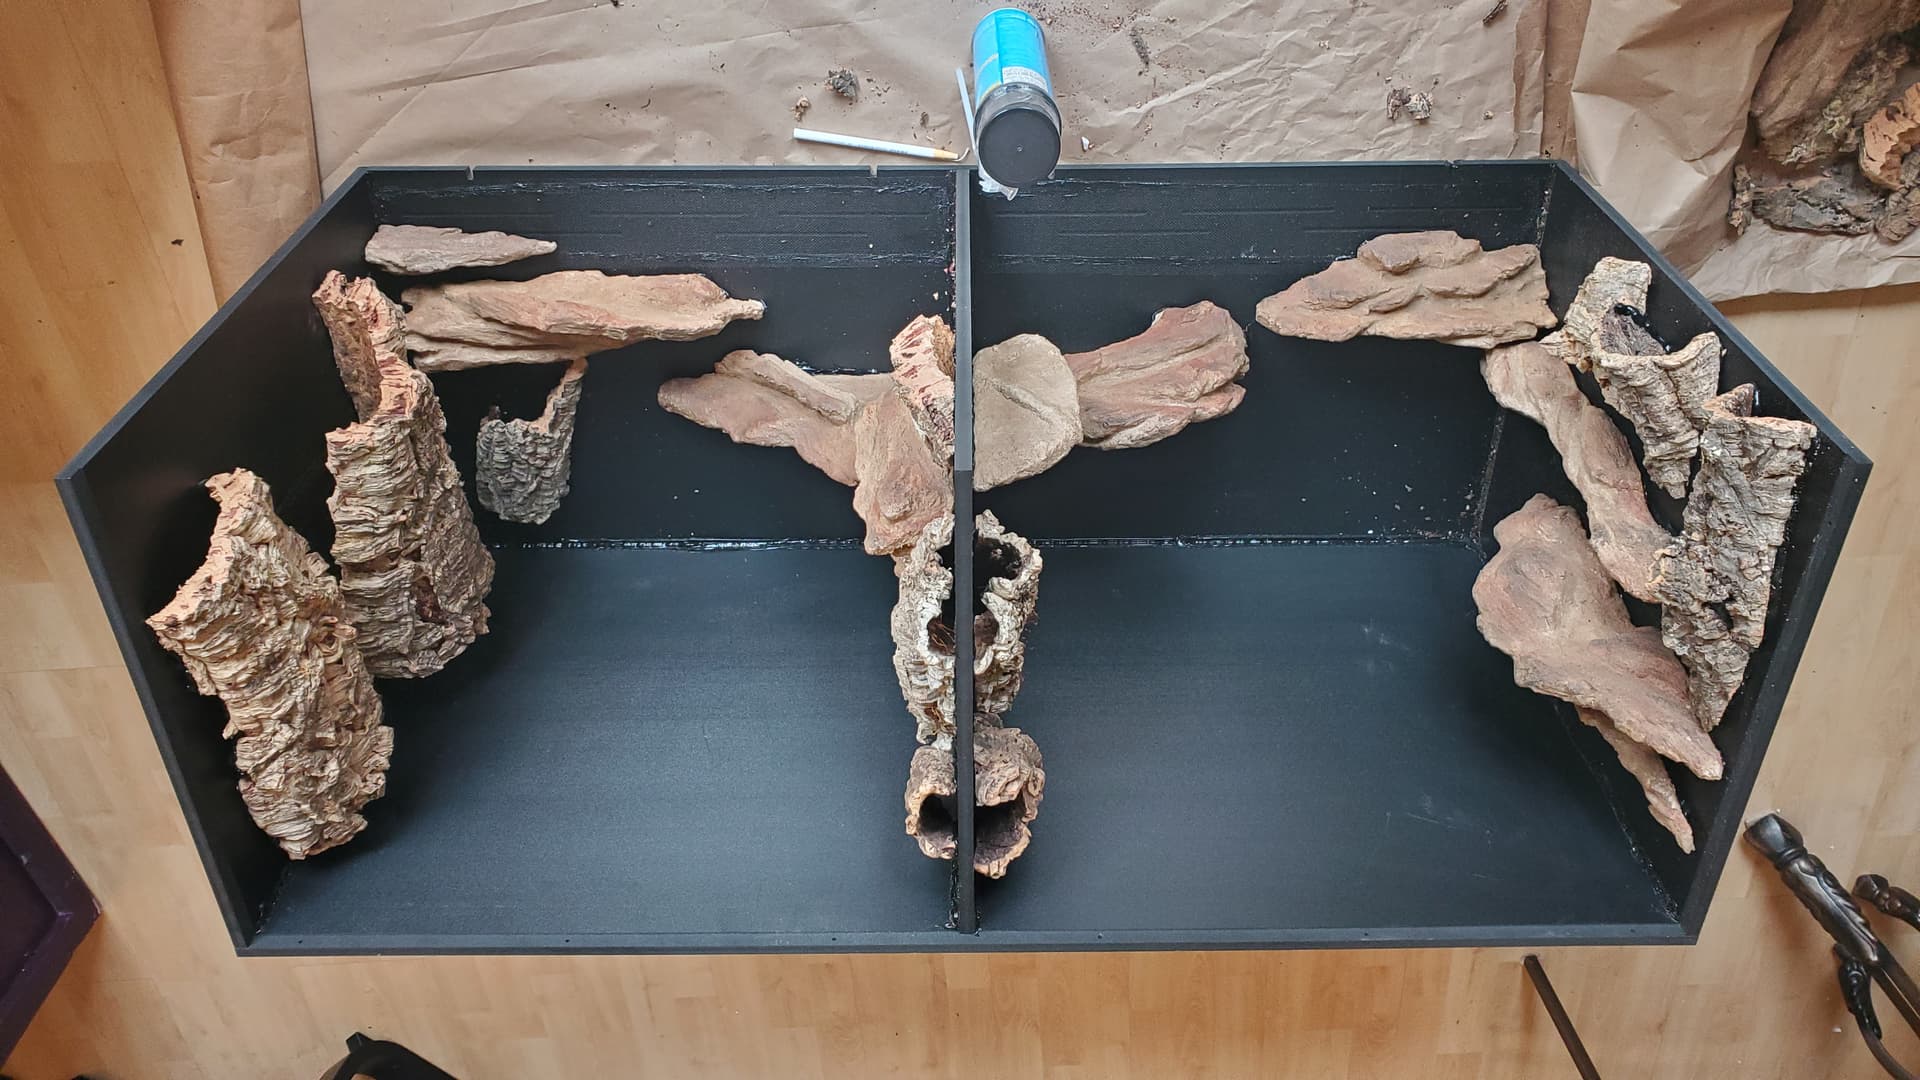
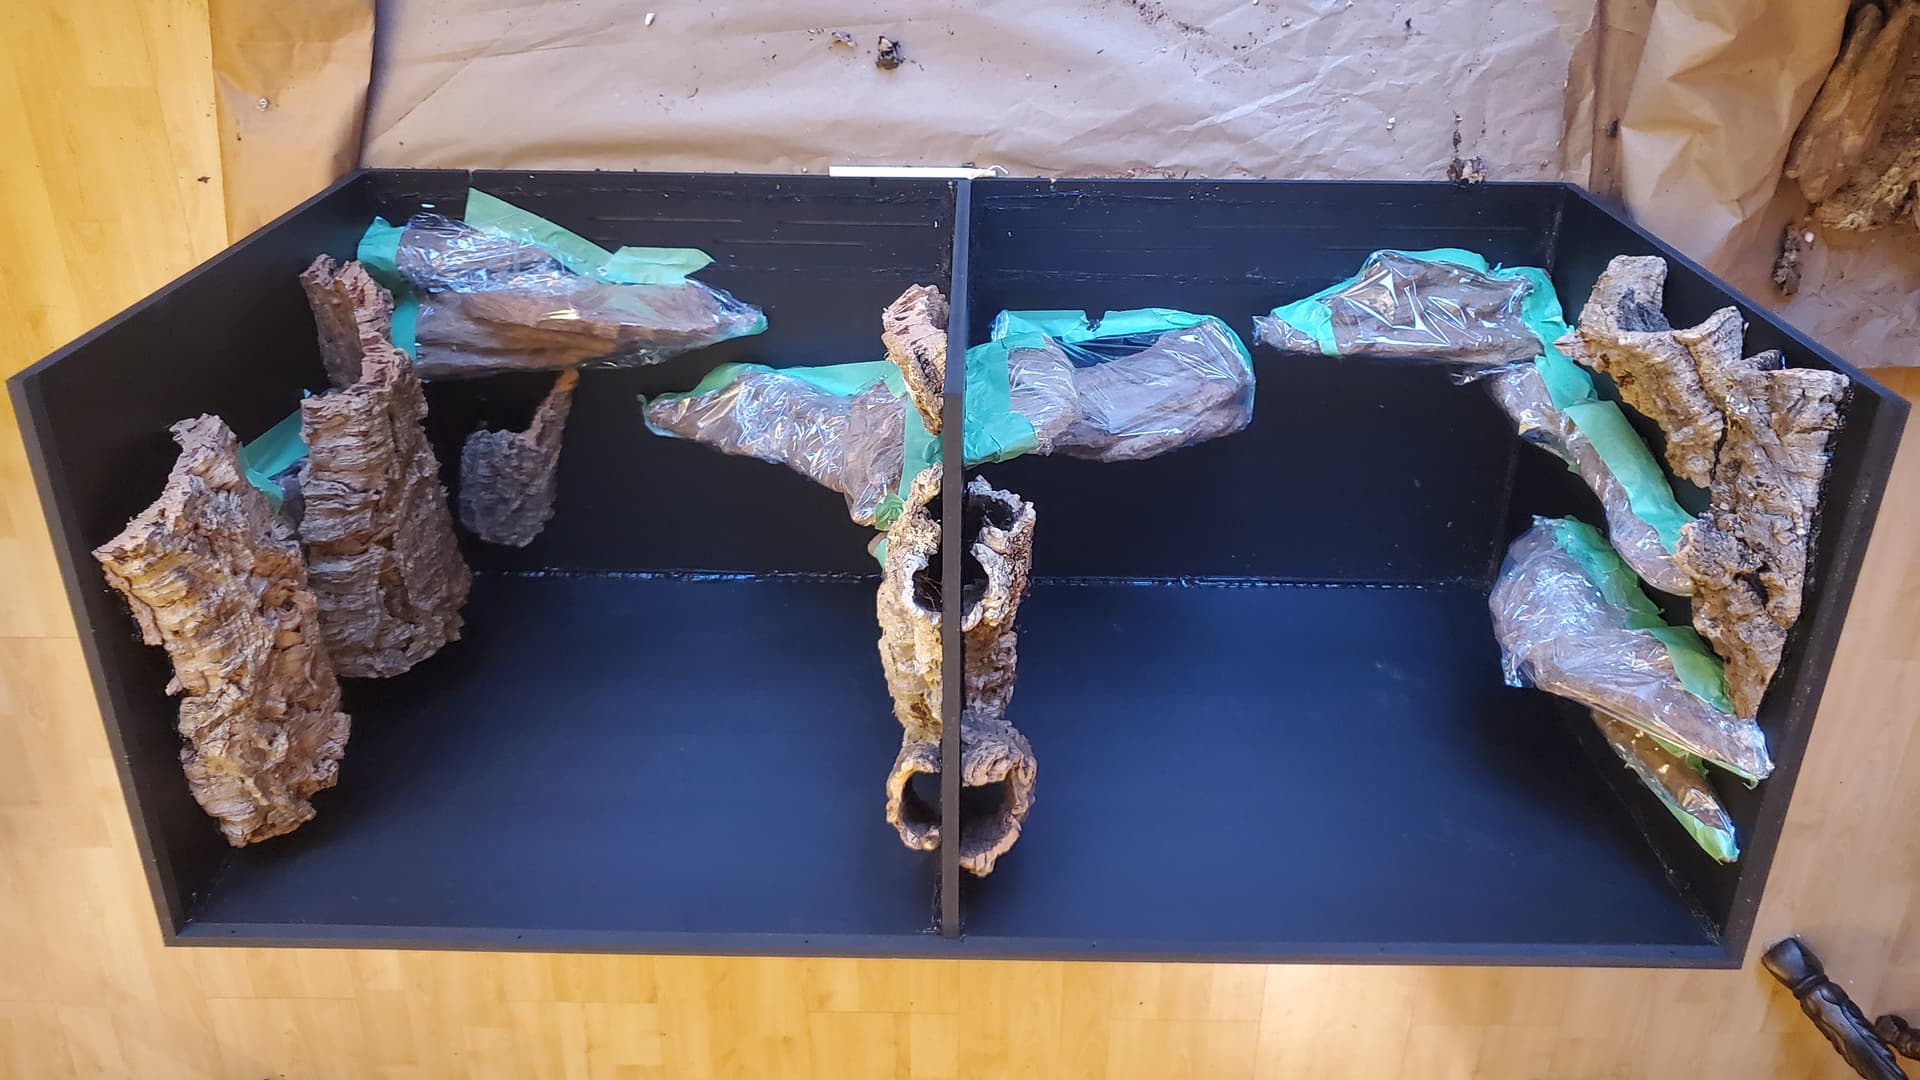
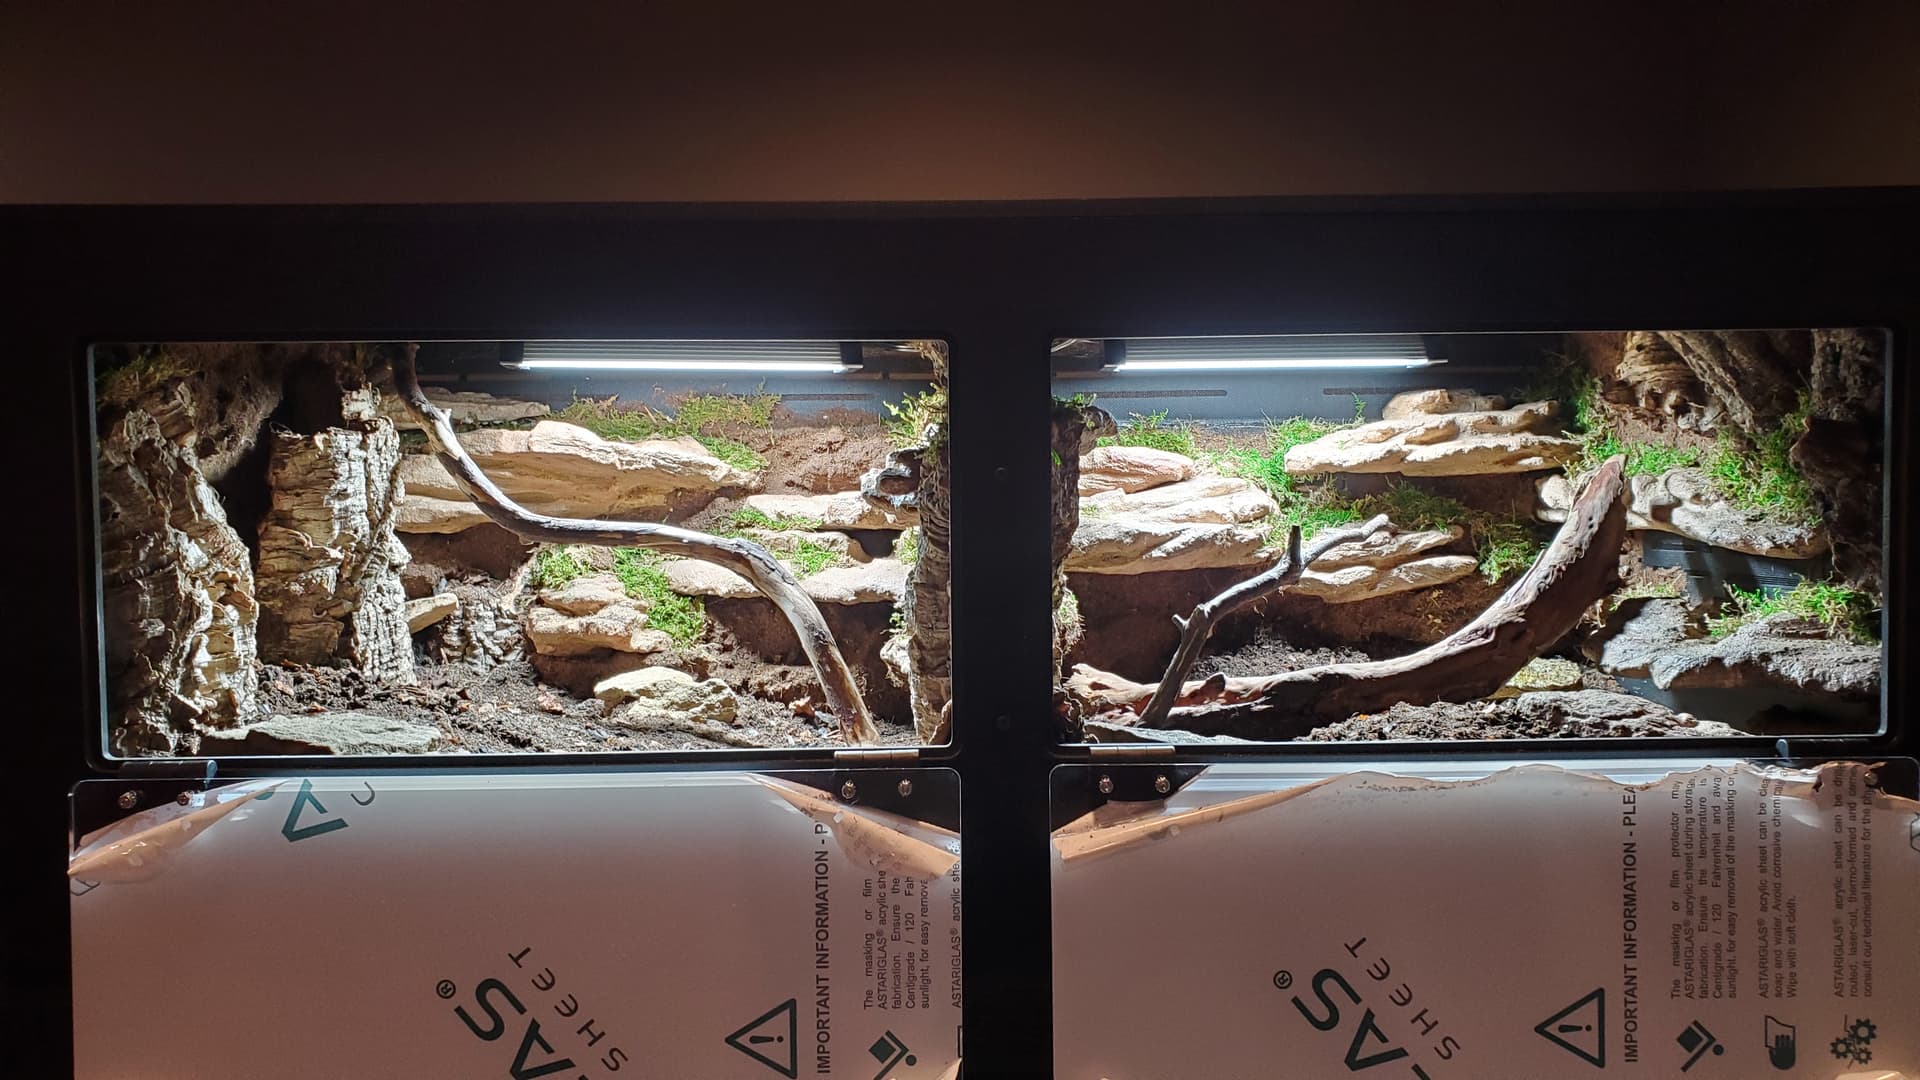
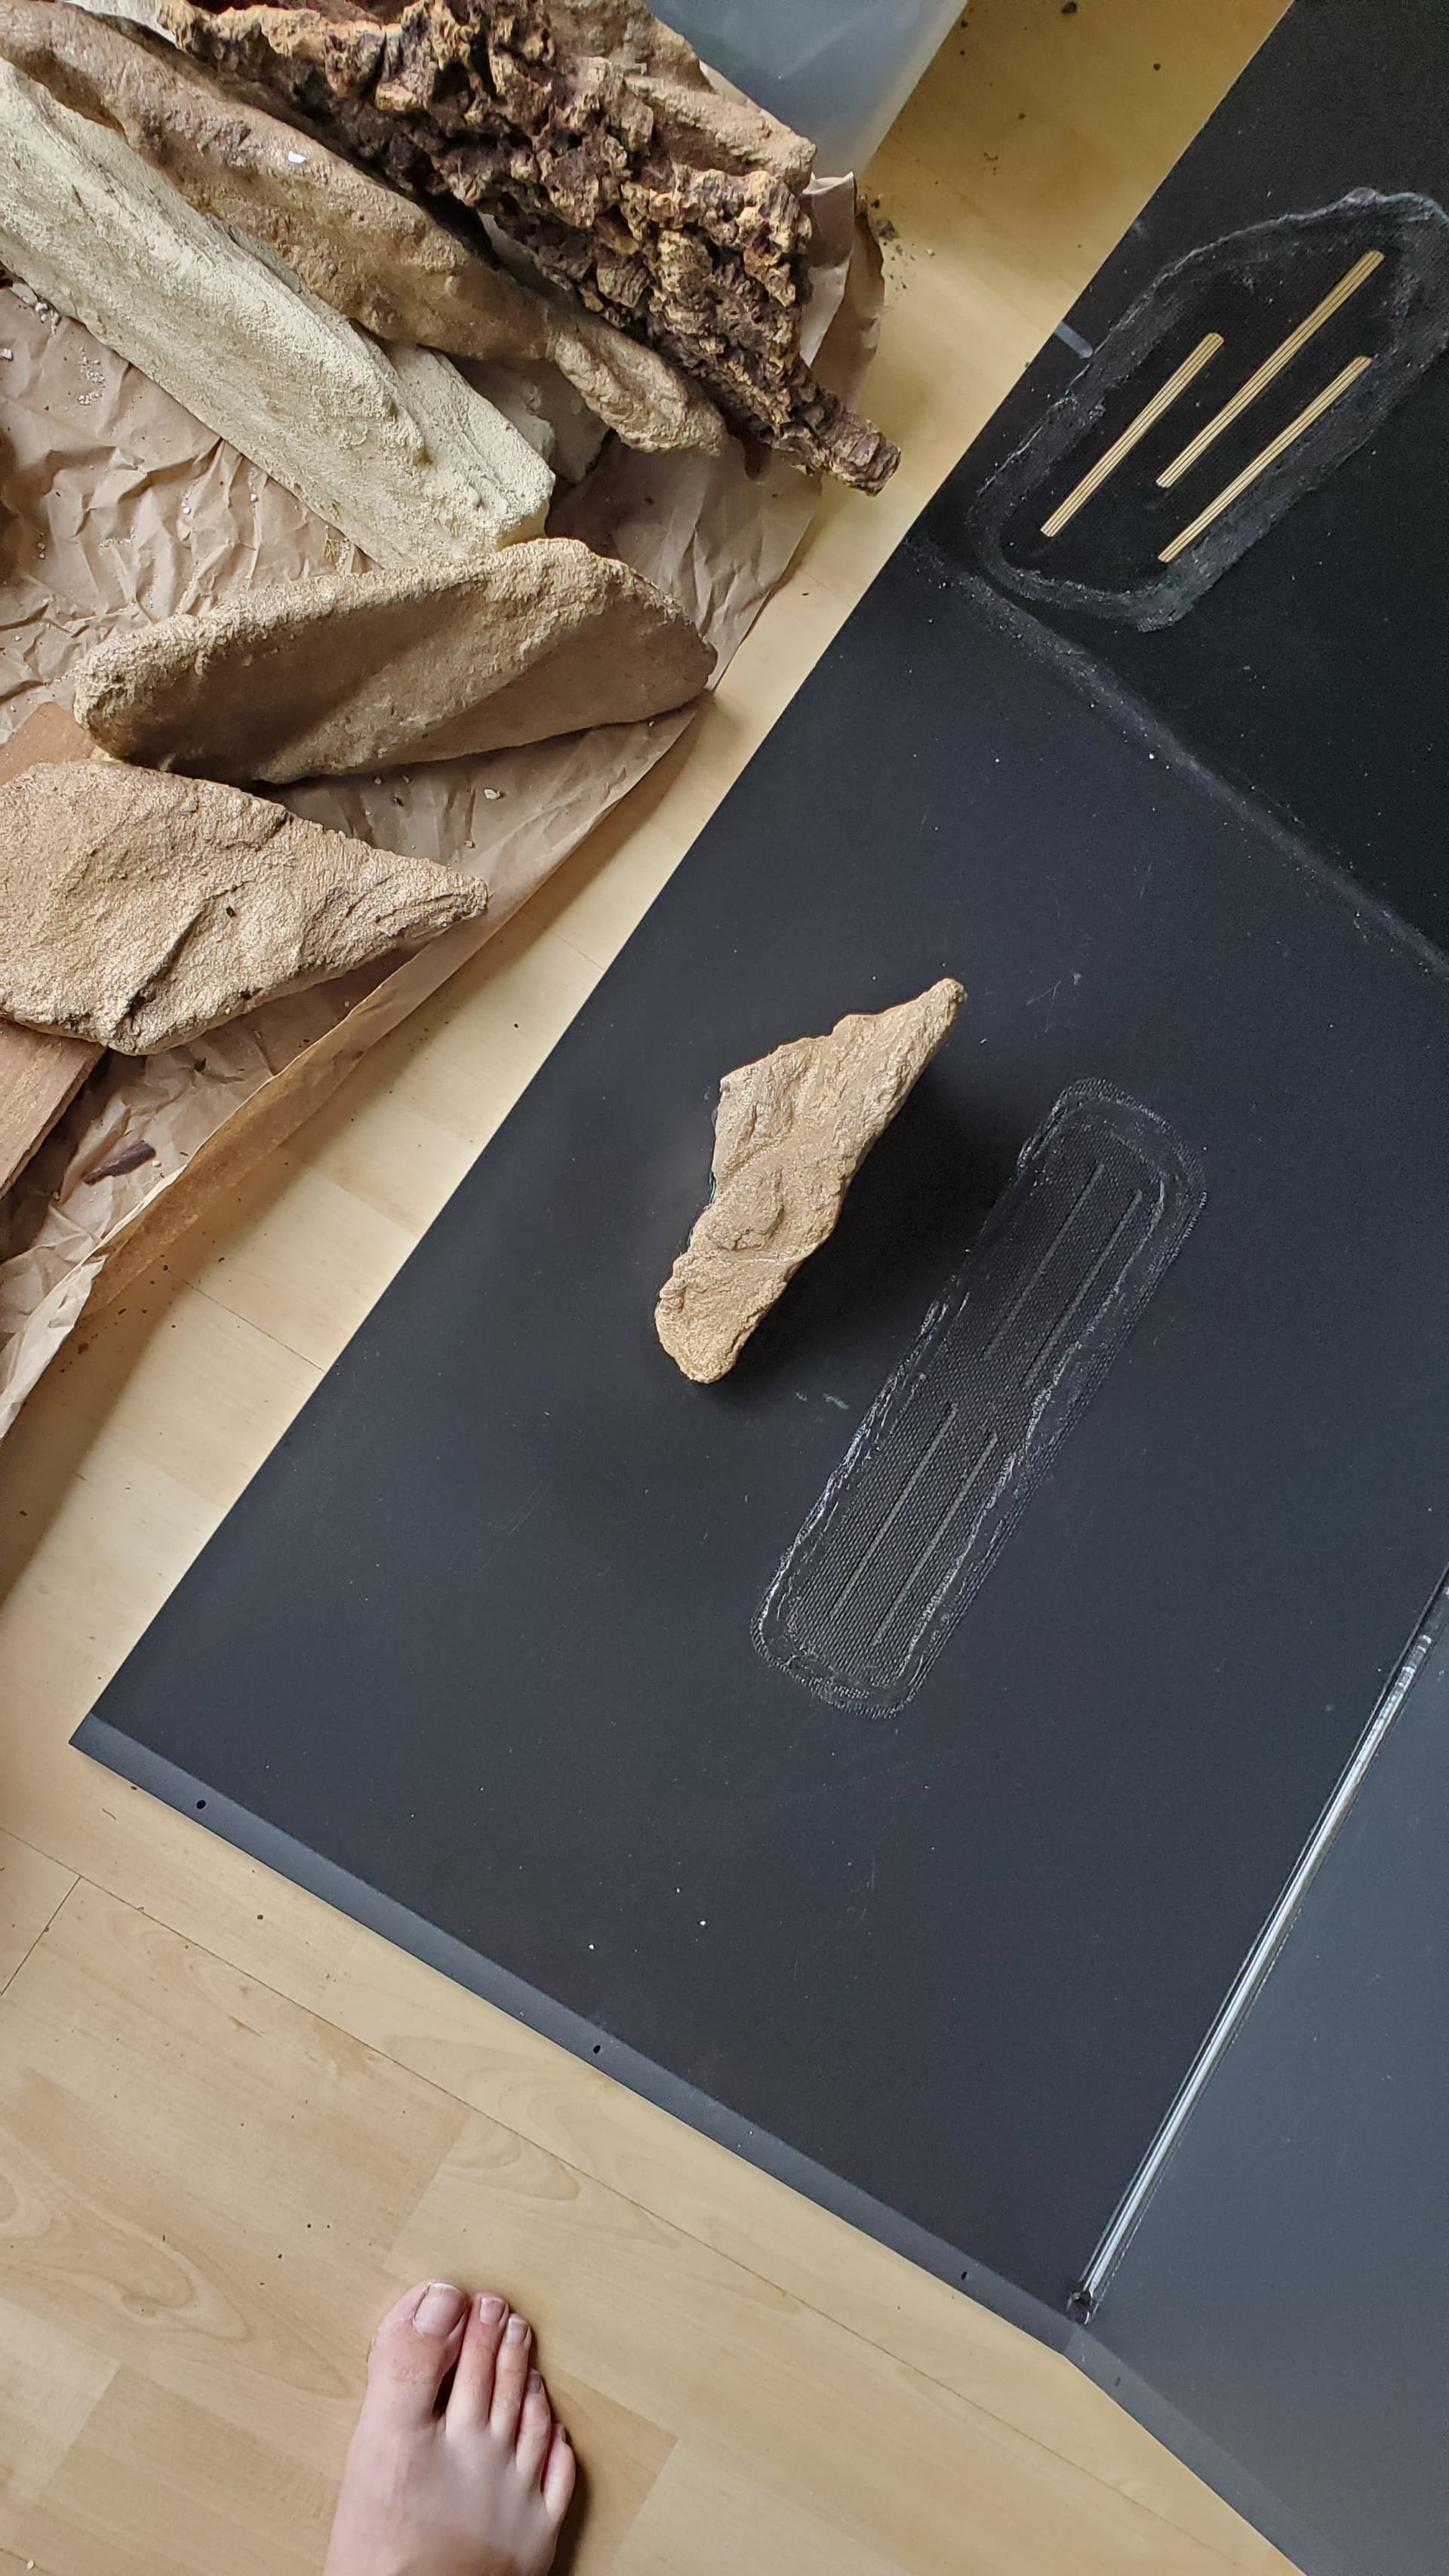
And then, the fun part begins – placement!!
I didn’t use all the rocks. Some of these were intended for my next two planned builds, but I spent one billion years (approximate) deciding which rocks to use, and where each rock should go.
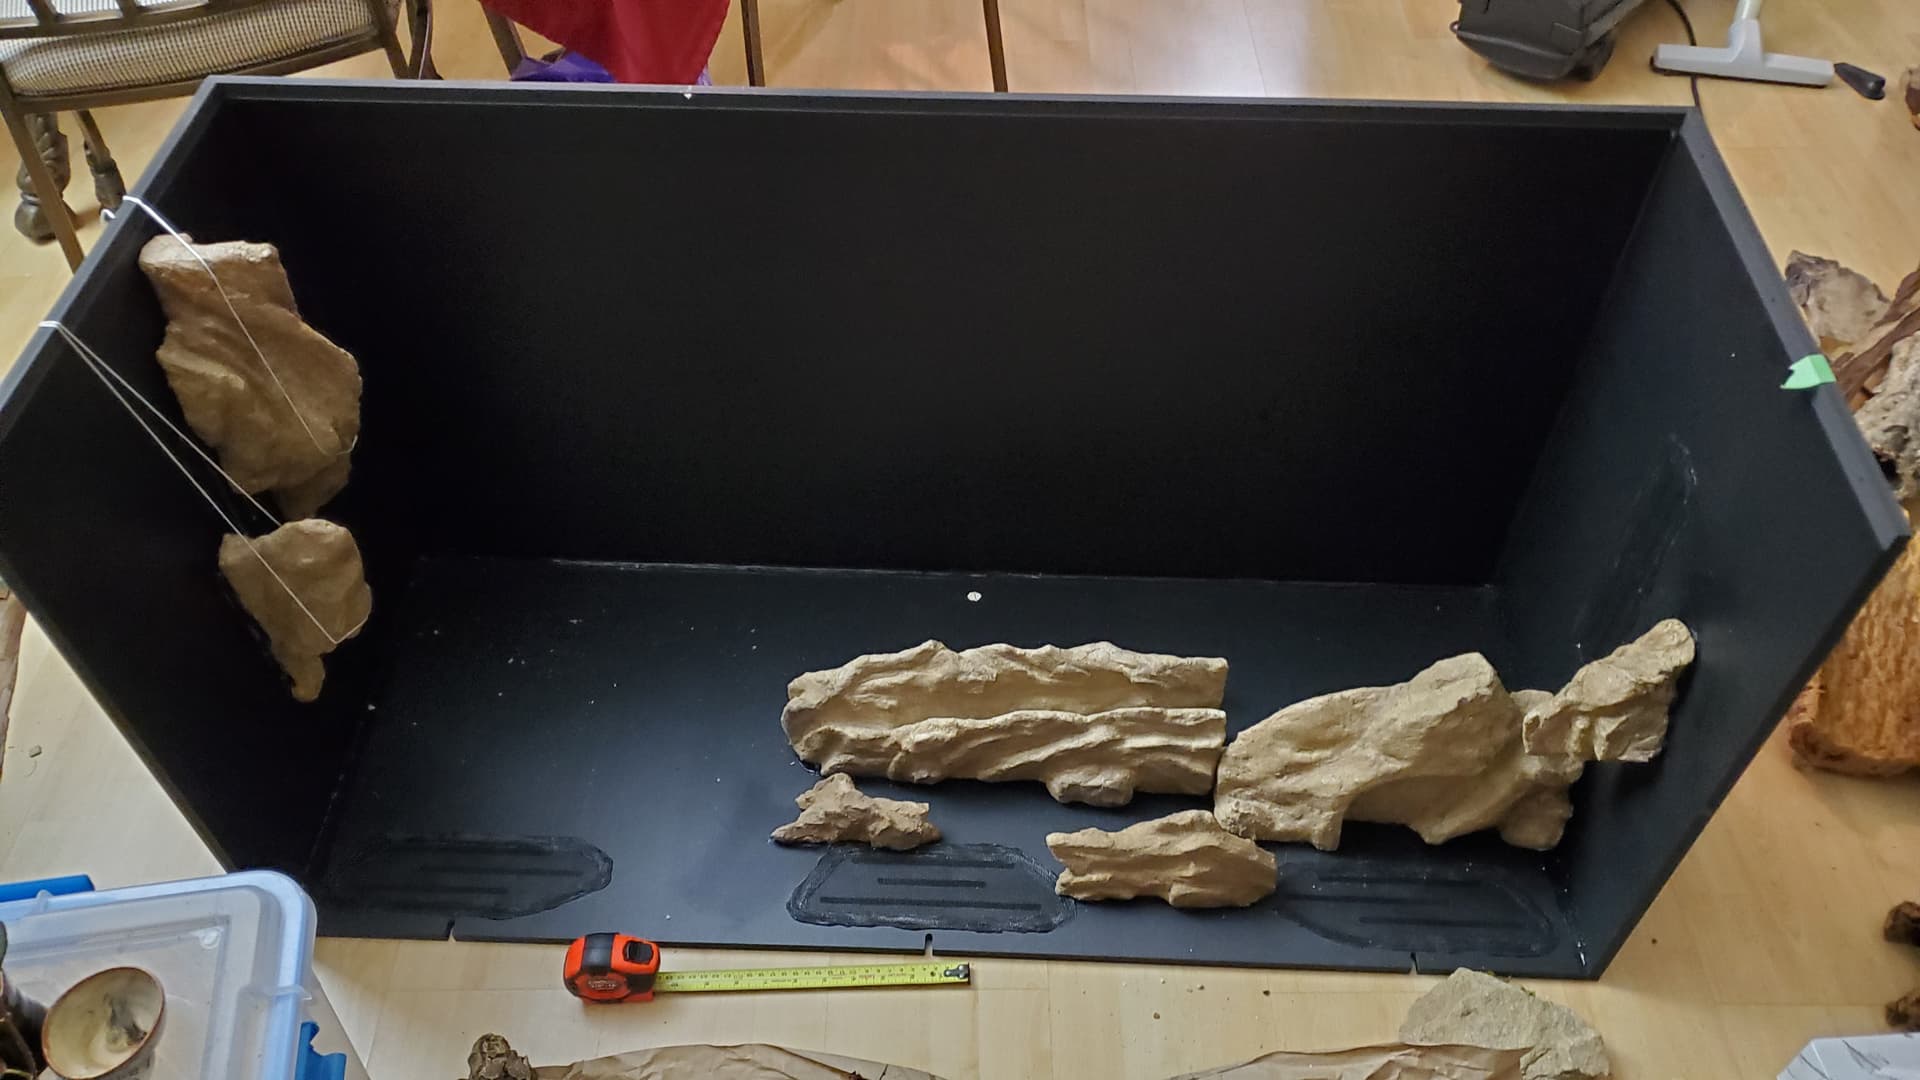

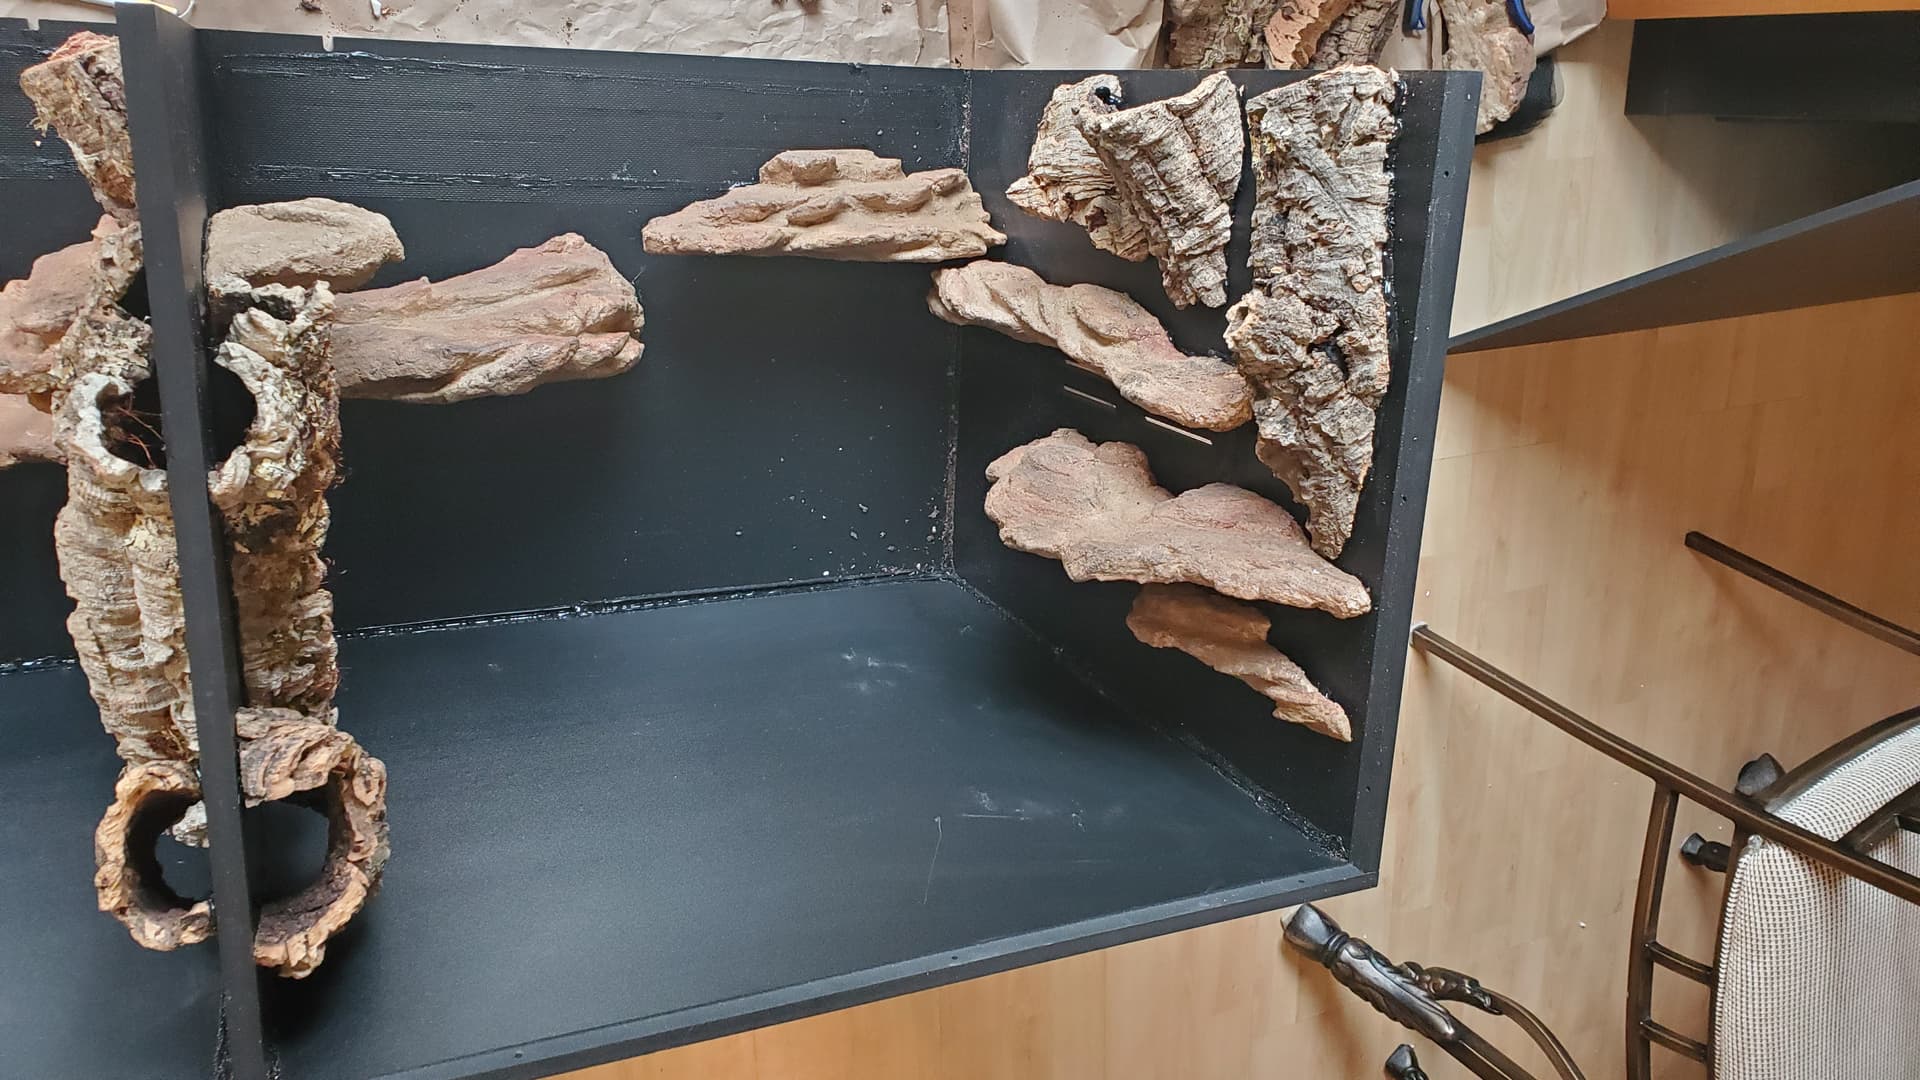
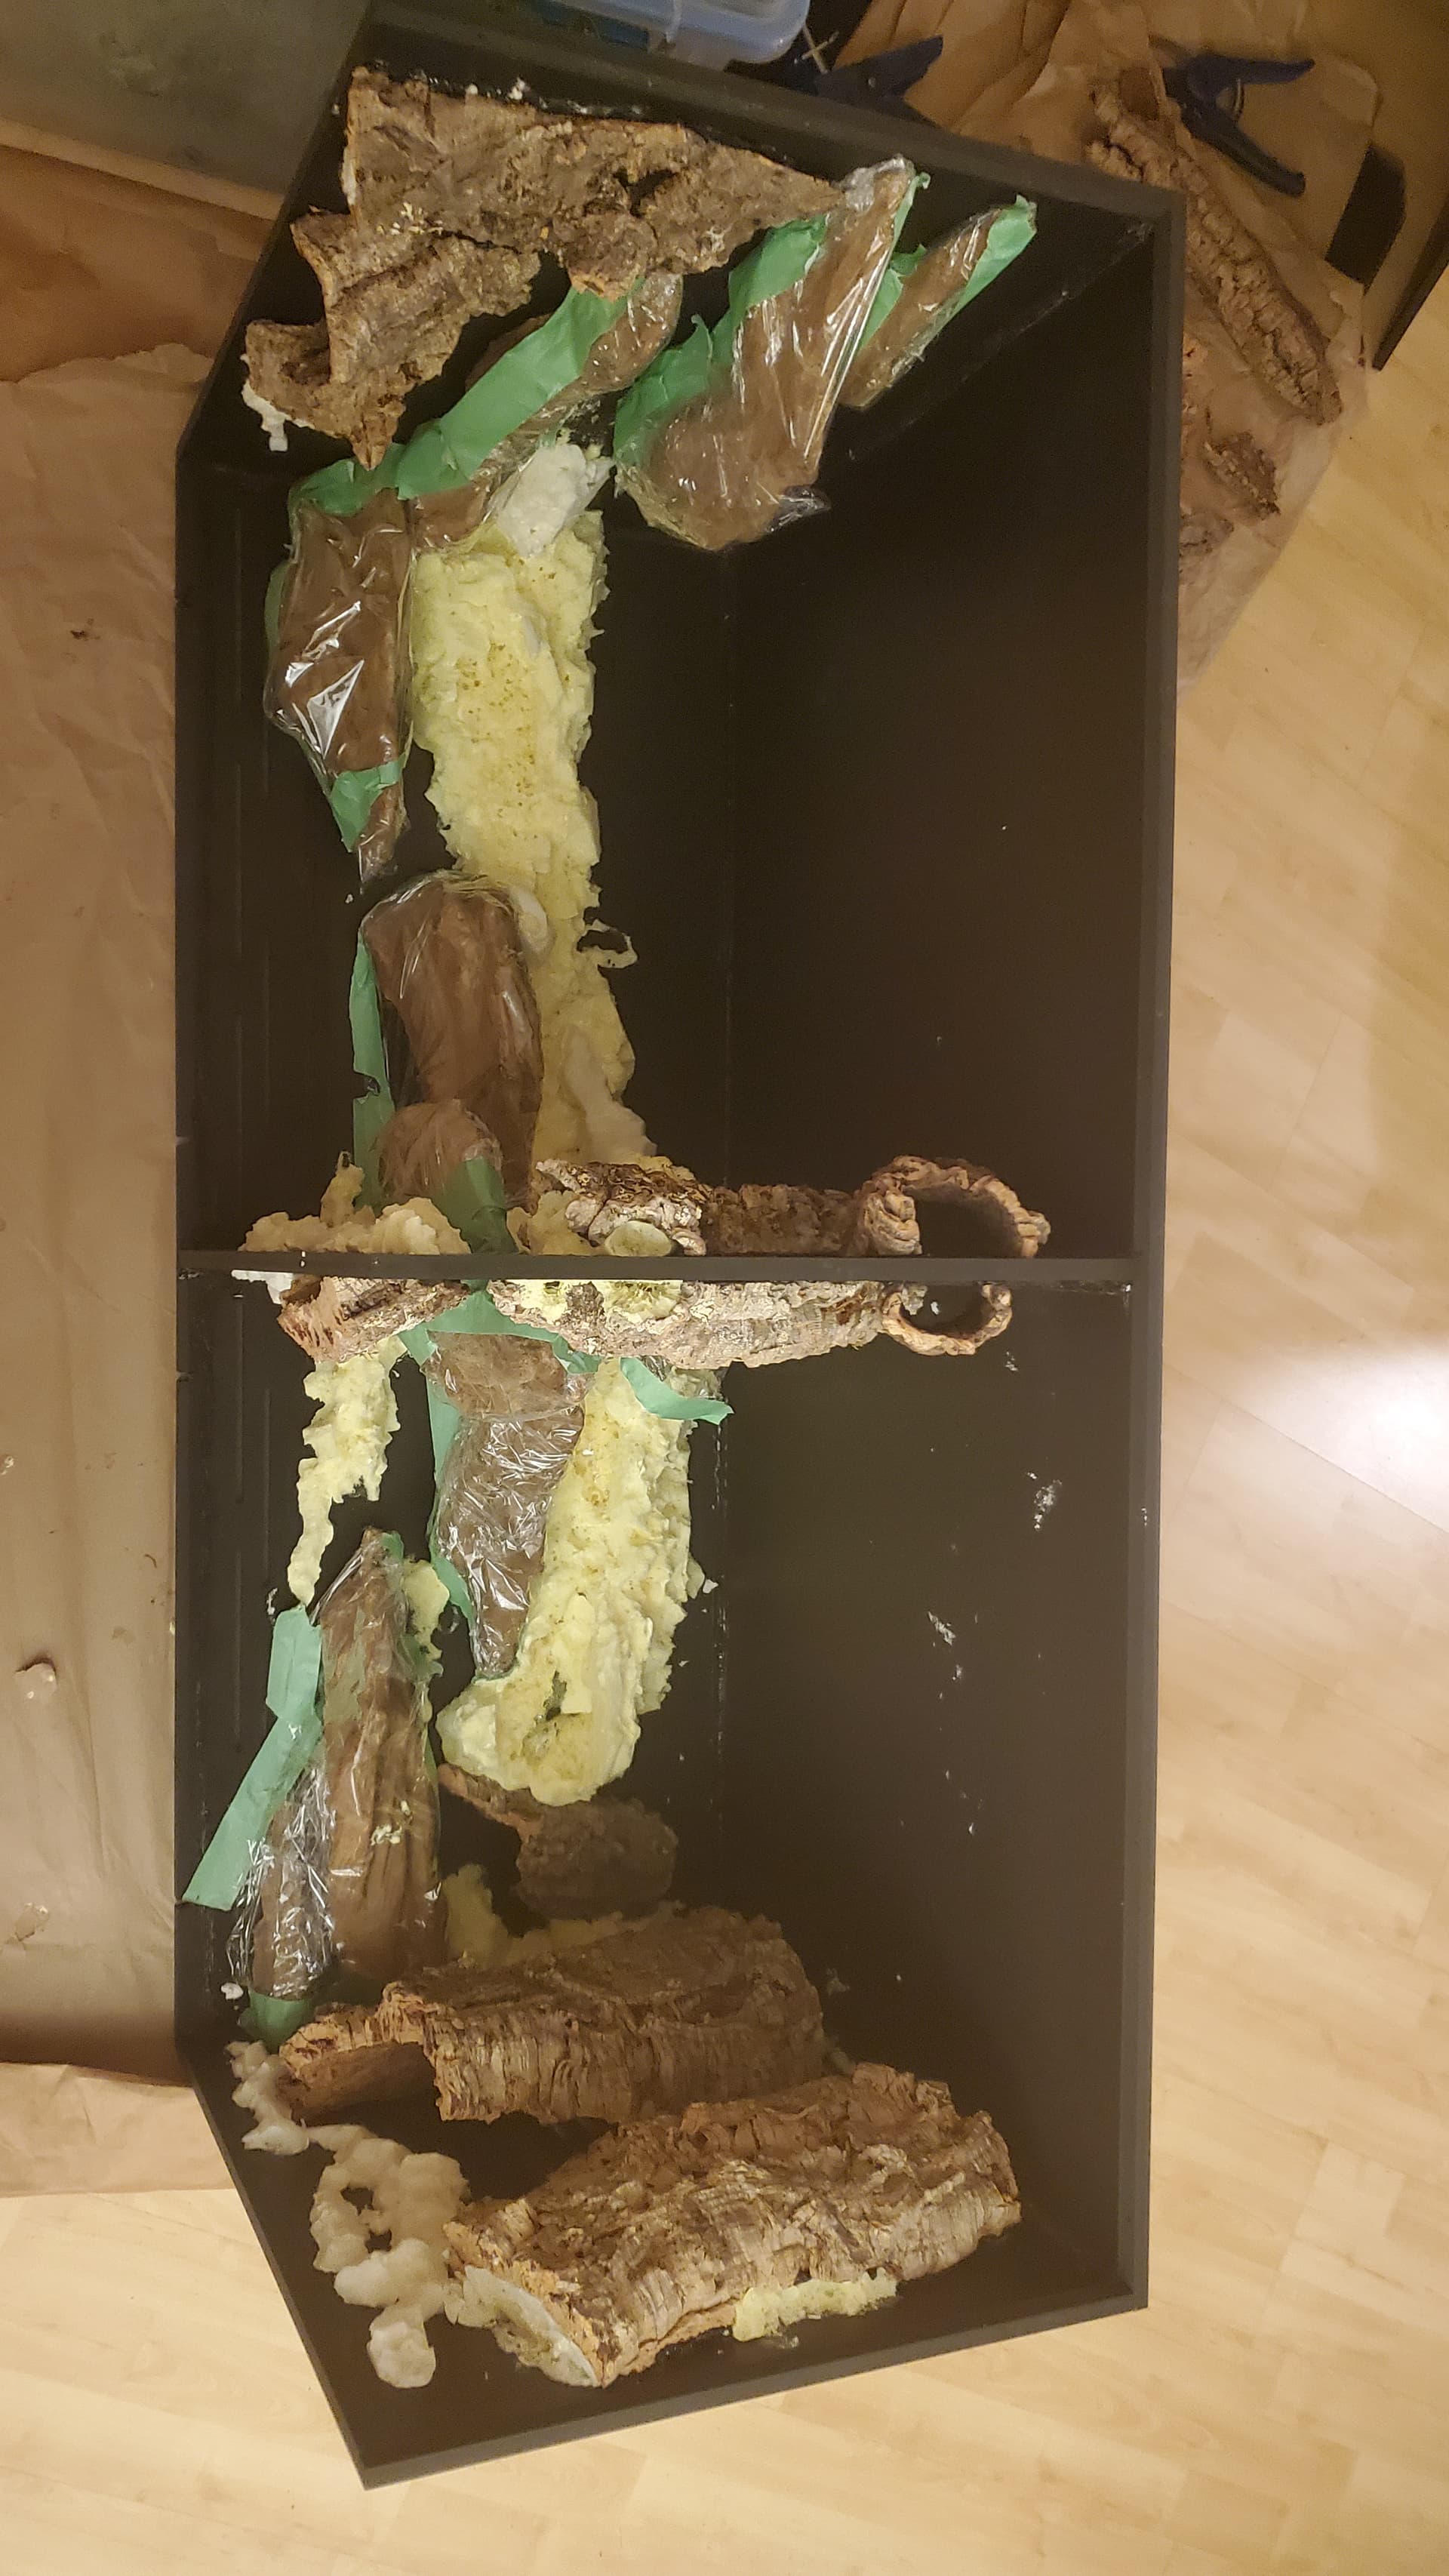
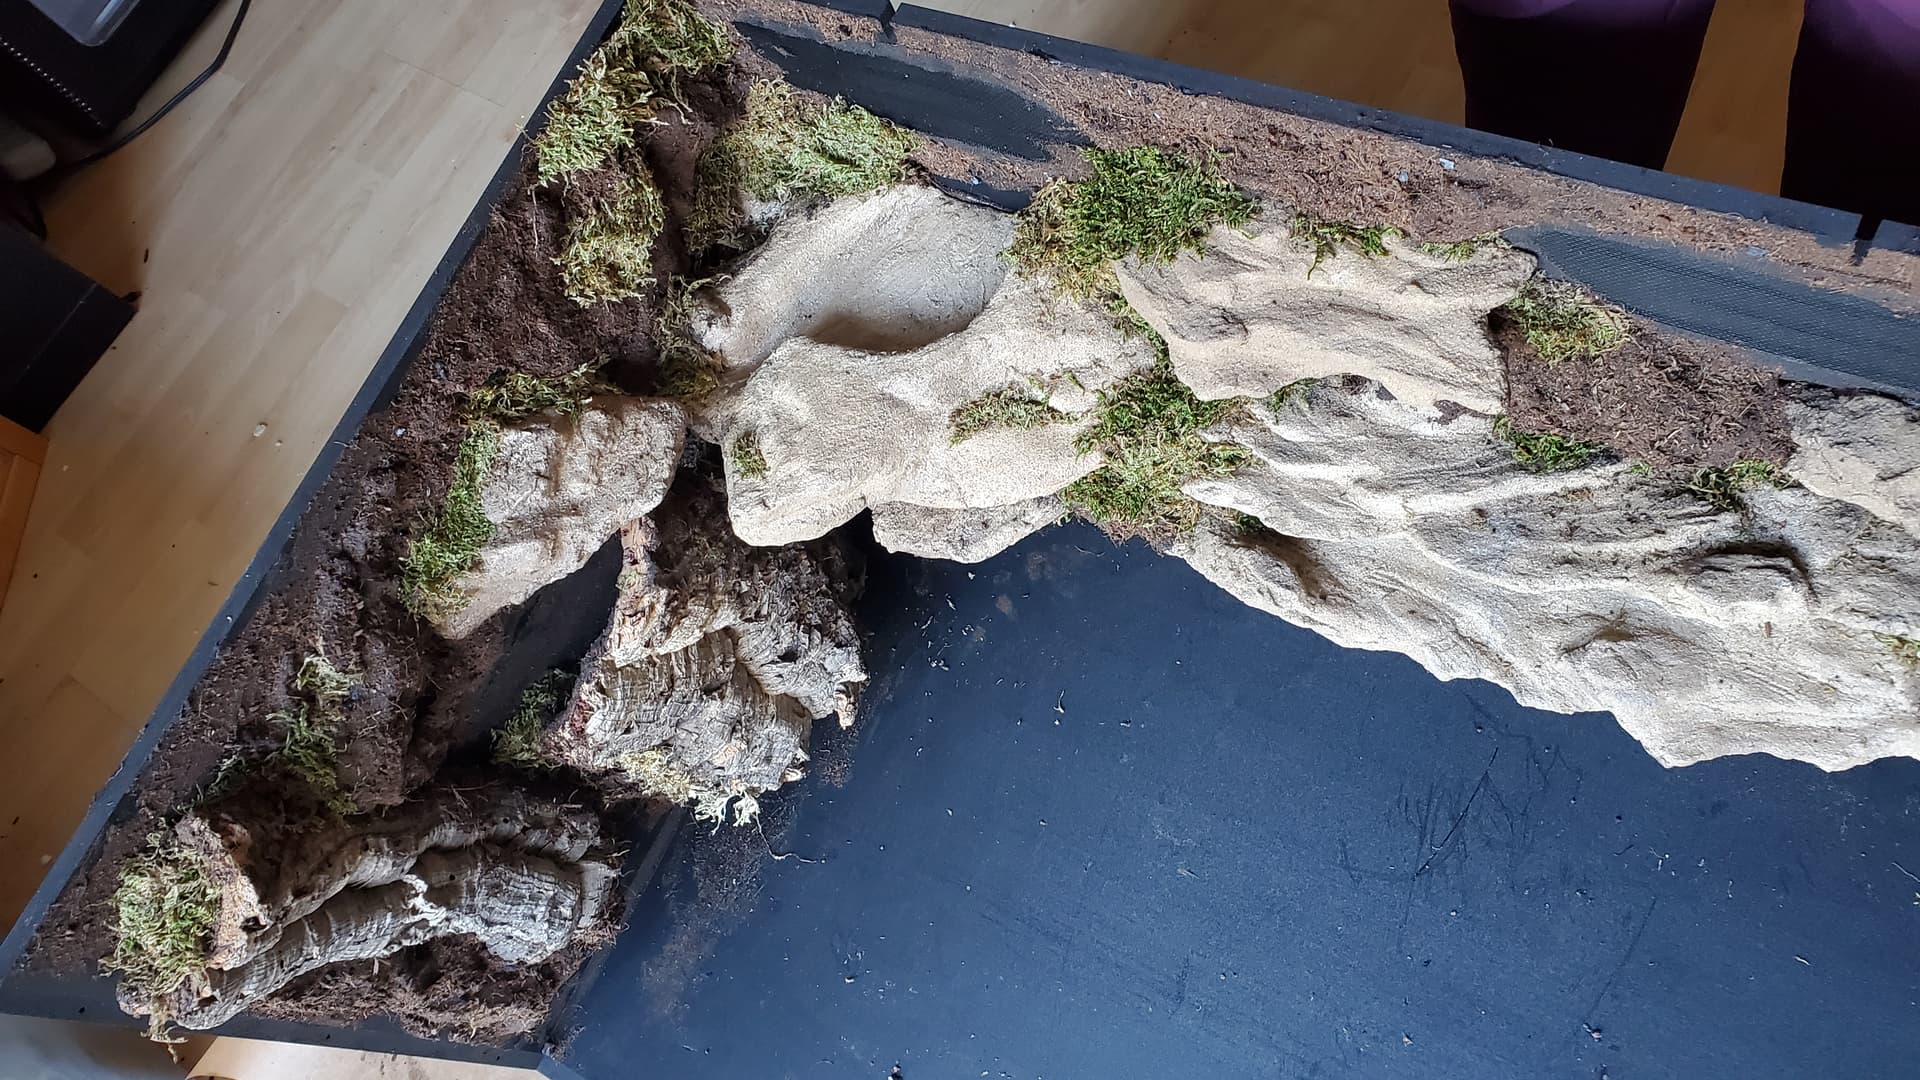
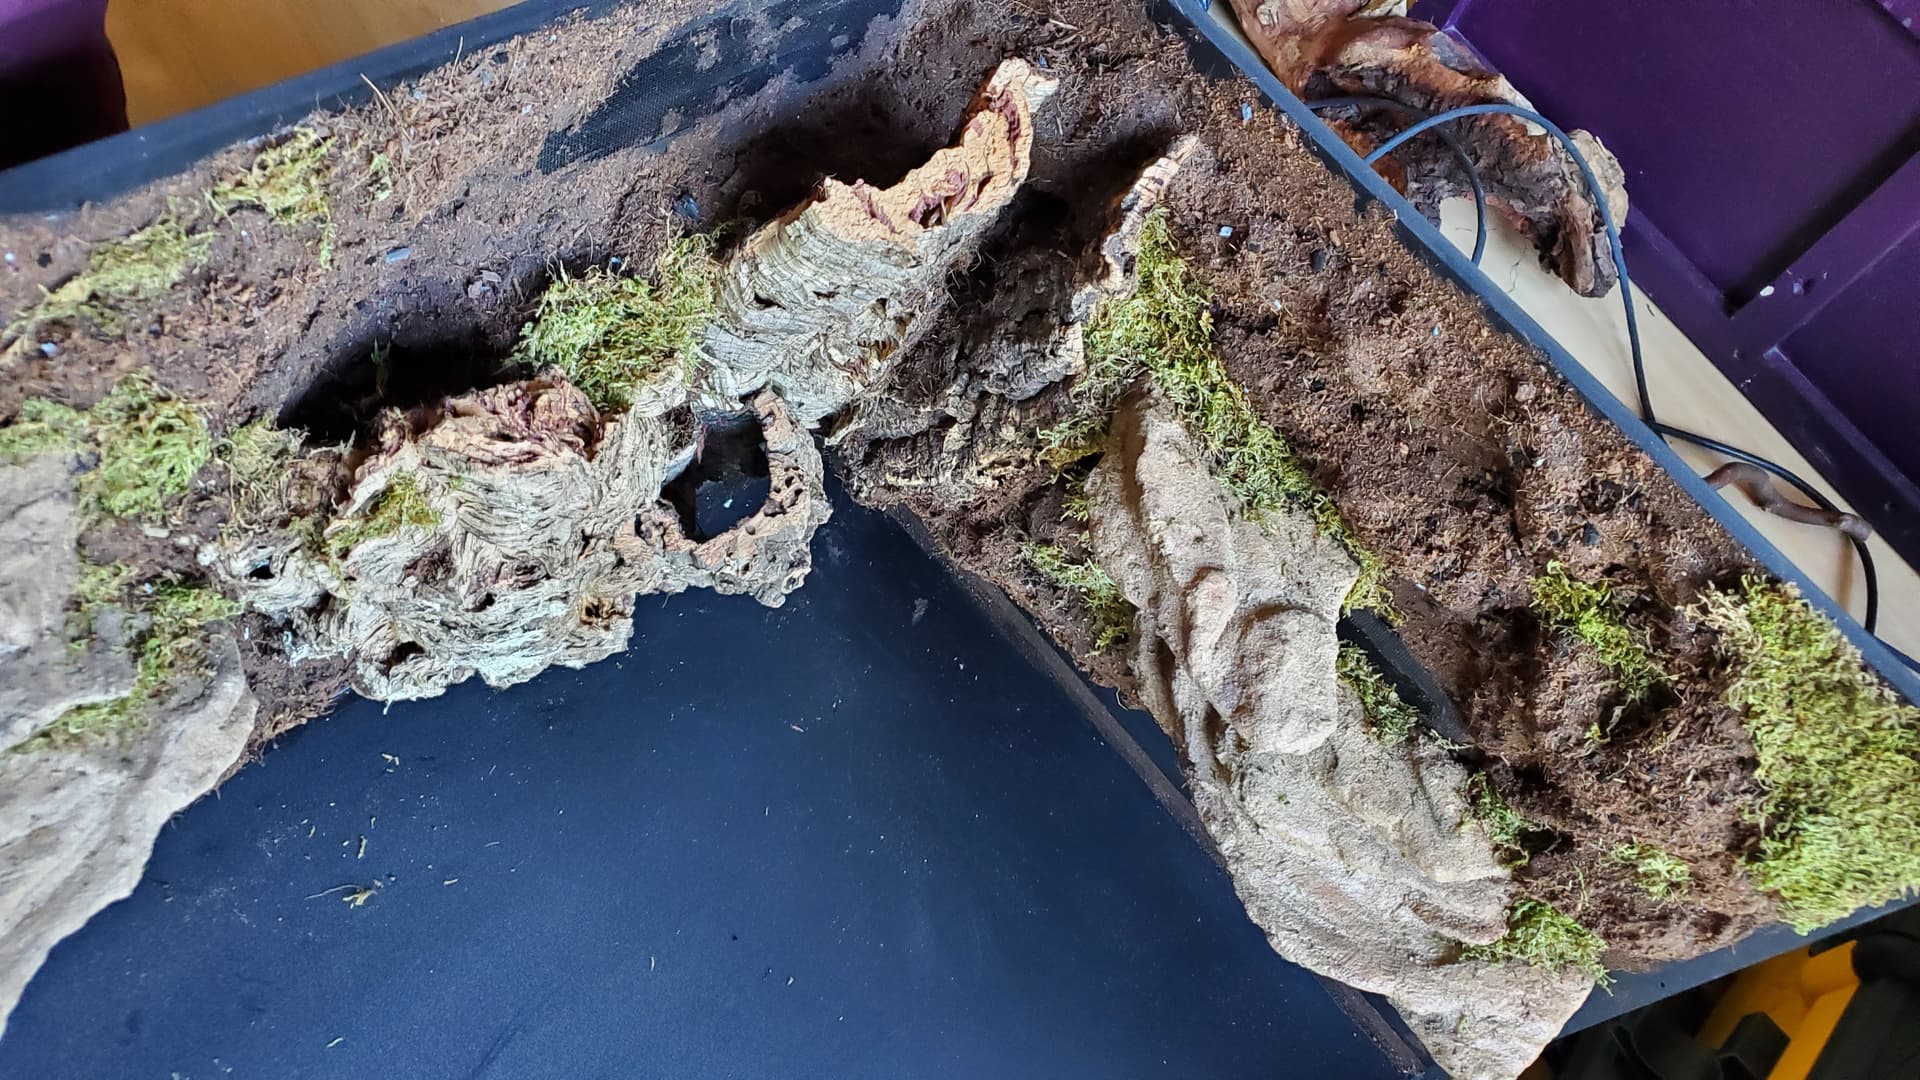
Then, foam placement and carving (great, more foam; this is after cleanup) –
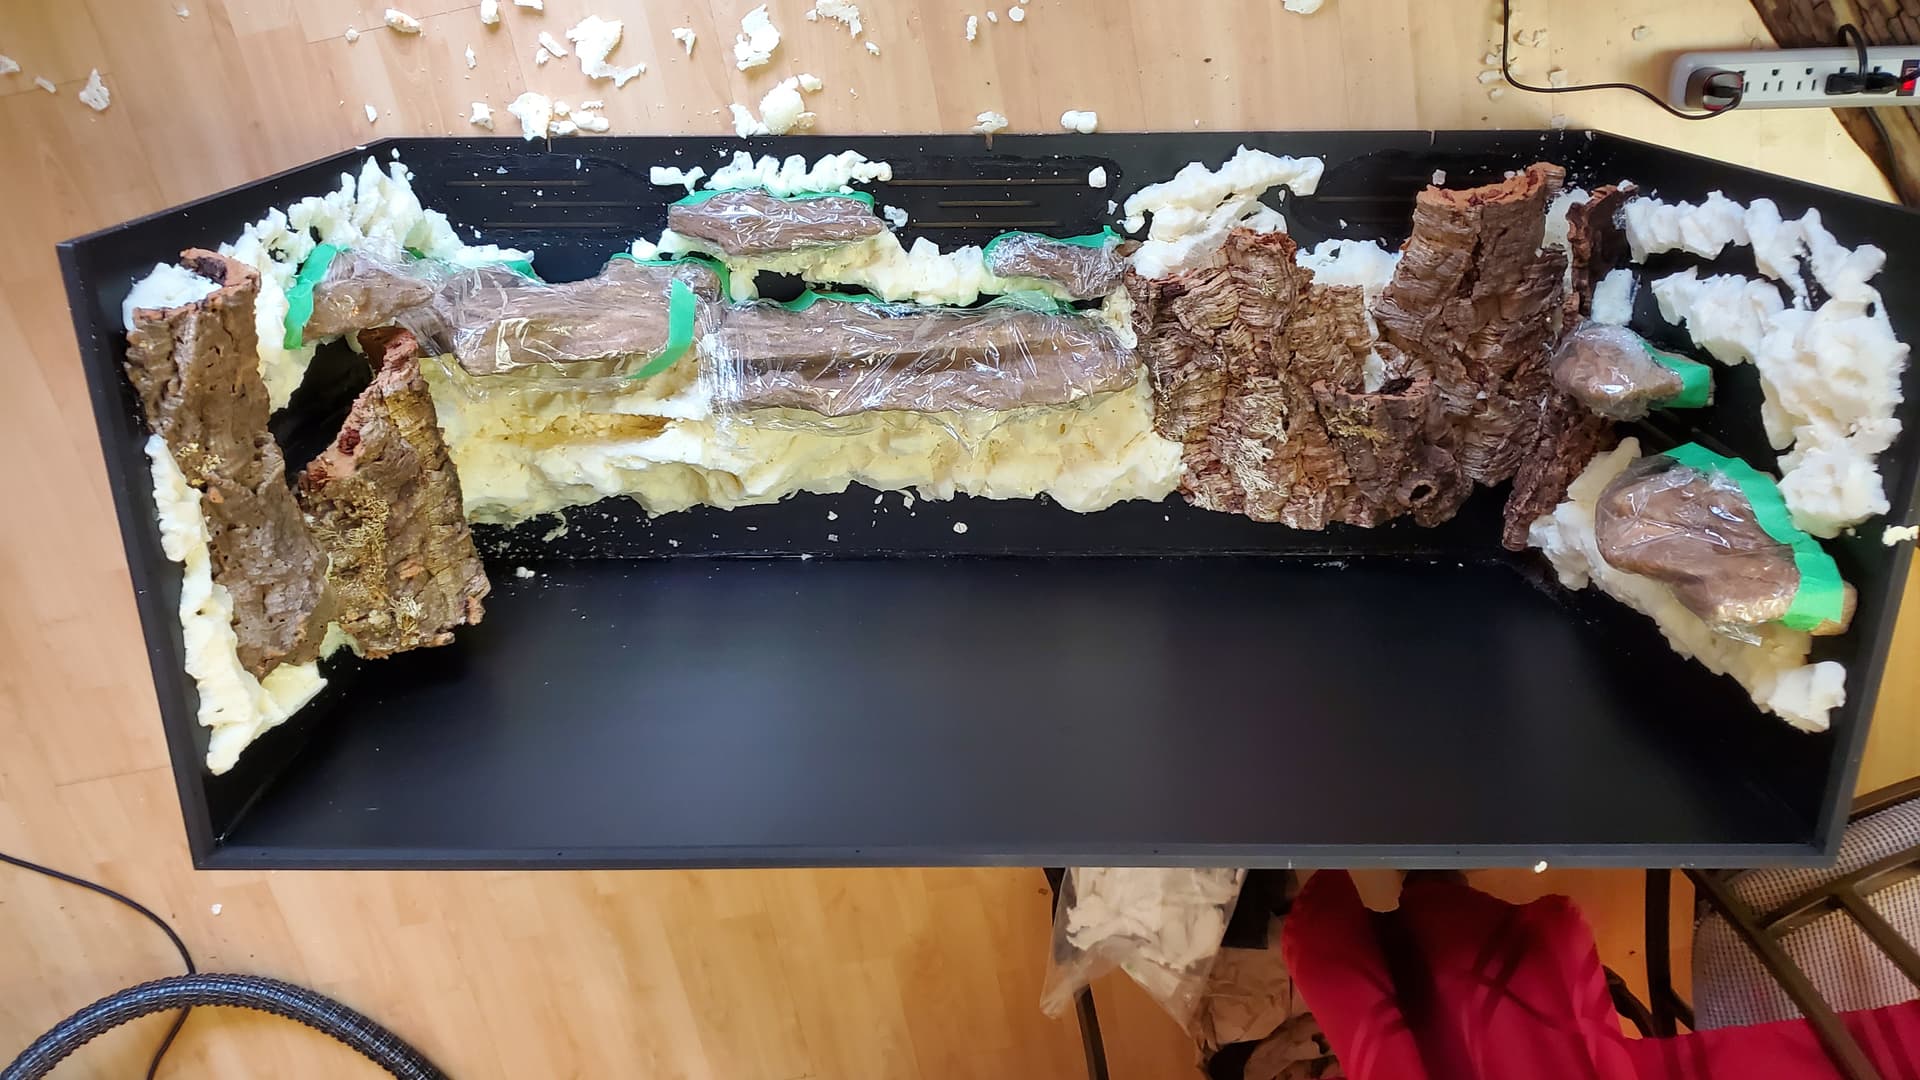
Then, sealing foam with silicone (black) and patting on a naturalistic dirt mix –
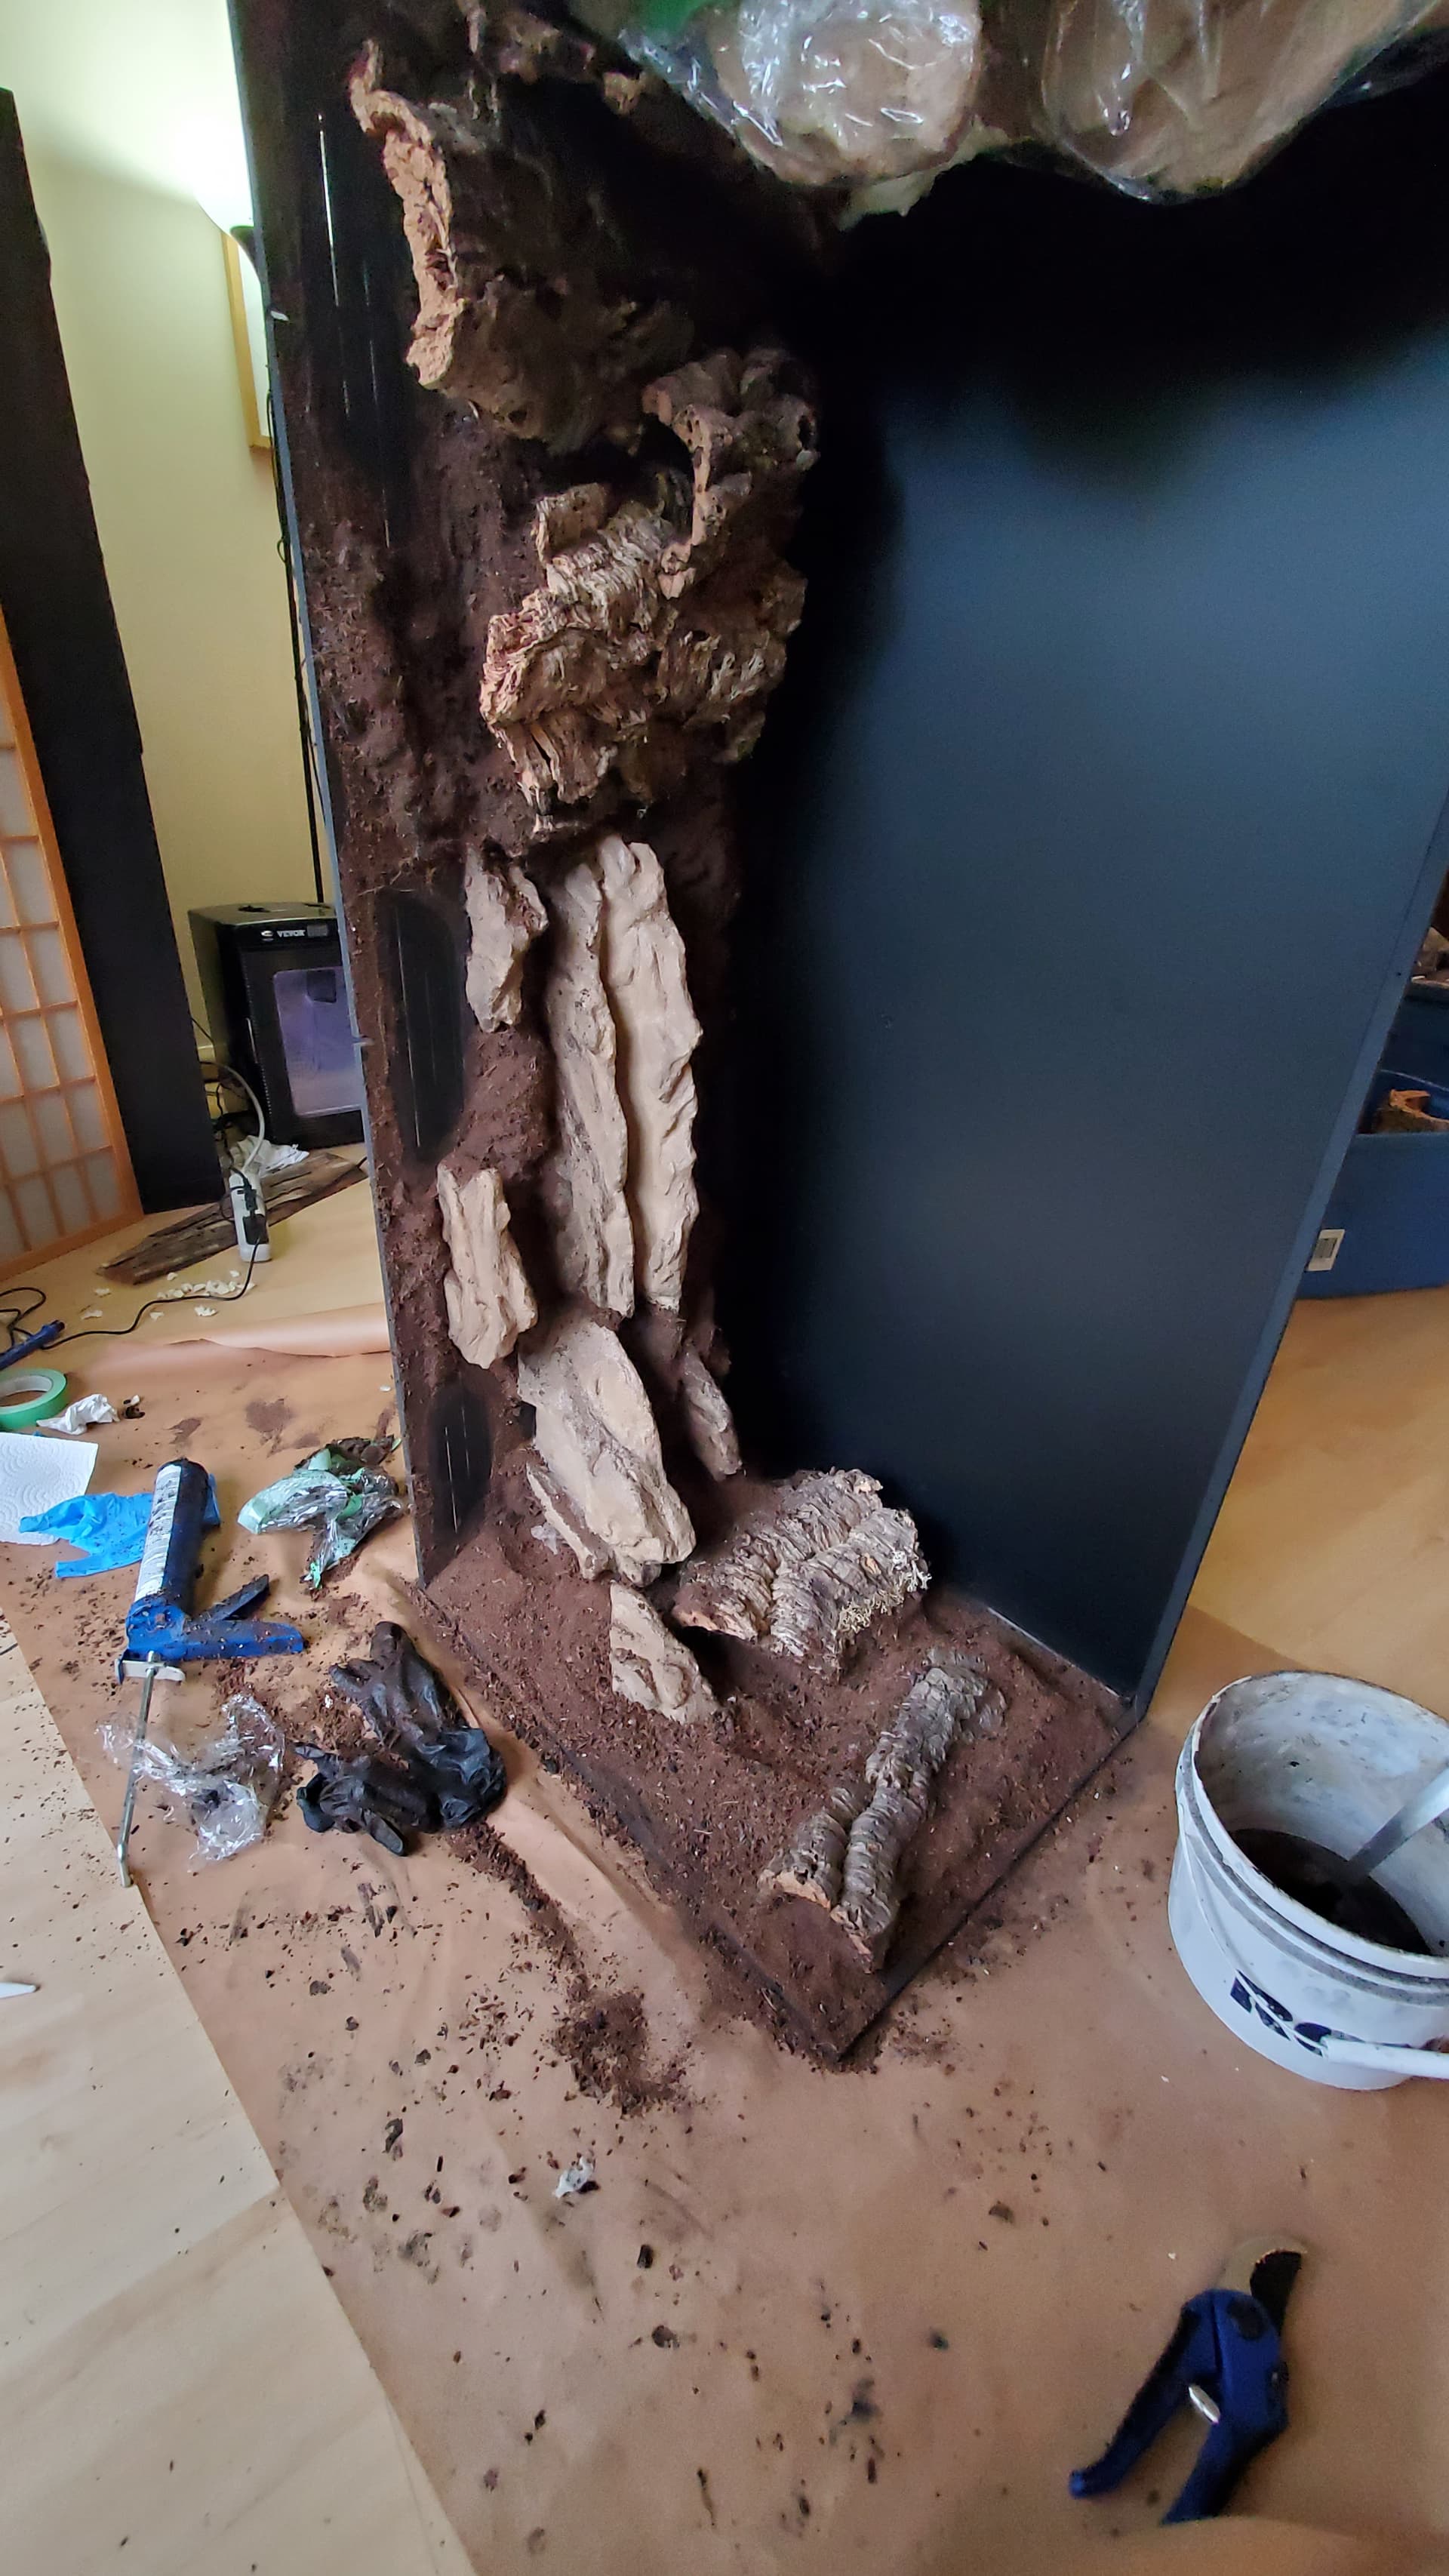
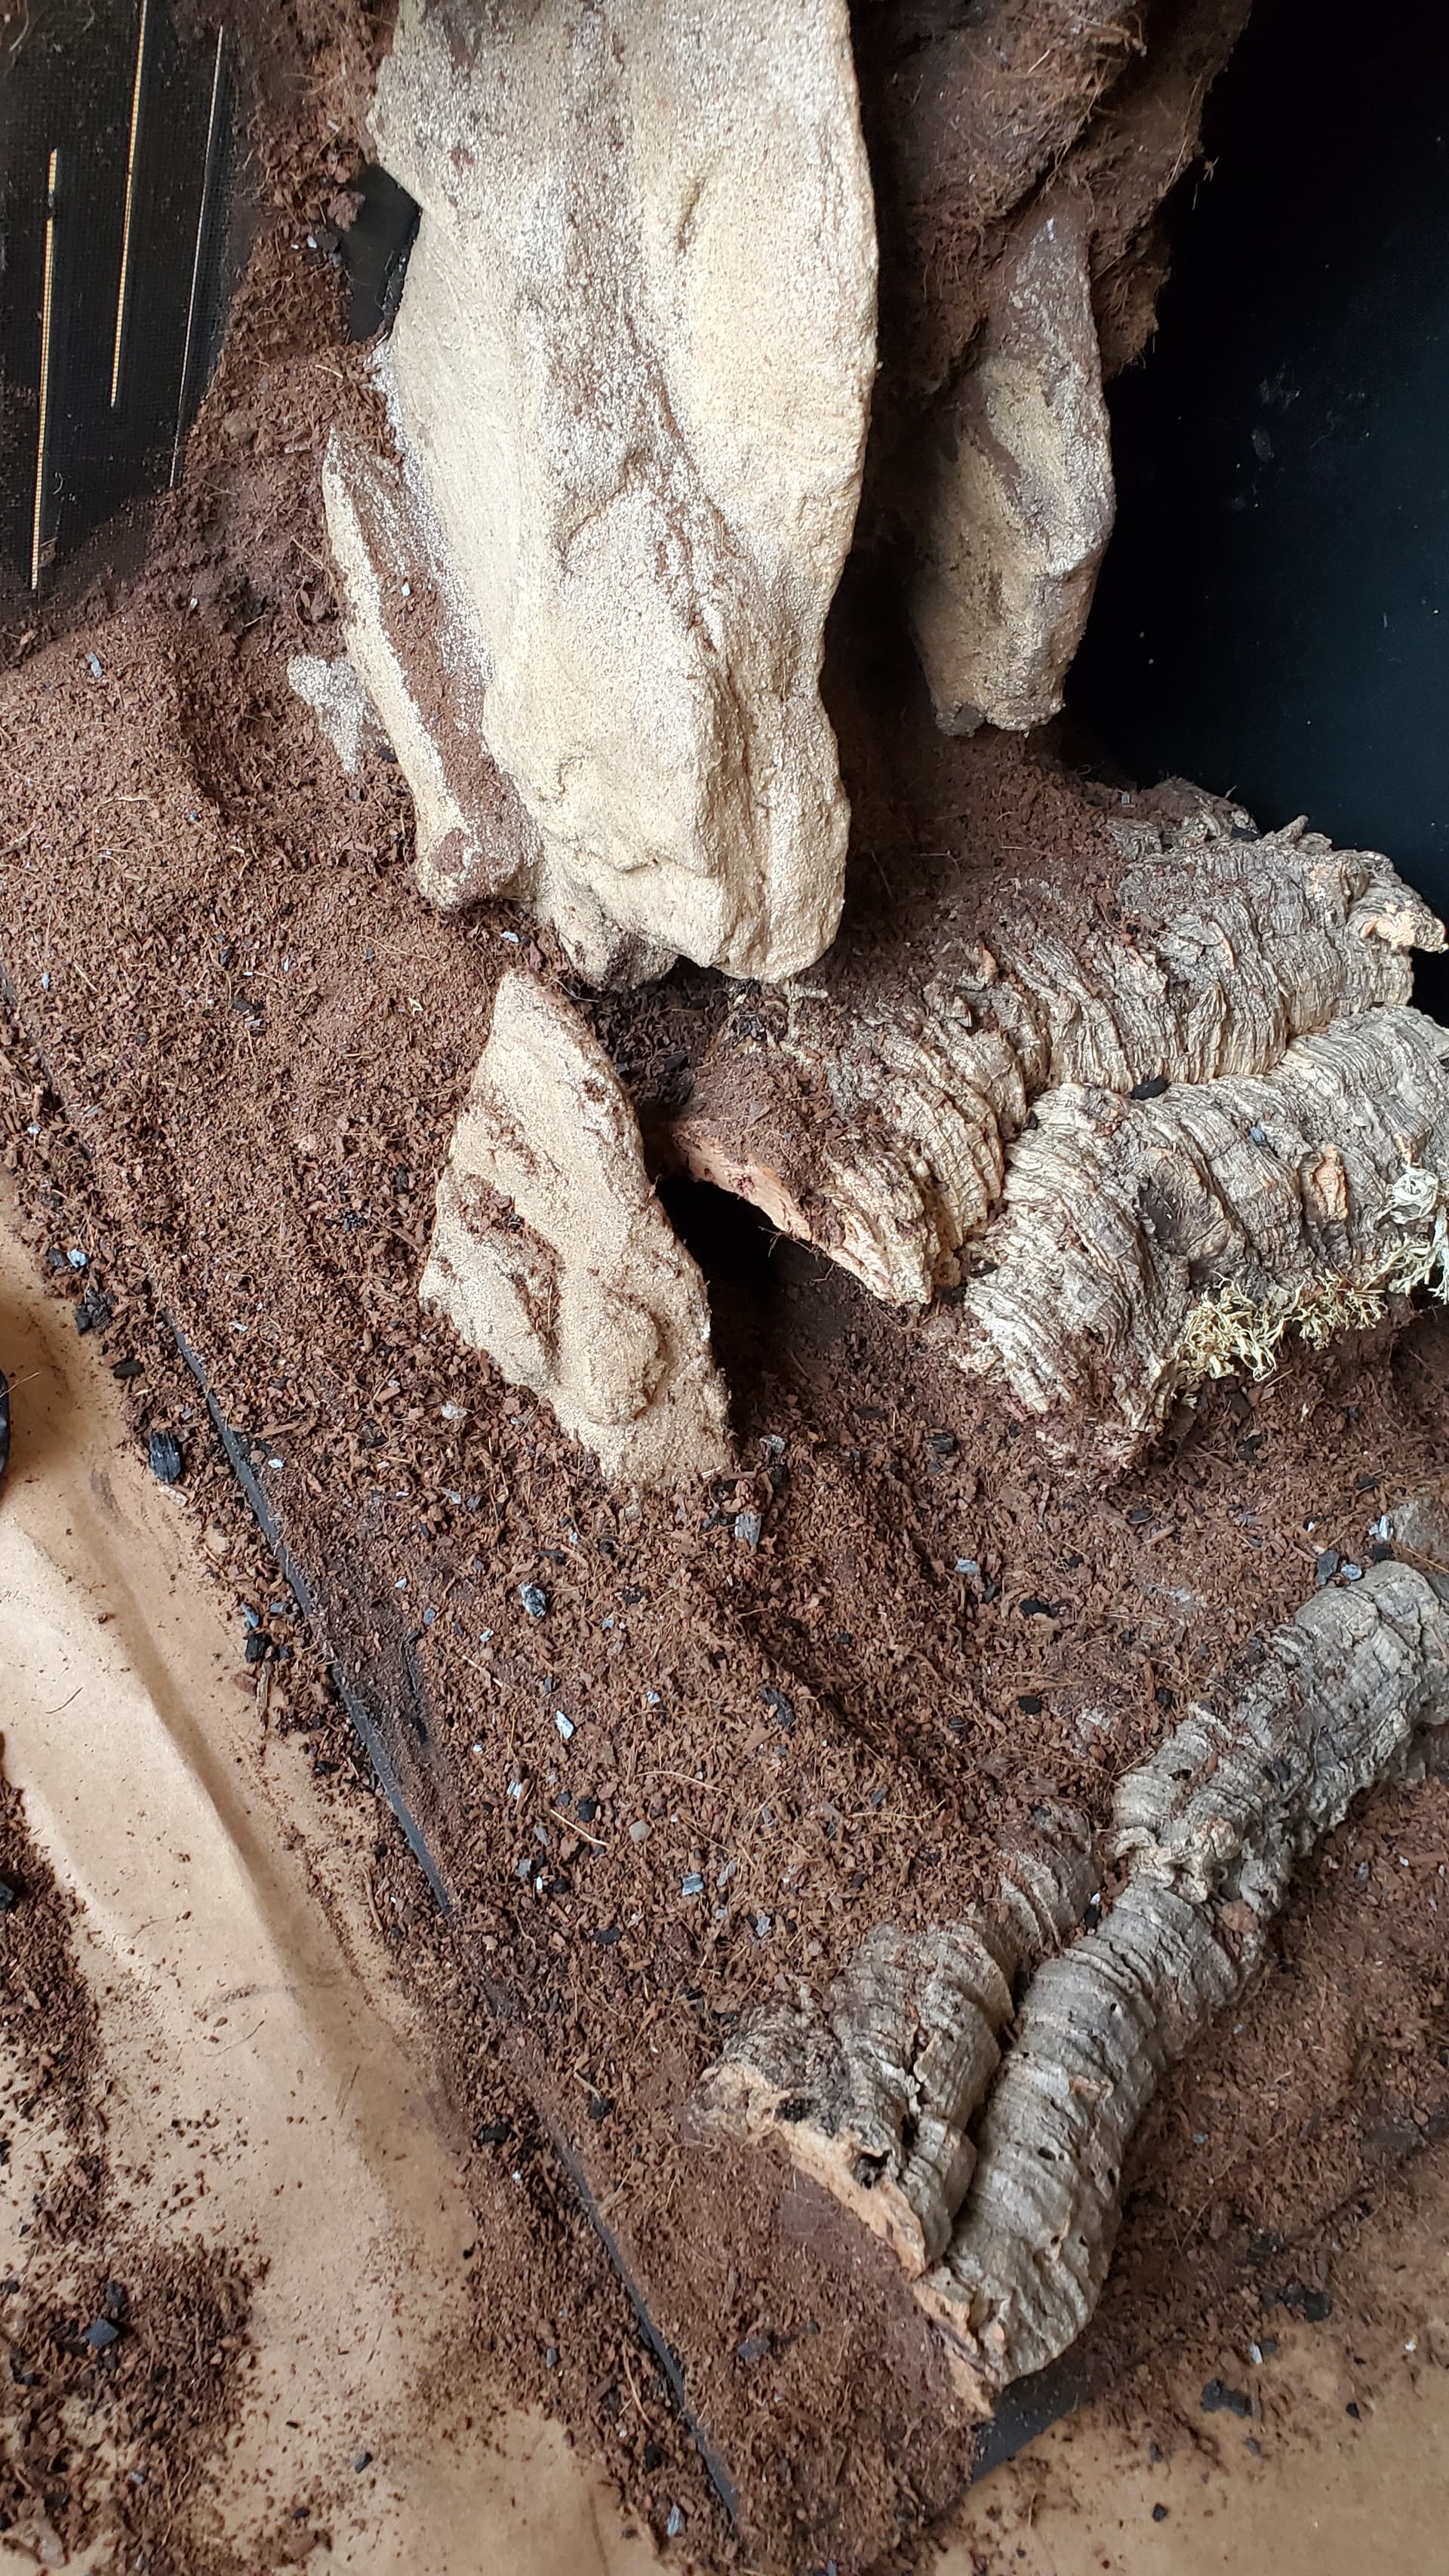

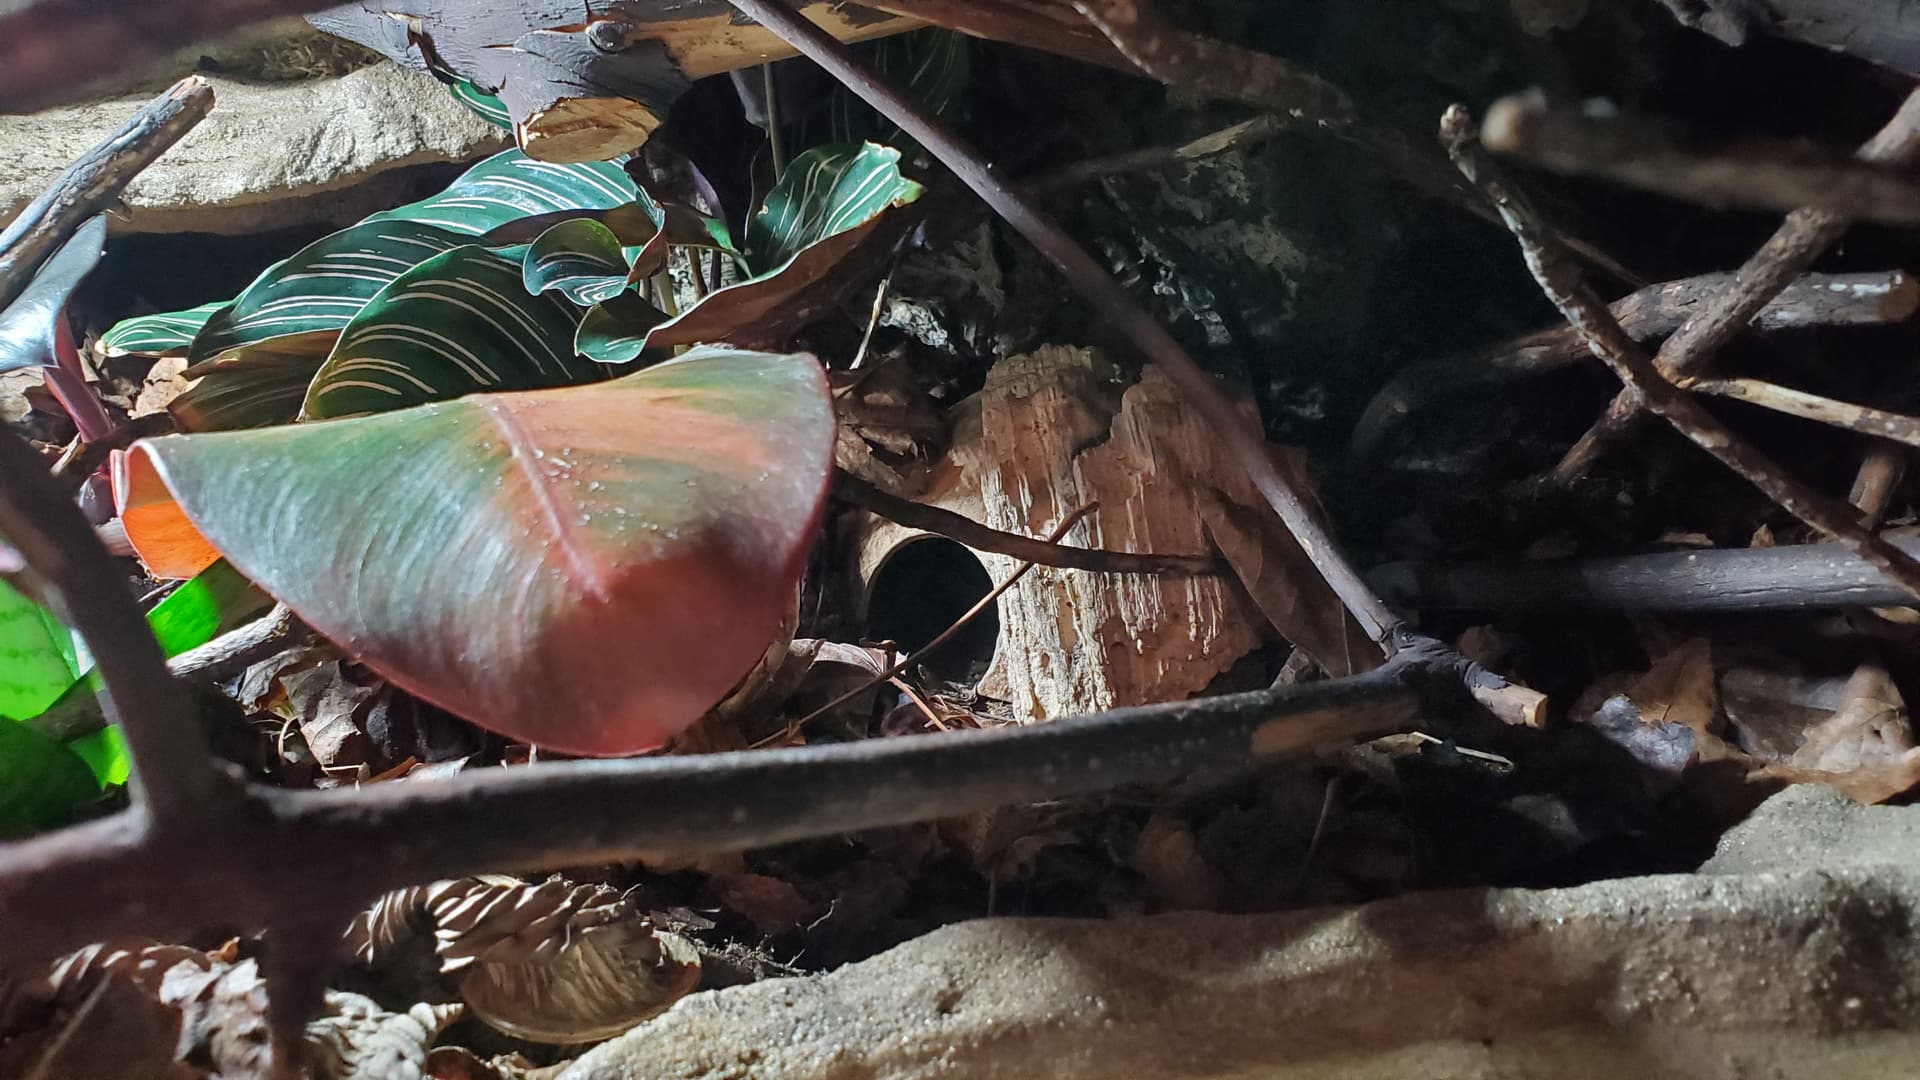
Then, taking inspiration from those original rocks, Gorilla Gluing on preserved moss –
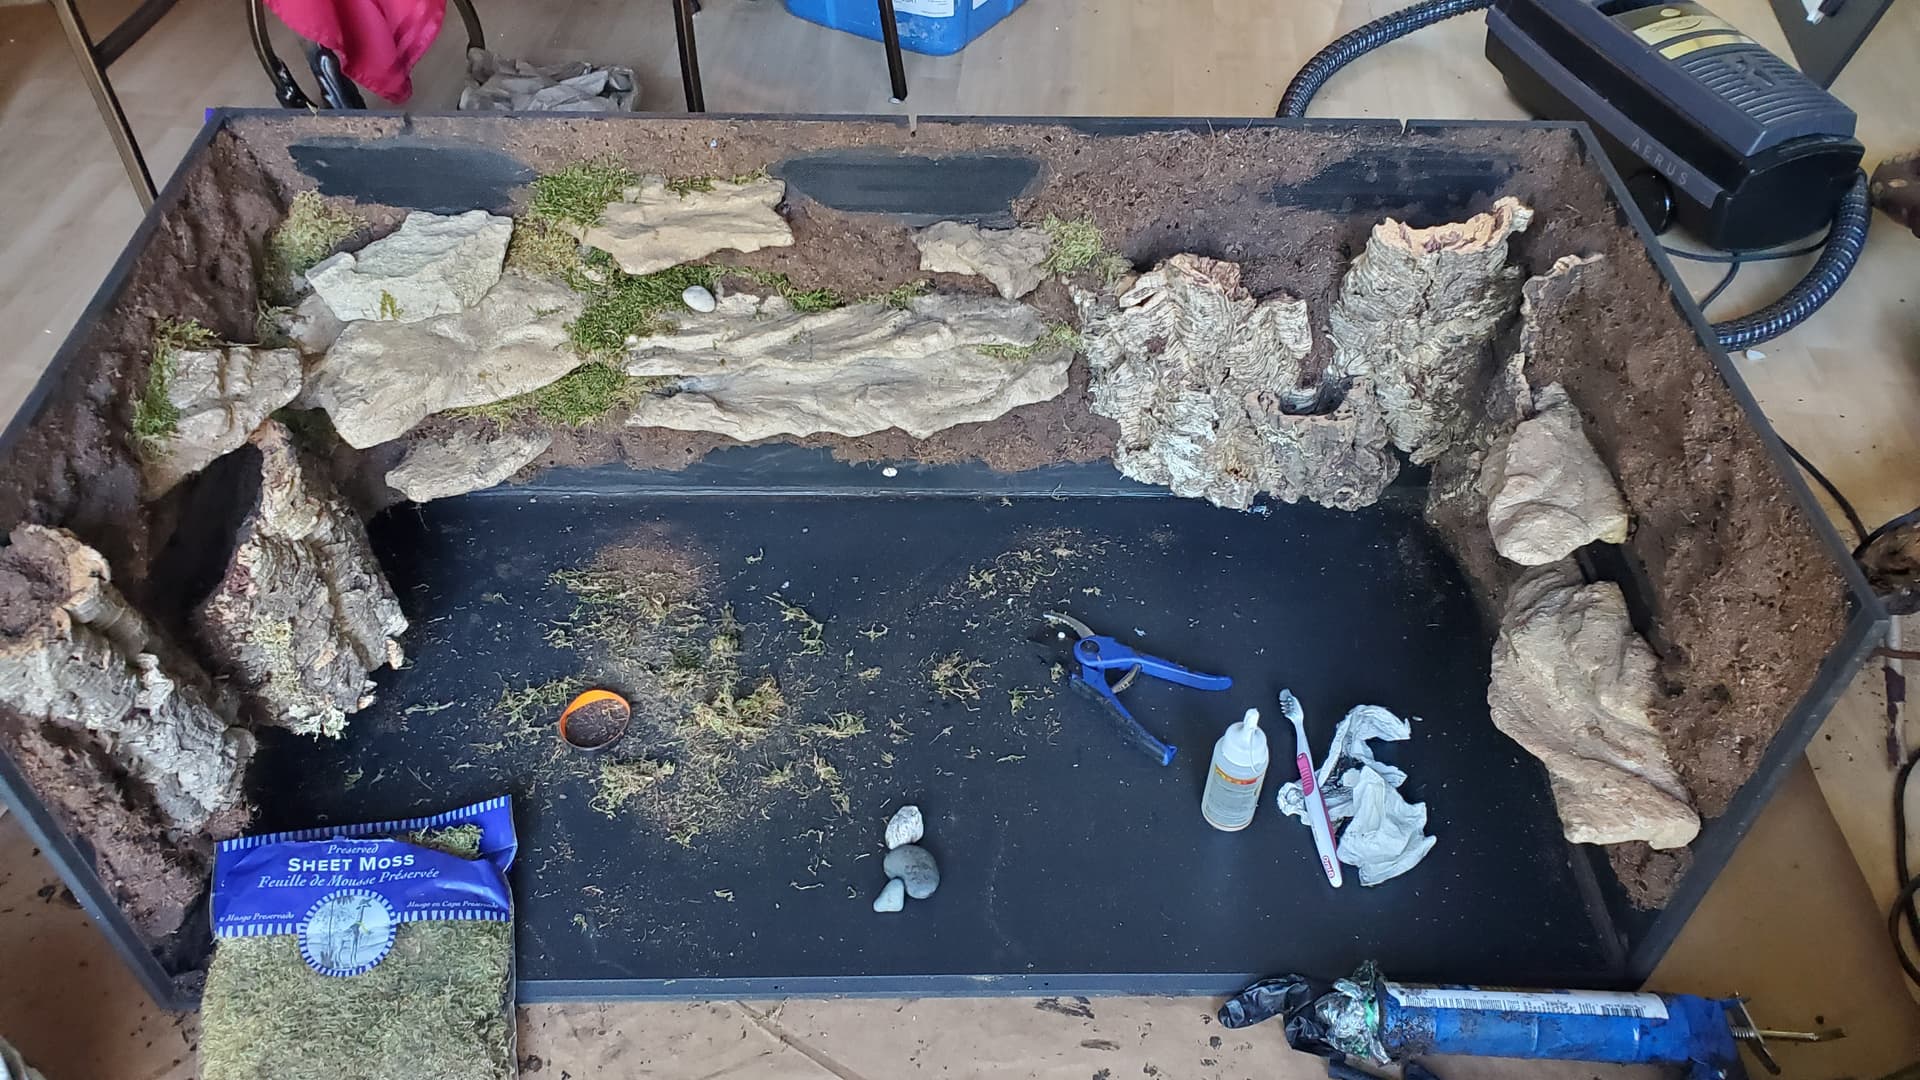
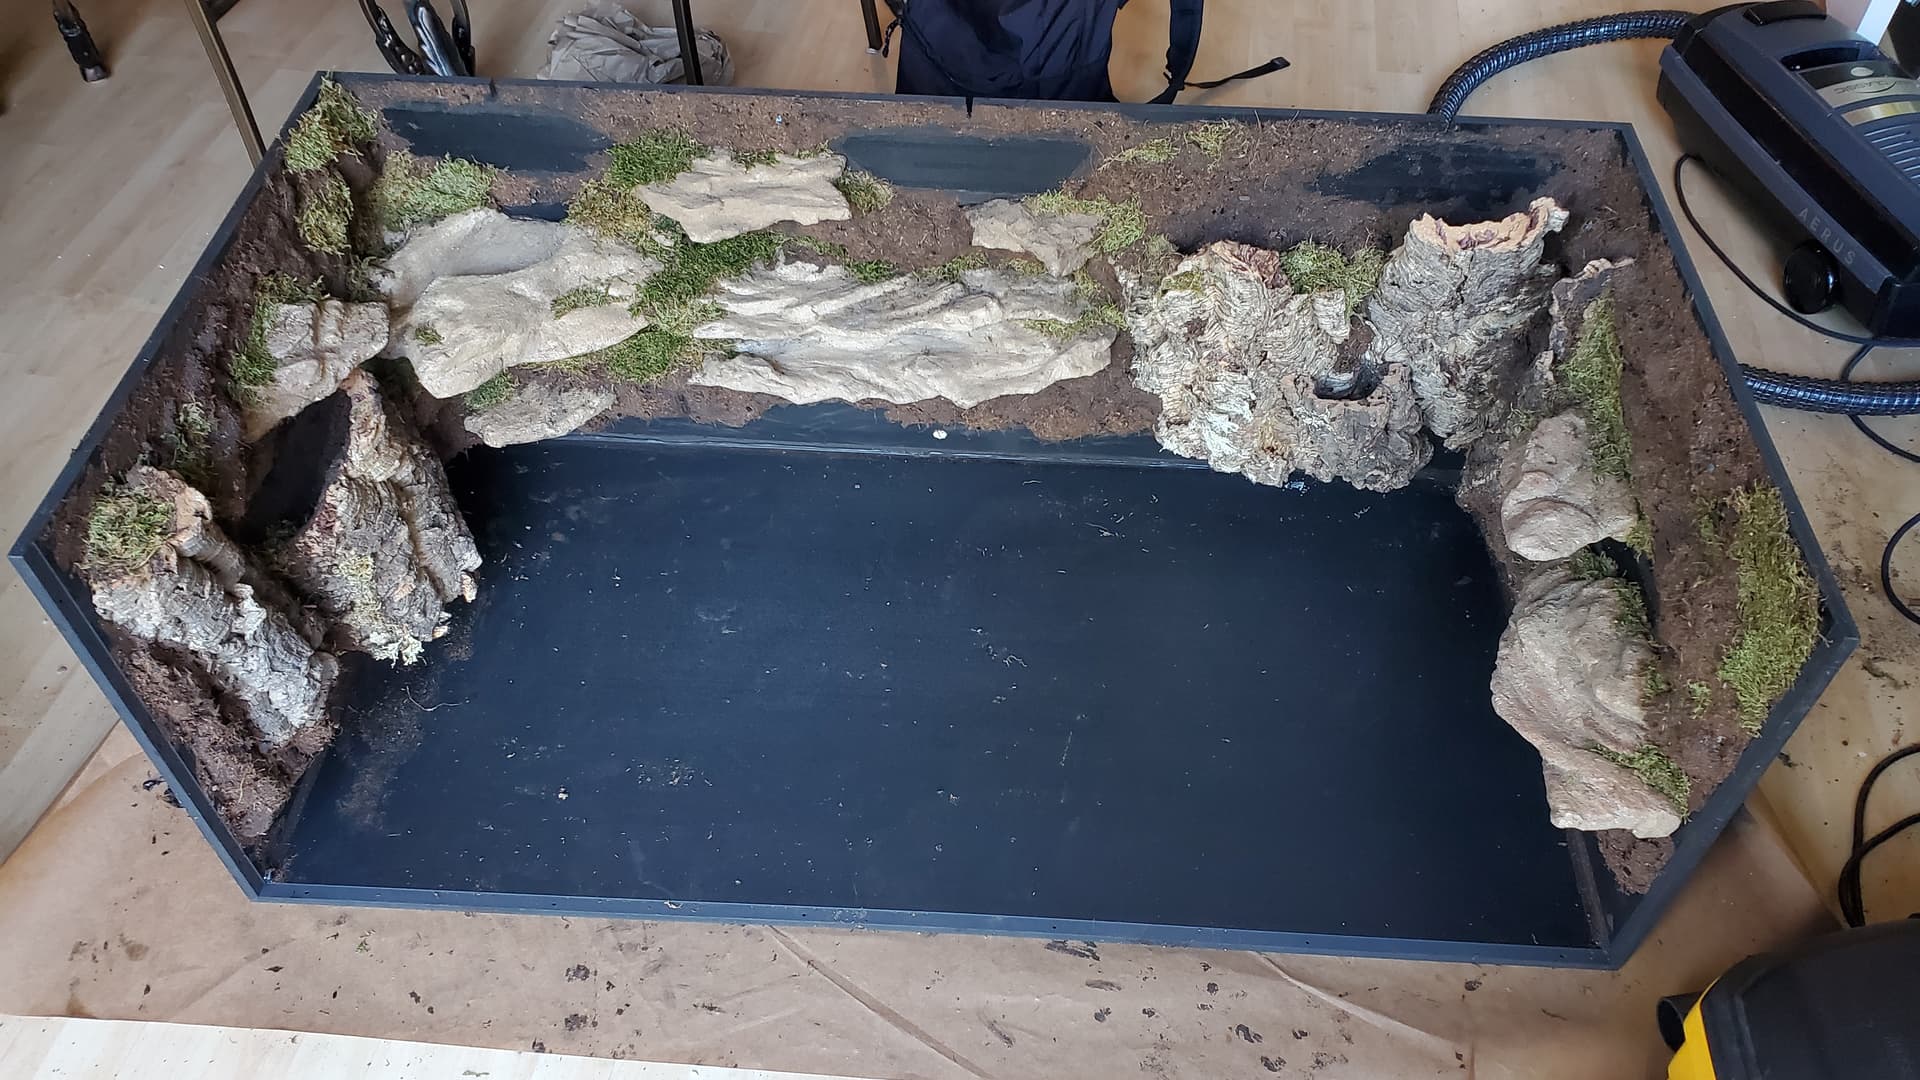
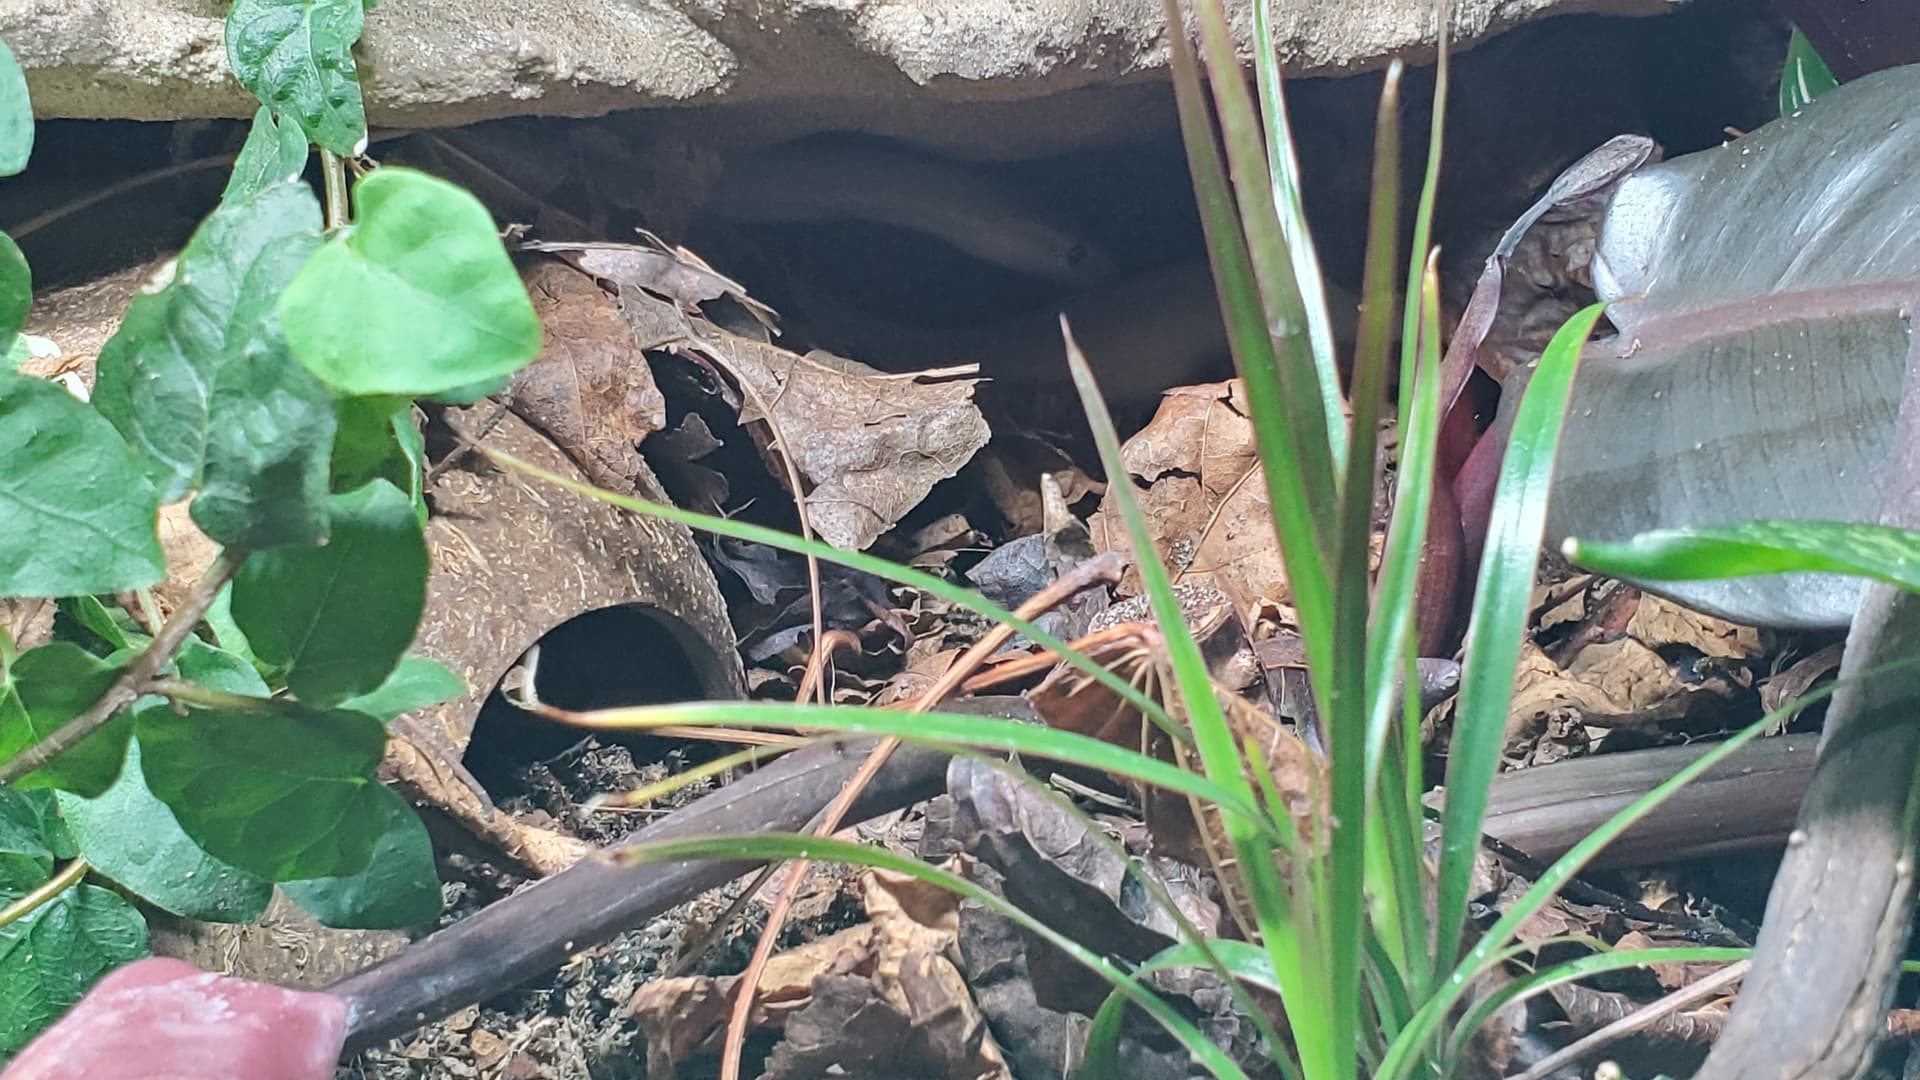
(then giving Andy a sneak peek of her new home, shhh)

So, remember when I said my living room was a bit of a mess after foam? Oh, at this point we yearned for those days.

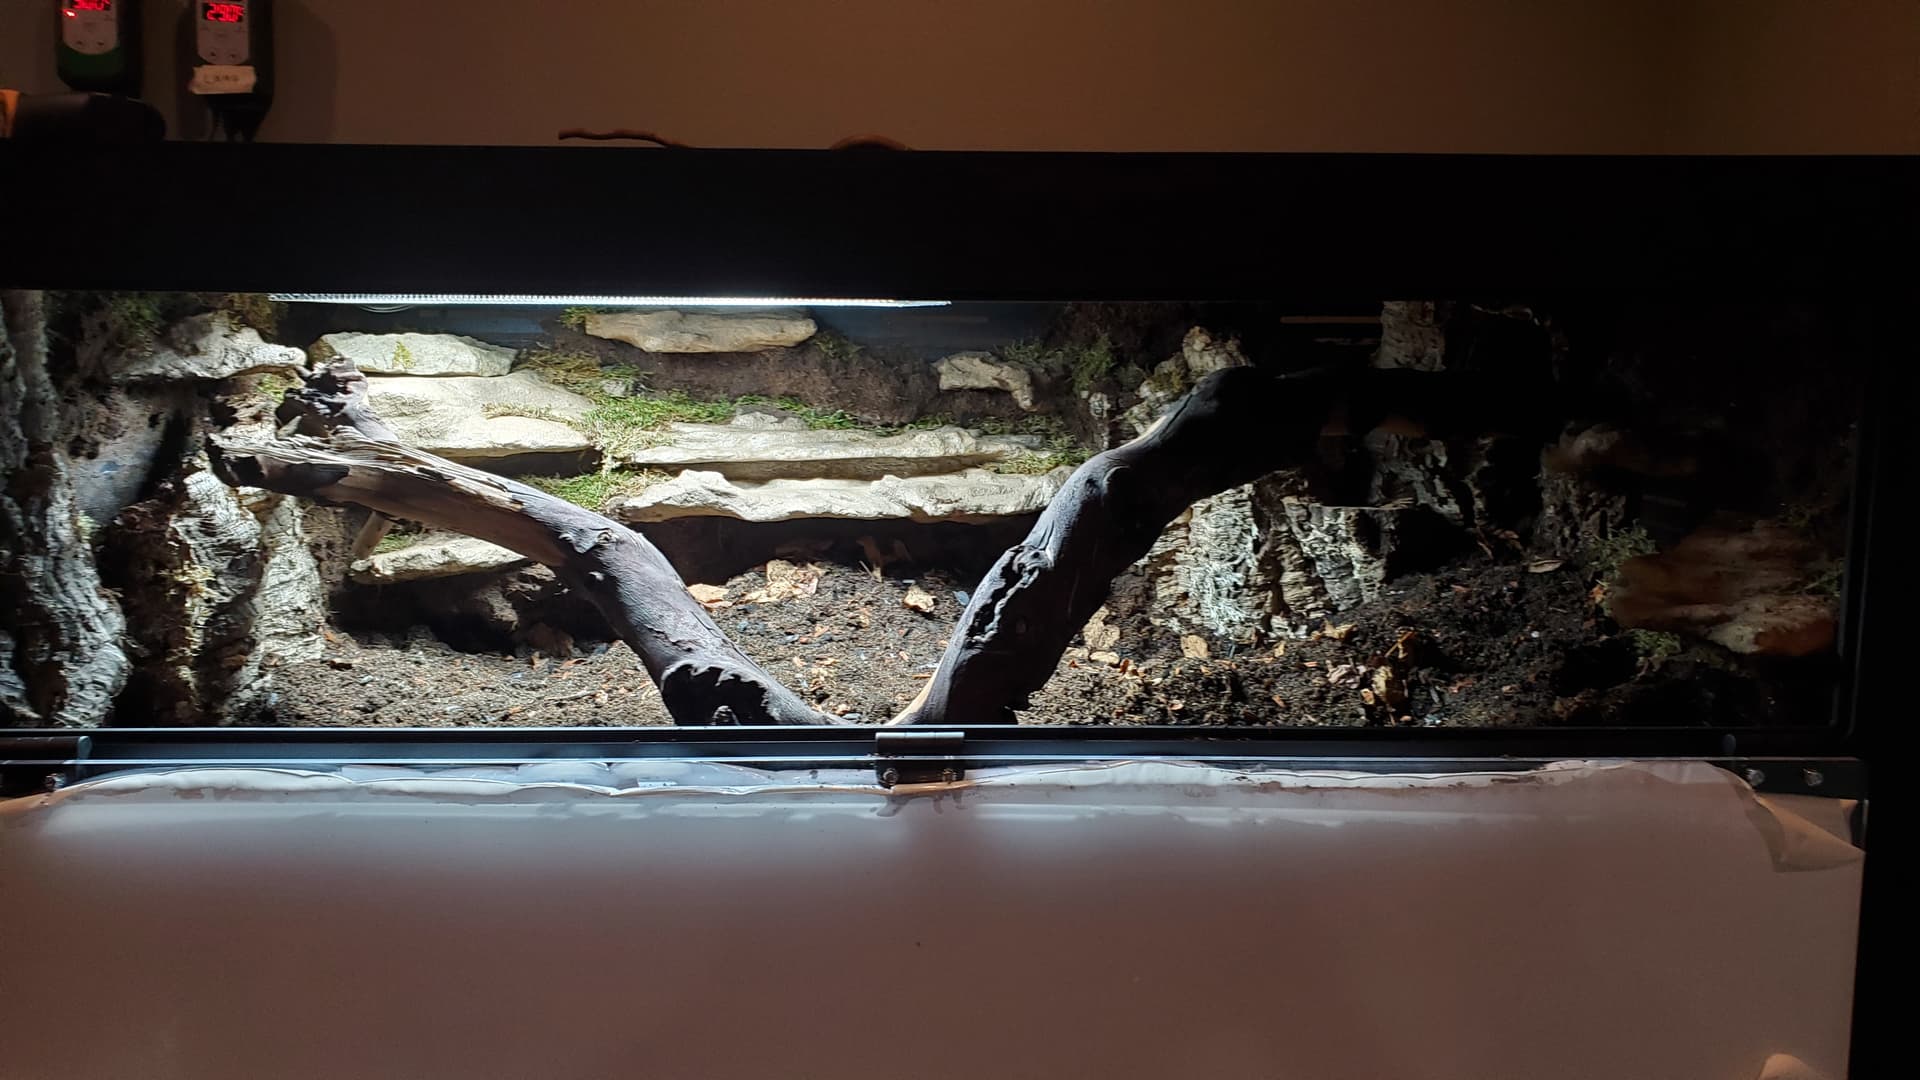
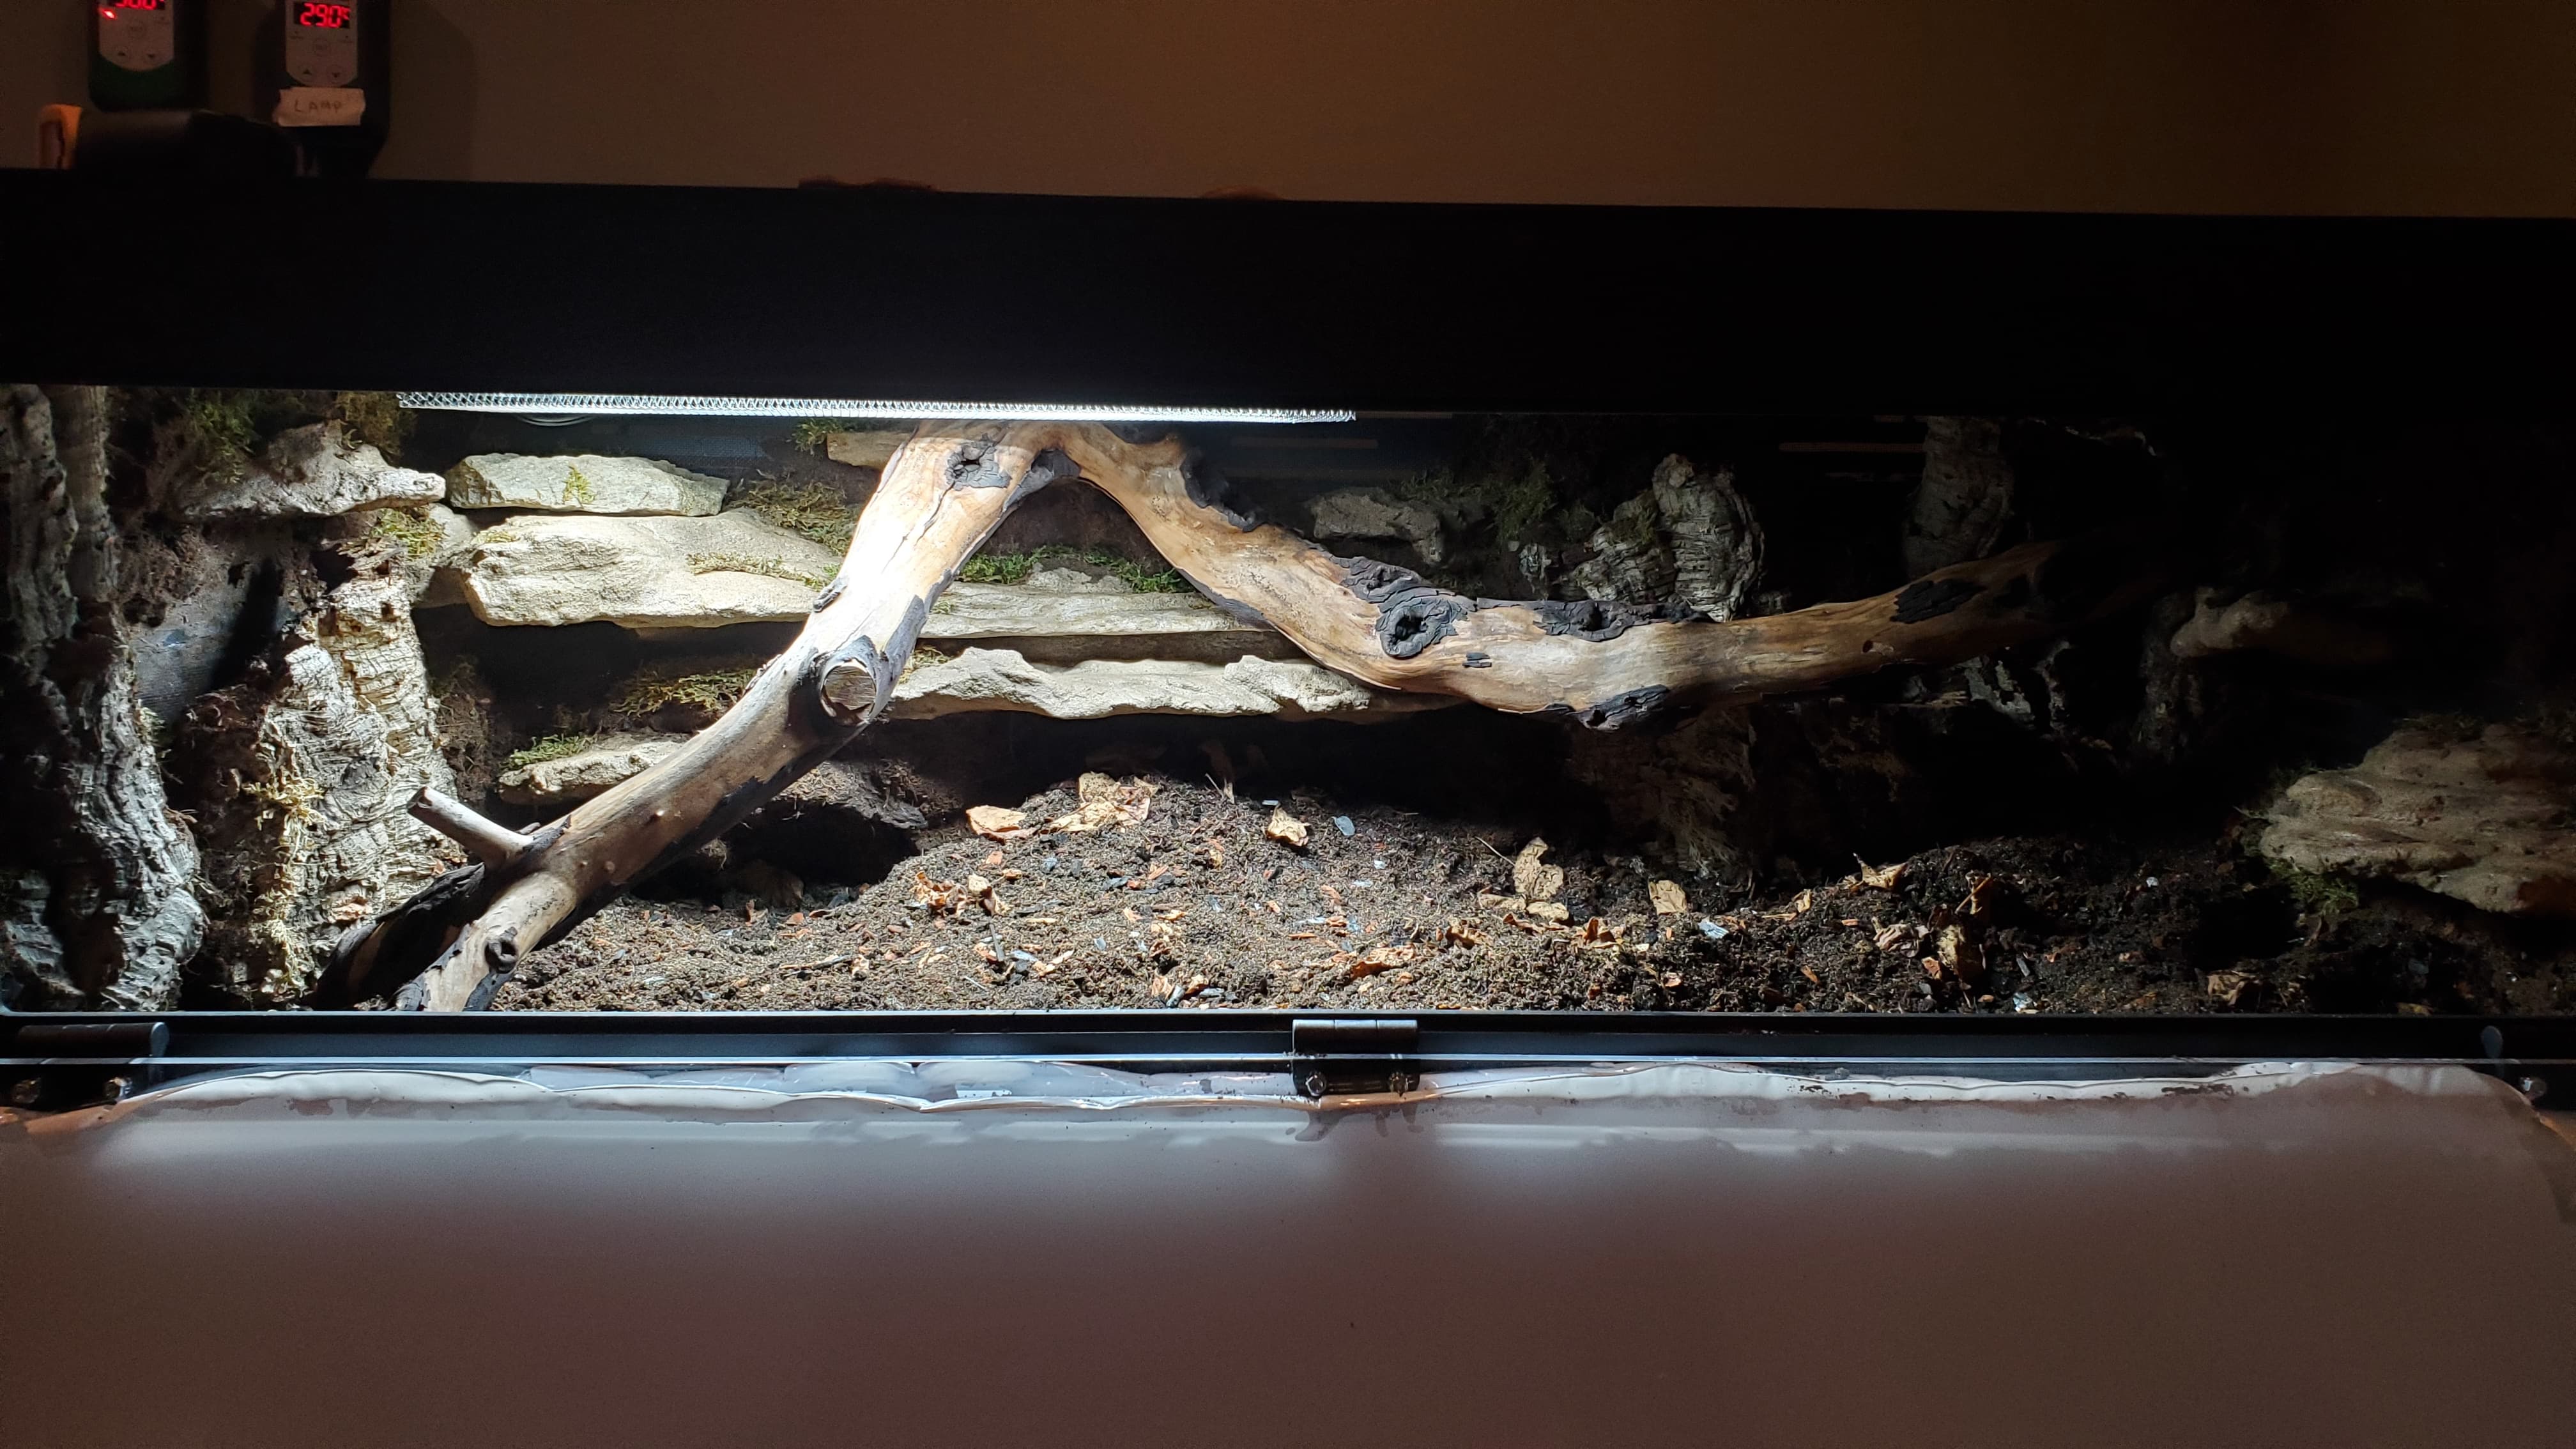
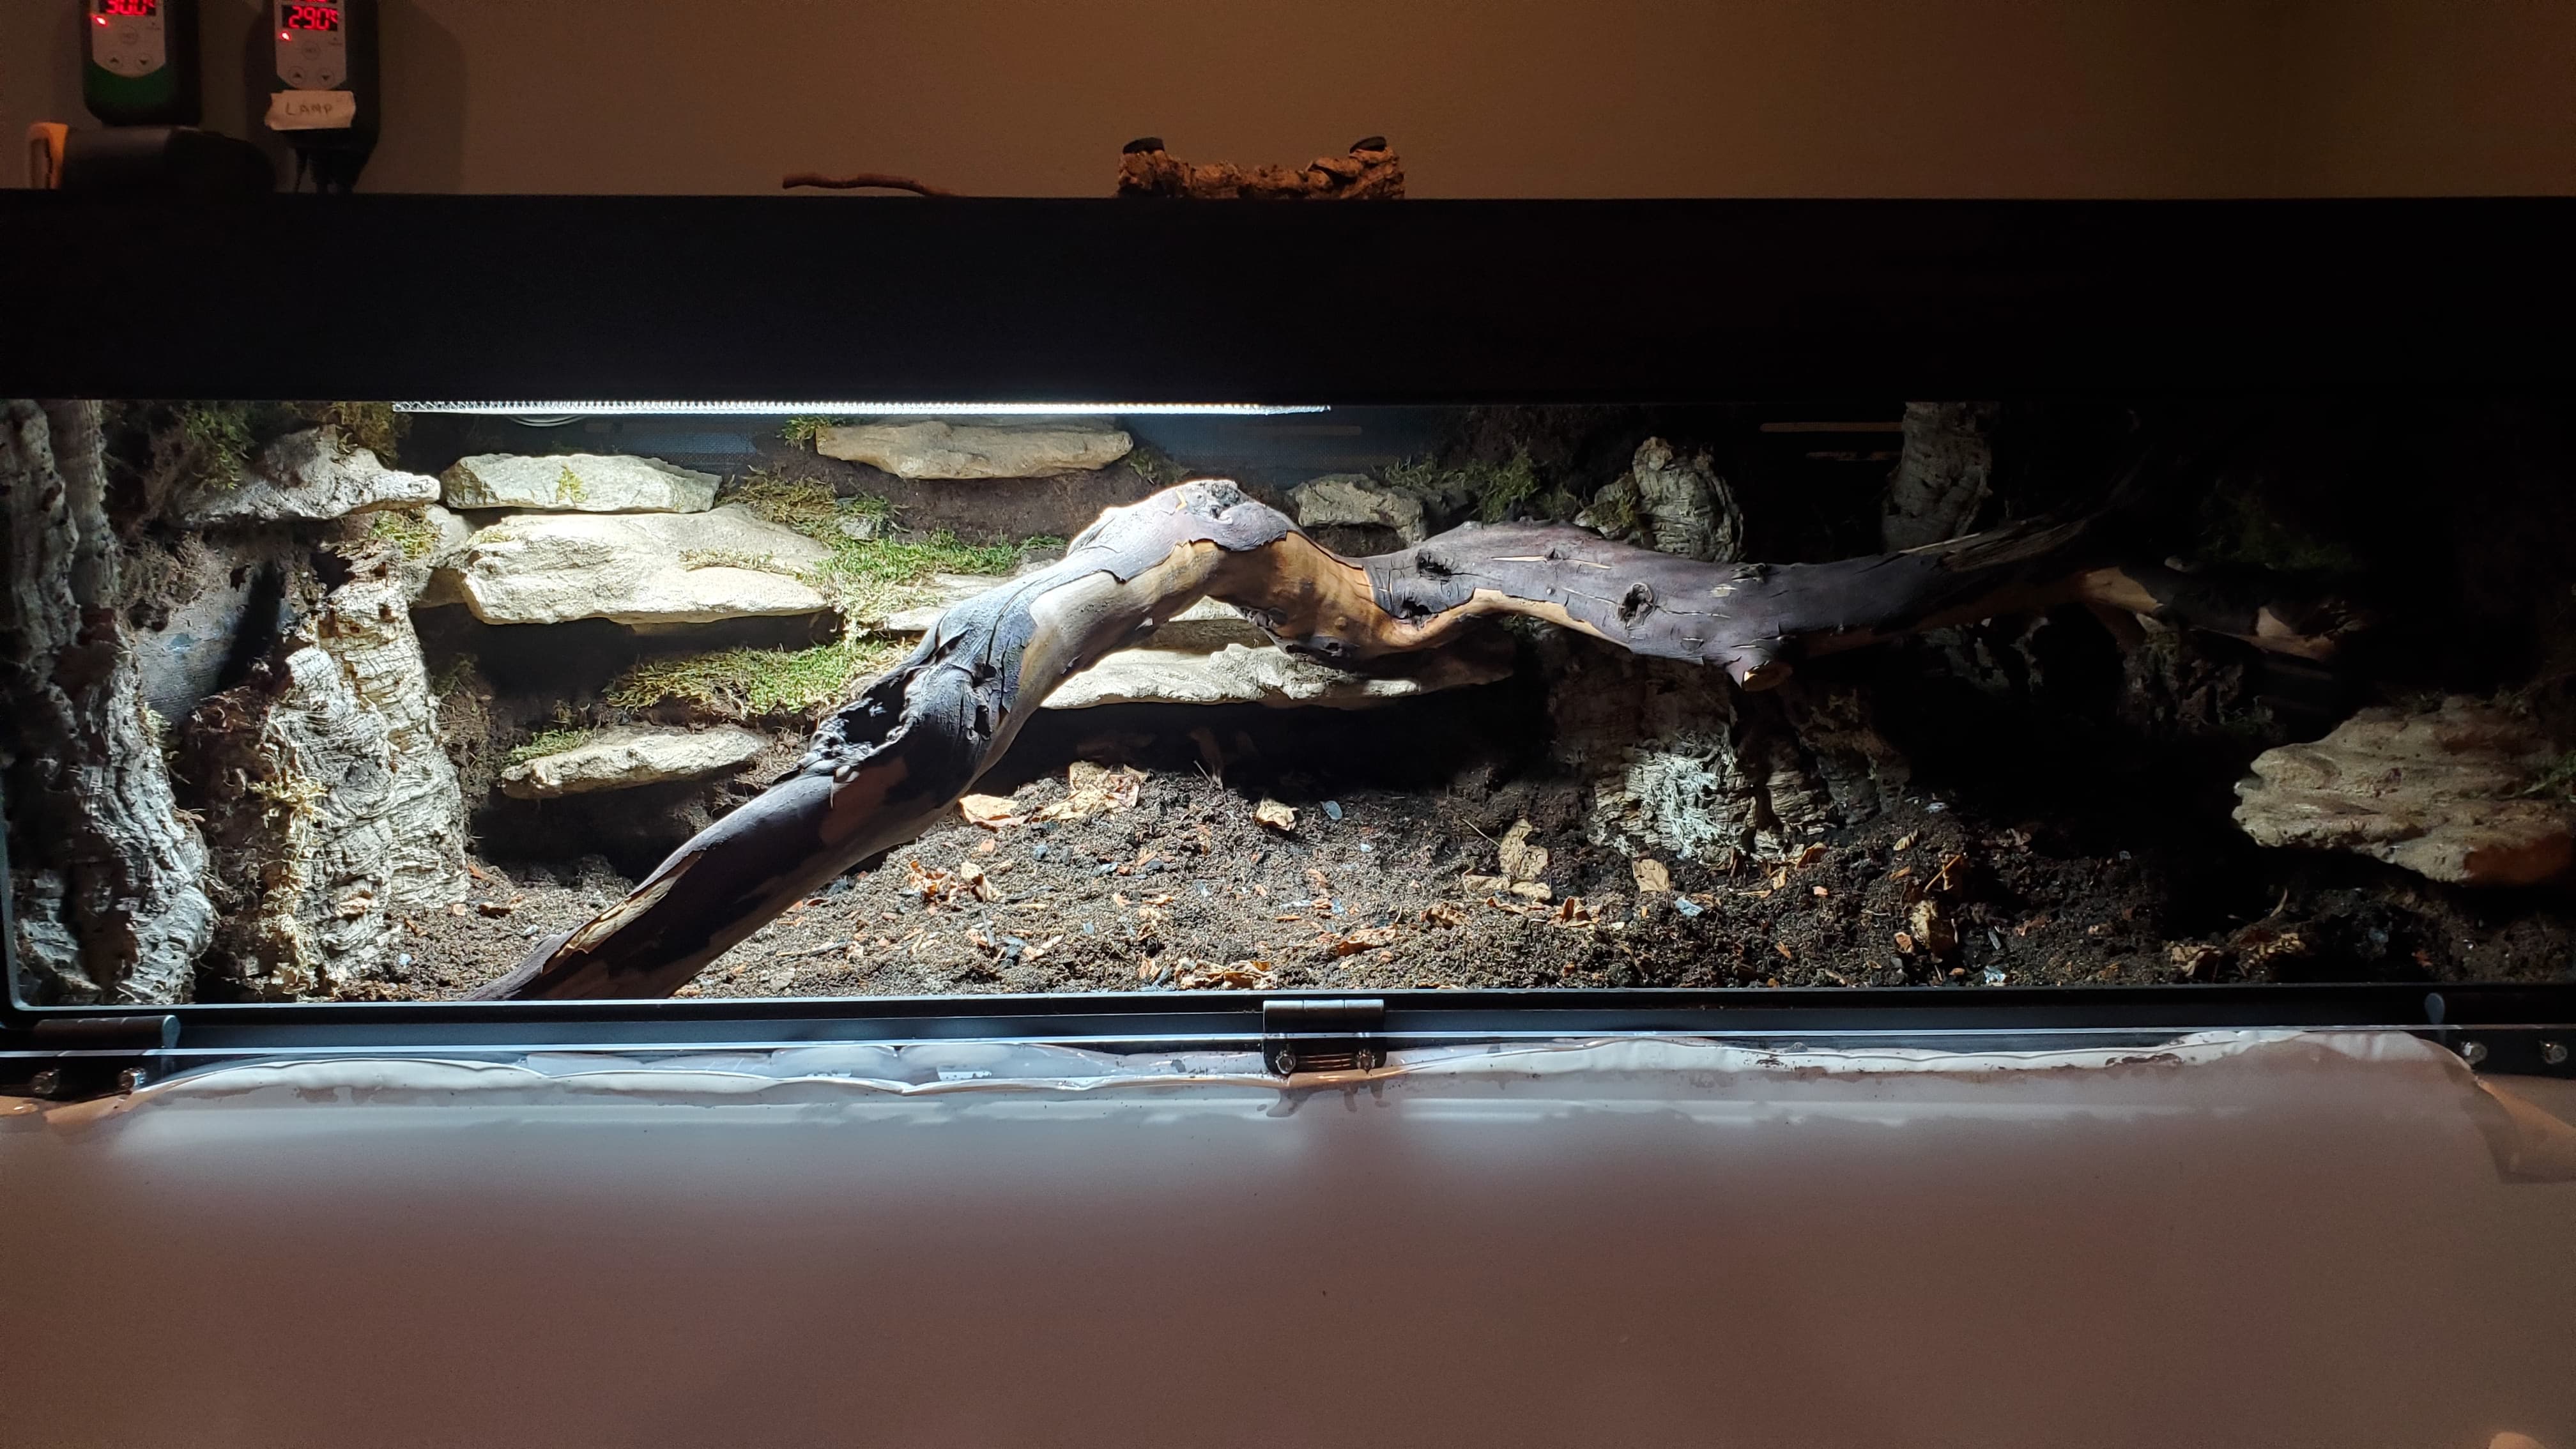
(If you look closely on the left there you can see the very cool arbutus branch that will feature later as a main piece!)
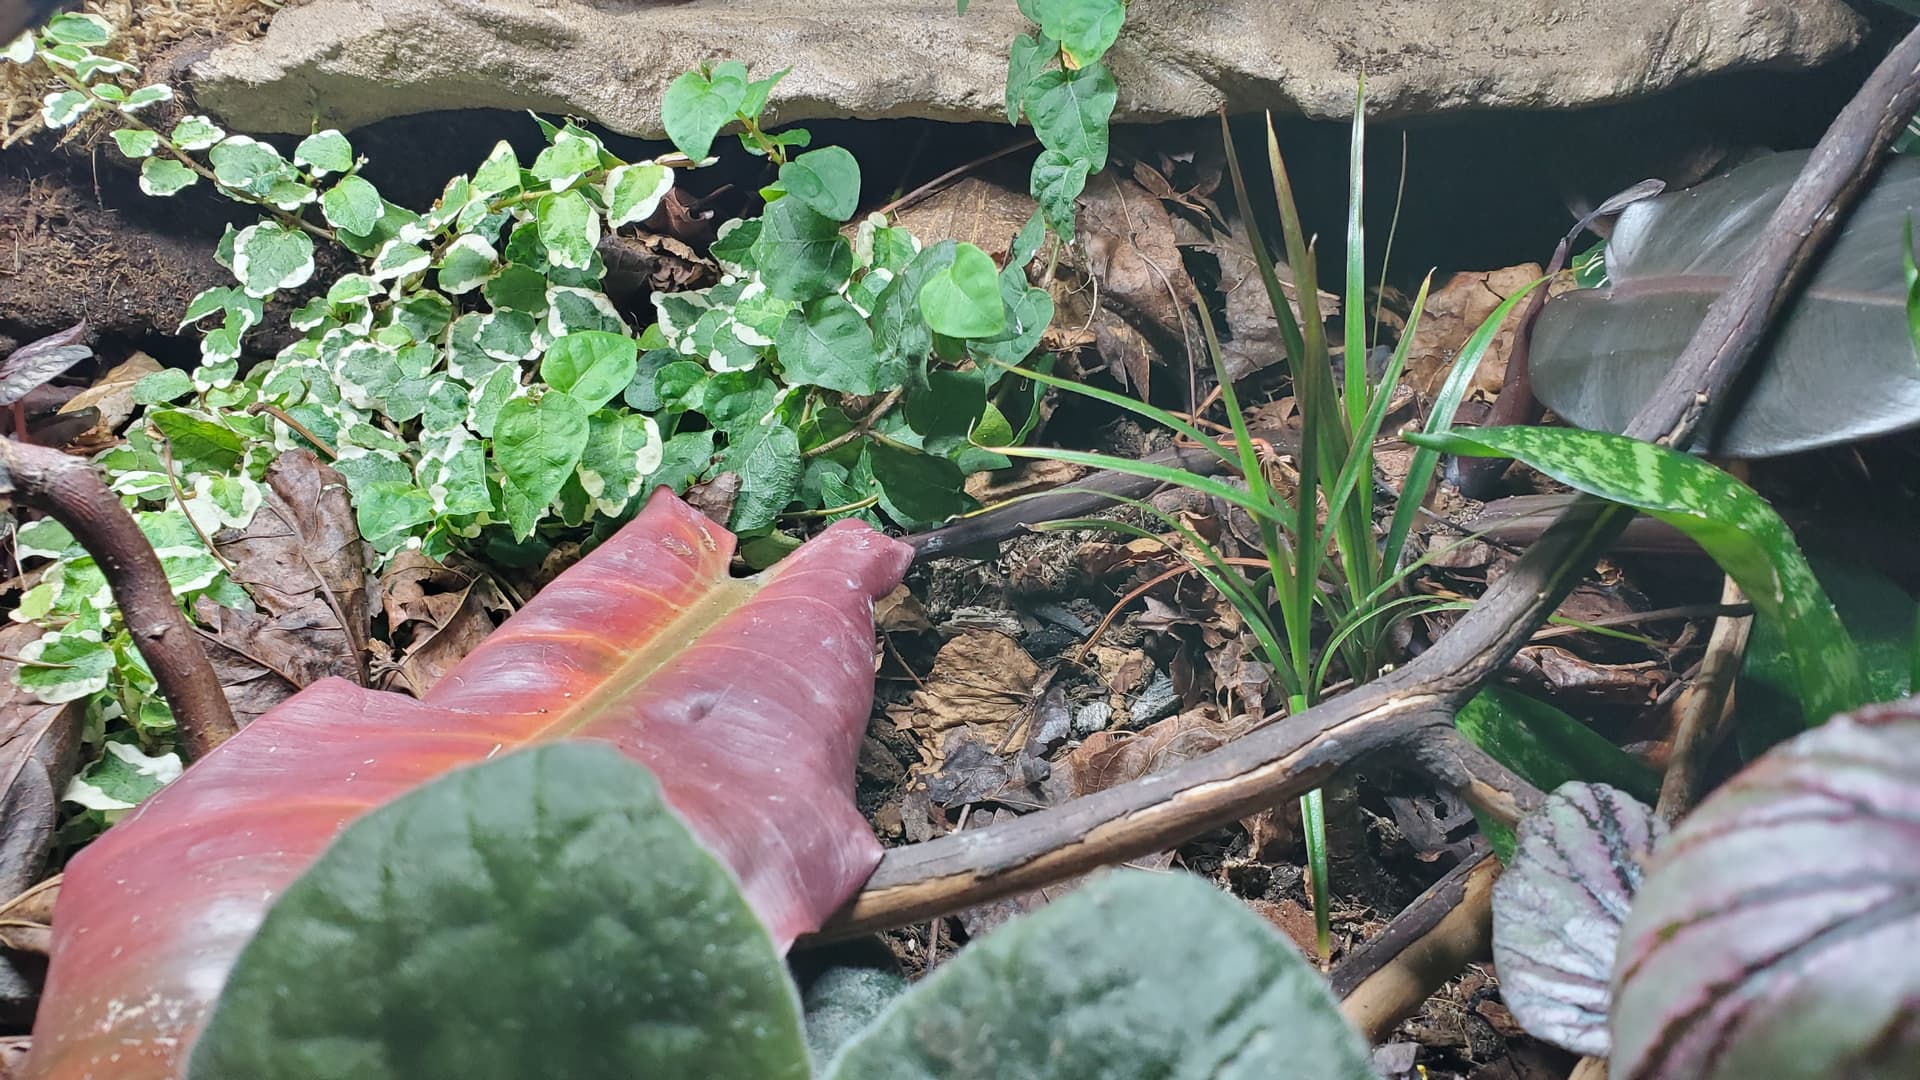
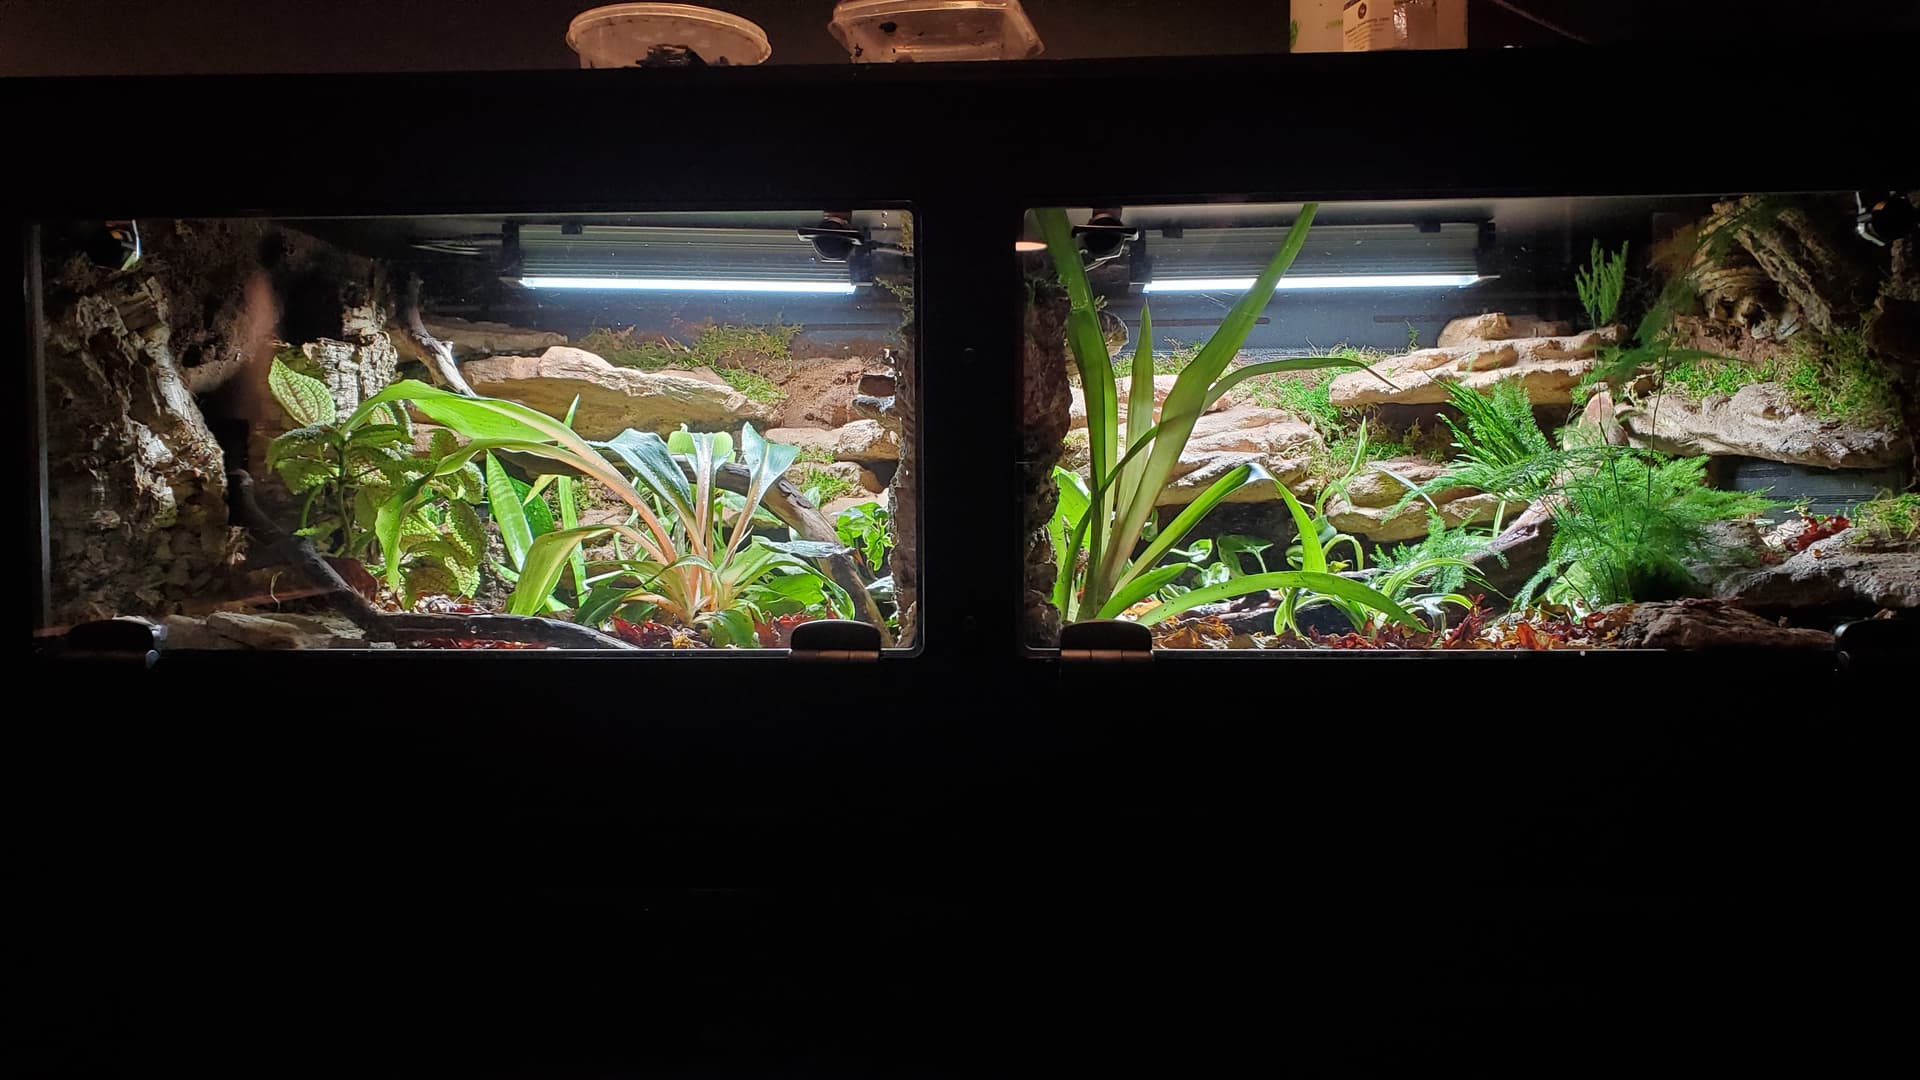
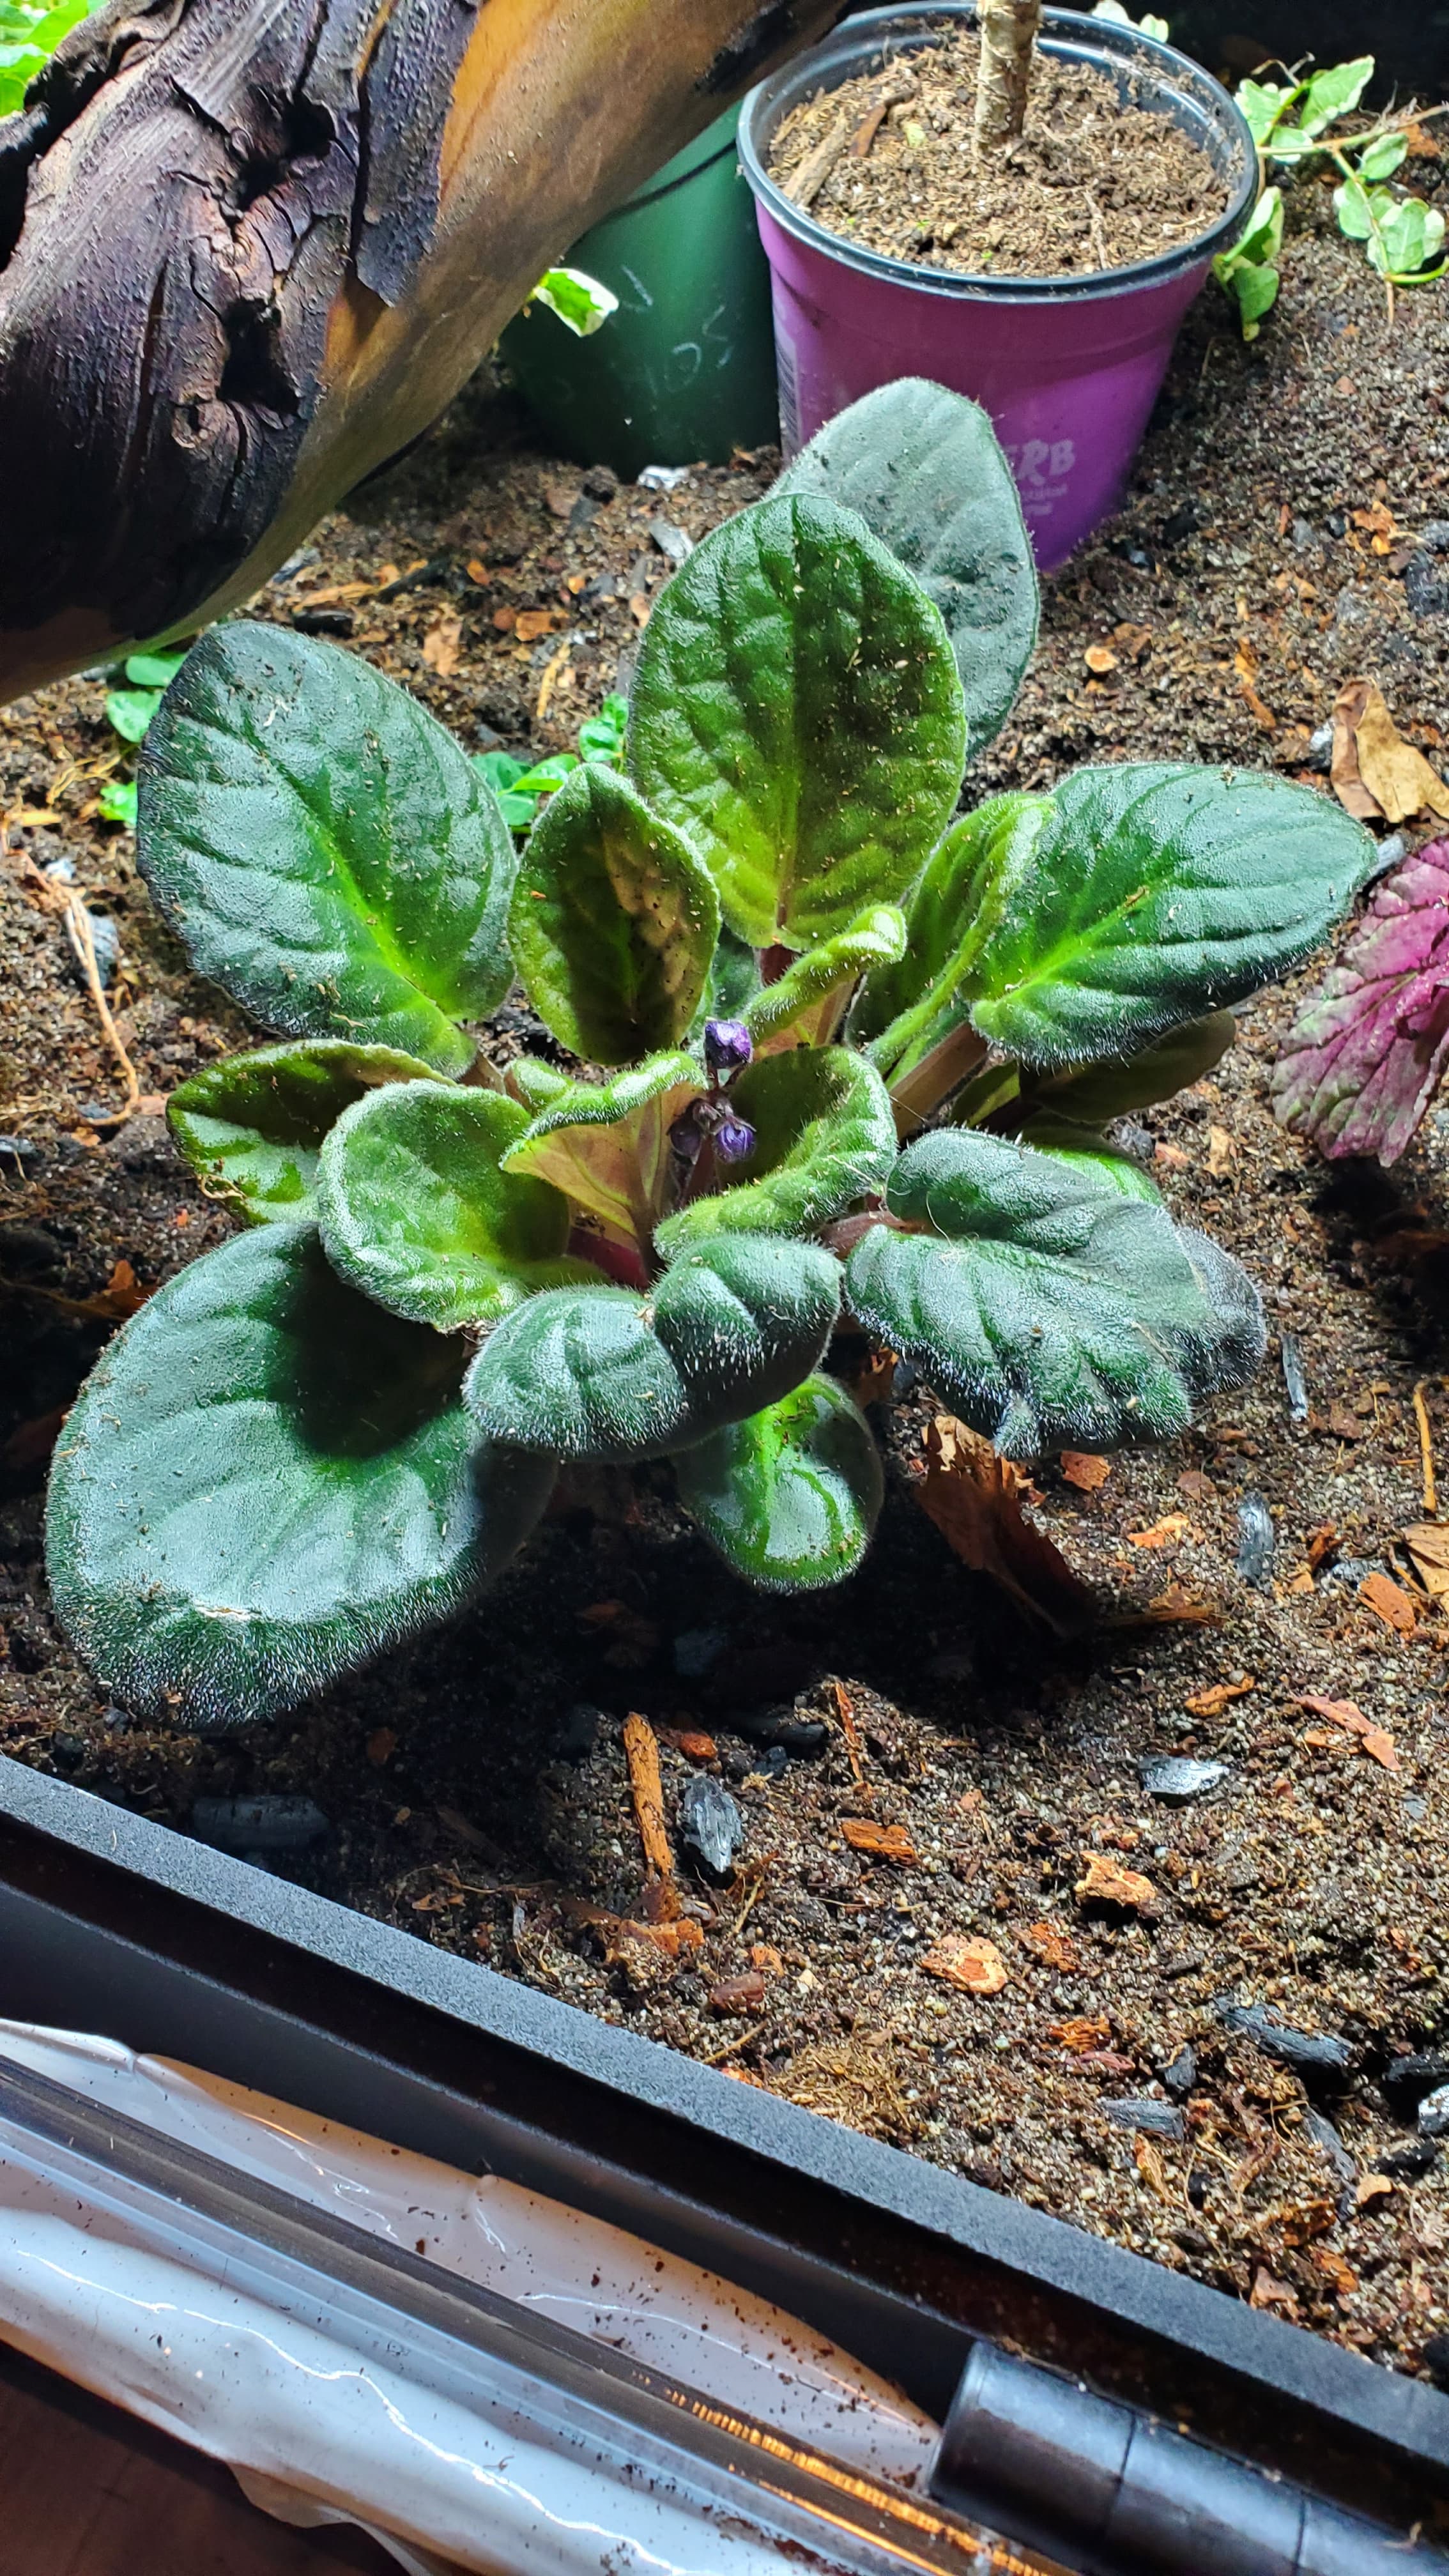
Now, the second fun part! PLANTING!
I had been collecting, washing, and quarantining plants for months now, a la Serpadesign’s plant processing instructions – wash, bleach wash, quarantine. So I had a bunch of very happy plants ready to go. I was aiming for a darker theme to the foliage in this terrarium, since Andy’s a beautiful dove grey and I wanted her to stand out, so there’s a lot of purples, grey-greens, and dark greens featuring here. Learning from Hestia’s terrarium, I did my best to sort out what plant would be happiest in what conditions, but I expect some attrition will be inevitable. I have backups of other, potentially more compatible species waiting.
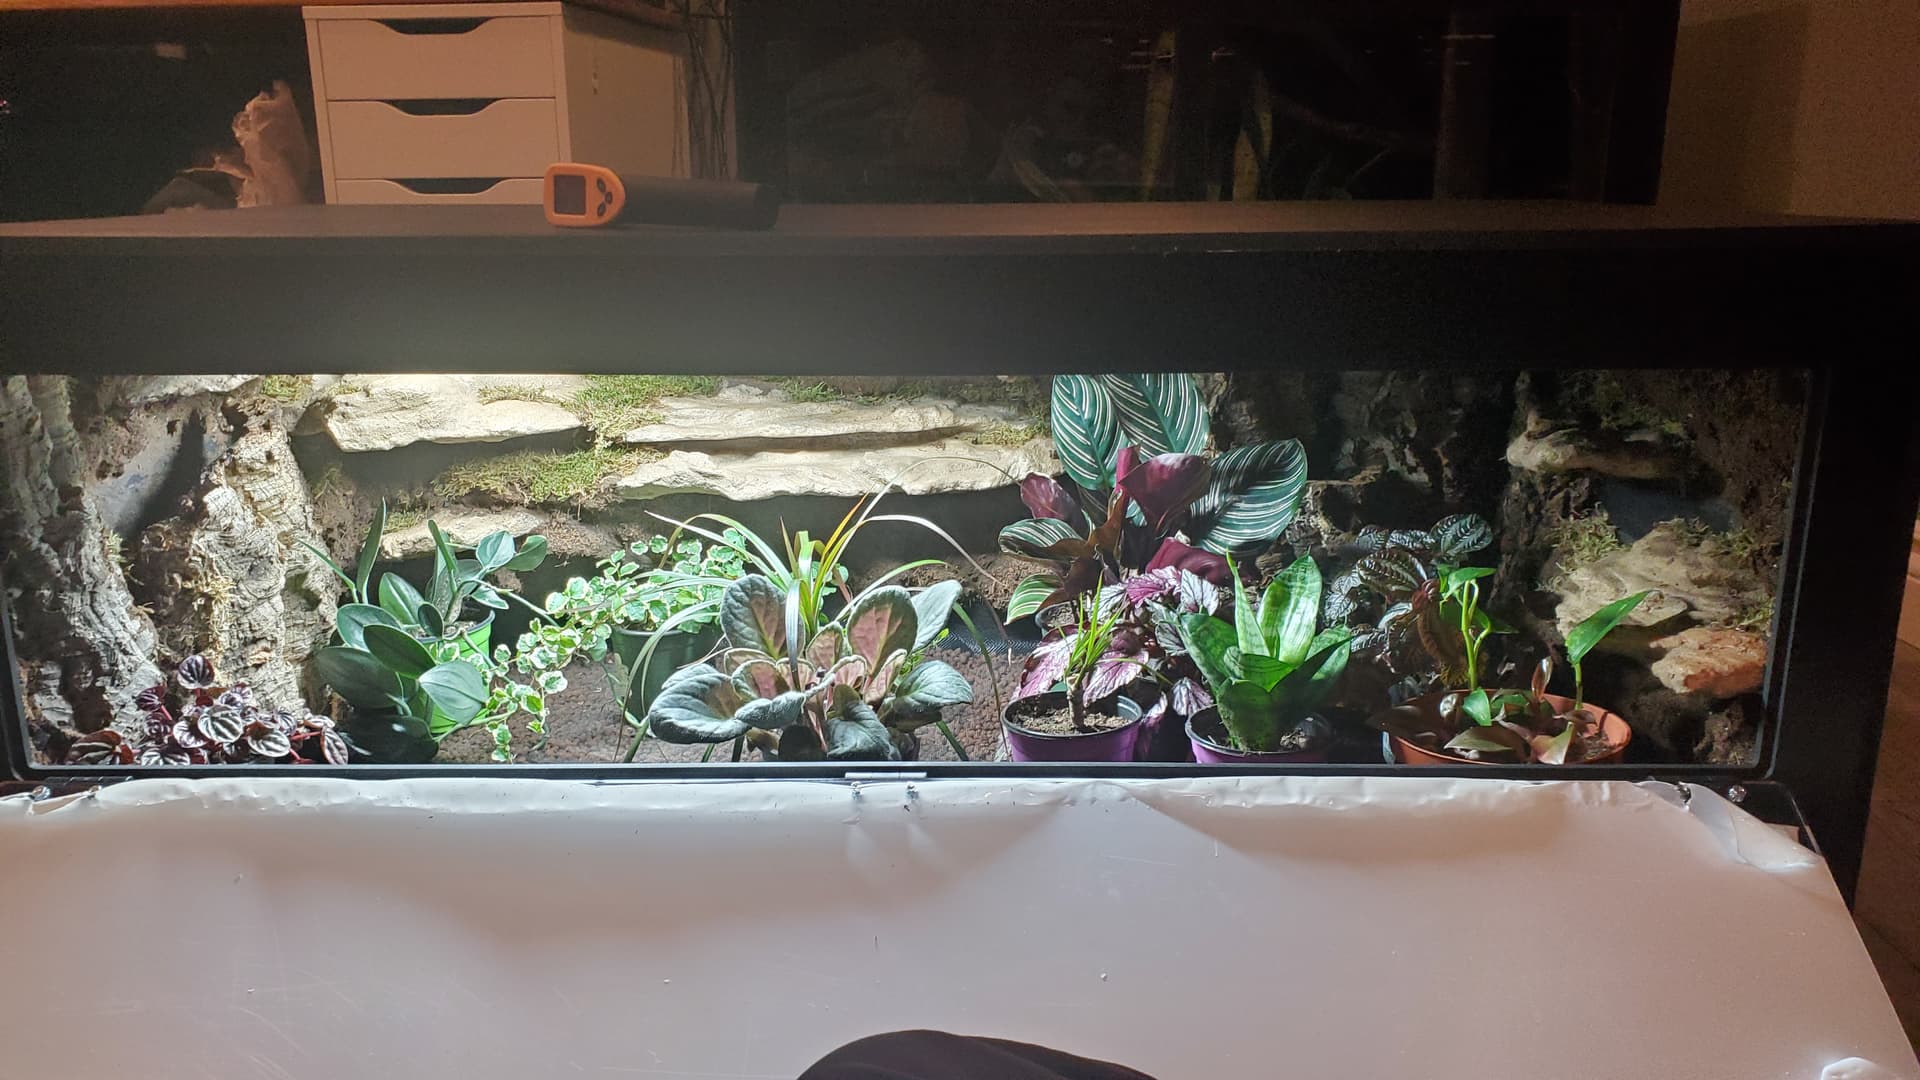
First I spent some time trying to figure out how the big feature-branch was going to sit. (Not gonna lie, I loved it a lot at this stage. You could see the backdrop rocks really well. But what is a bioactive without plants?? I knew it would get even better.)

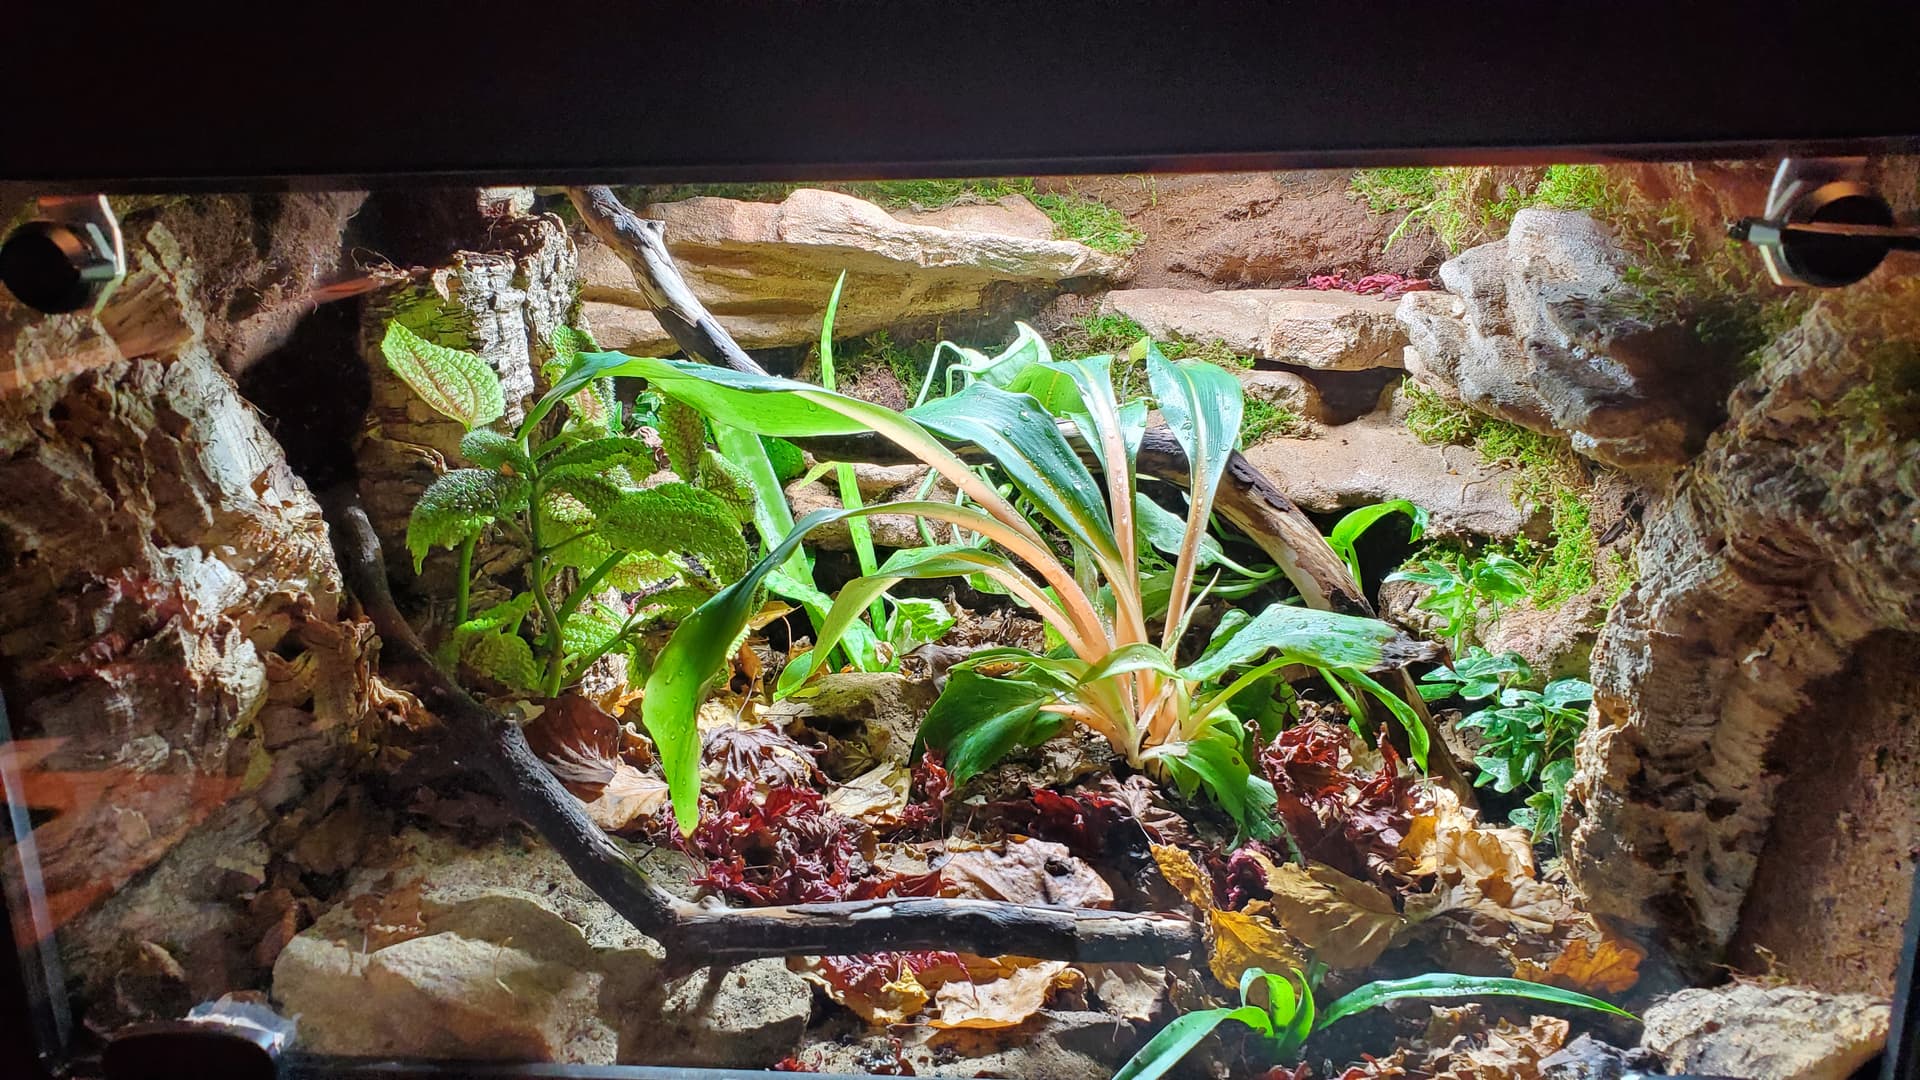
Cribbed another idea from SerpaDesign for the plants that like their soil chunkier and better-draining than the basic substrate I’d mixed up, and tied chunky bags around some of their root balls.
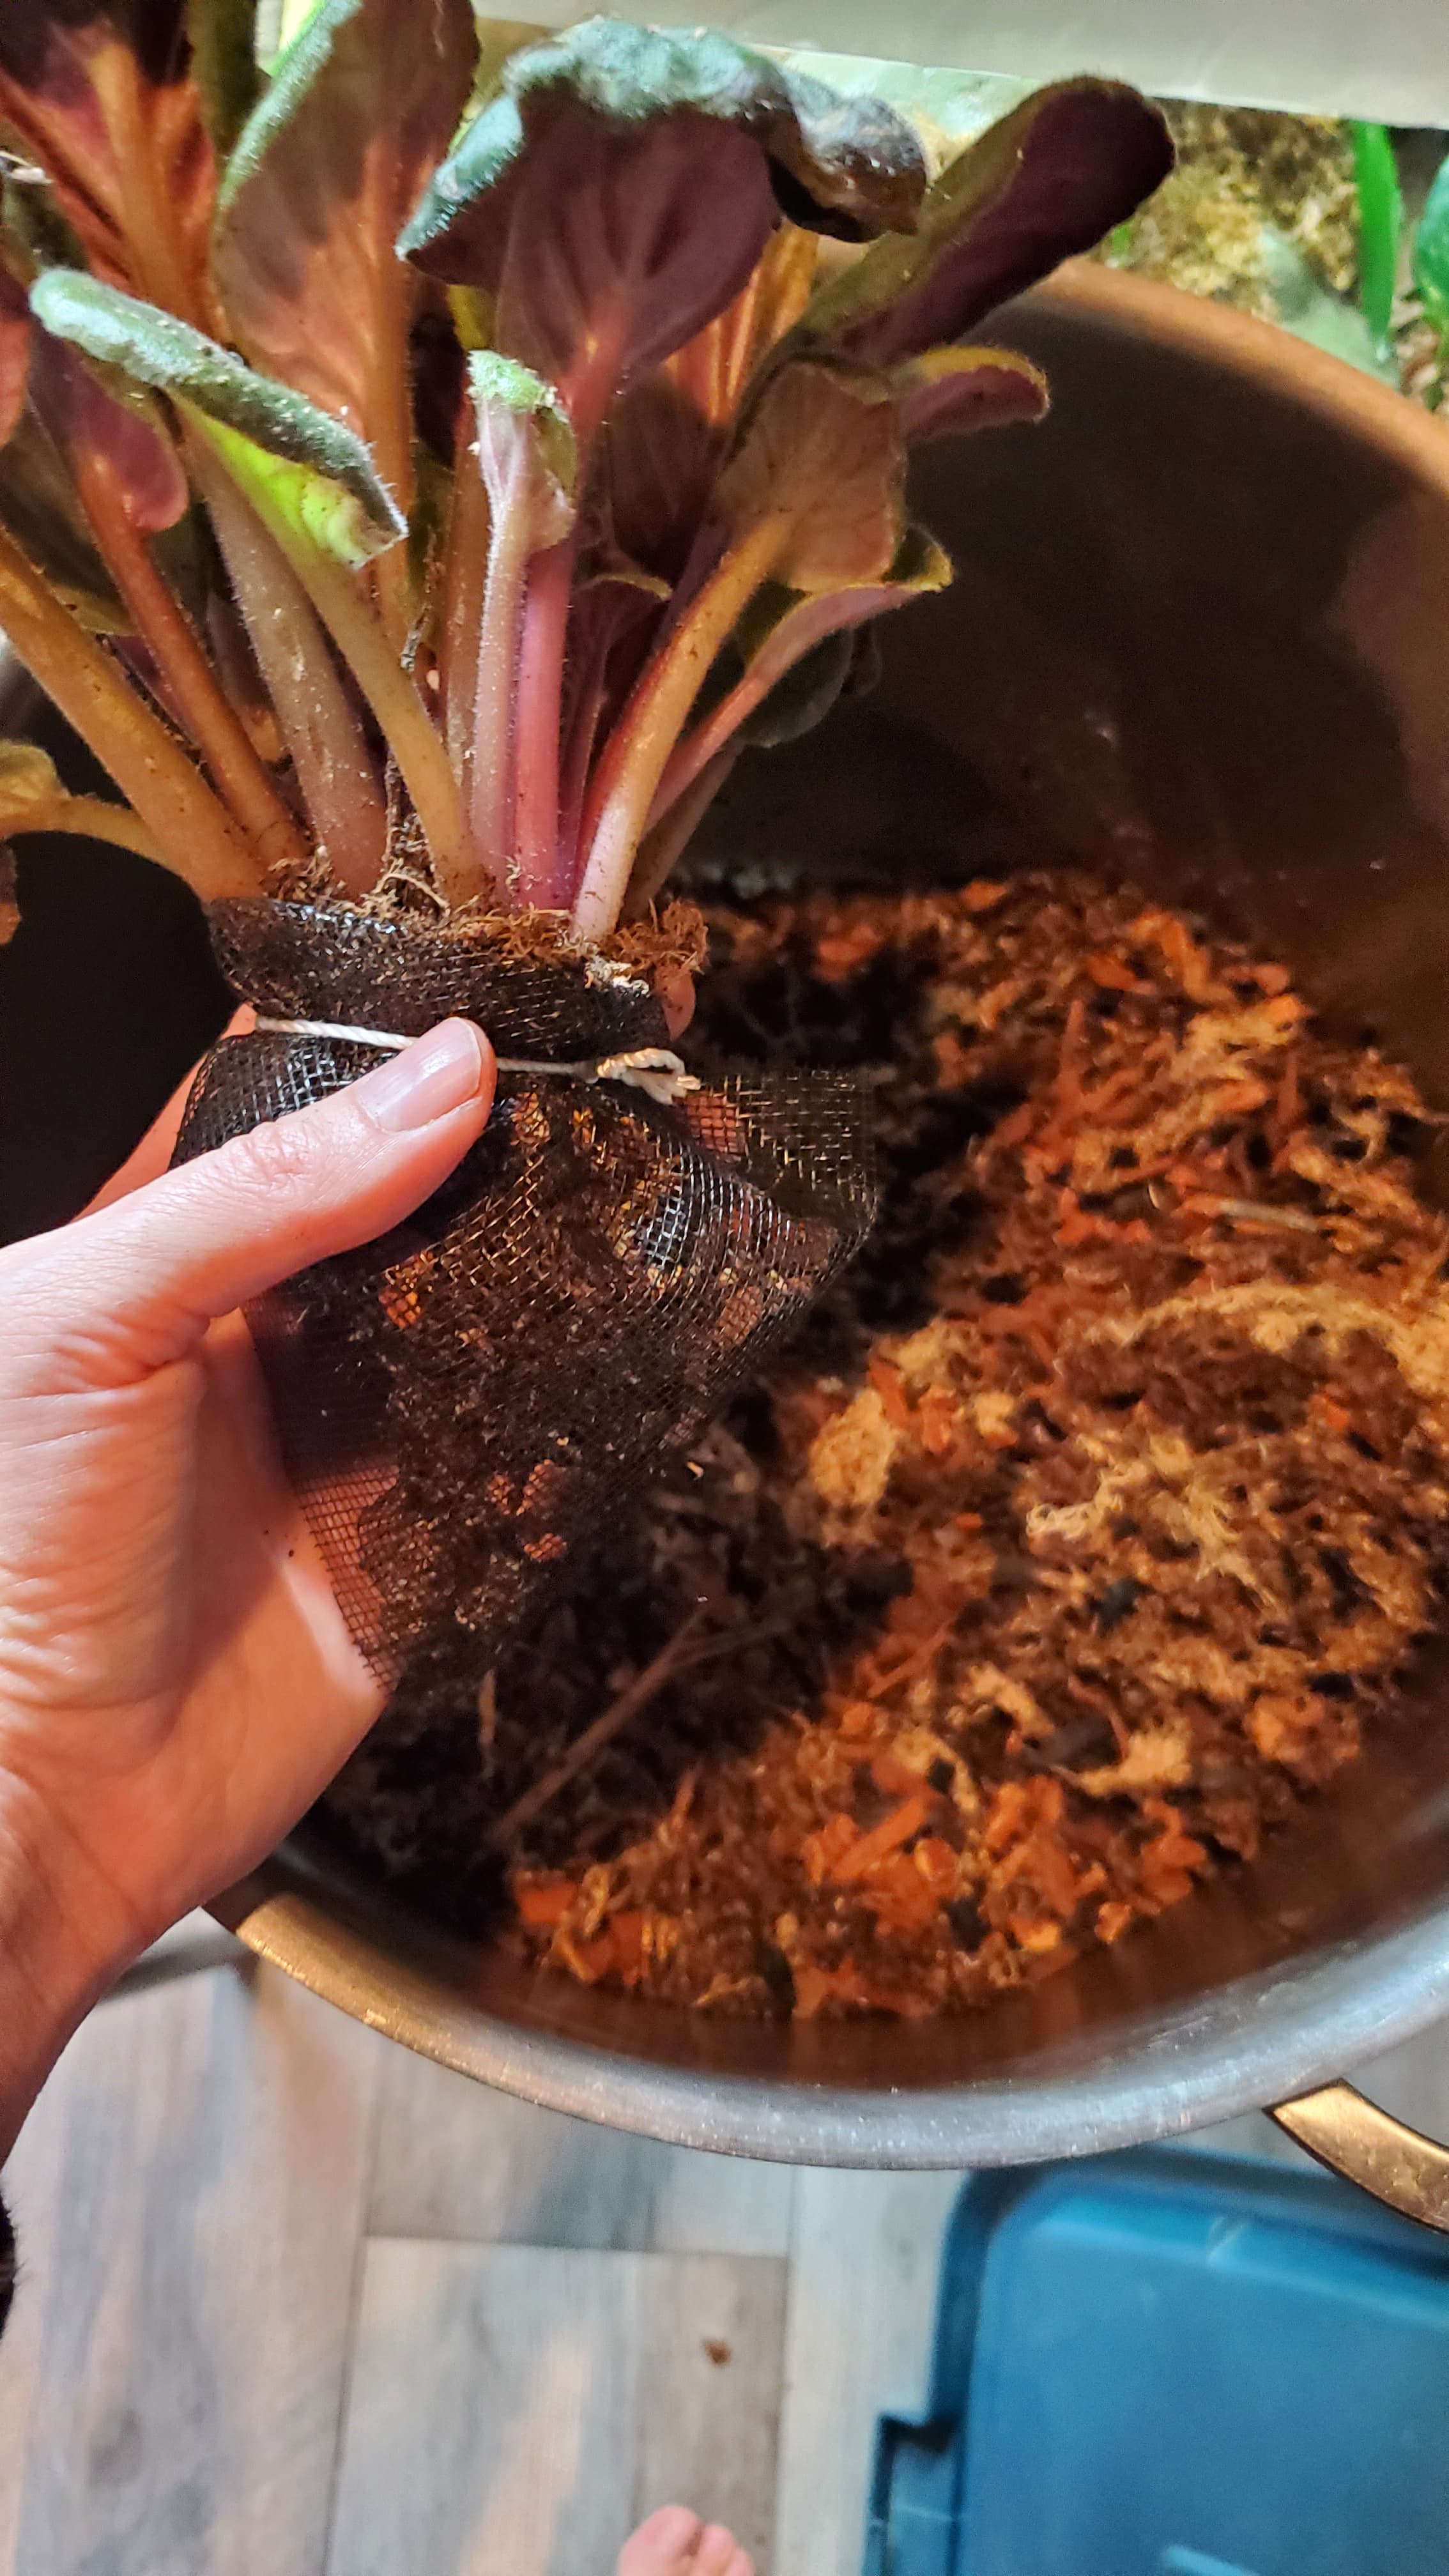
Then: The Planting!
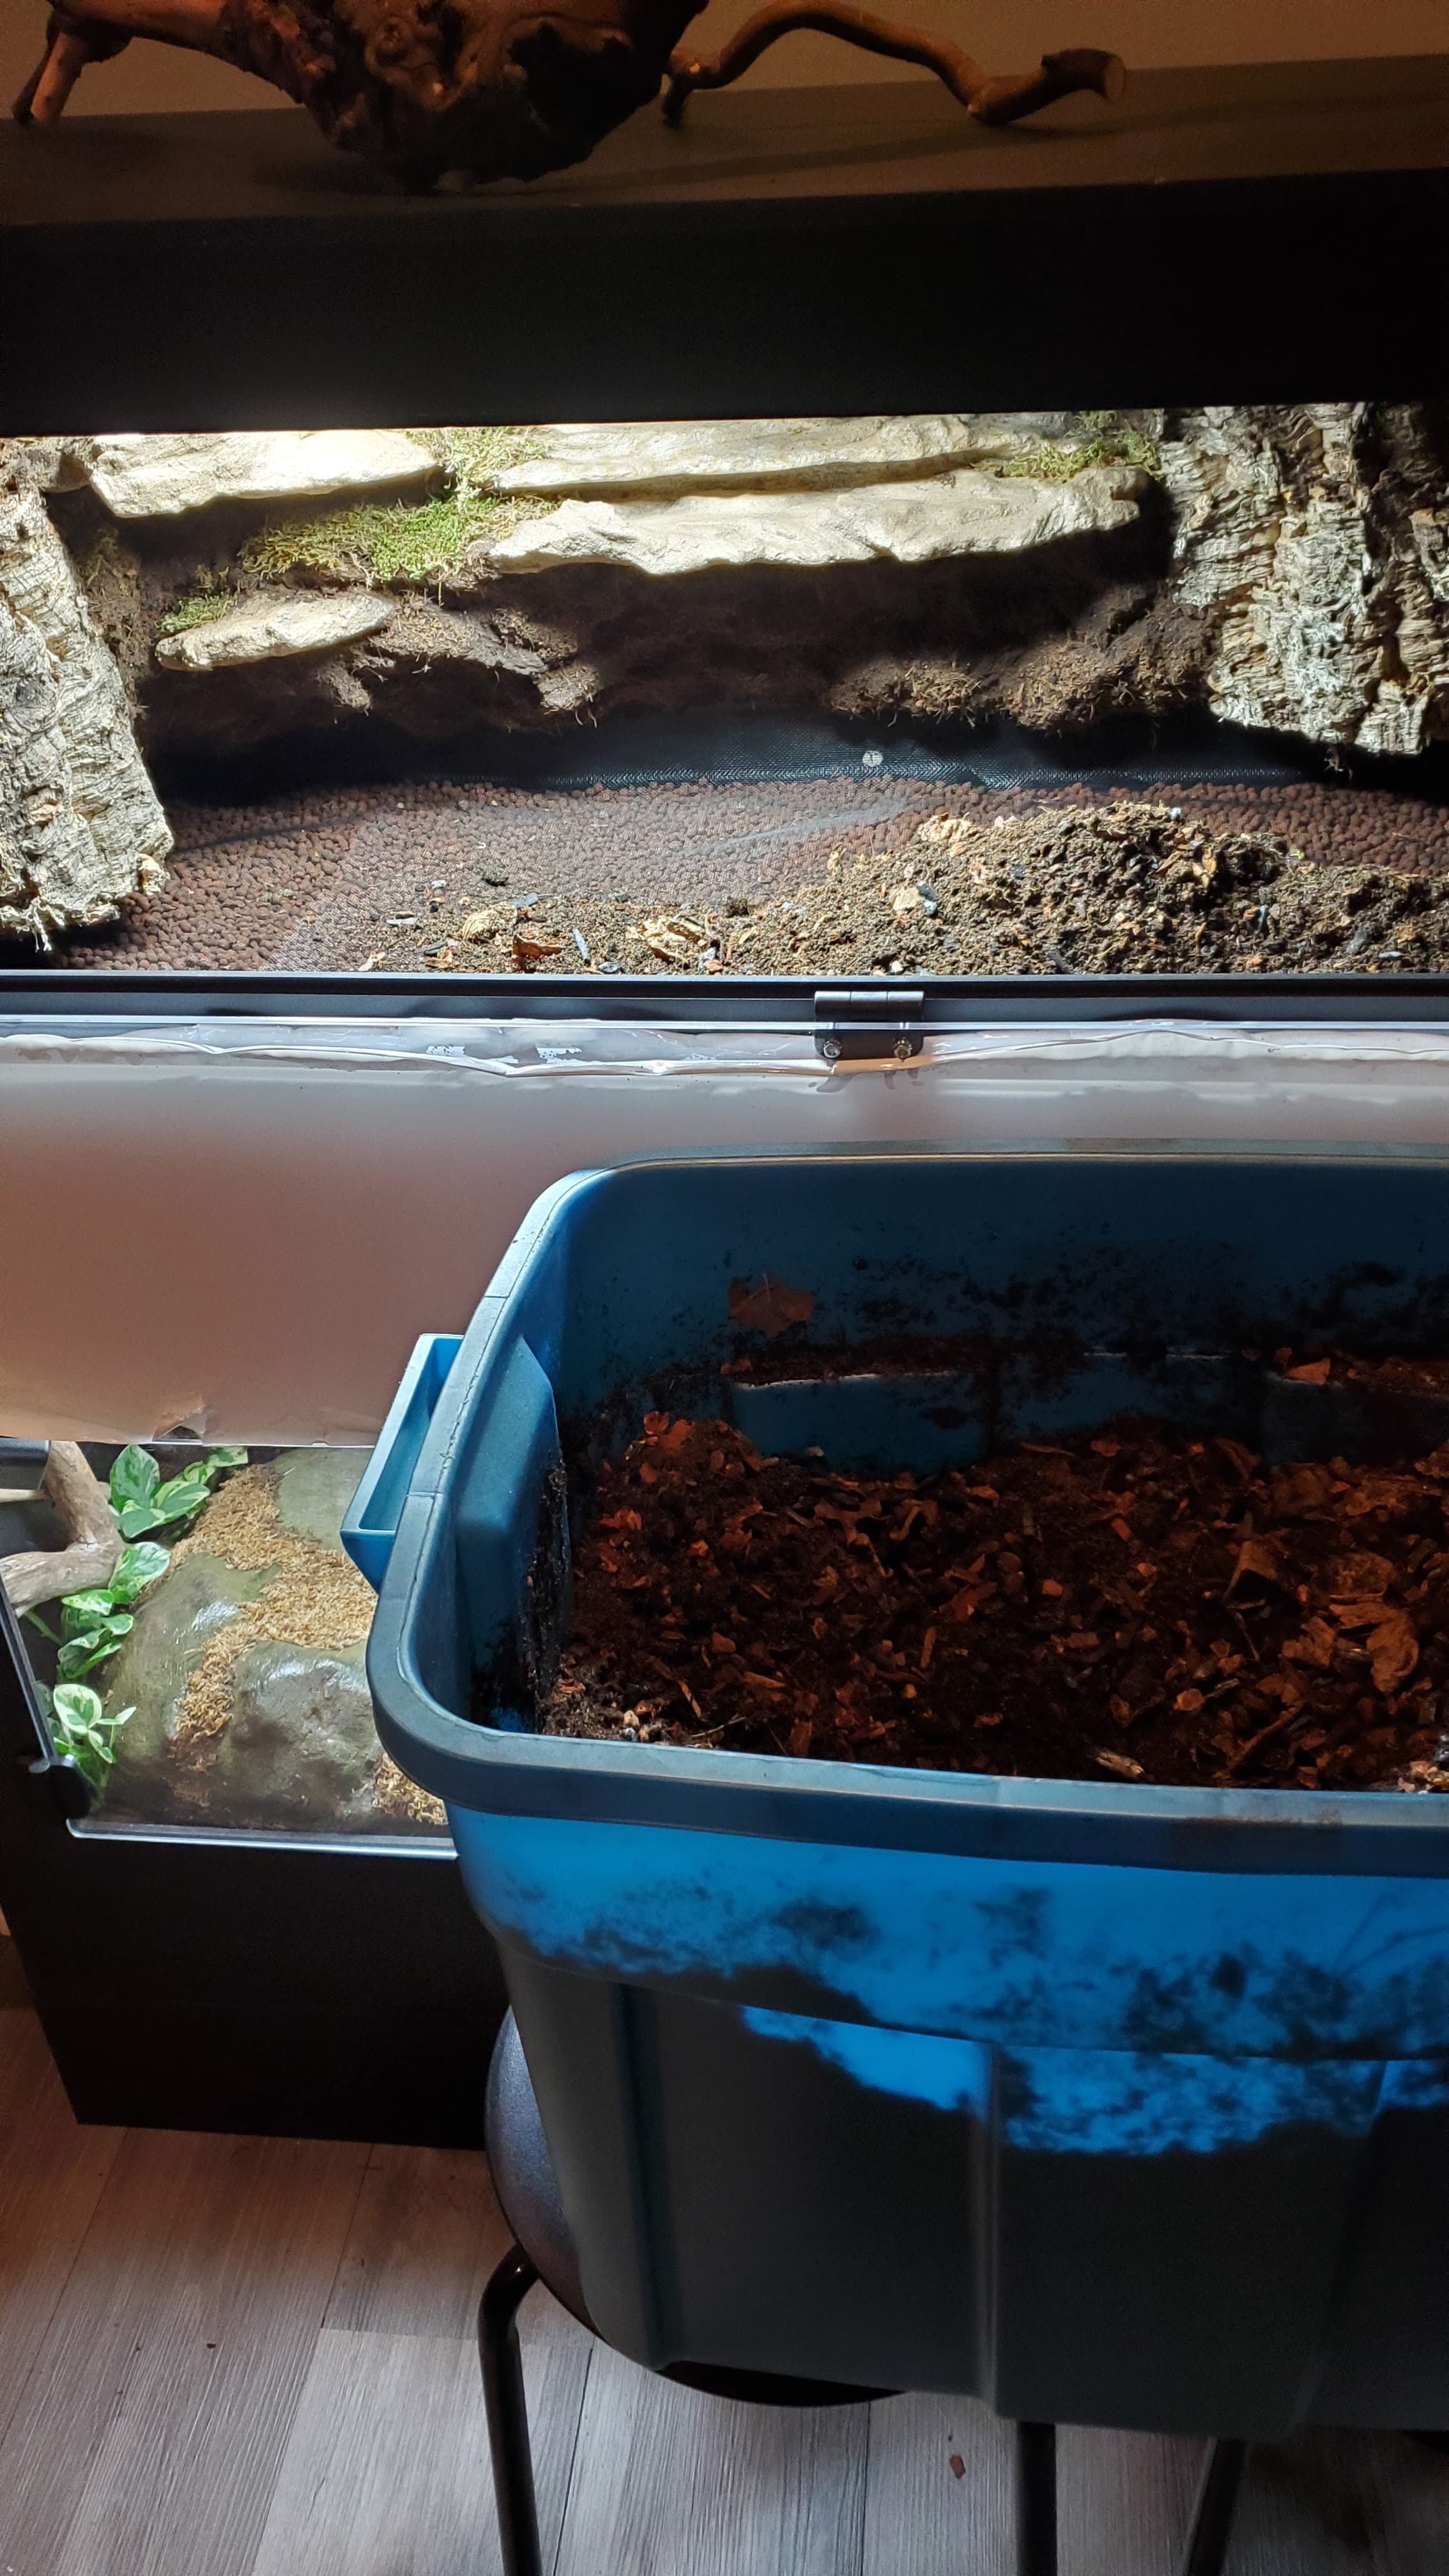
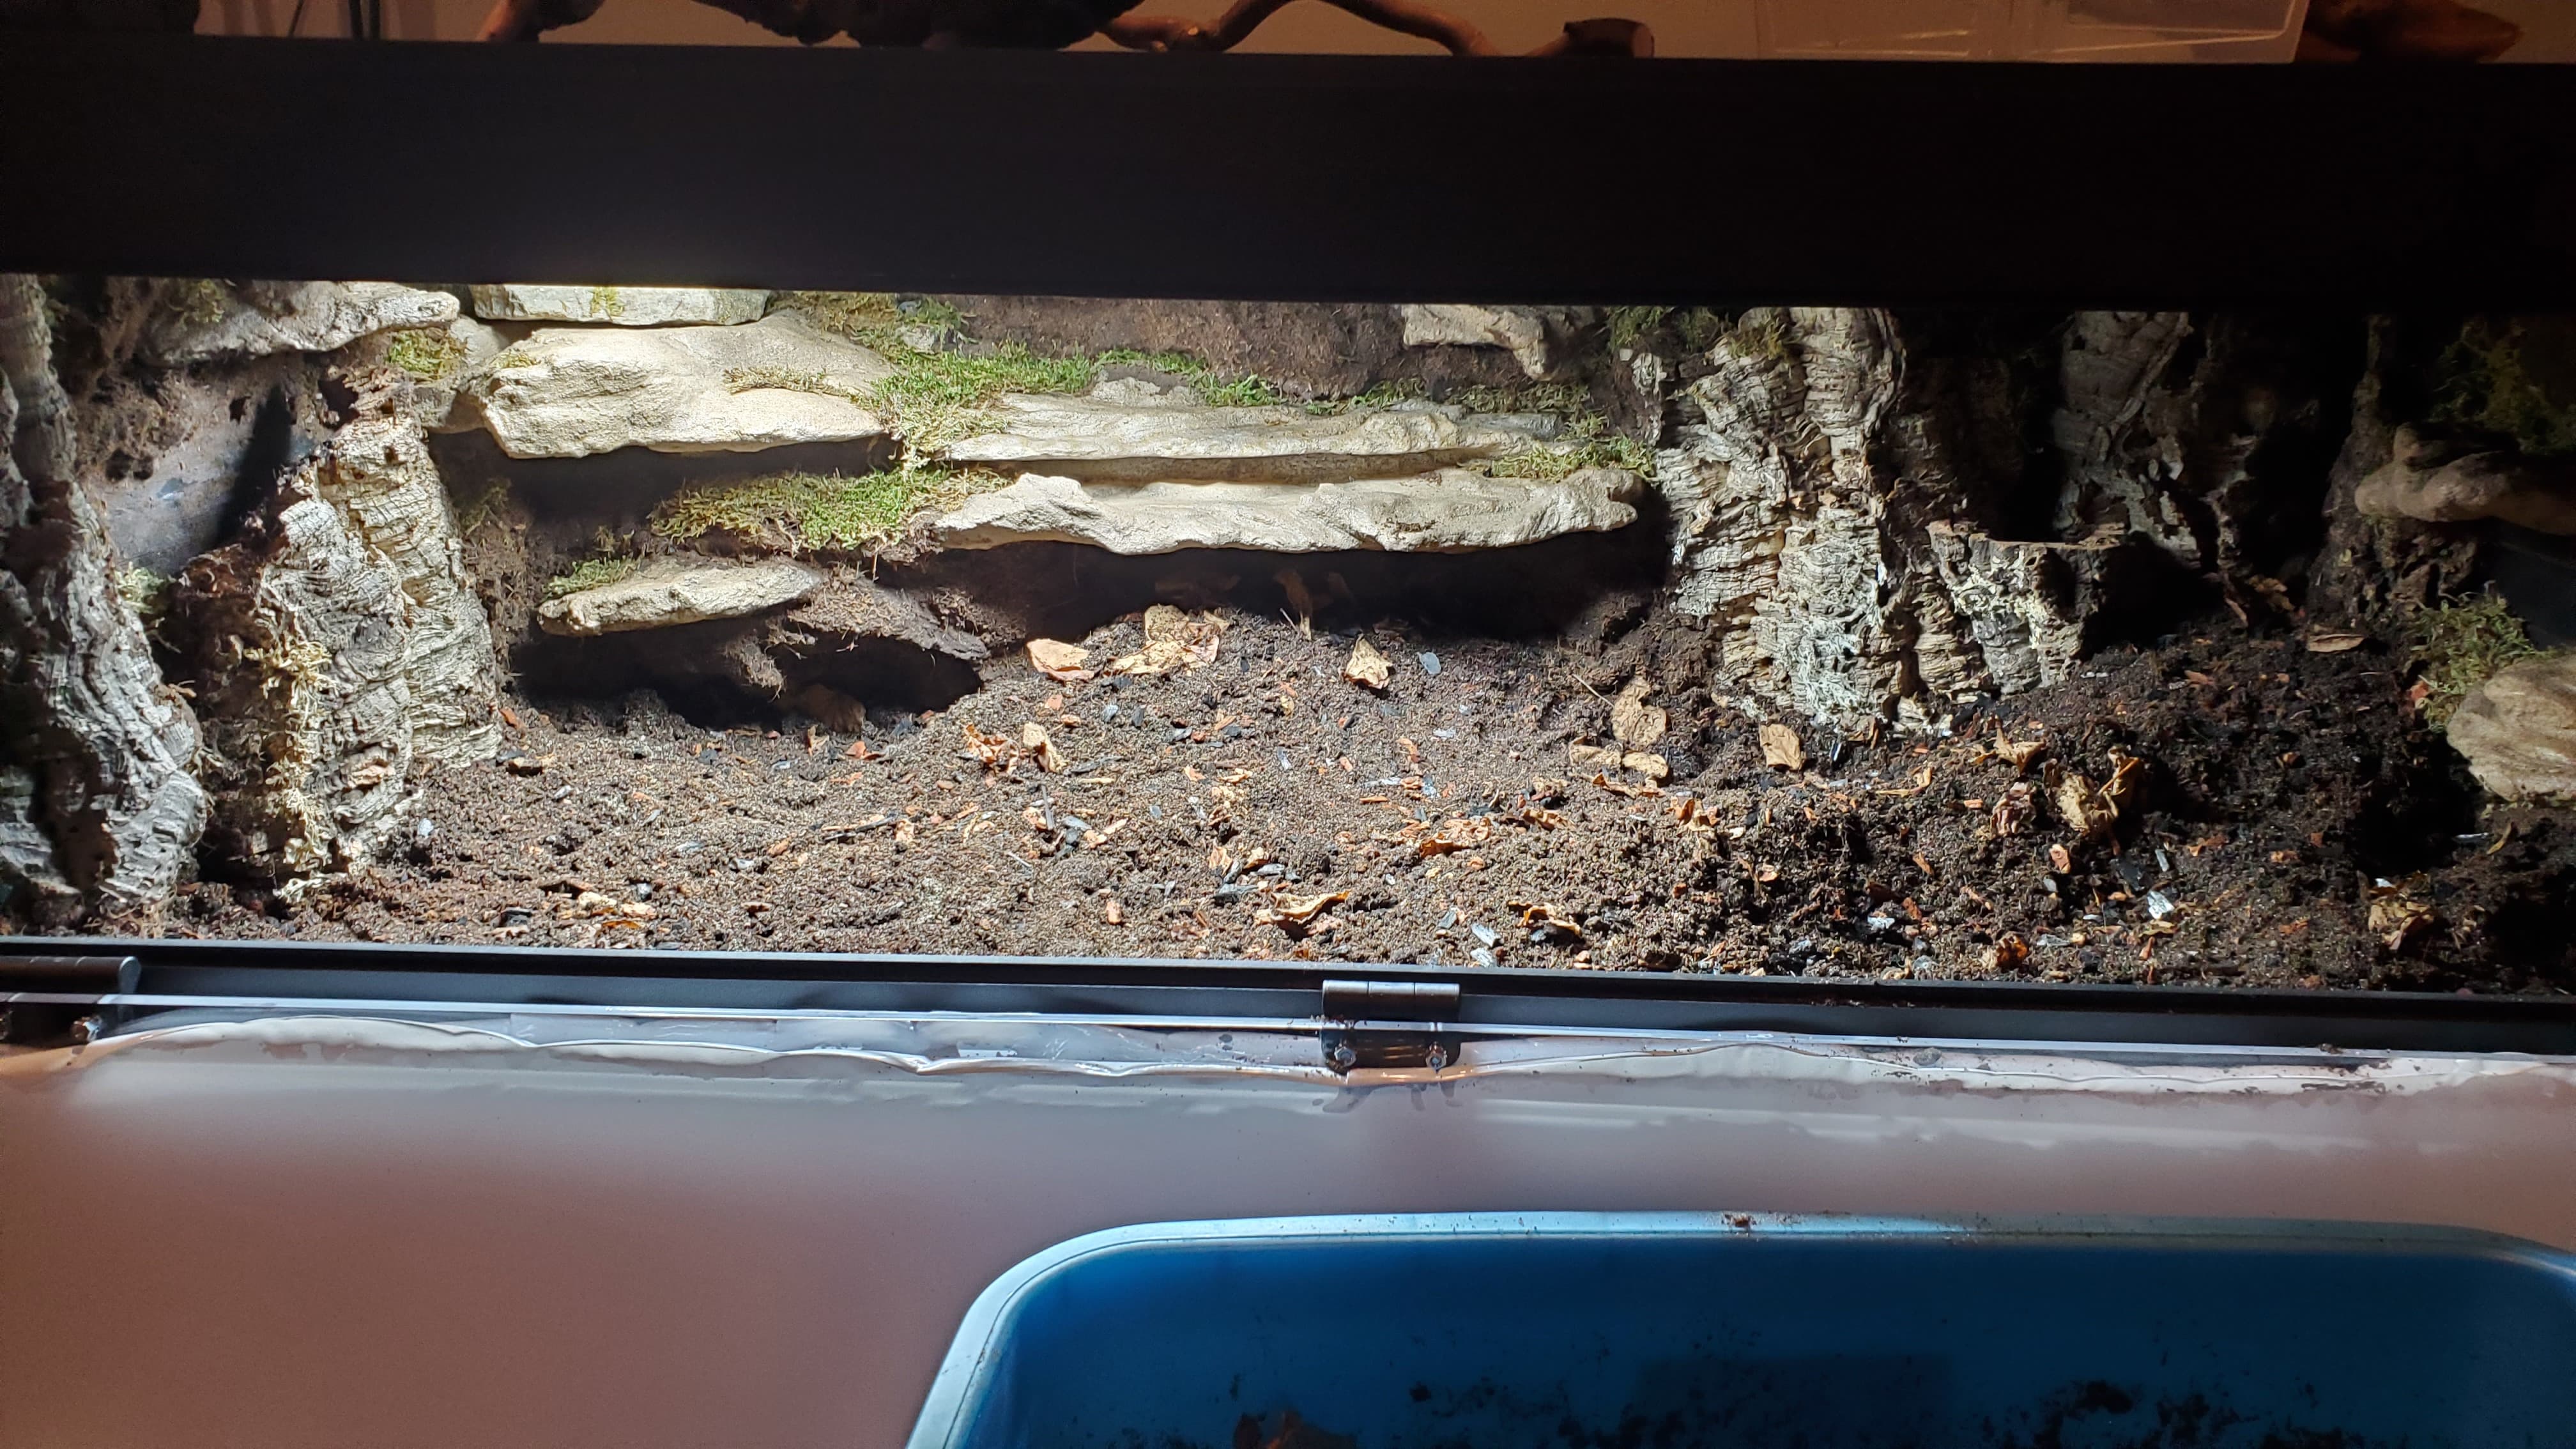
Introduced some isopods and springtails to jump-start the ecosystem, as well as some beneficial bacterial cultures I found available at a local grow shop. (I caught a video of the first isopods entering but woe, it’s too big for MM!)
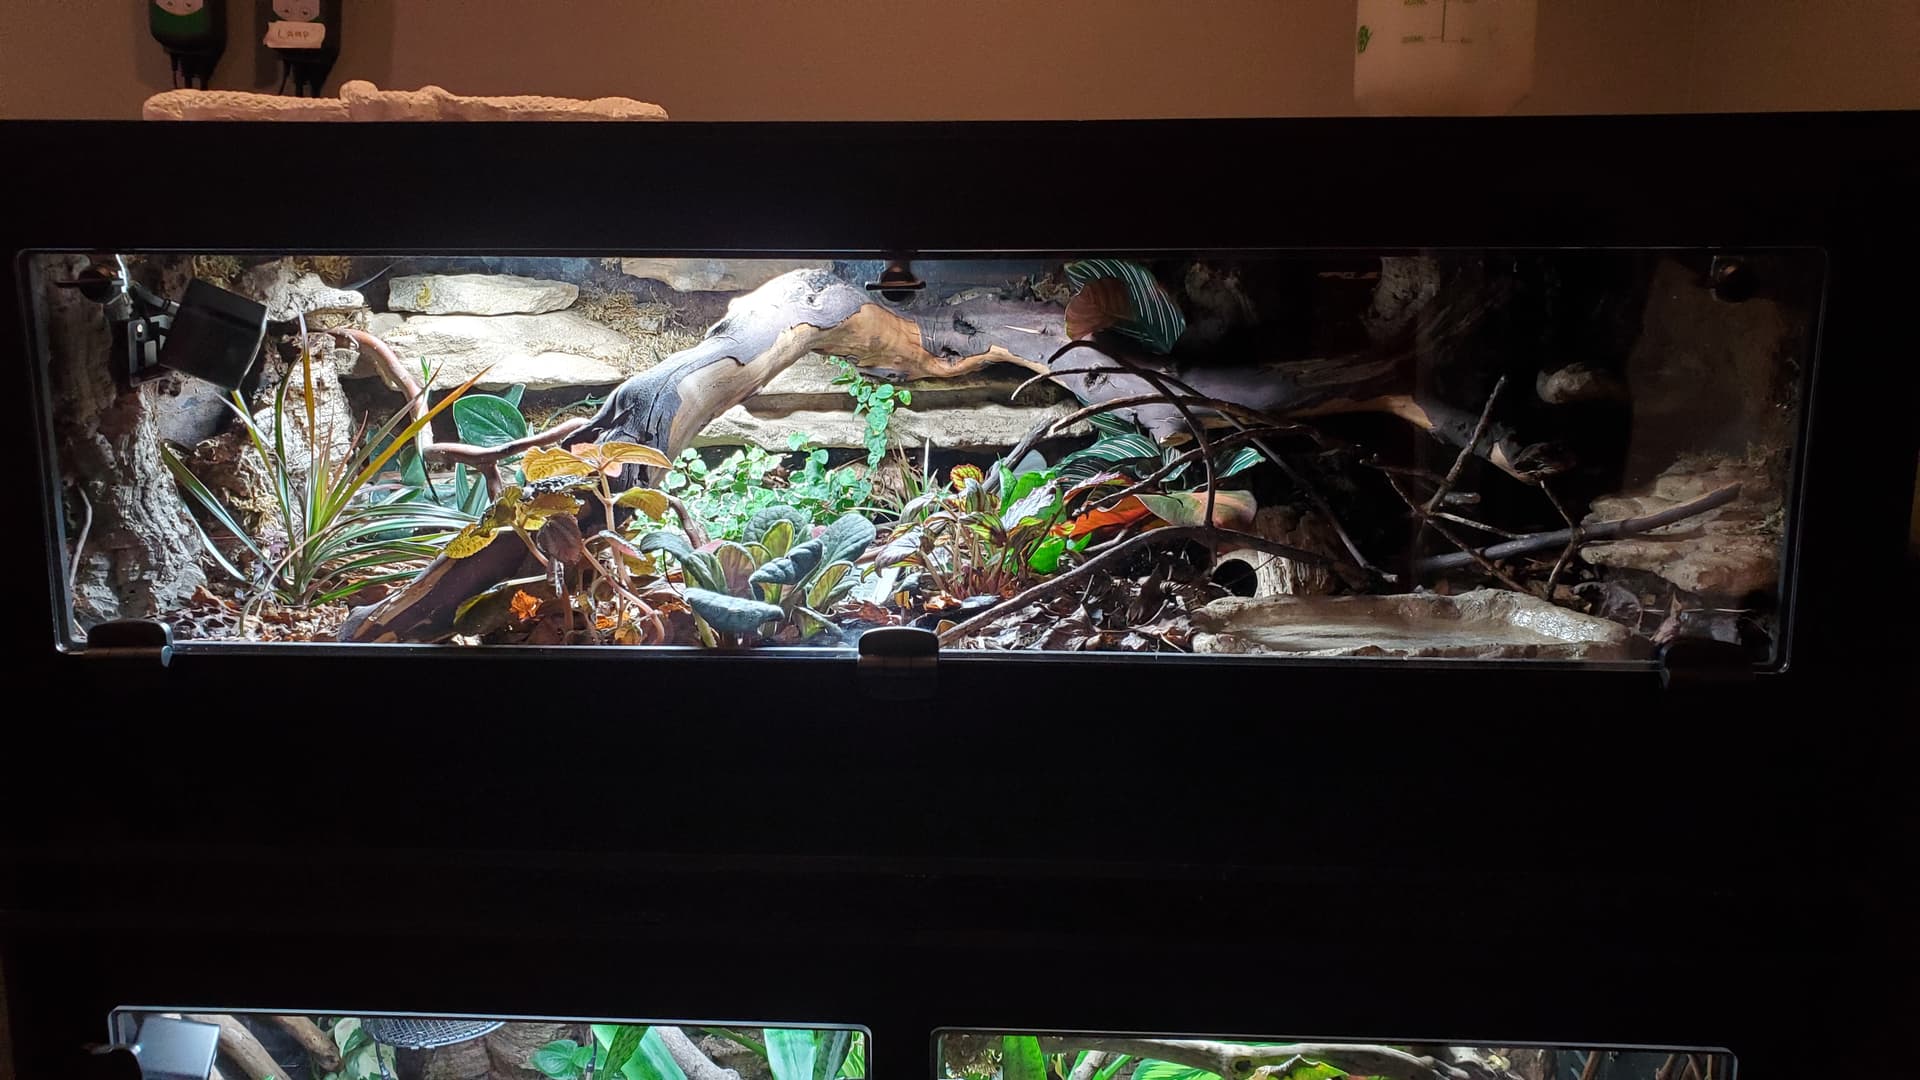
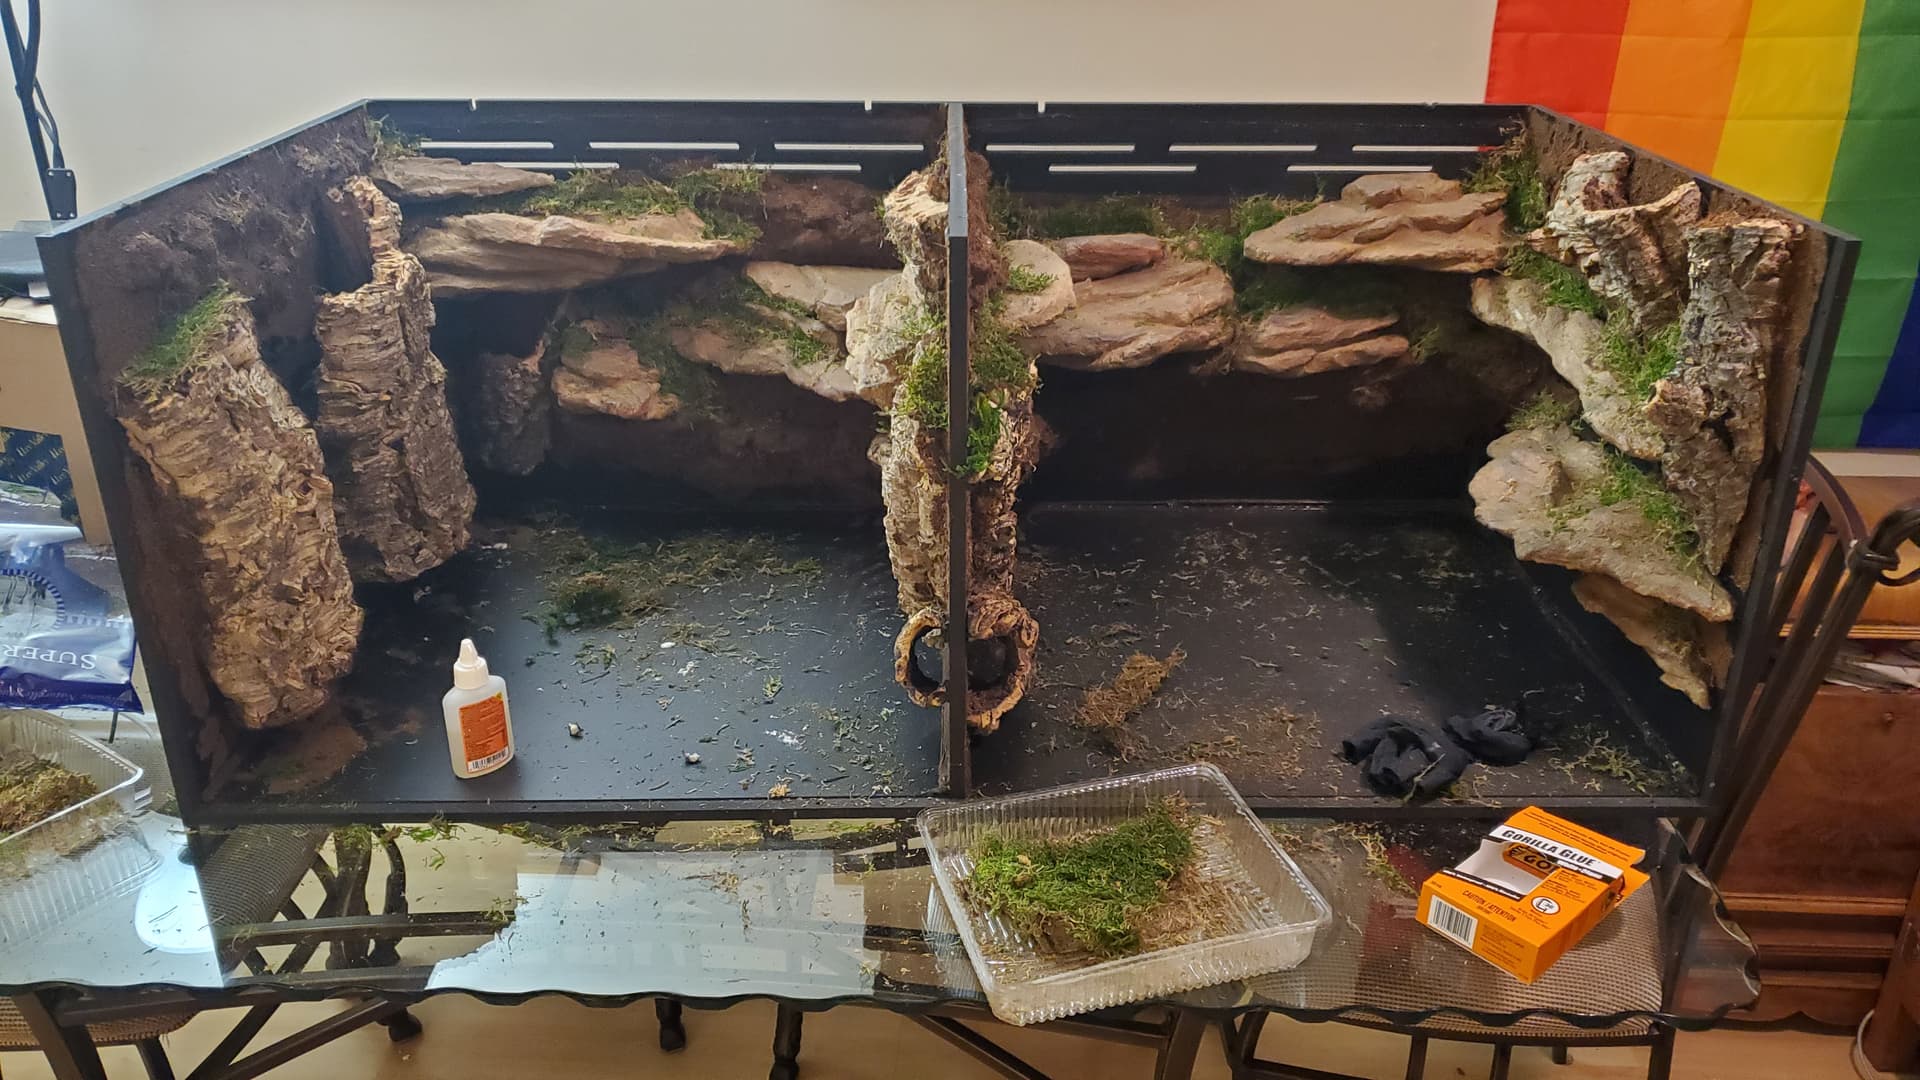
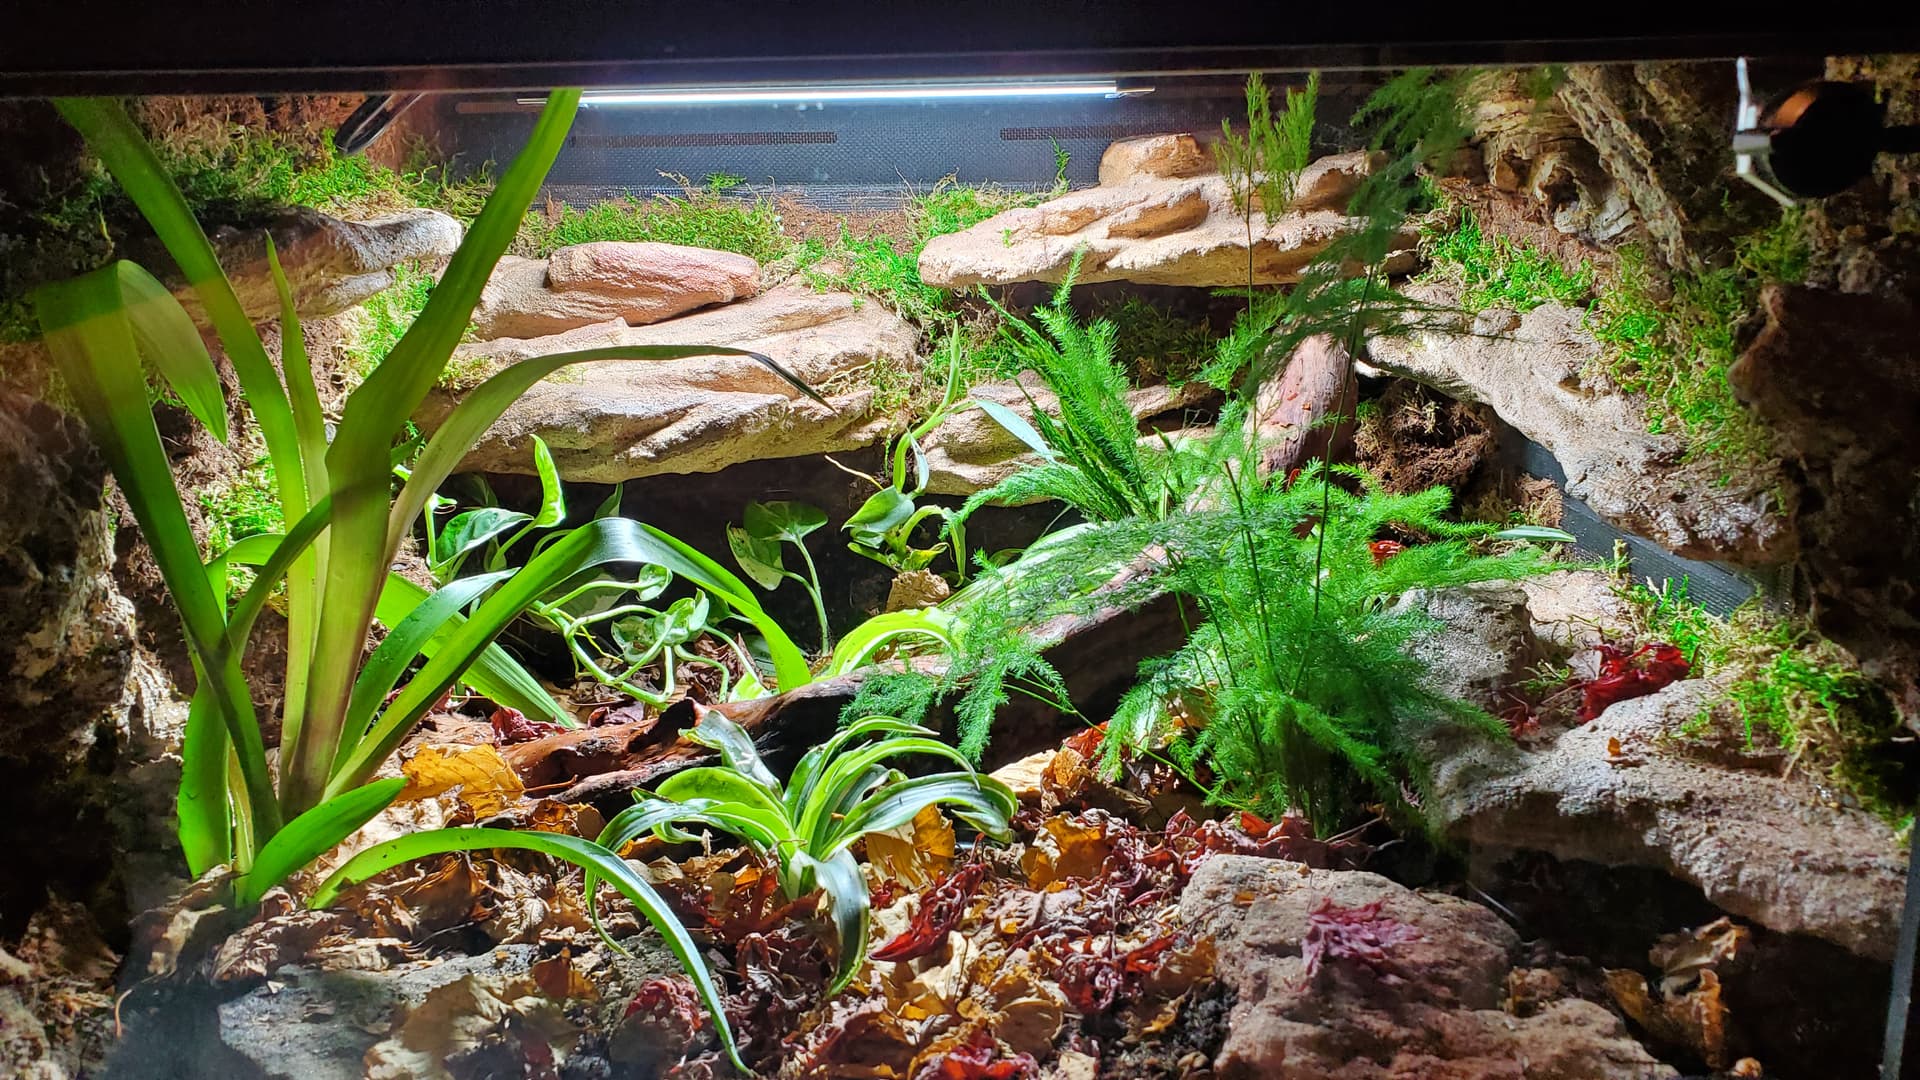
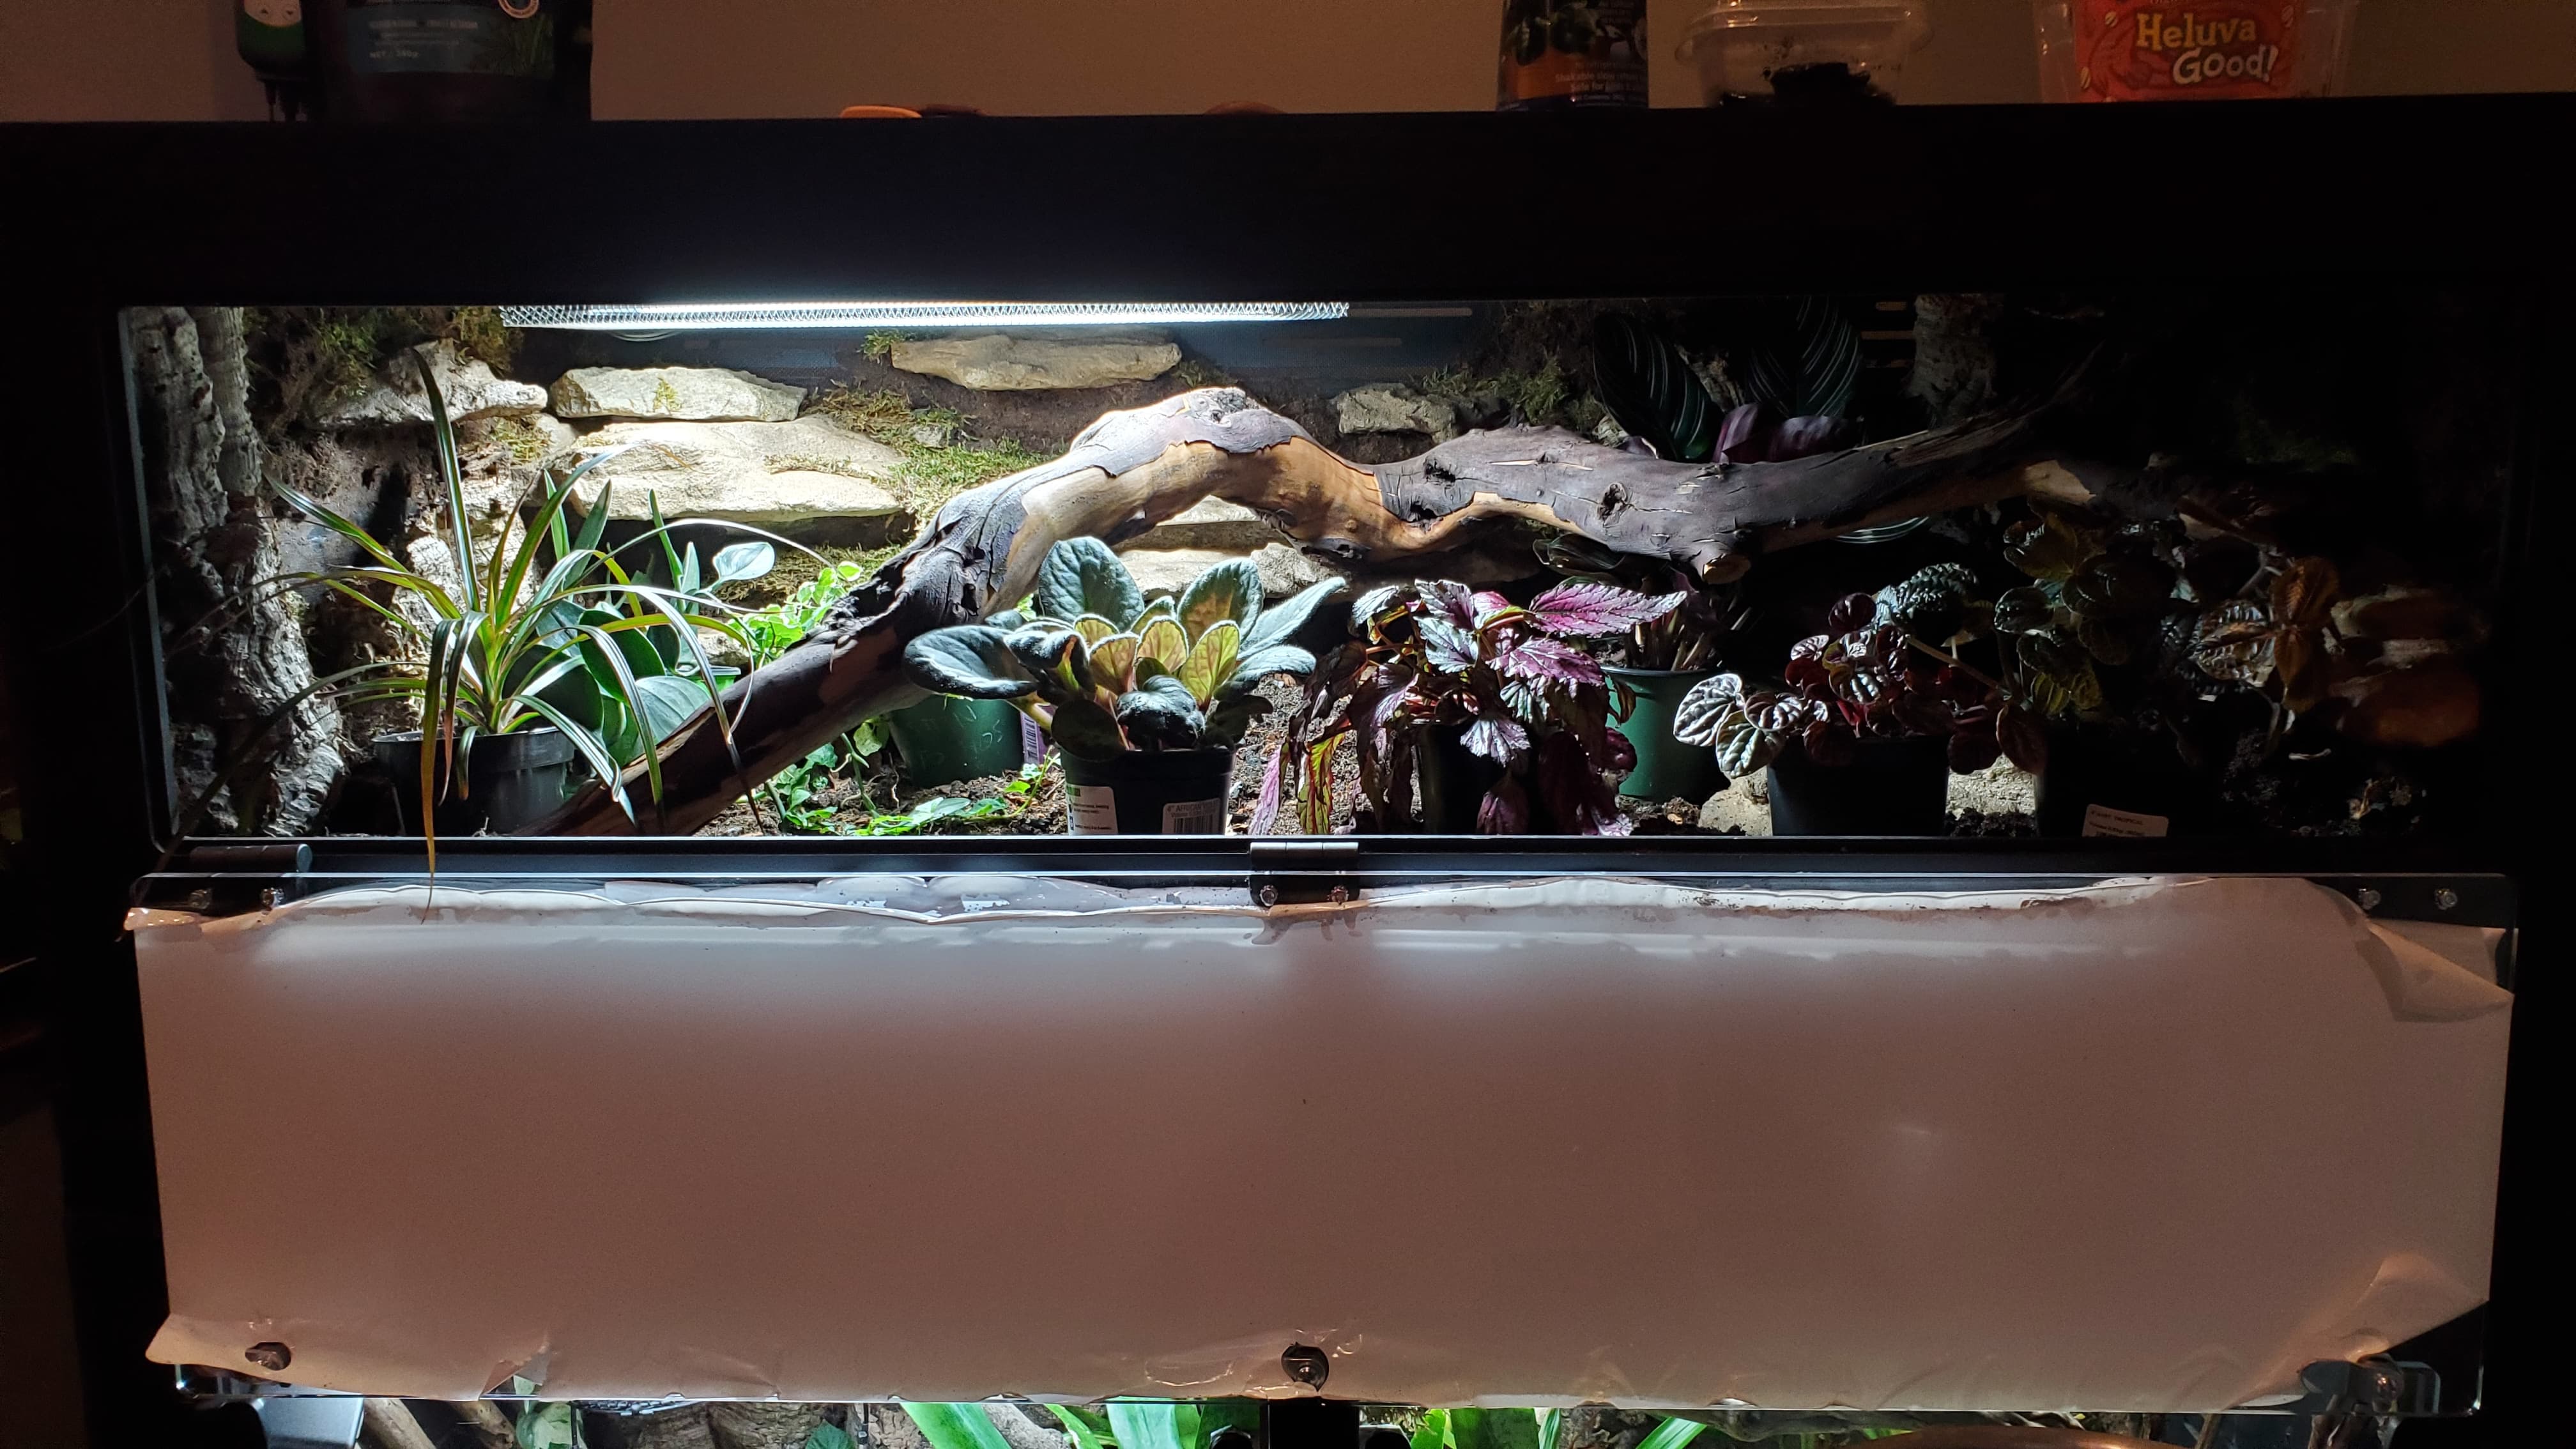
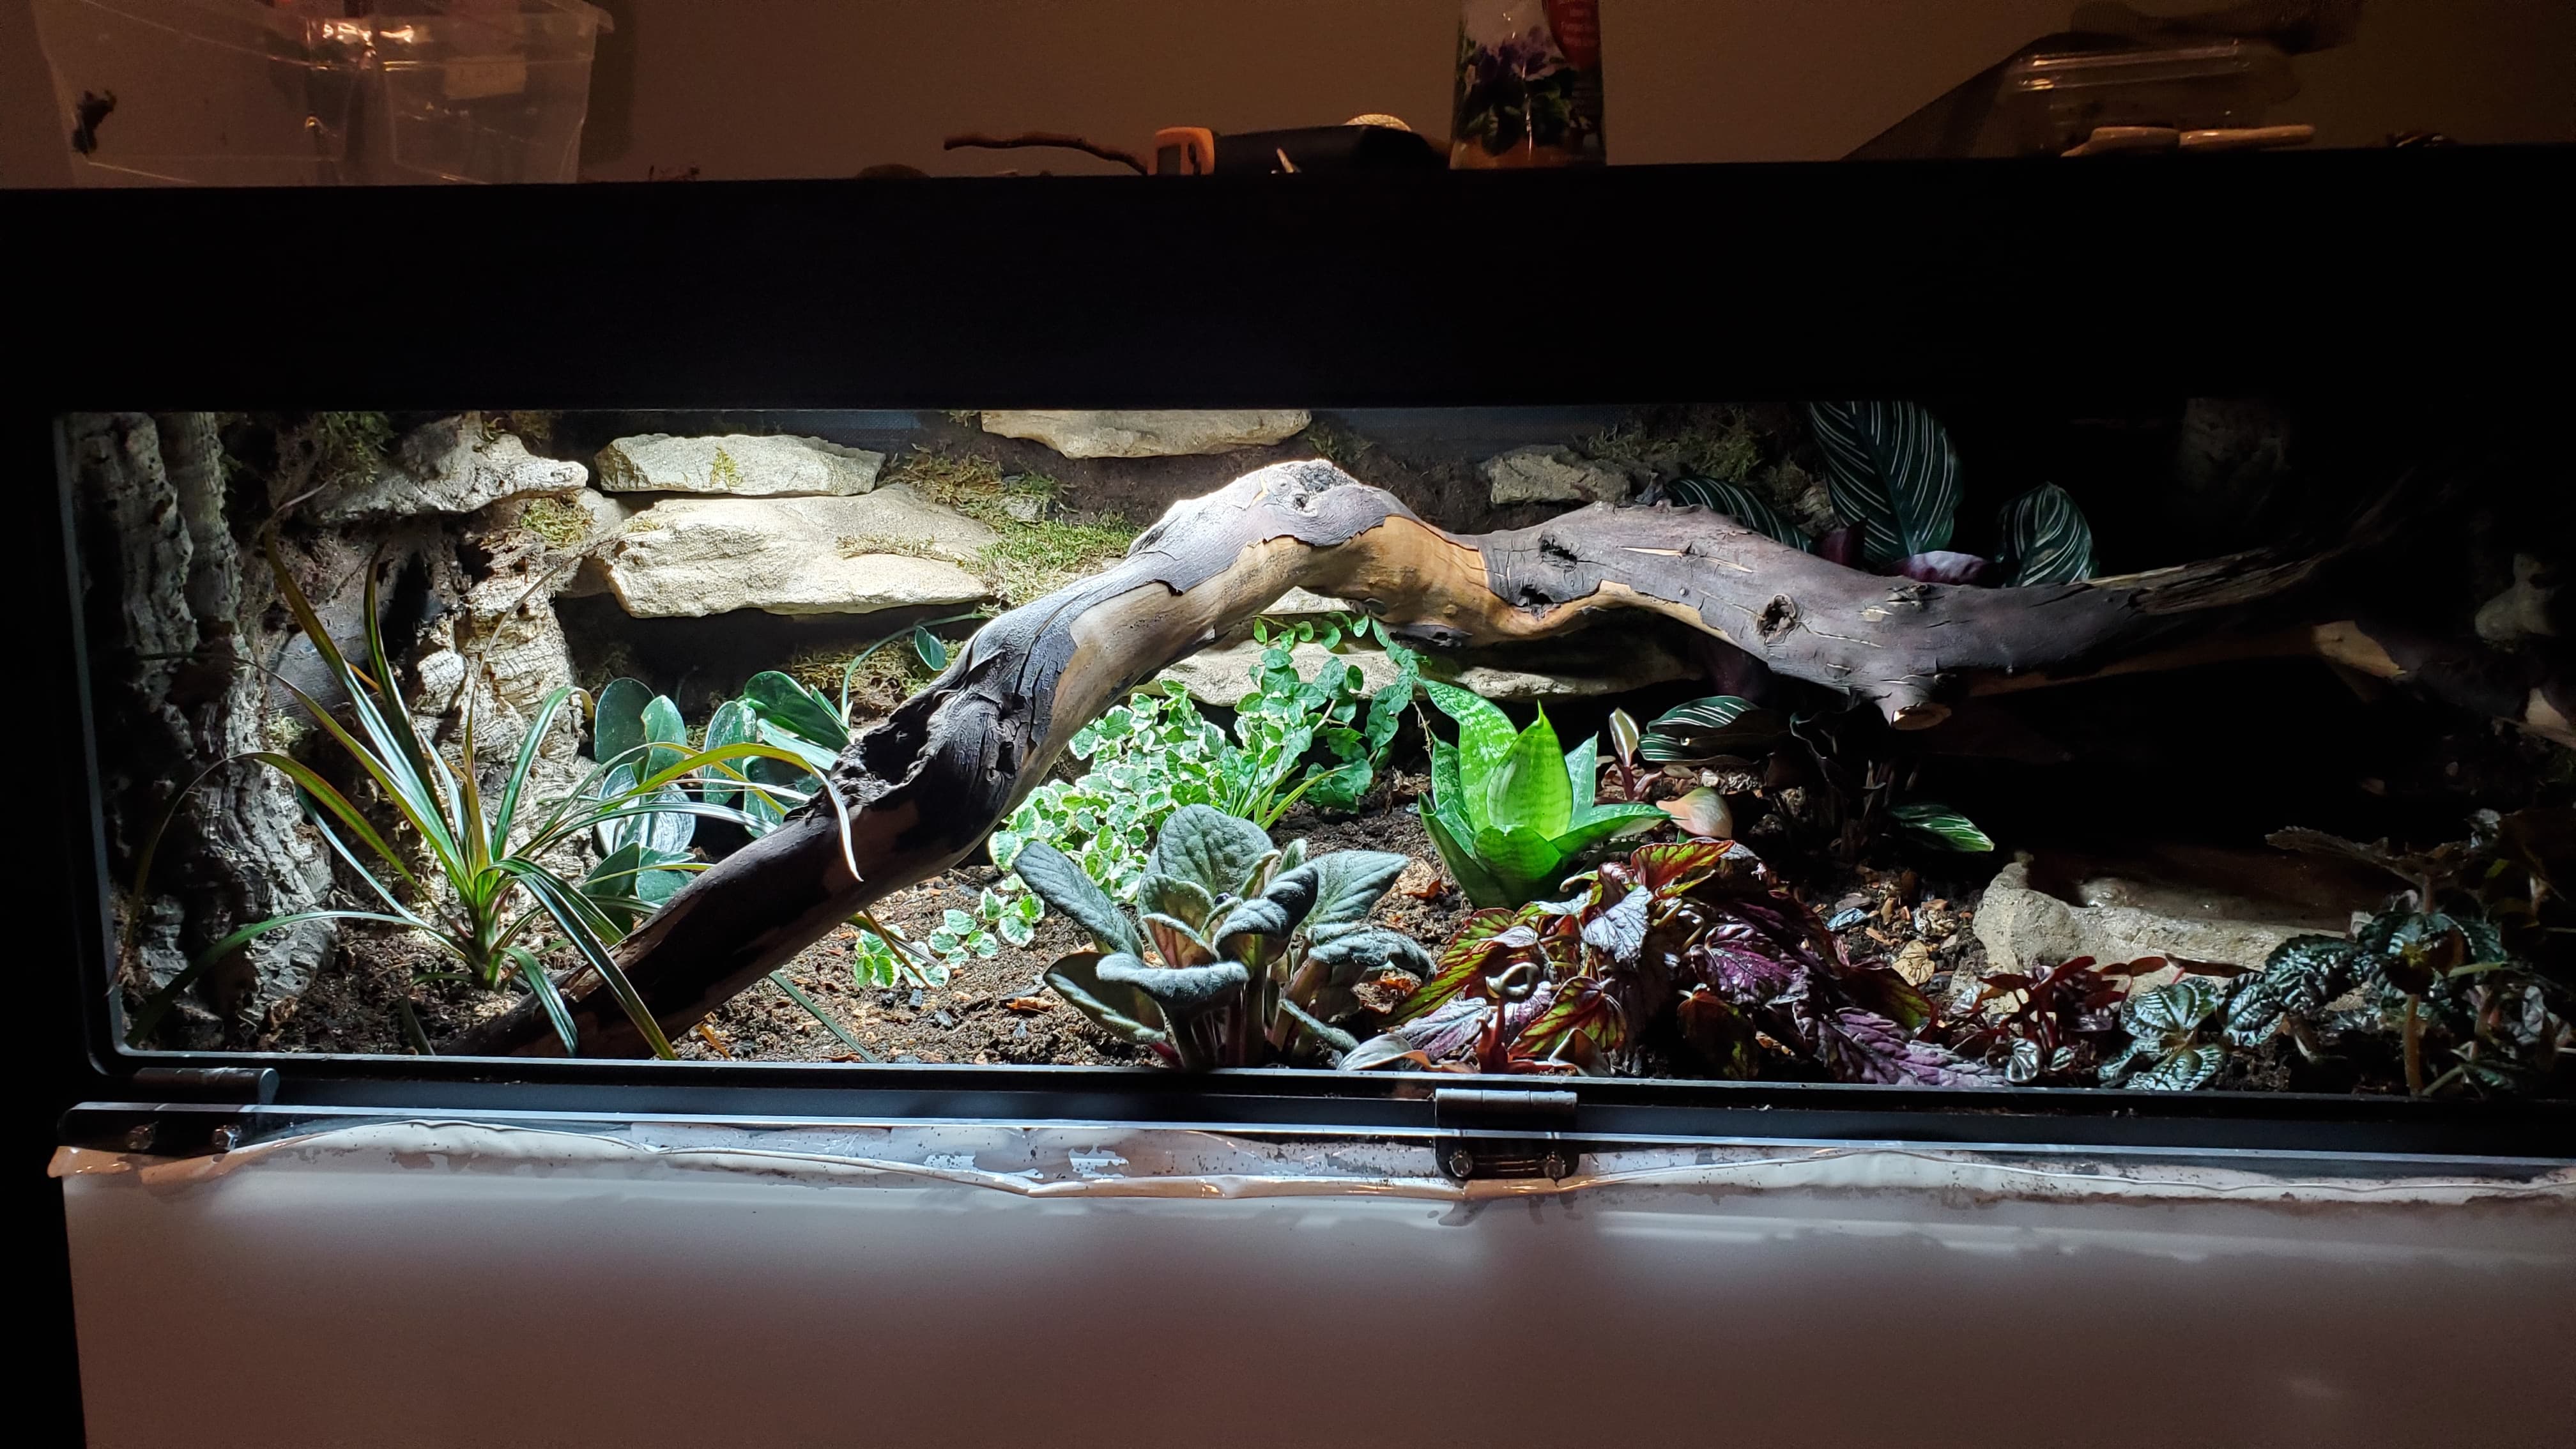
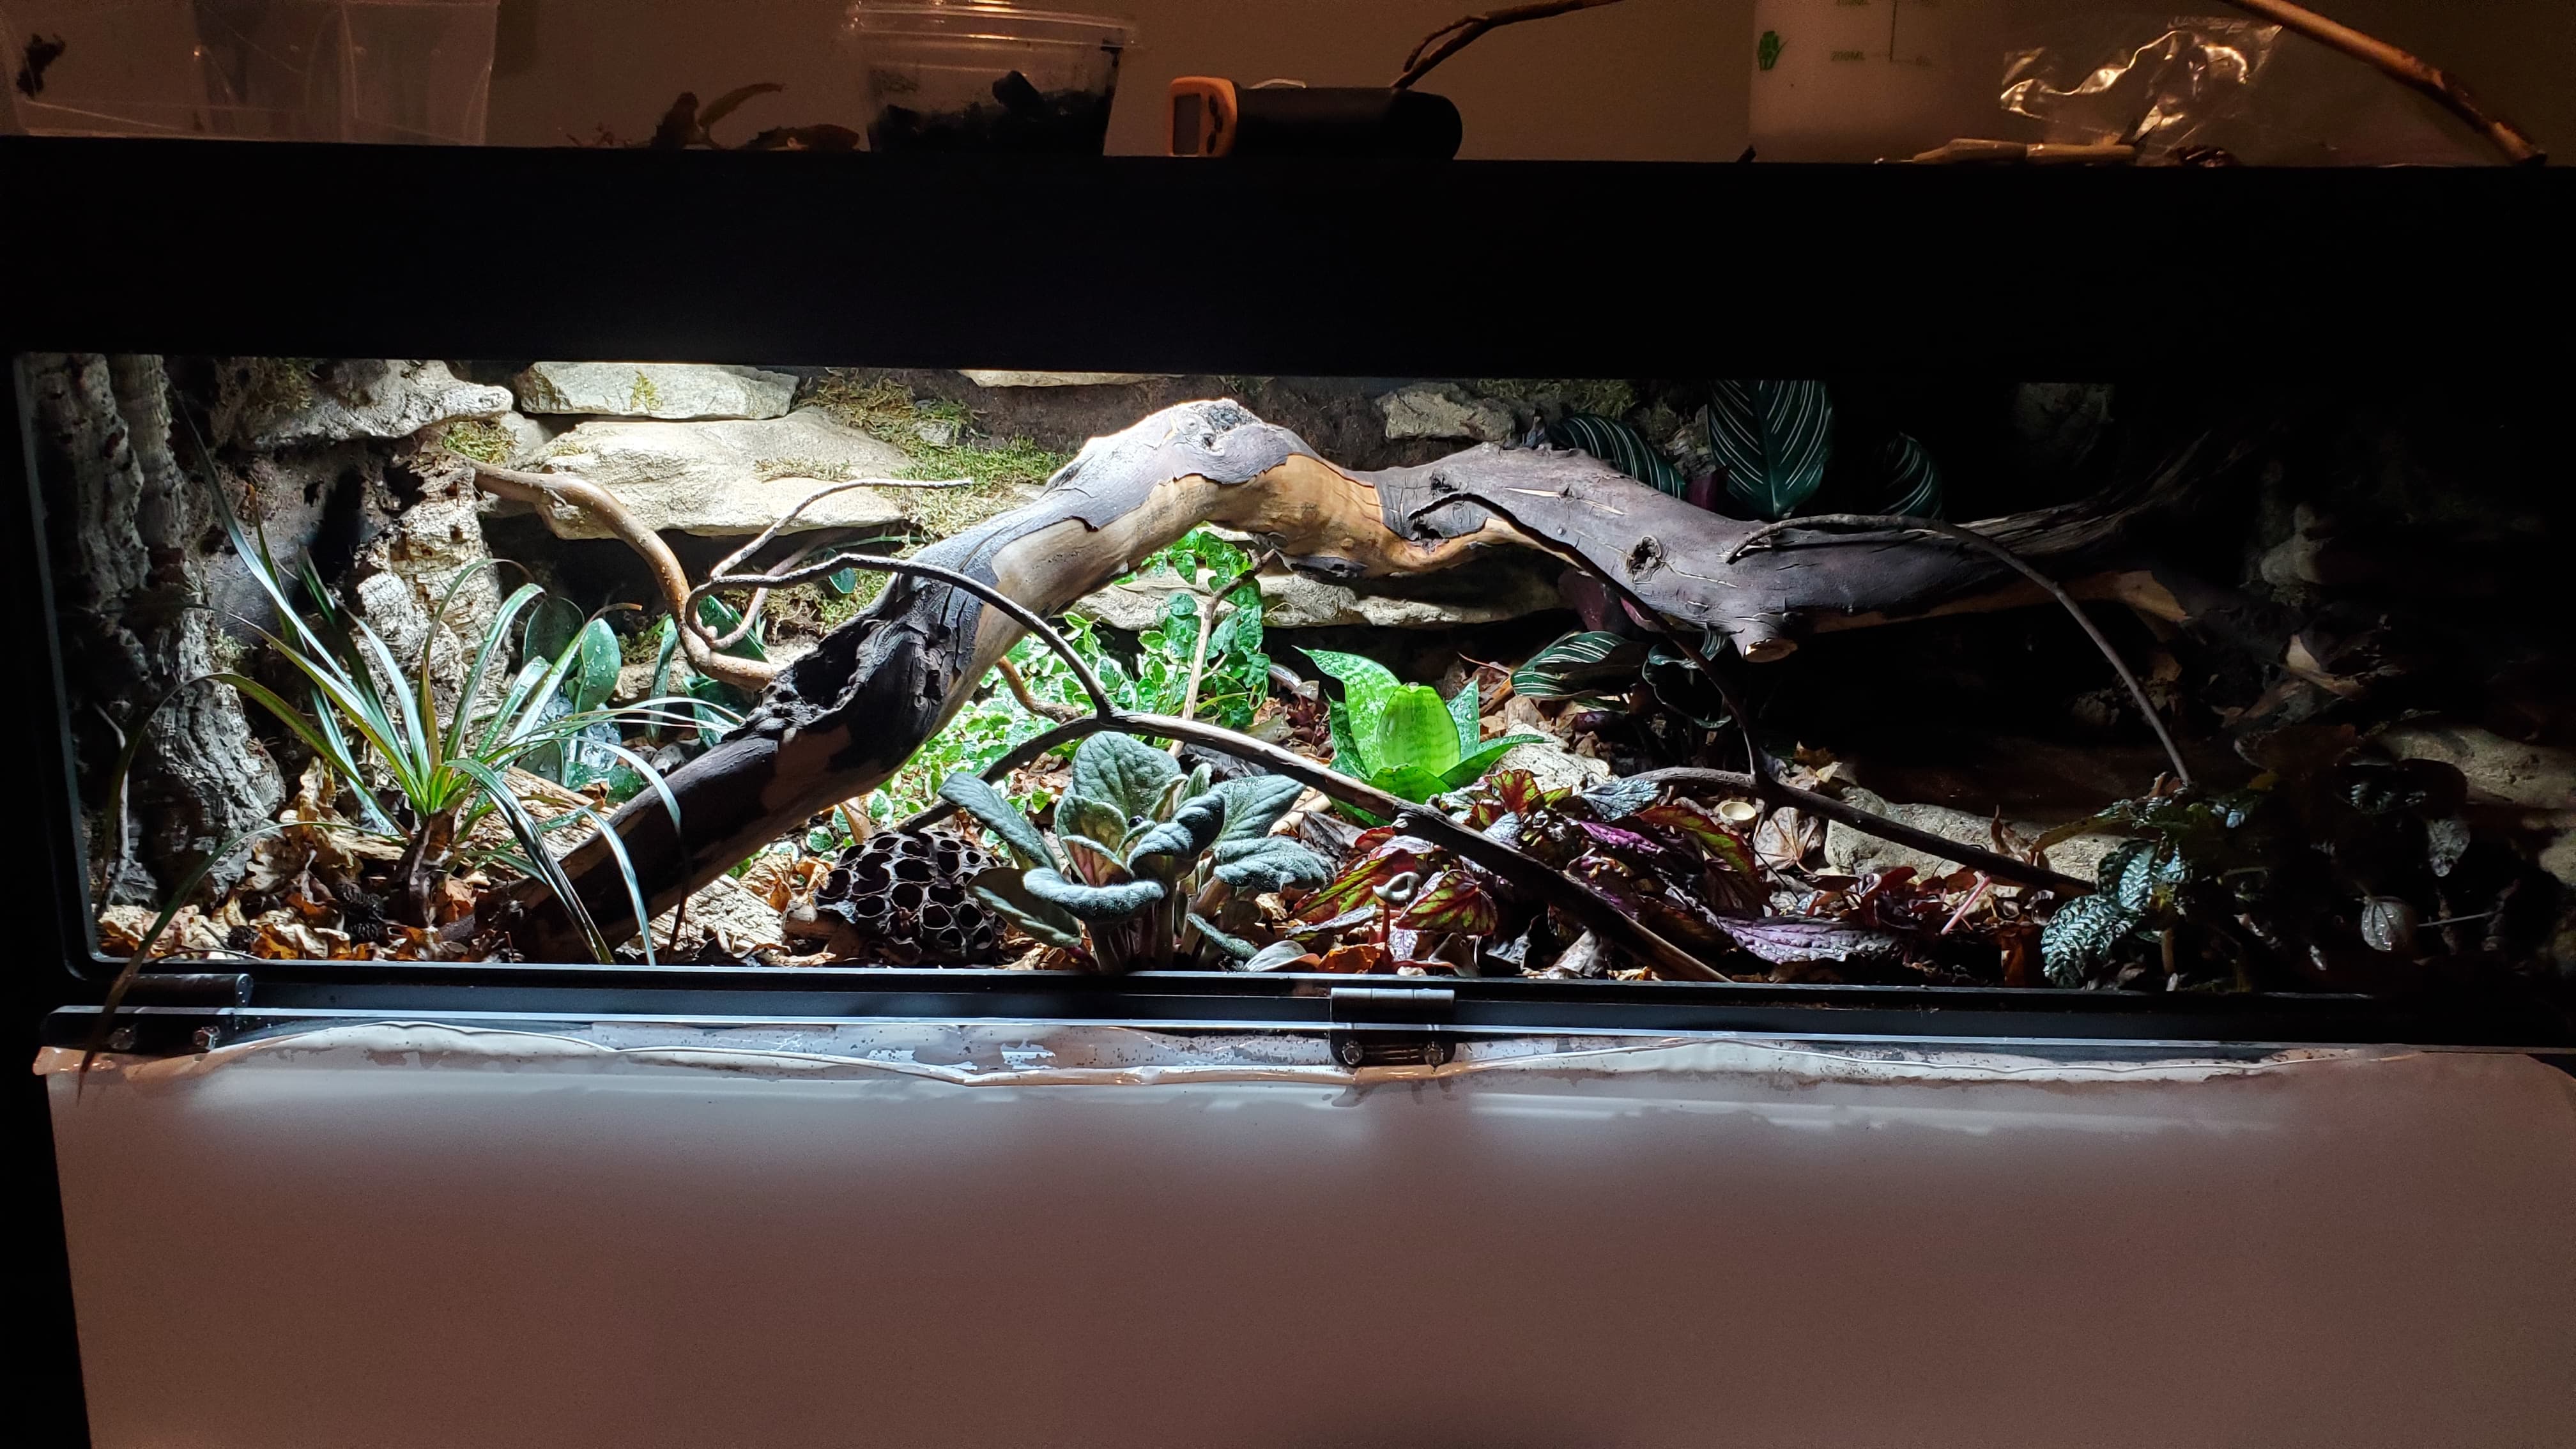
The final product:
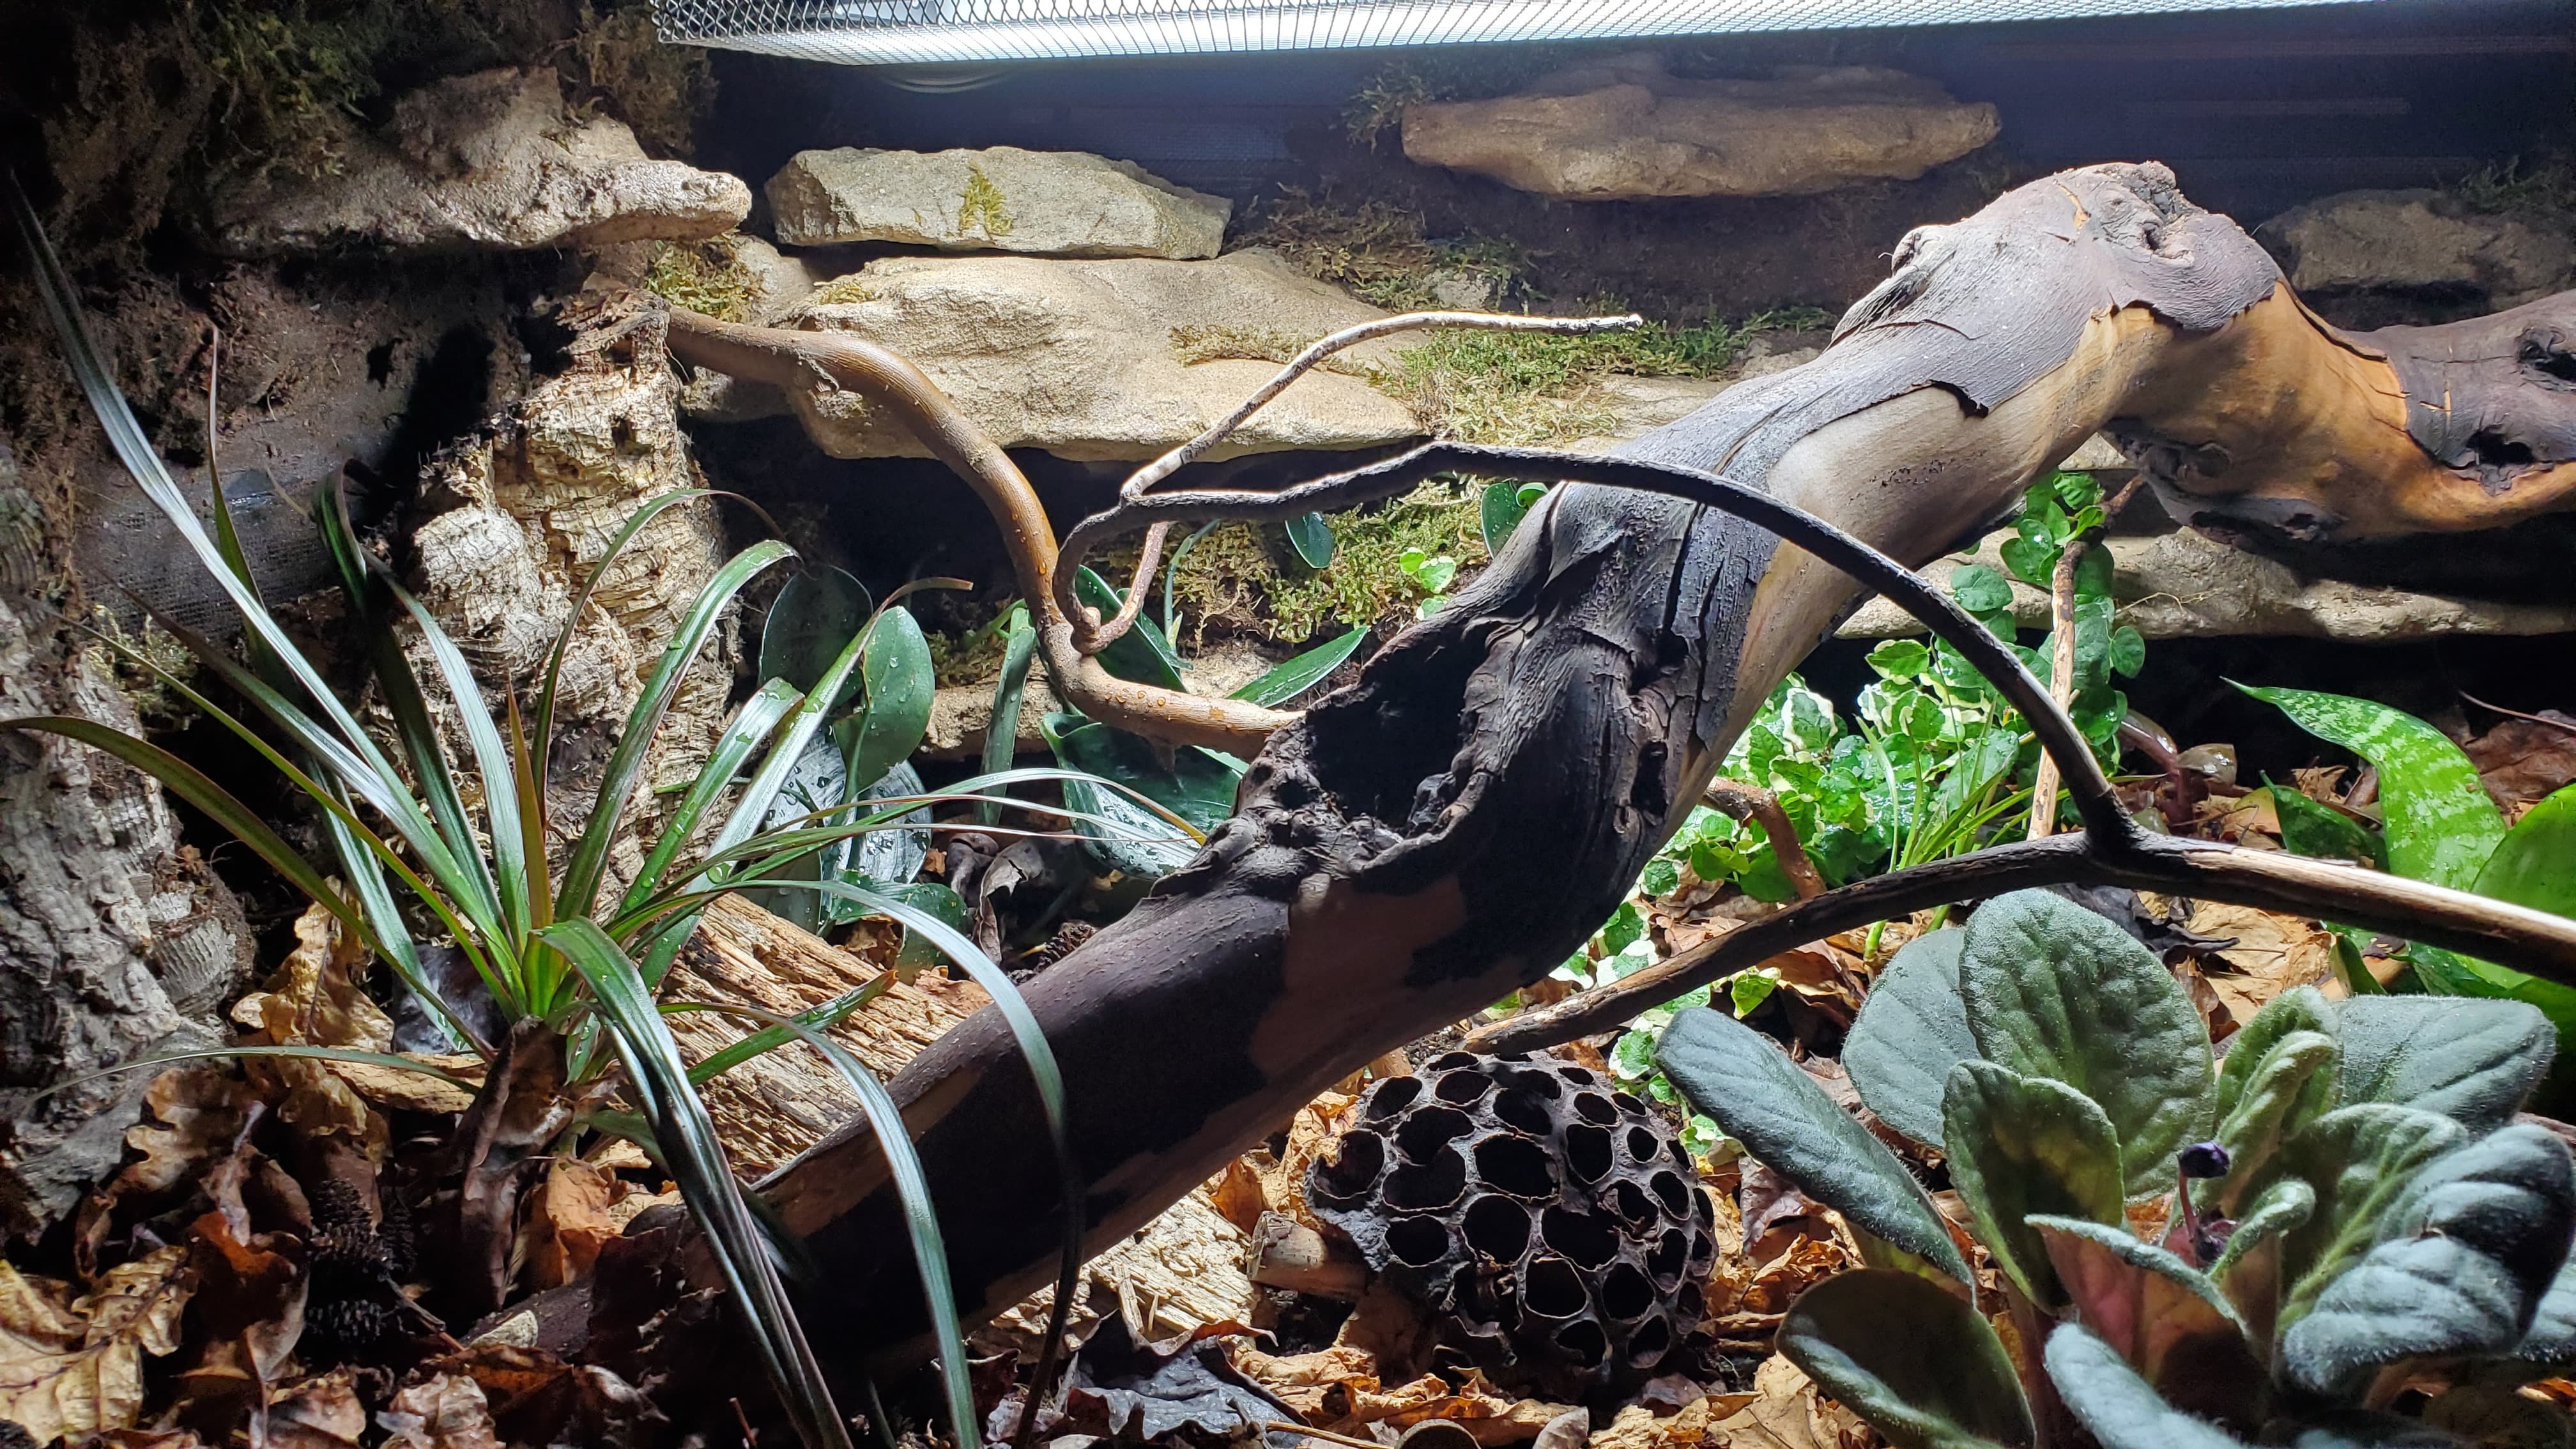

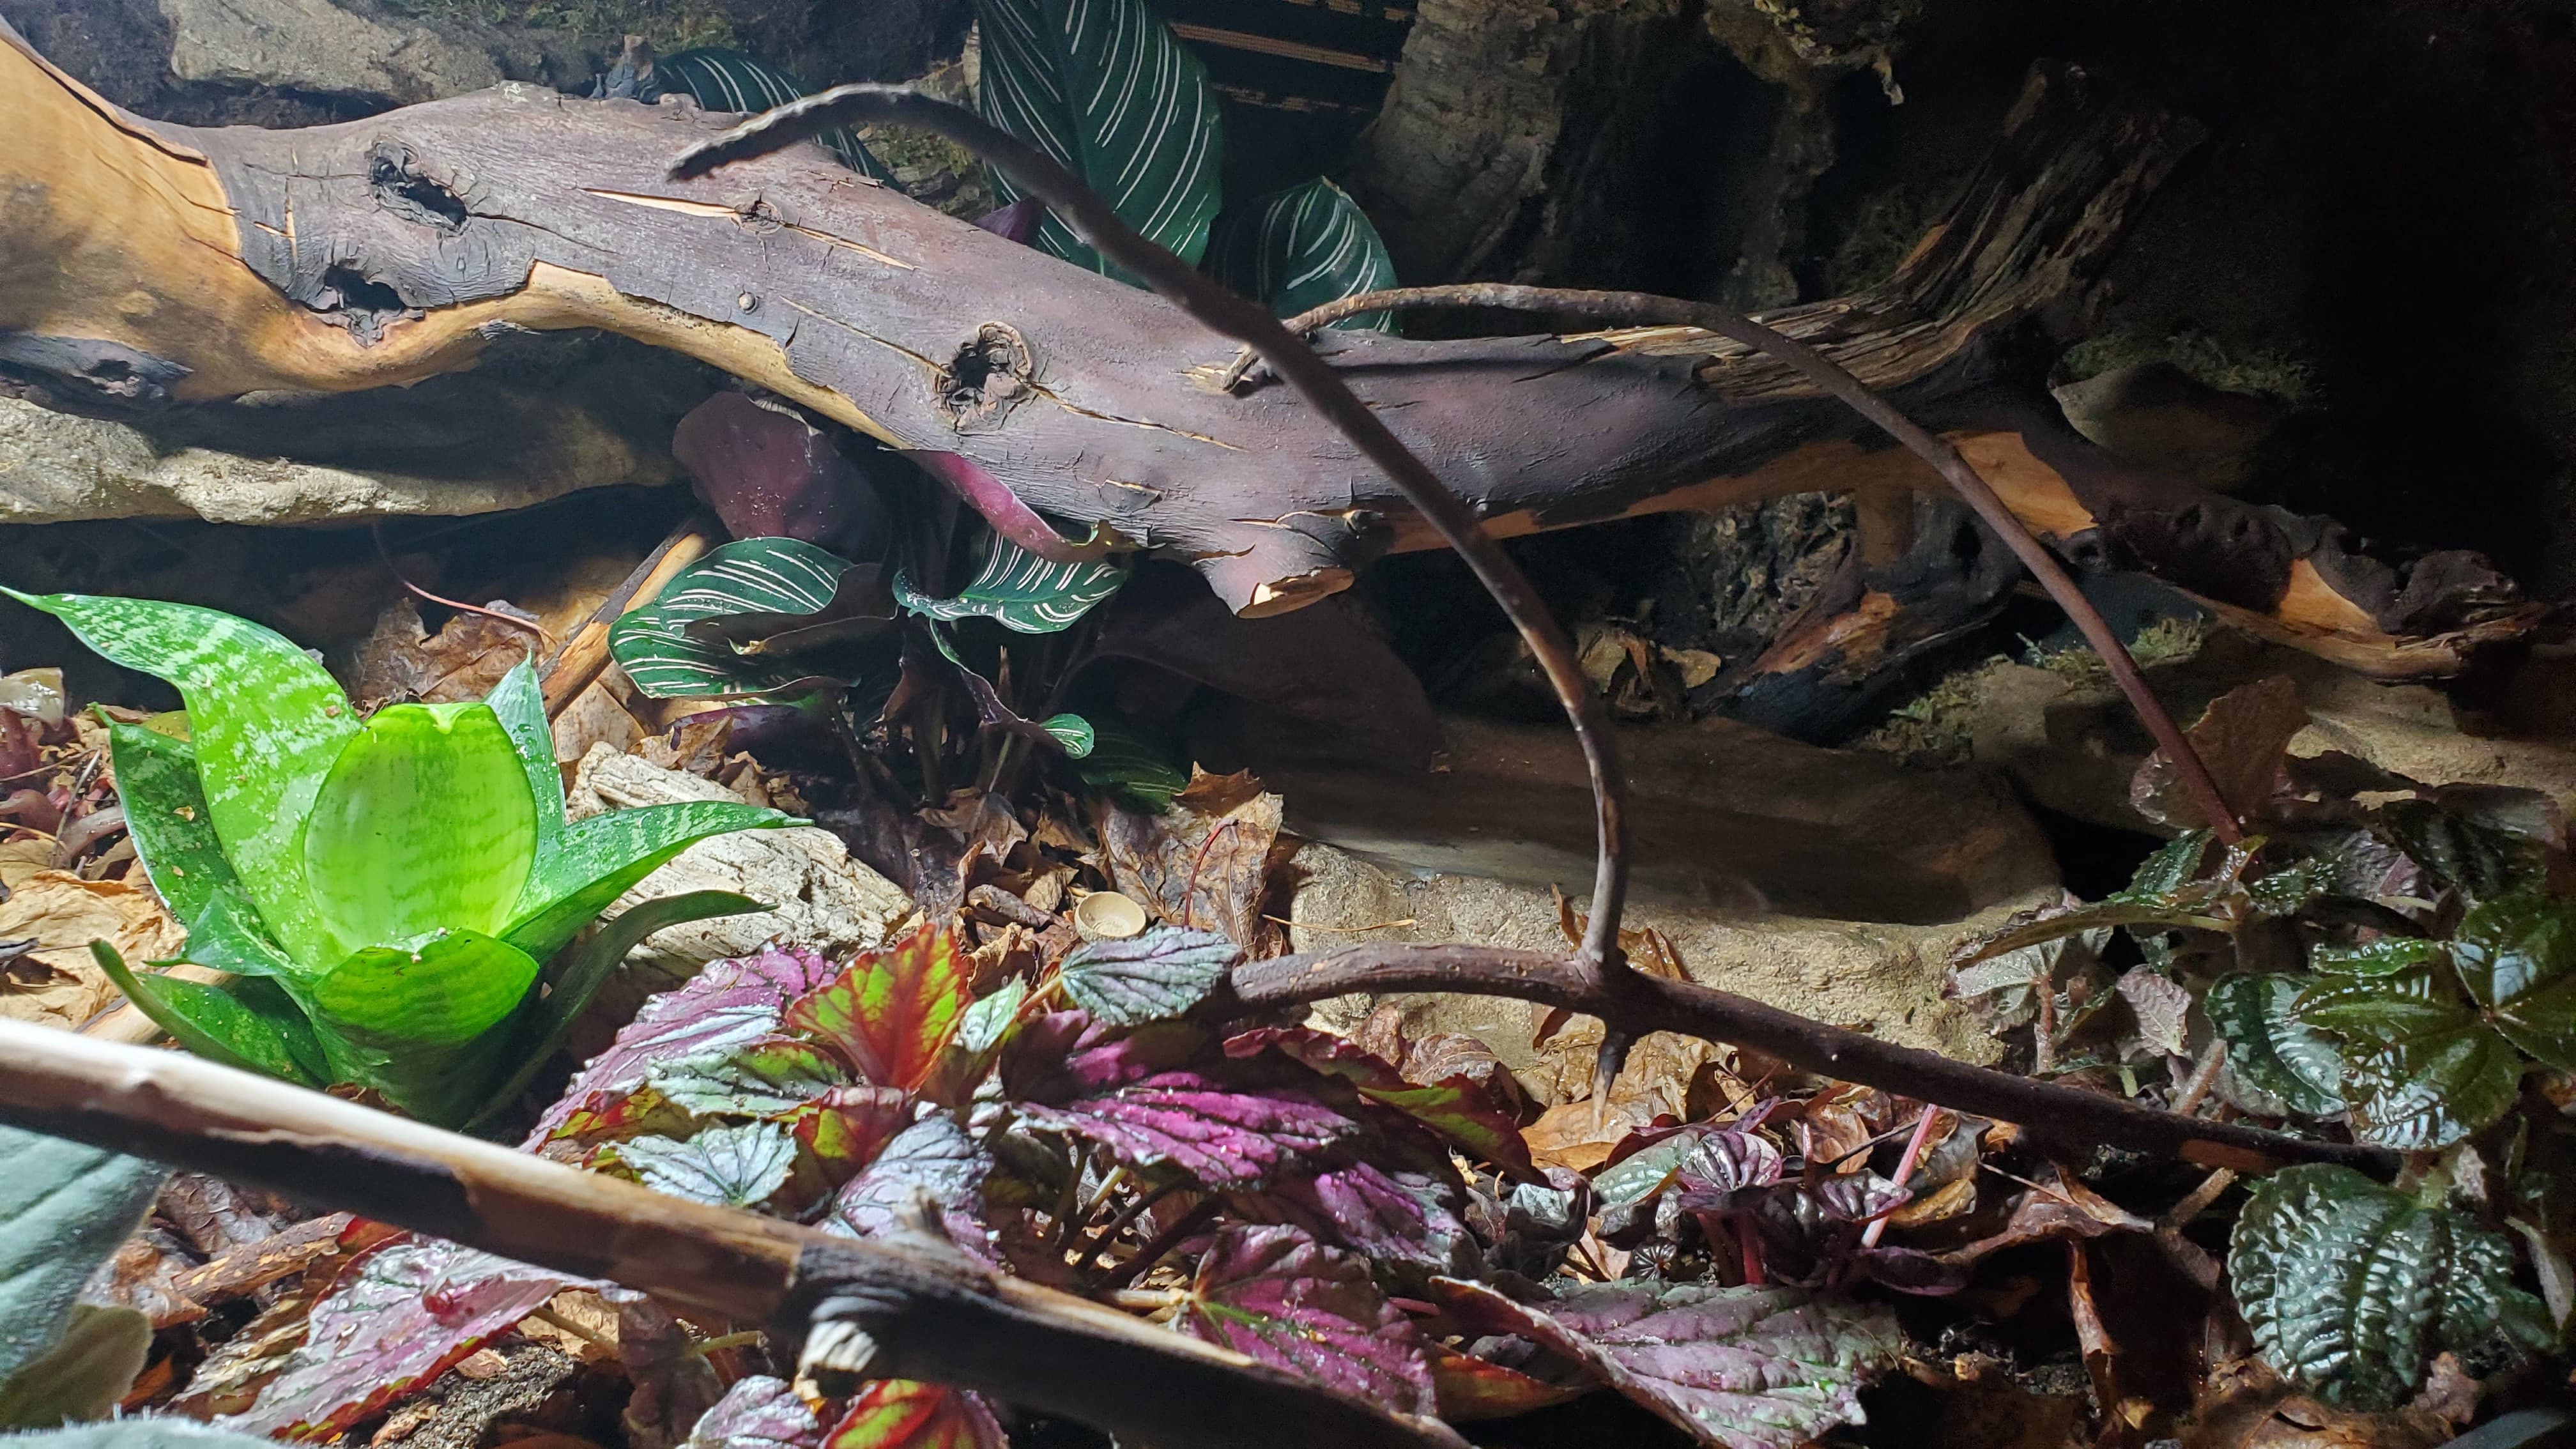
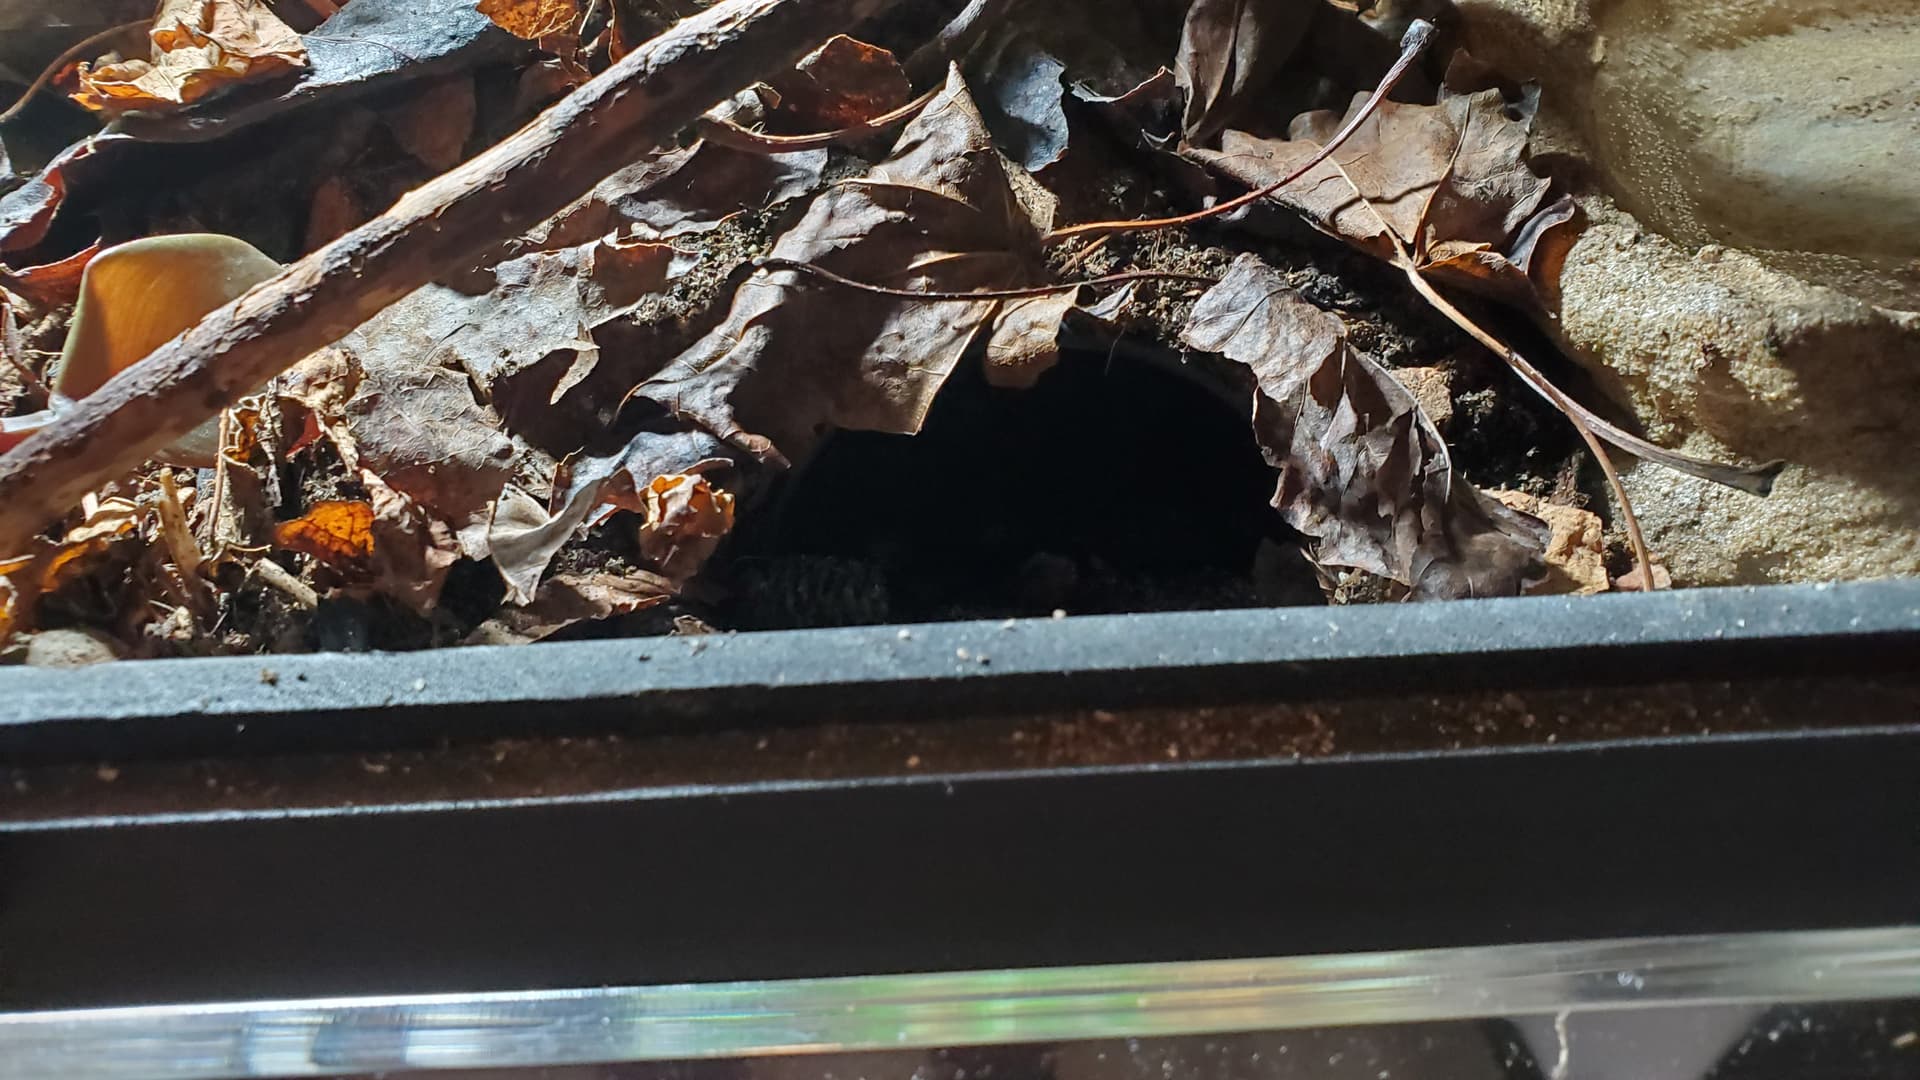
I’m pretty happy with it. There are a ton of nooks and crannies for her to enjoy and explore, a solid heat gradient, and later, after things settle a bit, I tucked a couple of little coconut hides in unobtrusive spots.