Building Bioactive on a Budget

Once I get everything worked out, I’ll have a big reveal to show off my newest little guy! But for now, questions!

I’ve never done anything bioactive, but I want to get into it. But I’m on a budget! I can’t spend hundreds on this project! I need some tips. I know the basics though.

Here are a few questions I have:

Substrate. Do I have to get it from a pet store? Is it possible to get something from a hardware store or something similar, for example? What type of substrate should I use?

Plants. Are pothos plants okay in a reptile tank? I have wayyy too many! :joy:

Clean Up Crew. Any suggestions on isopods to get as a beginner?

Thanks yall!

4 Likes

Pothos is a great plant to use. Any substrate has to be free of fertilizers. I am tagging @logar for his expertise!

3 Likes

Here are some good sites I get my bioactive stuff from.

https://joshsfrogs.com/?gad_source=1&gclid=Cj0KCQiA1p28BhCBARIsADP9HrMJ1JKbu9IGpeCO-tr_b3ZIrok7B5jHAbqCU14vBHYgiWWs06kBWmgaAnRtEALw_wcB

You don’t have to spend hundreds unless you are really going all out for a large enclosure build. The max I usually spend on my small bioactive enclosure builds is like $80-$90usd. Everything else is stuff I gathered outside and either scalded with boiling water or baked in the oven at 250°F for an hour to kill off any unwanted and dangerous guests. I only have one other terrarium project that I’ve actually genuinely spent hundreds on, its a 40 gal vertical enclosure that has a water fall going down into a small water feature I plan to add cherry shrimp to :slight_smile:

I can’t really help in the department of actually designing bioactive setups other than the basics because I feel the design of each enclosure is unique to the person that builds it… you do need Isopods (I use Powder Blue & Orange) and springtails long before you introduce an animal so they can really procreate, as well as adding your plant choices before the animal so they can establish strong healthy root systems and grow a bit. Pothos work really well, they will grow like weeds in almost any condition outside of an arid environment and you can cut and propogate them very easily whenever they grow too long.

Make sure you have a drainage layer for water to settle without swamping the substrate, lava rock and pea gravel works well, you can buy these in bulk for pretty cheap if you live near a home-improvement store that sells landscaping material. You’ll just have to crush down the lava rock a bit because they come in large pieces and boil whatever you use.

For the substrate you’ll want to layer in a decent
amount of charcoal, leaf litter, small broken twigs, and for an added benefit to the cleanup crew and plants, a little bit of worm castings.

Other than that the design of the terrarium is up to the type of animal you put in there and your personal preference. A youtube channel I go to a lot for terrarium inspiration is SerpaDesign, he makes incredible builds that benefit the animals needs and look beautiful at the same time. I hope that helps, good luck on your bioactive build! :slight_smile:

2 Likes

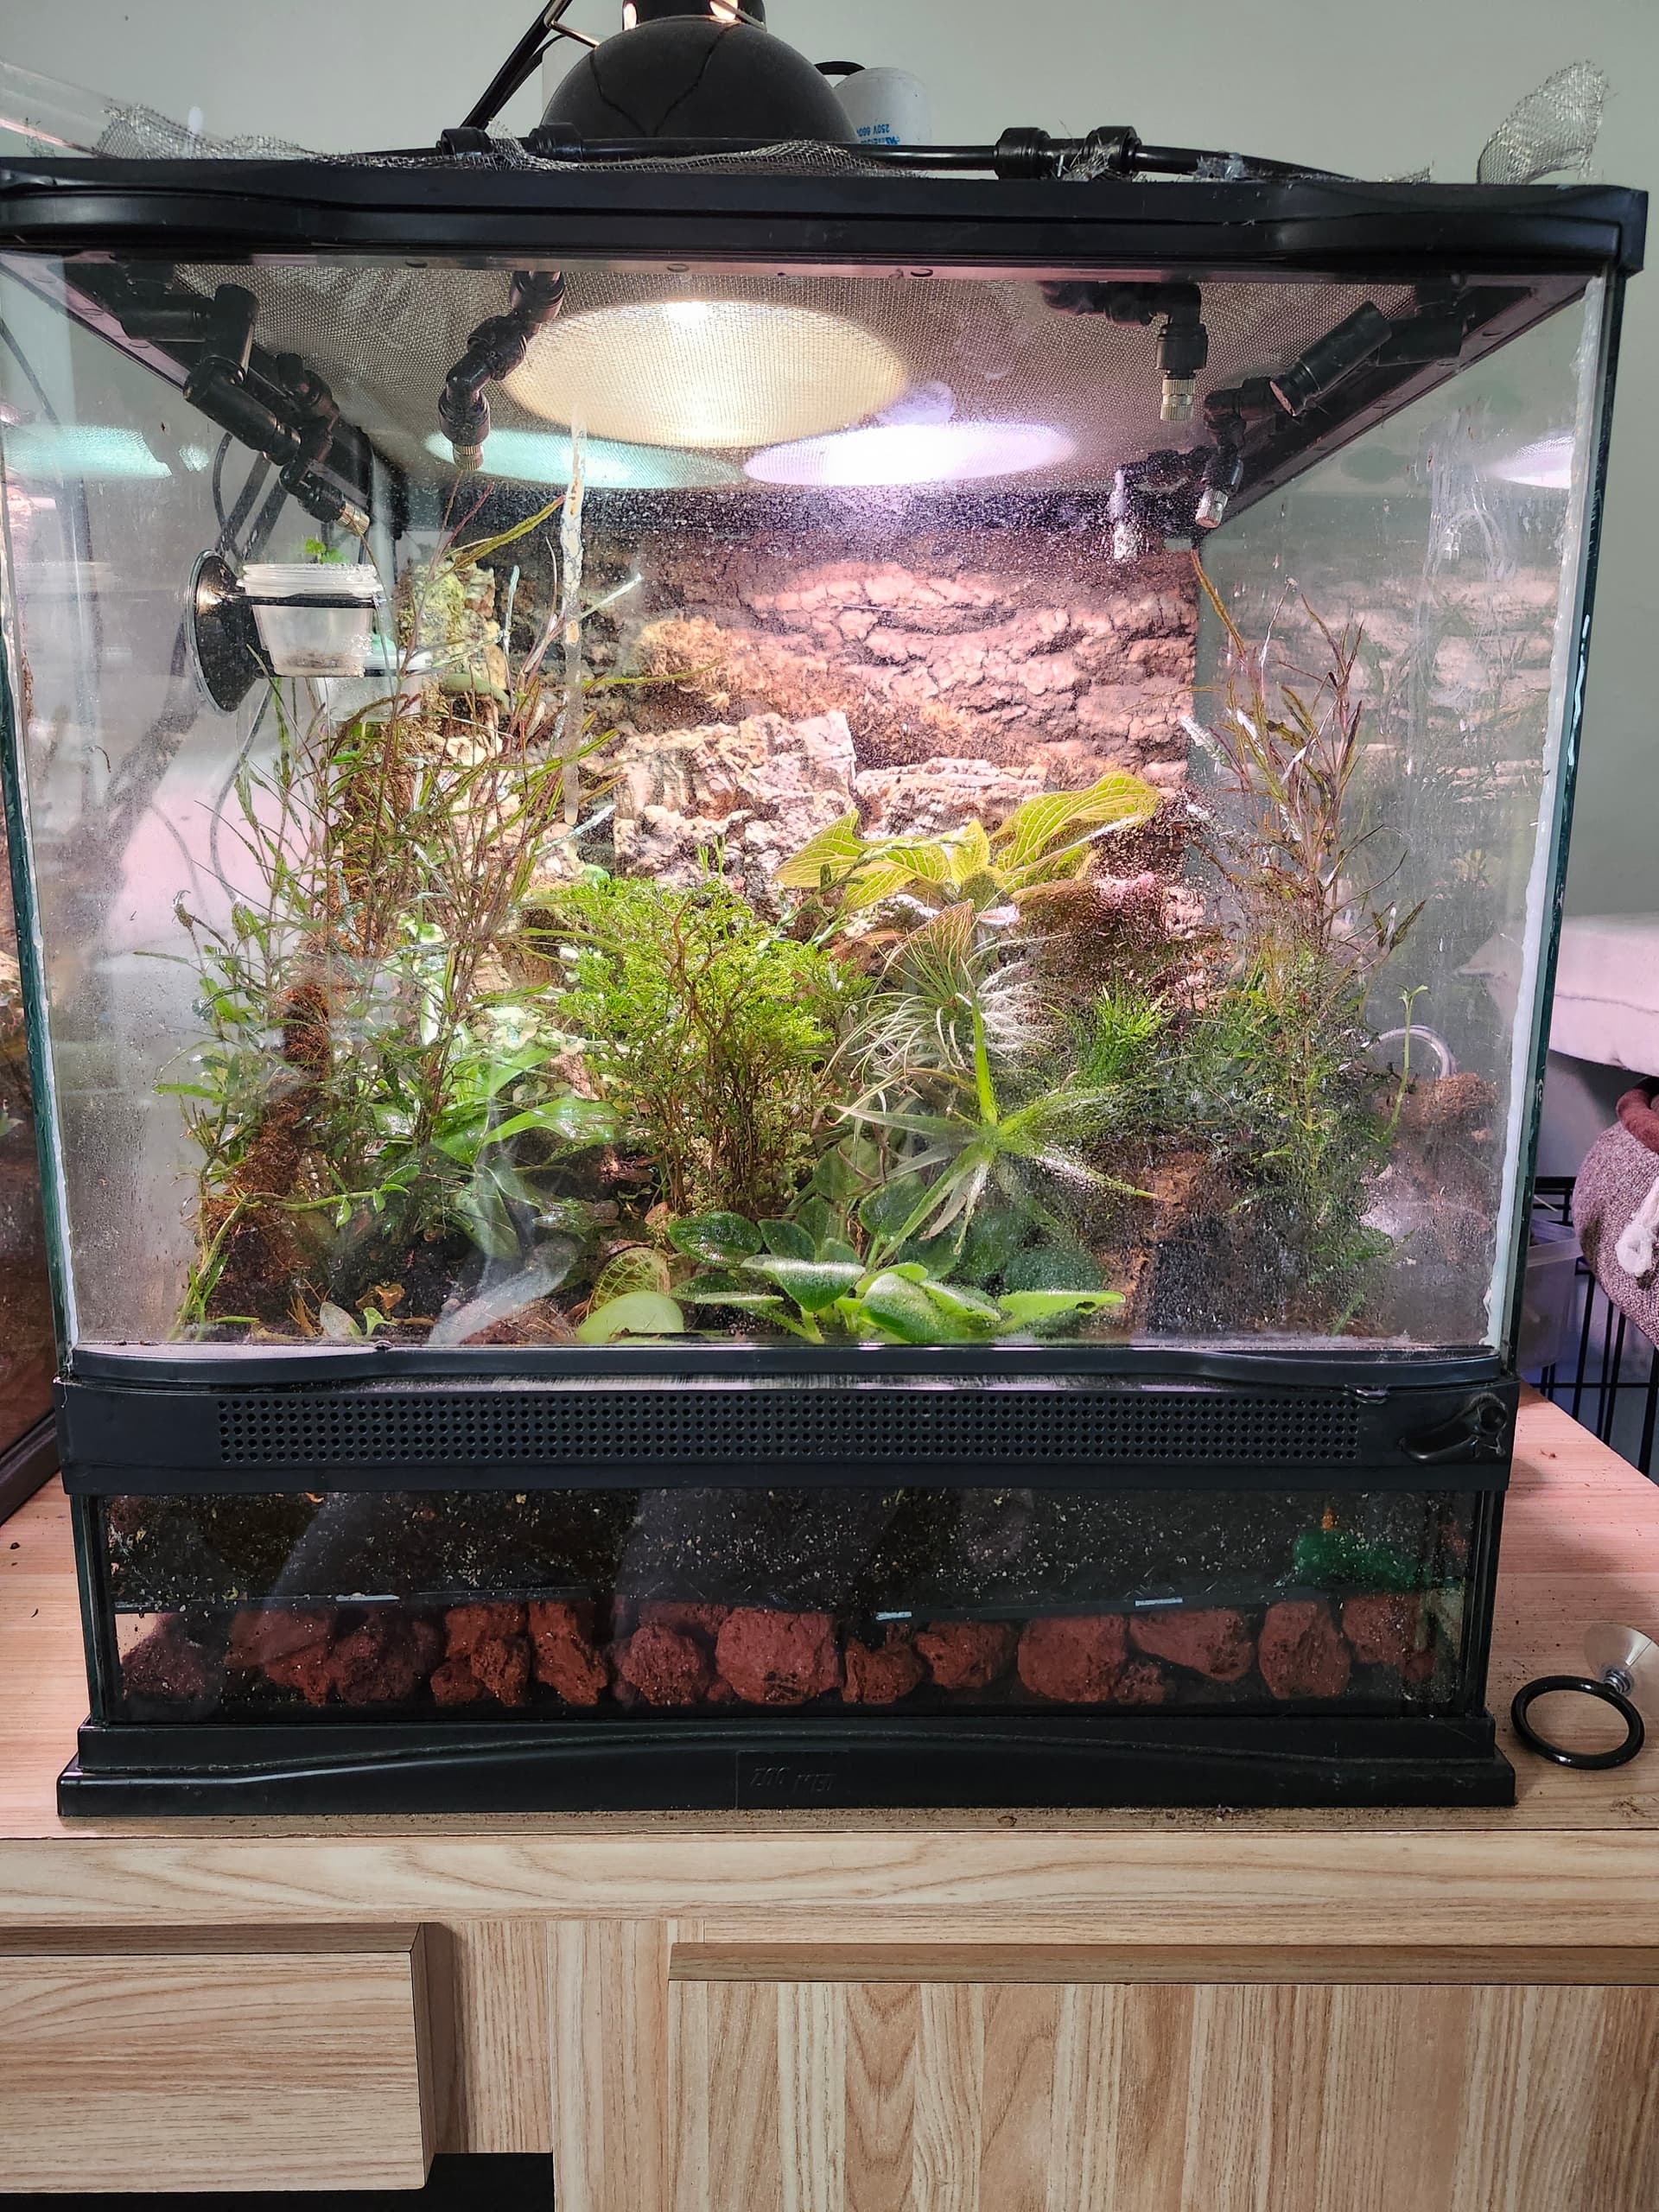
Substrate can be relatively cheap if you mix it yourself rather than buy pre-mixed! If you can find topsoil (important that it doesn’t have fertilizer added in, and topsoil in the US is pretty cheap) and play sand. As your base mix it’s pretty economical. Like CMSReptiles said, add in some sphagnum moss, worm castings, charcoal and leaf litter (you’ll want a bunch of that on top of the soil too, for the cleanup crew to eat) and overall it’s not too expensive. We mixed up a HUGE batch for our 4x2x2 and a couple of other terrariums and I think it came out as less than half the cost of buying bioactive substrate straight.

You can definitely gather and process your own decor, and actually, your own leaf litter, too. For the leaf litter we boiled and baked. Boil for 10minutes then put a single layer on a baking sheet and bake on low at 200F, stirring often, for maybe 30. We baked because we wanted them dry for storage, but if you’re just tossing them in and on the substrate you can actually just use em wet. The isopods like that.

We foraged a lot of our own branches and rocks from the nearby woods, scrubbed and sanded them smooth and then baked them. (Be cautious baking rocks – they can explode. Big ones, you’re better off sanitizing in some other way.) The most expensive part of our big bioactive was actually the cork bark, because we used a fair bit as backdrop.

If you’re going to do a lot of DIY and gathering from the wild, I definitely suggest being VERY careful about cleaning, sanitizing and quarantine. Hitchhikers are sneaky.

Keep in mind you will want to process your plants to account for pests, too, especially if you buy from large plant stores. SerpaDesigns has a good video on that: you’ll want to do it ahead of time because after cleaning, you quarantine them for a while.

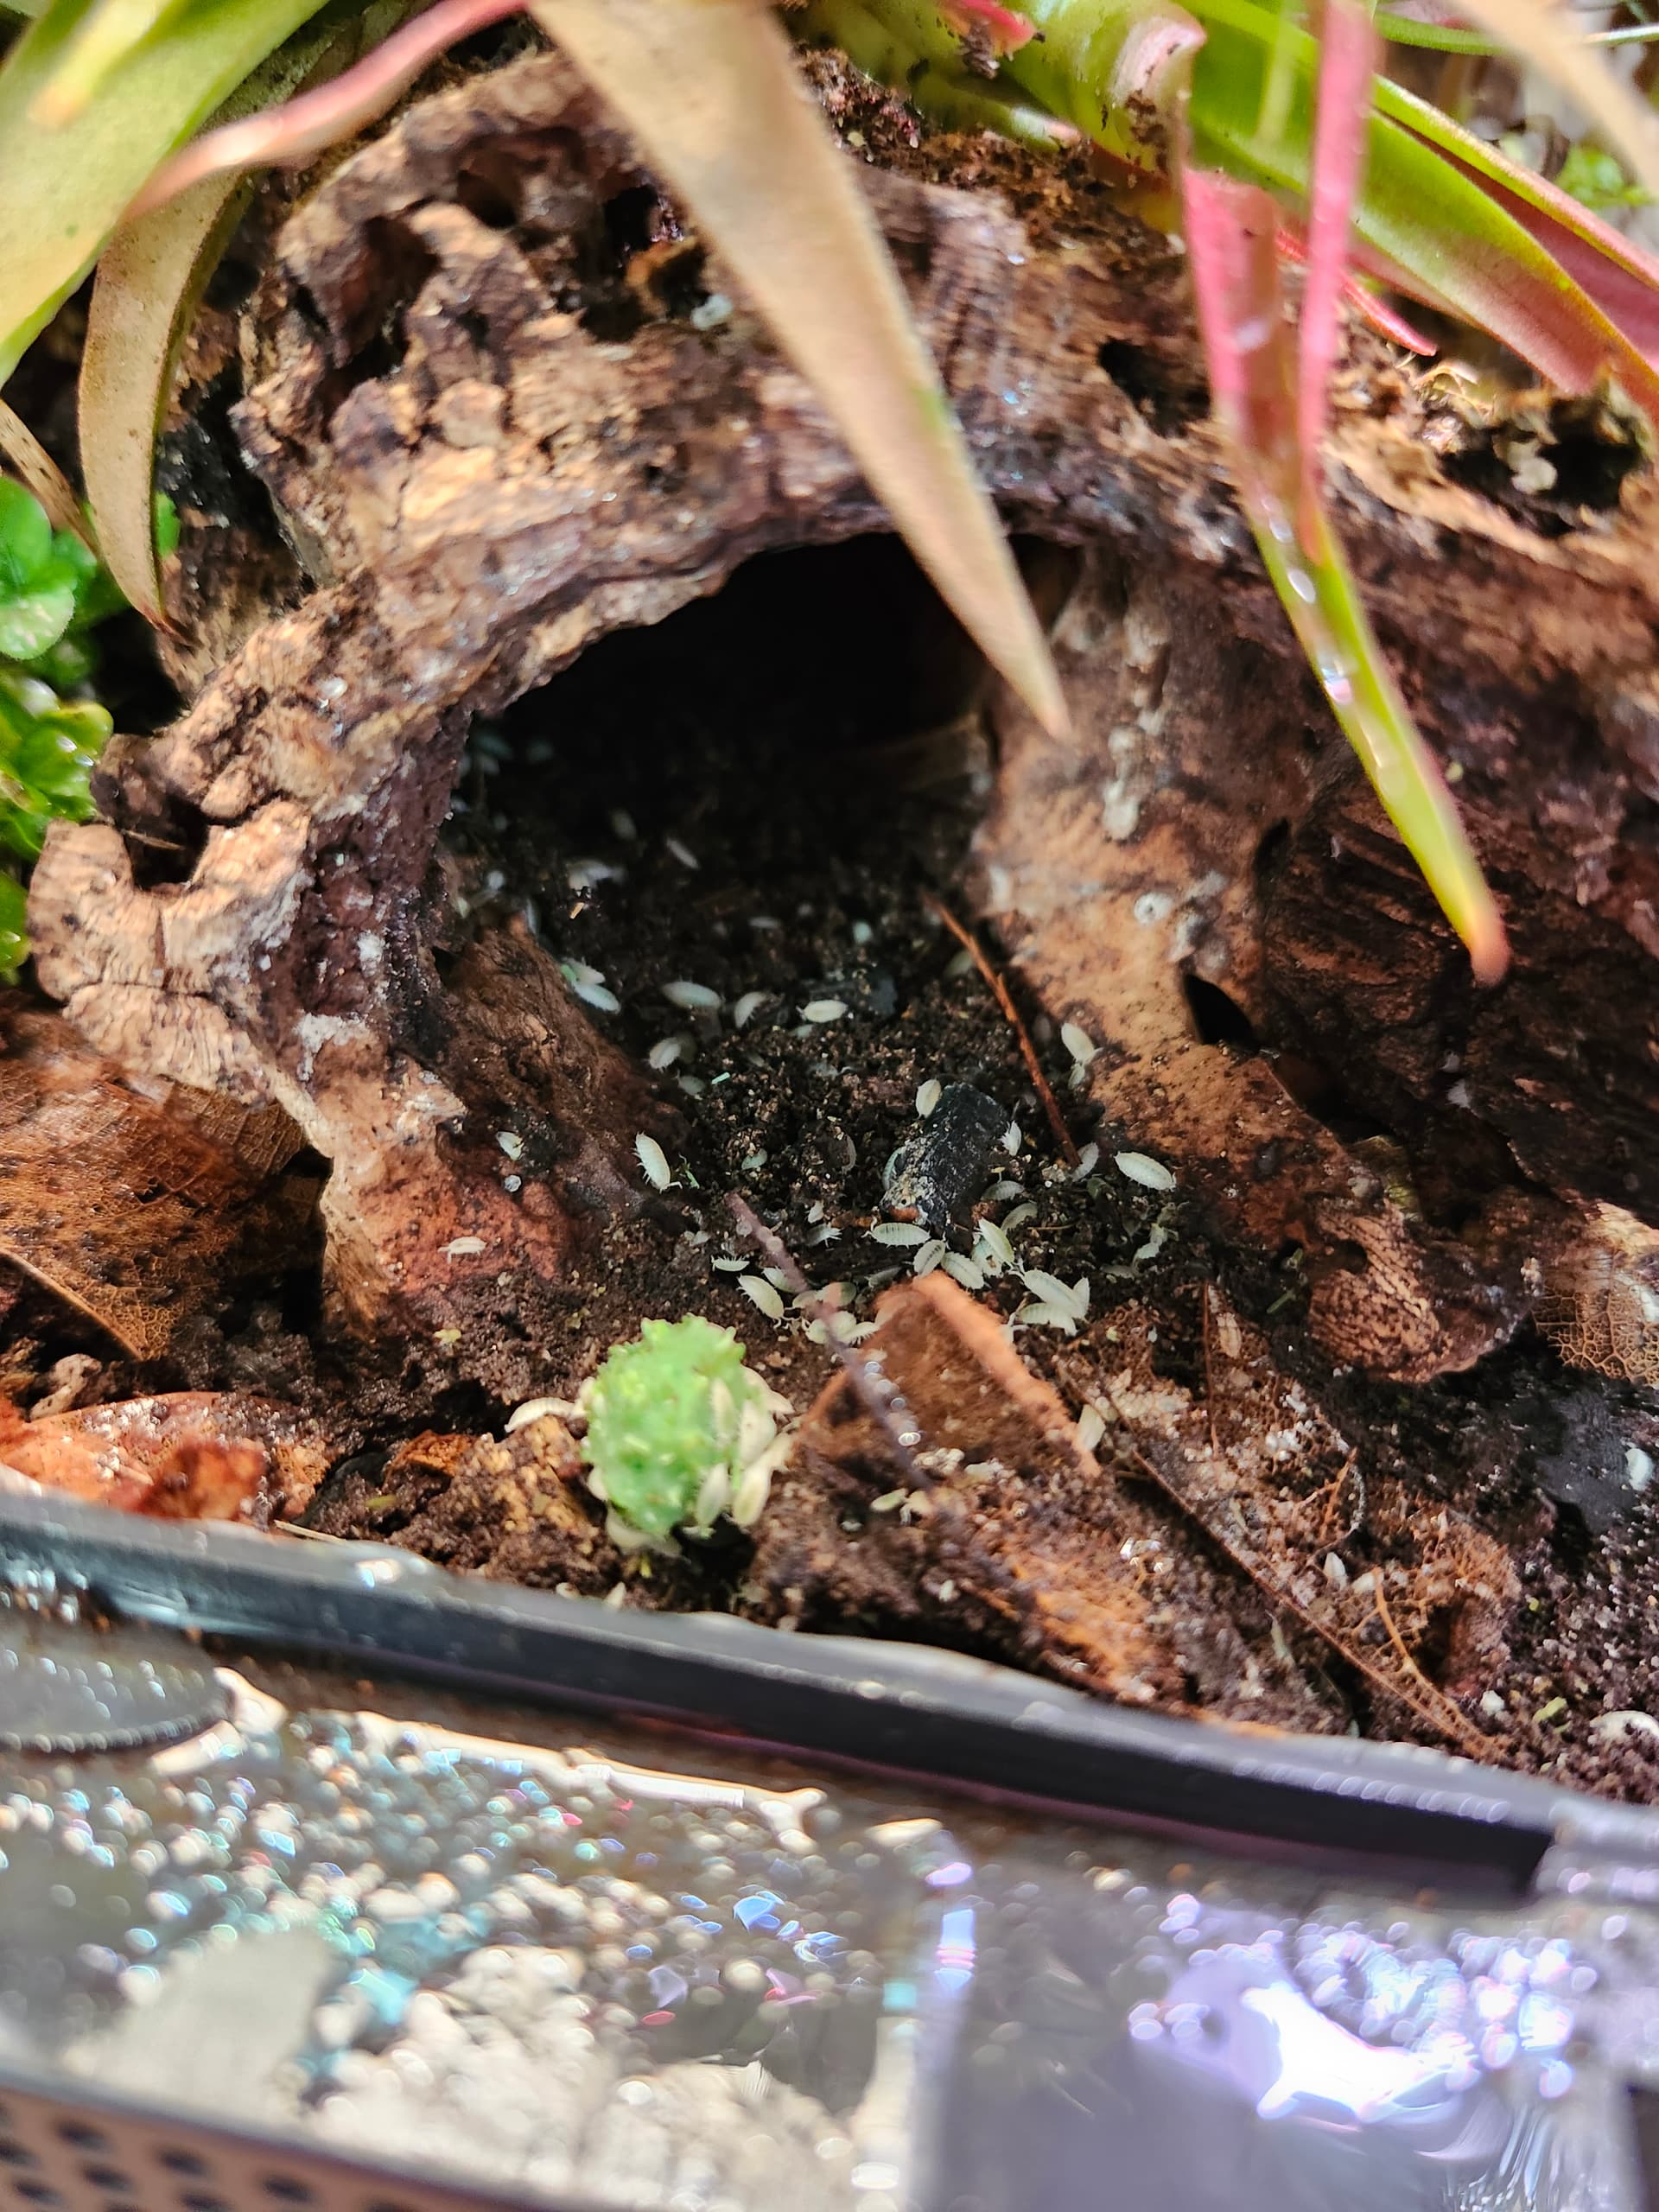
We also ended up getting beneficial nematodes in addition to springtails and isopods (I second powder blue/powder orange as a suggestion; porcellionides pruinosus is the proper name of the species and they come in white-spotted too!). The nematodes do a bang-up job preventing fungus gnats, which we had an issue with at first. I’ve also been considering predatory mites, because even with all our careful processing, wood mites got in, lol. They’re not problematic but they did make me jump when I saw them on my BP.

Another thing I wish I’d known when starting – when you first set up your bioactive, you’re going to get mold and you’re going to get mushrooms in the first couple months when it’s establishing. This will balance out with your cleanup crew eating them (my pods LOVE mushrooms) but while their population is still establishing, just do spot cleans when you see mold and mushrooms. Also be conscious of the air quality; if you’re sensitive to mold, you may want to run an air filter in your terrarium room while it’s balancing out. This is also part of why you want your bioactive to cycle for a couple of months before you add your animal.

Also don’t be heartbroken if you have some attrition with the plants. Expect to have things die on you unexpectedly, and be ready with some pre-quarantined replacements. Our bird’s nest fern did not thrive for whatever reason – on paper the parameters were correct – really a shame though, it was pretty.

As for plants to use, it depends on your humidity/heat parameters! For a ball python bioactive, we’ve had good luck with our golden and marble queen pothos (but NOT the satin pothos, for some godforsaken reason those all died), prayer plant, lemon-lime dracaena, snake plants, and fittonia (although the cleanup crew have been eating these ravenously lately and I’m not sure they’re long for this world).

Bioactive is a lot of fun and I’m glad you’re trying it out! My first terrarium has settled quite nicely, and it’s been running for about six months – I’m no expert, but I have recent newbie experience, hah!

3 Likes

Glad you are considering bioactive! I started November '23 and Im never going back. One thing Ill say when mixing your own substrate (I did this too, and it worked great), is to add some form of bioactive booster blend. There are two companies at least that make this - its got extra micorhizal fungi. Also, I got a “compost tea” type blend from a company that had beneficial bacteria too. That seemed to help a lot with the mold.

Mold also was controlled for me with ventilation. I got these fans on amazon that have a hygrometer connected to a fan. You set your max humidity you want, and if it goes above that the fan turns on. I also got auto misters. You’d be surprised how cheap those actually were, the fan and mister each were only about $20 to $30. All of this has really helped to automate my bioactives even more.

Do be prepared for die offs of plants. Some live, some dont. Get good plant lights for broad spectrum lighting, some blogs I looked at had recommendations on cheaper ones that work well.

You may also have some isopod die off from time to time depending on fluctuations in moisture. If this happens, there is a problem you should look to fix regarding moisture, microorganism growth, etc. Or it could be you just picked a more sensitive variety. I tried some more fancy varieties, and found the hardiest were the basic ones - porcellionides pruinosus and porcellio laevis (both do better in a little more temperate/arid environment in my experience), and the dwarf white (the dwarfs are tropical, so dont use them in an arid) Also, I had cubaris murina do well in one set up (tropical). If you mix species, often one will out compete the other unless they are fed extra. Also, if you mix morphs you could have your population revert back to wild type due to gene mixing. Also, for springtails pick the cheaper varieties that are good for your environment type - tropical versus temperate.

Arid is possible, with the right choice of CUC and plants for lower humidity. The key is that an arid is not dry through and through. Some parts are very moist - the top is kept somewhat dry, but the under layers of soil are kept moist (I put an automister nozzle under a rock in my arids - feeds mosture directly to the deeper soil and the Isopods love it). This is actually a bit more like reality, as in arid environments there is moisture a few inches down in the soil. I found the auto misters and fans helped with this alot as you can control the parameters better. Some places say with arid you dont need a drainage layer. I recommend against this, you need one for those too. Ive got one set up for a Leo and a uromastyx (separately). They love them.

Make sure you build in access for siphoning your drainage layer if needed.

Do mind hitch hikers from plants. Im still dealing with a little slug issue in one of mine. For anything nonliving I put in, I boiled. Even cork purchased (there are spider eggs Ive seen in those, and dead wasps). For a bigger piece, put it in a 5 gallon bucket. Boil water on the stove, and pour it in until its full (just be careful!). Even if it drops below boiling while you wait for the next pot to pour in, it still helps alot as it is still VERY hot.

If you put in some work, you can do it indeed without breaking the bank! Its very rewarding!

The pic below is one of my tropicals going on 1 year!

And then there are the dwarf white isopods - you cant beat them in a tropical

2 Likes