Keeping reptiles on a budget

Are you on a budget but in desperate need of a racking system to house your snakes?

Purpose built racks can be extremely expensive, especially for people with other financial commitments (children, health, debt… so on).

D.I.Y is the way most people go, but, without carpentry skills, it can easily become a mess and an eyesore.

Here’s how to make a rack for less than £110 without ever needing to lift a tool (well unless you wish to fasten it to the wall, which I recommend, especially if you have children).

This is just to make the frame, heating will need to be done by yourself to match the needs of your species.

As this is a wooden structure, this isn’t a lifetime lasting system. This is just something that can be built on a budget, until you can afford a purpose built rack.

Let’s get started.

Prep:

  1. Measure the space you have available. Height - Width - Depth. Write this down!.
  2. Make sure there is a power source available nearby.
  3. Have a good breakfast, you will need the energy.

What to buy:

  1. Carcass - PLATSA FRAME - £45

These come in several sizes and colours, which makes it easy to blend into most rooms without causing too much stress on the eyes.

60x55x180 cm 9 levels

60x55x120 cm 6 levels

60x55x60 cm 3 levels

  1. Shelves - HJÄLPA SHELVES - £7 (each)

60x55 cm

That’s it!

180cm high

60x55x180 cm X 1

60x55 cm X 9

Total: £106

120cm high

60x55x120 cm X 1

60x55 cm X 6

Total: £77

60cm high

60x55x60 cm

60x55 cm X 3

Total: £41

Tubs:

Each shelf can hold a number of tubs depending on the size and style. (if you use lid-less tubs, make sure to firmly place each upper shelf so that your animals don’t escape.

1 shelf can hold:

4 X FB-5-CV-G

2 X FB 10

1 X FB - 20

Build:

Rather than list a whole list of instructions on building it, here is a link to the downloadable instructions that you can follow.

There isn’t any screws or bolts needed to put the frame together, it is a simple ‘click and lock’ system.

10 Likes

I would like to applaud you @eaglereptiles because is a wonderful opportunity and example of a DIY done right

1 Like

Do you buy these units from ikea? Here in the States they’re PAXS system from ikea. I’ve seen them used before, I wasn’t sure they were available here but they are. I’ve never been to an ikea , had one where I use to live but not around here. I thought about using one as a more flexible quarantine, something like this would be nice. ***** I just downloaded it. Lol. I see that they are from there. Cheers

1 Like

Yep :blush: it’s all from IKEA.

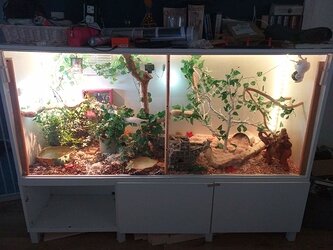
I actually used the Pax to make my Boa enclosures.

Here is one of them. (This is a old picture, we no longer use that boat decoration due to snakes not being able to judge the size of their own heads :roll_eyes:)

I’m going to break these down soon though and build new ones from scratch. Trial and error has led to a lot of unwanted scuffs and scratches here and there.

If you are going to use the pax as a enclosure, I recommend a minimum of 6mm plexiglass.

2 Likes

That’s really awesome, I’ve often wondered if there was a good way to repurpose some IKEA furniture to make a good rack. Cost wise it seems to come out to pretty much the same as my DIY melamine, but this definitely seems easier to those who don’t want to deal with power tools and blueprints

2 Likes

Man this is freaking awesome! Can you stop by and build me a couple retic enclosures lol. Very nice thomas!

1 Like

@chesterhf - with the tools and ability, yours is the route to go. It’s far more customisable and can be made to fit more specific sizes.
This is just for people like myself, that when it comes to woodwork, we measure once and cut twice, rather than vice versa. This is also melamine coated aswel.

@saleengrinch it can be arranged, I’ll hop on a plane and you can call my wife and tell her where I’ve gone :joy:

3 Likes

Wouldn’t recommend I talk to your wife about it! Lol if I was good at that I would still be married!

2 Likes

Reviving a bit of an older thread here.

Has anyone used the US PAX version of this for 3.5" tubs (FB5/FB8/FB10). Looking at all the documents on IKEA, it’s not clear what the exact spacing is between shelves is (or even what the exact thickness of the shelves themselves are as their US and Metric numbers don’t exactly match). Thanks! Peter