Thought I’d put up a spot for documenting my methods and techniques and the results I get! I hope maybe things I do could benefit anyone else who likes to craft stuff. I’ve been learning so much the last few years from everyone here and online elsewhere.
This thread was inspired by my sitting to whip up the perfect hide for my House Snake, and realizing I oughta keep track of how I do this.
This stuff is EVA Craft Foam. It makes a nice closed cell material to use as the core or skeleton of this build, as it will not stand a slim chance of molding like paper mache and it is cheap as dirt in these little flat craft sheets.
I’ve used basic masking tape to stick it together into the Box With a Spout shape I want. This hide will enable my snake to feel like he has a warm little burrow, the way he likes, but I’ll be able to lift the “lid” off the top to access the inside, and have a look without pulling him out and bothering him when he’s sleeping.
The next step is to mix up some basic tile grout, tint it with a mineral pigment, and slather a layer all over both the box and lid of this hide like I am frosting a cake.
Okay step one was making my shapes out of craft EVA foam.
Now, This is step two.
I mix pigment into grout, then sacrifice a couple of crafting utensils to this project and use them to paint the grout all over the foam shapes.
This is just coat one, and then this will have to cure for minimum 24 hours before I put another coat on top… but longer is better.
NOTE: DO THIS IN A VENTILATED SPACE. Away from snakes! And Ideally with some kind of fan on to blow the vapor away from you. It won’t smell bad while you work with it but it’s lying to you. Later your sinuses will feel abused. Just trust me. VENTILATED.
Now each coat will be covering section by section so I have a dry spot to hold, and eventually they will layer, thicker and thicker. I will go over the whole of each piece inside AND out, building up more and more of this grout.
While it is curing is a good time to scrub over the mostly dry surface with your fingers and pick off any pointy bits. We do not want soft scales to get snagged by sharp points. It should feel like cement, but no sense in leaving pokey parts.
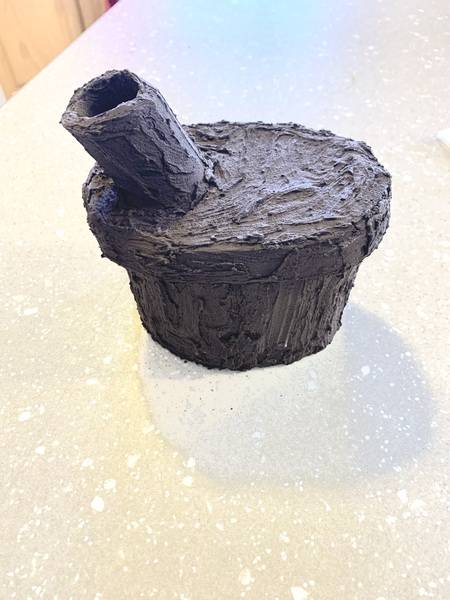
Aw thanks very much! This particular style of hide is quite easy so I am documenting it if you wanna give it a try! It could be made much easier by doing a square box, not an oval one.
Here’s the end result after two layers of grout, dried outdoors in between layers. We’ve got an oval box with a lid that has a “spout” for burrow access. This will be buried so that under-tank heating will be able to warm the snake (and the thermostat probe, v important! I like it right in there on the same surface the snake is touching, esp with a snake like this who does not urate in his burrows) but I can still access the snake if I need to by lifting the leaf litter off the lid and picking the lid up.
Here’s an Enclosure Hack anyone can do- it’s easiest with another pair of hands to help handle sticky details though. My Dad helped me with these.
This is my Ball Python 2x4PVC Enclosure, with the front and sides “wrapped” in peel and stick Vinyl. Instead of a big black box, I now have it blended into the other woodgrain furnishings in my steampunky Office Study.
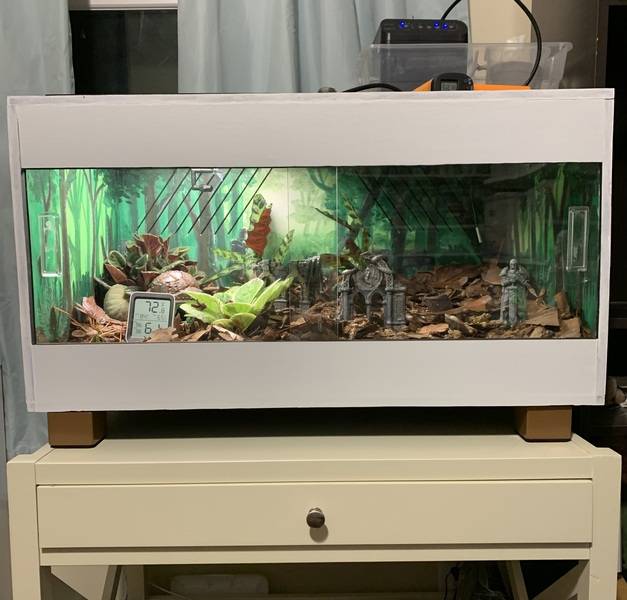
This is the 31 inch Bioactive I have prepared for my House Snake to graduate into. We covered this one in white woodgrain textured vinyl. The Vinyl doesn’t stick to the raw PVC edges, so once we wrapped, I painted the edges with gesso and then white acrylic paint. This is in my sewing room which is white furnishings, and now there’s not a big black box lurking and bringing the room light down.