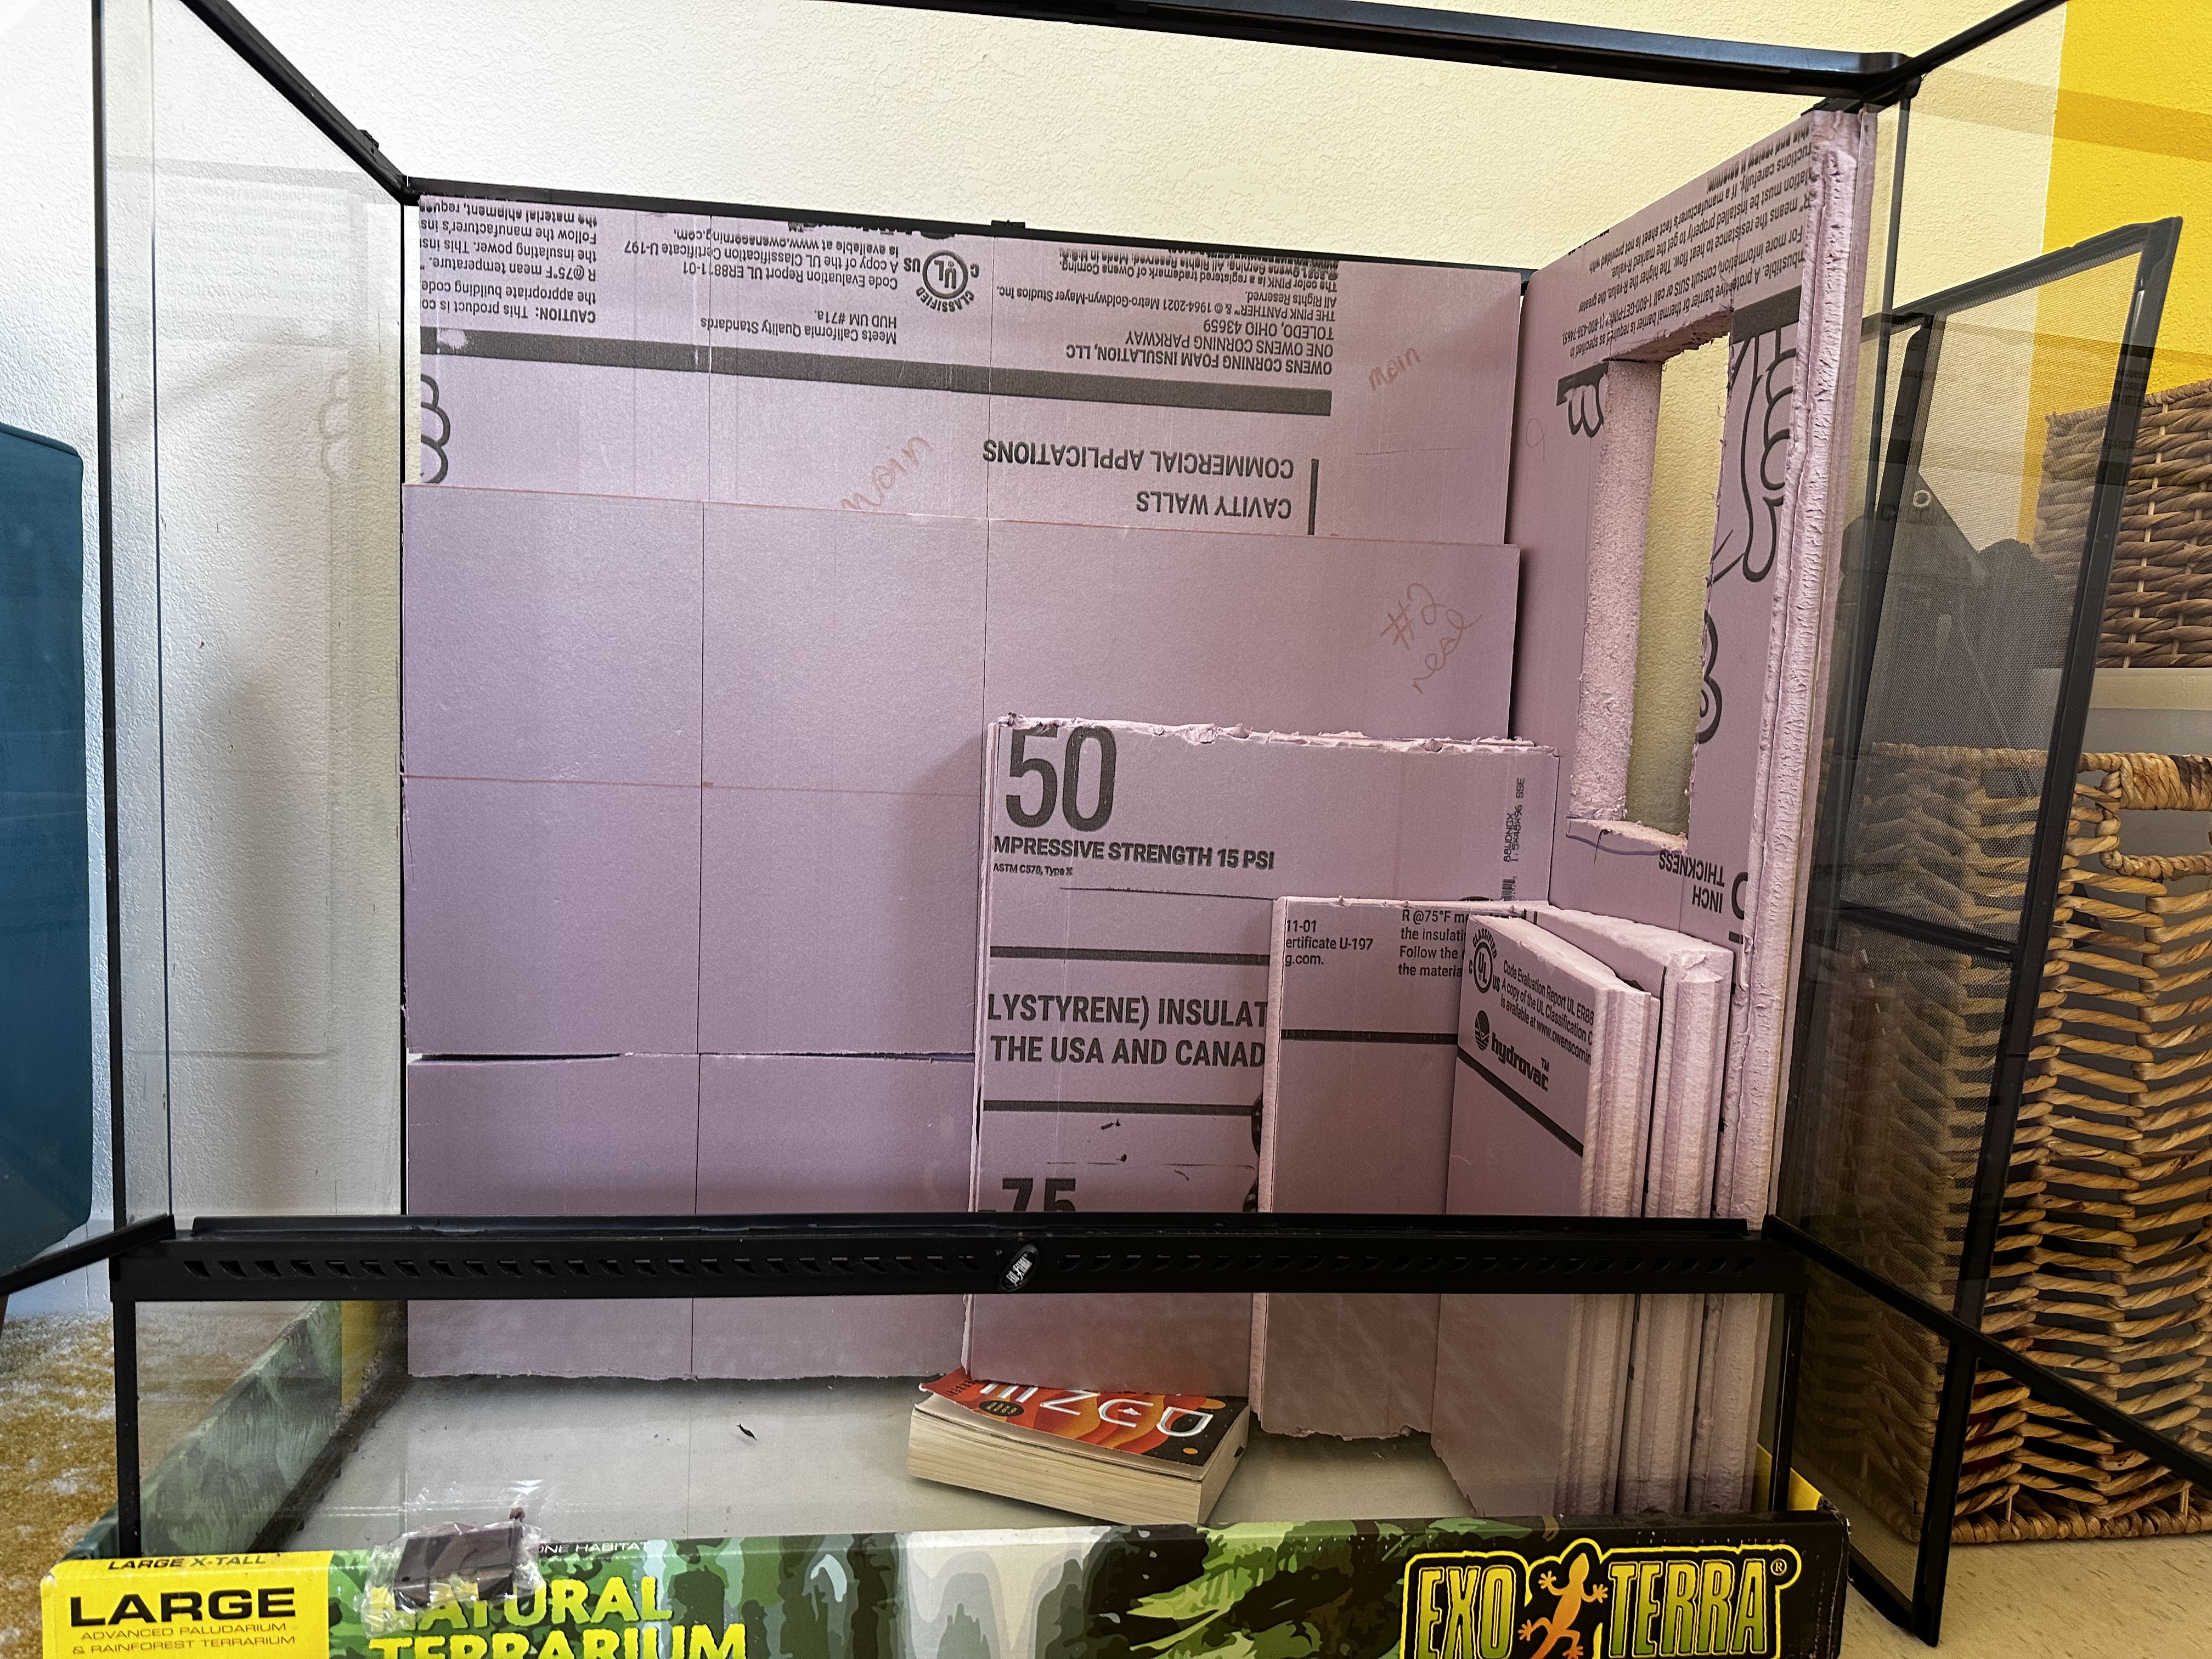
Always a good time when a build is underway! I’m setting up a new viv for my female crested gecko, Cookie. Went with a 36” x 18” x 36” ExoTerra — almost converted a 7’ saltwater tank because that’s how much I love building but this seemed a more reasonable size.
First up: background
Cookie’s favorite spot in her current tank is the flat ledge on TOP of the foam background, so I wanna give her a few more ledges this time. Thinking a tiered ledge system — like a cliffs of Mordor kind of vibe!
Started carving today! Thought I’d try for rocks — I dunno, looks a bit hoakie. Usually I just rough up the foam and call it good. Thought I’d try something new.
I started shaping with a dremel first and then carving with a steak knife. Nice work break in the sunshine I wear a mask just to make sure I don’t breathe any in.
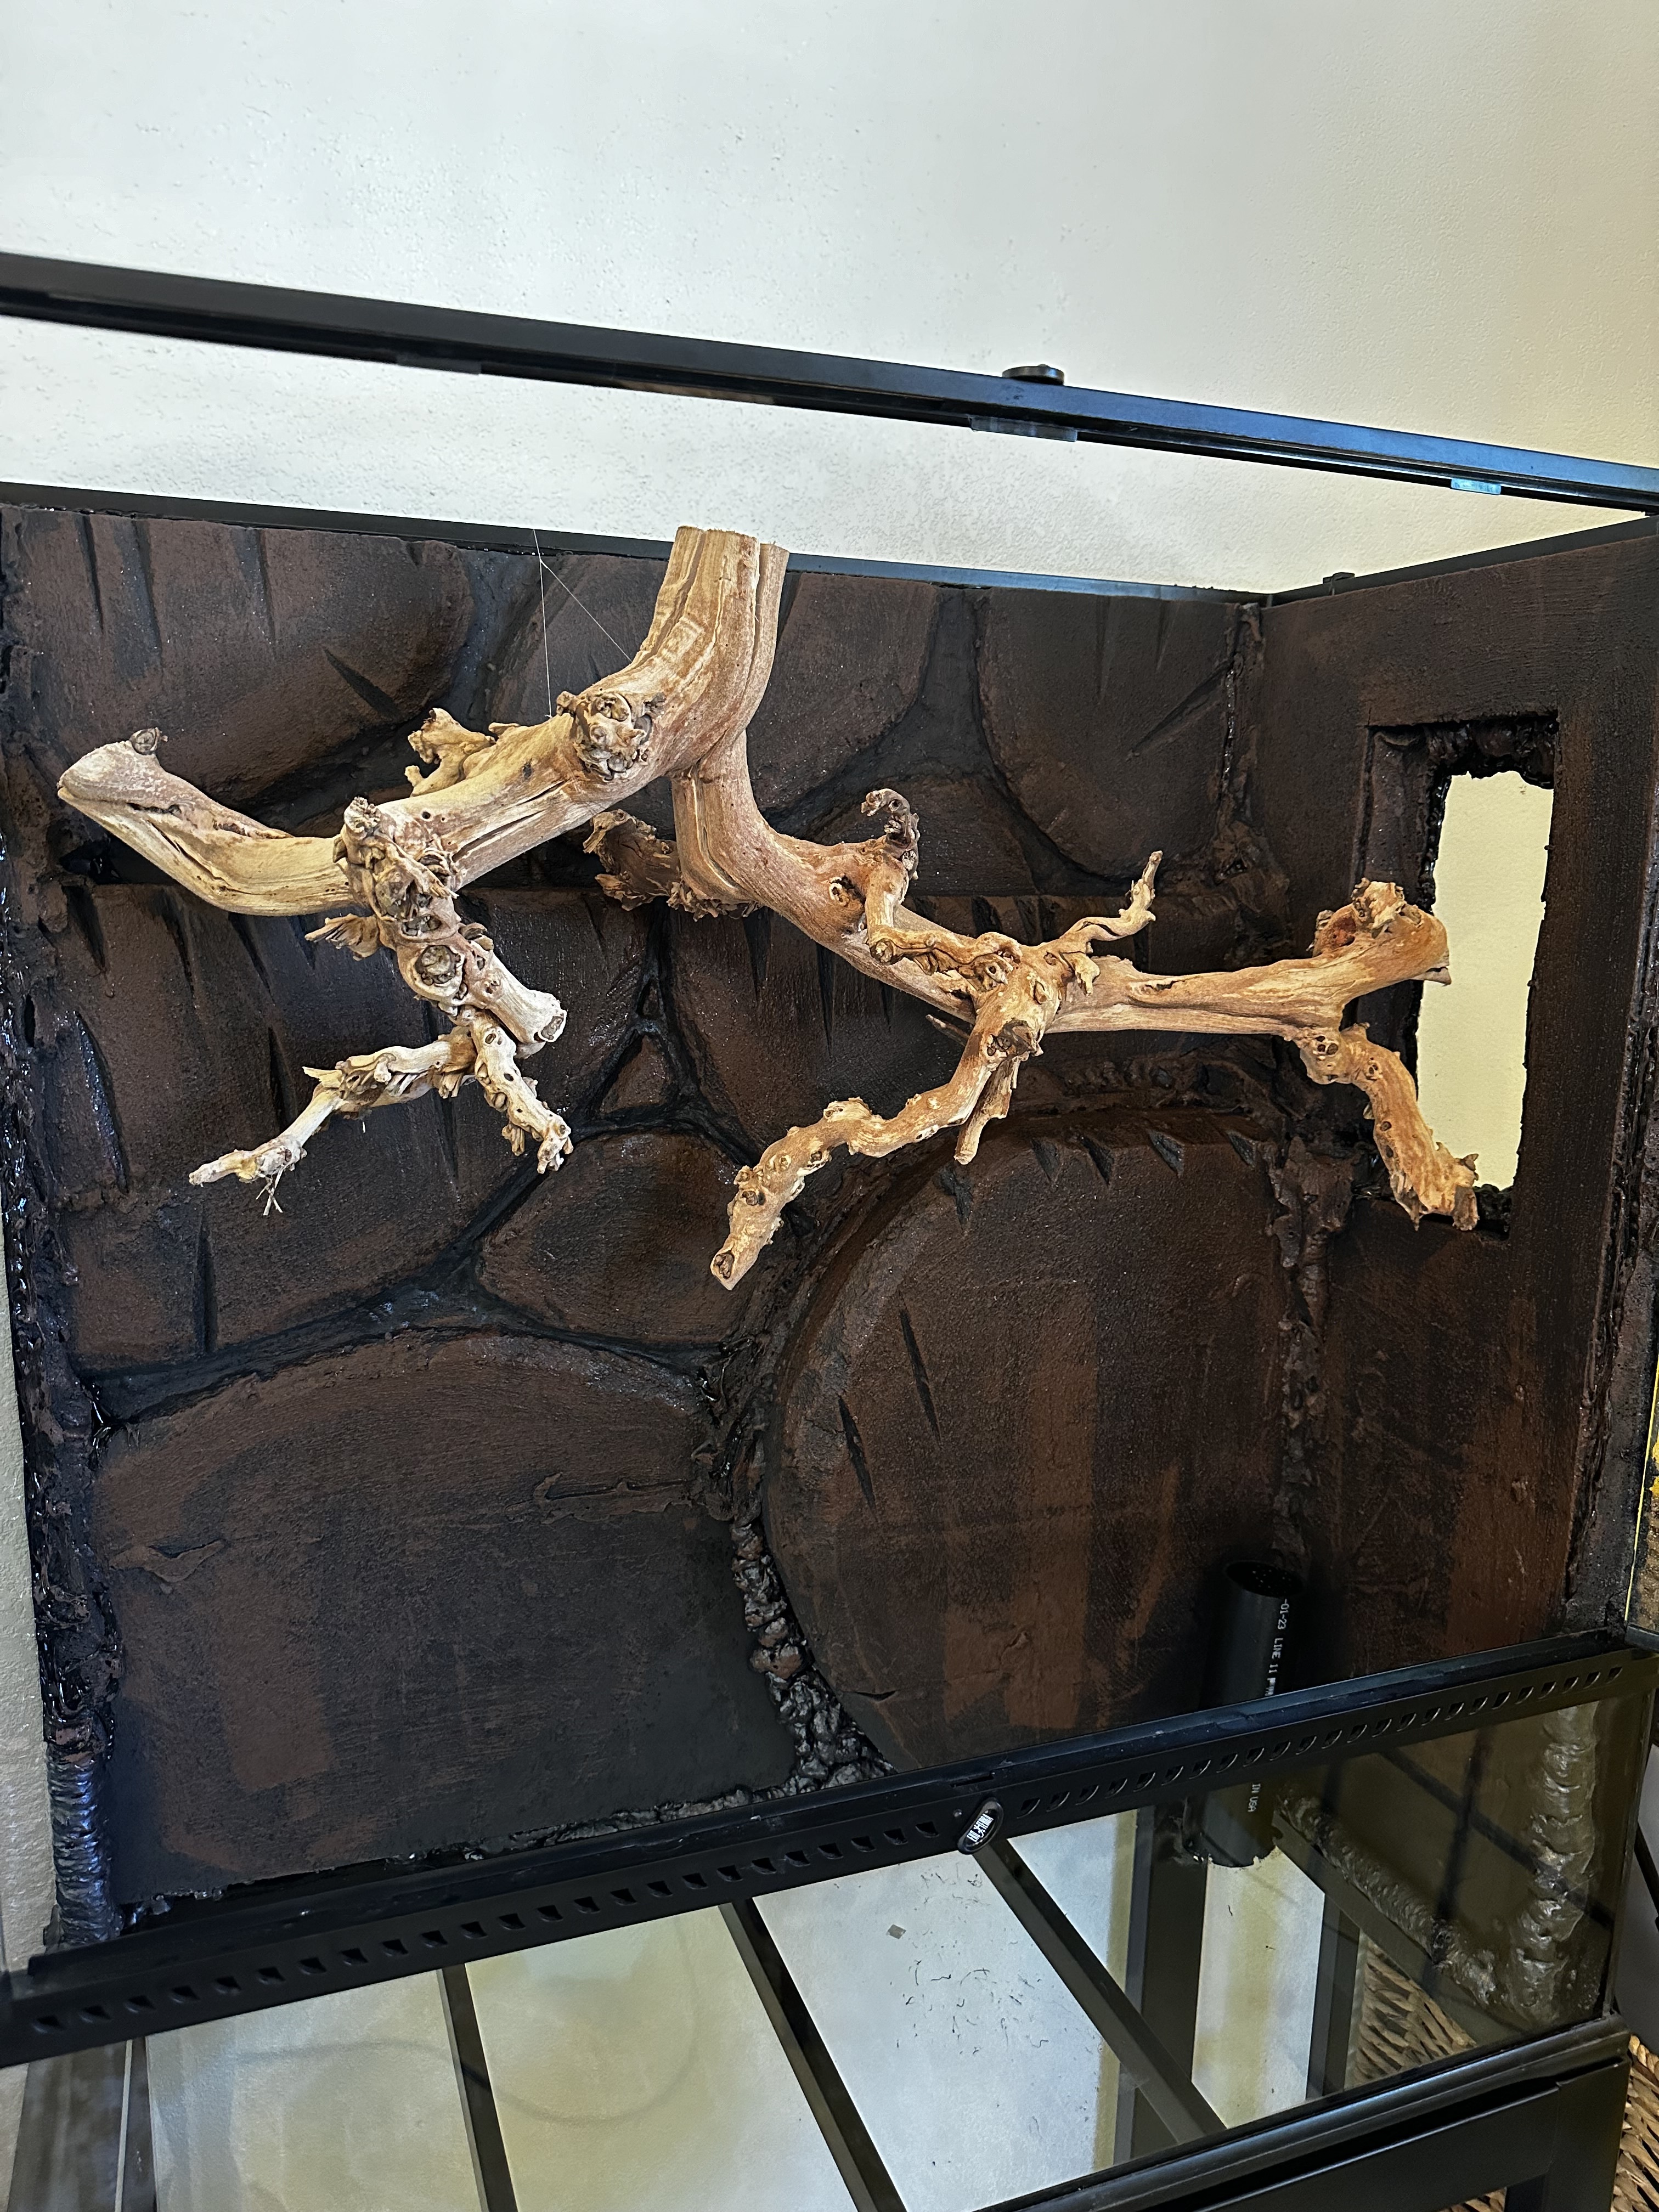
Painting on the drylock, dyed with concrete stain. Starting with all black and then will layer in some lighter colors. I like to do that step once it’s actually in the tank, so I can guess how the light would naturally fall.
Just sprayed the foam to hold it into place and seal up the seams. In a day or two, I can carve that down and start to silicone the edges.
Today I installed the first piece of wood! And the drain spot, where I can easily suck water out of the tank. I also finished the background with a layer of Drylock with brown stain, to add a little depth to the color.
Really starting to take shape now!
My clay balls and Mist king arrive today, so I can setup the mister and drainage layer!
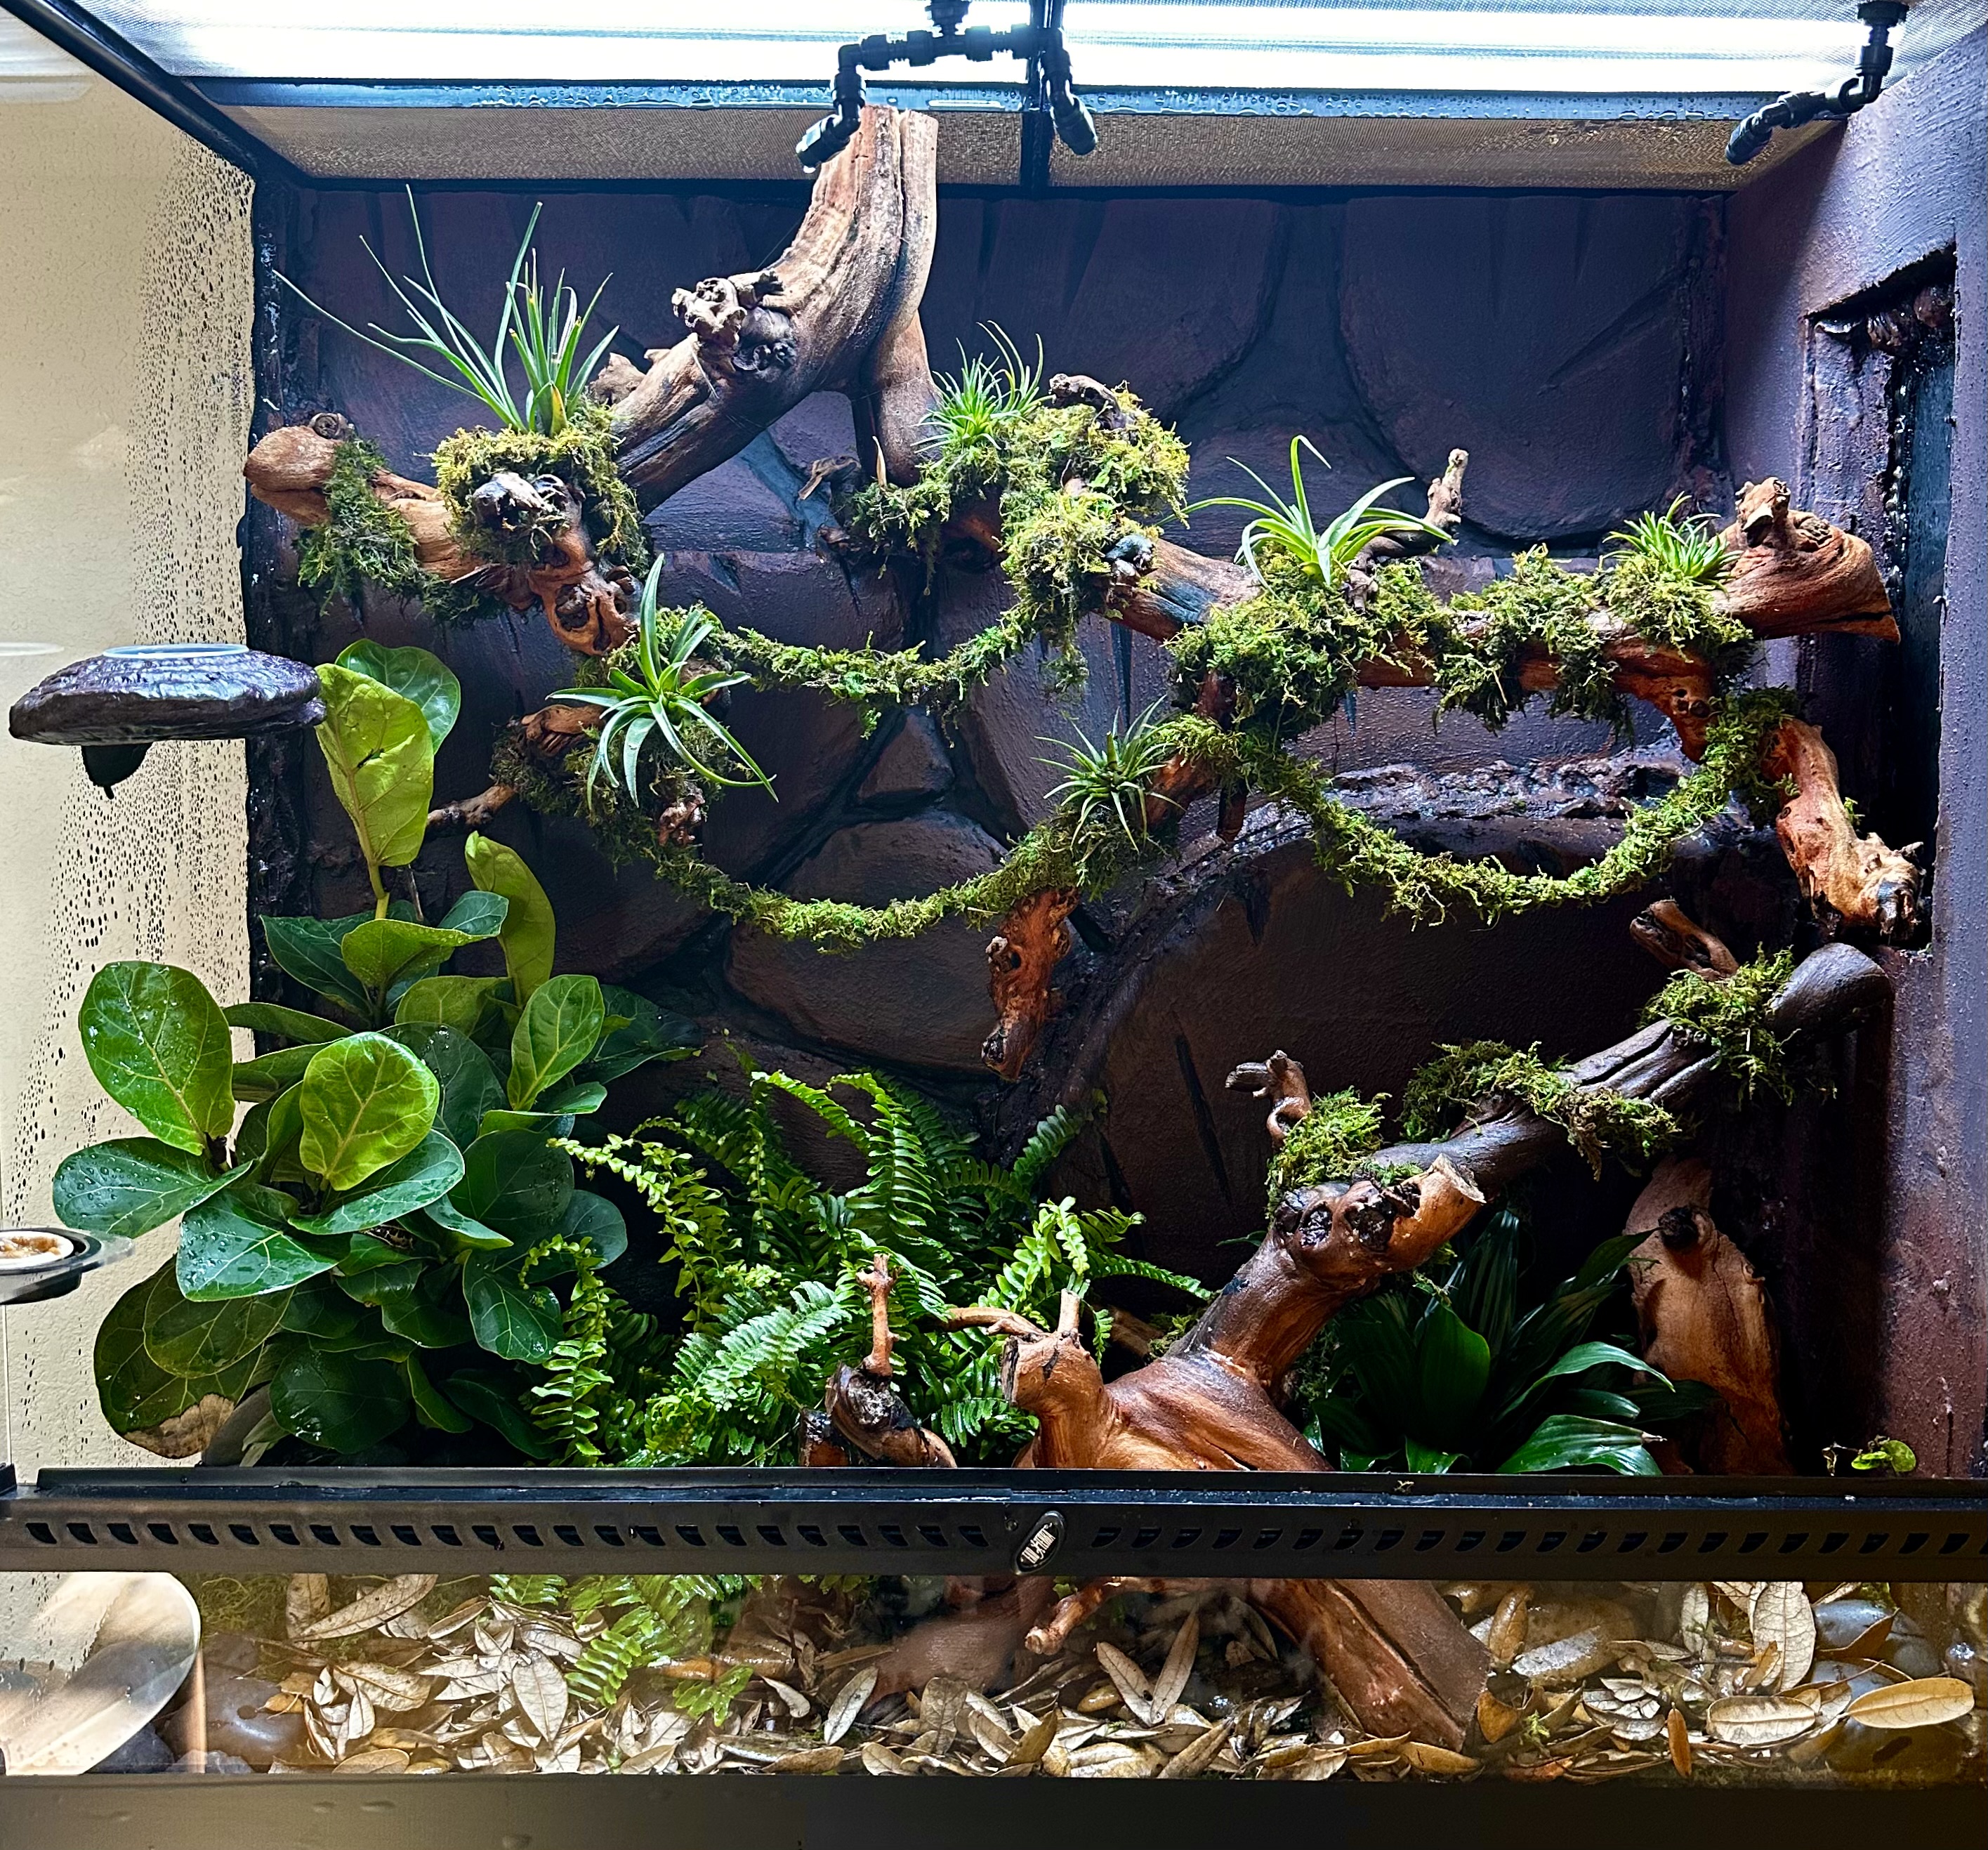
Thank you today I started playing with plants and moss. Got a UVB light up and installed the misting system (I have to order a few more nozzles, but this is a start). Setting up all my timers, so it’s actually starting to function like a tank!
I was feeling pretty iffy on the background, but the plants are starting to bring it all together!
It’s really happening now! I JUST put the soil in and got plants in the ground. Second mister nozzle arrived this morning
I did a soil blend and covered it with Galapagos-brand sheet moss, which is a big pop of color and helps with soil ingestion issues as well. Does have to be replaced every 6months or so. I think black river rock adds a modern touch!
I’m still hoping for more ait plants and a moss vine around that second mounted stick. But for now, I am soooooooo stoked about how it’s turning out!!!
Still playing with layouts and adding more vines. I seeded the isopods and springtails, and threw in some leaves so they can get established. This is really the fun part now
Well, per usual — build, debug, rebuild. I started having major mold issues from the grape wood. I hosed it off, tried drying out the tank, and ultimately pulled all the wood out to start over
I dried out all the wood and painted with drylock, since I had it on hand (I’ve heard you can use particular sealers as well). I used the red stain on the piece in front, and a darker shade on the top piece.
In hindsight, I would do them both red in the future I have used dry lock to waterproof wood in the past and it worked beautifully, so I’m hoping this fixes the problem.
Also, my fern died I can never keep ferns looking good! I replaced it with a second ficus, since they like it better anyway, and it seems to handle the moisture just fine.
Today, I couldn’t help picking up a little of the Spanish moss from the pet store. Fingers crossed that spreads!
Yeah, unfortunately grape wood molds pretty easily. I had a nice grape branch in my boa’s enclosure, but had to remove it after a month or so because I noticed some mold on it. Same story for a small piece of grape wood in one of my spider’s enclosures.
Sealing it with something like Drylock is a great idea! It never even occurred to me to try that. I might have to try that, because I really like the shape and look of grape wood, I just hate how easily it molds.