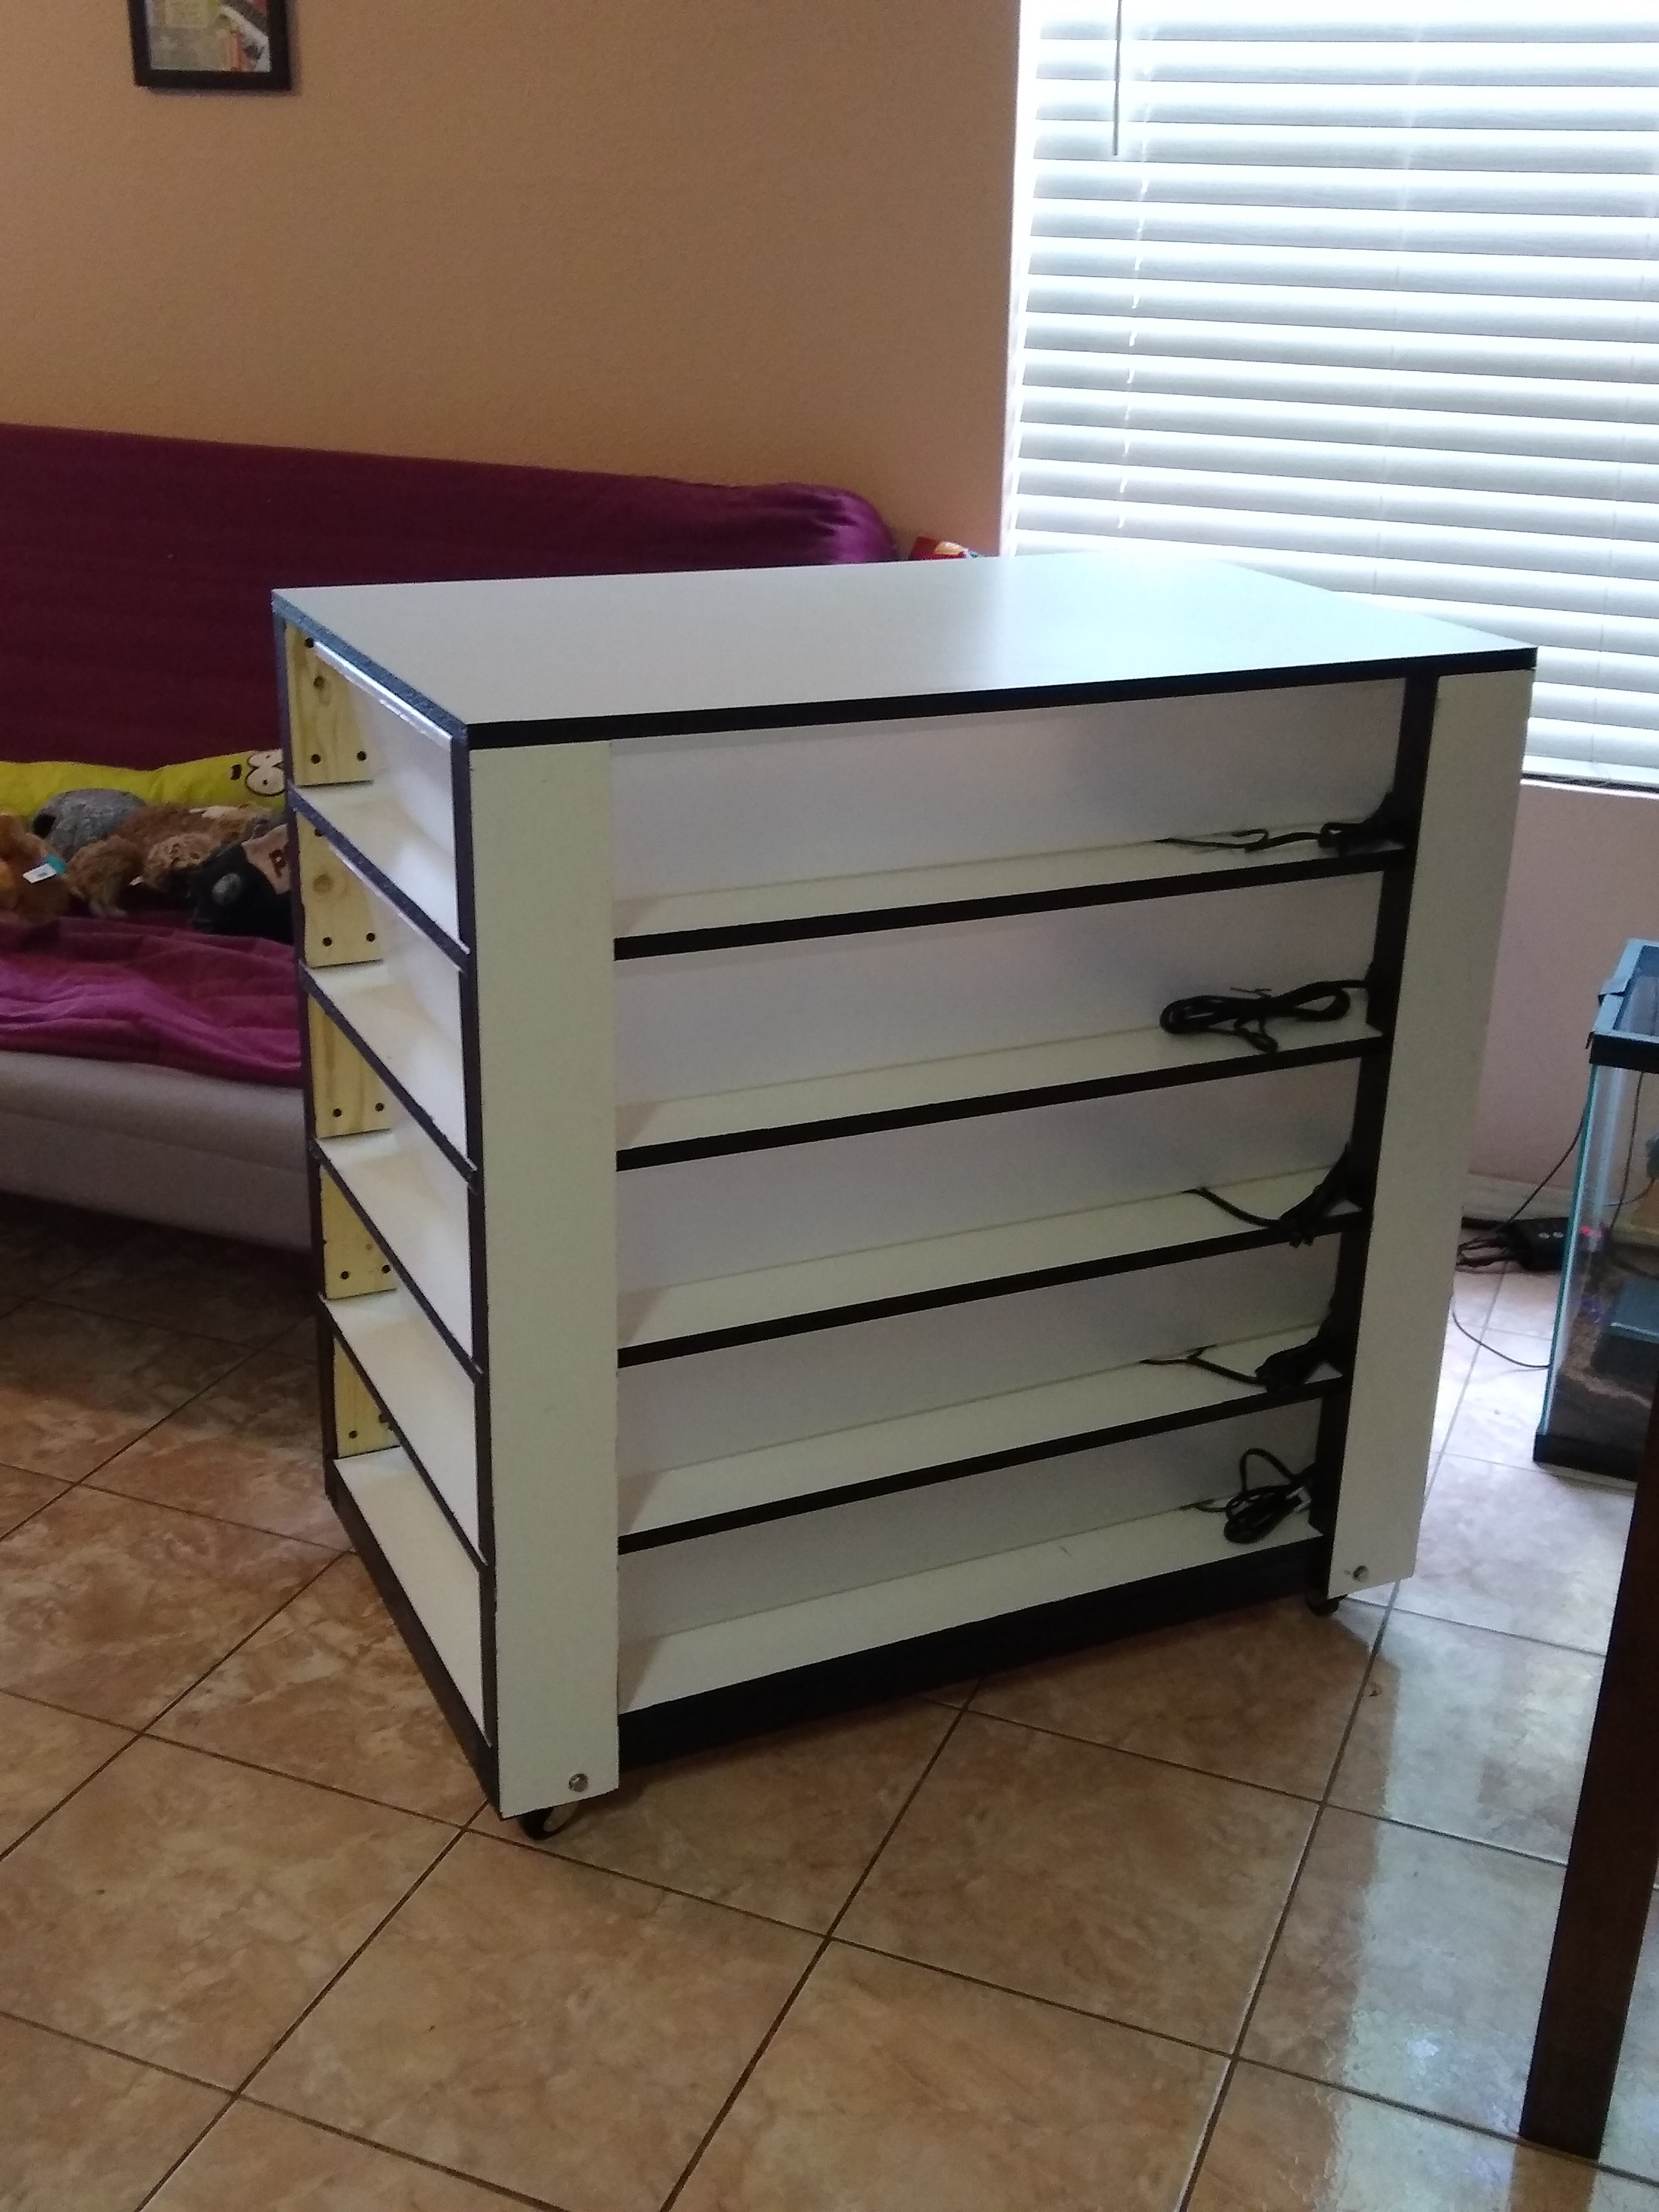
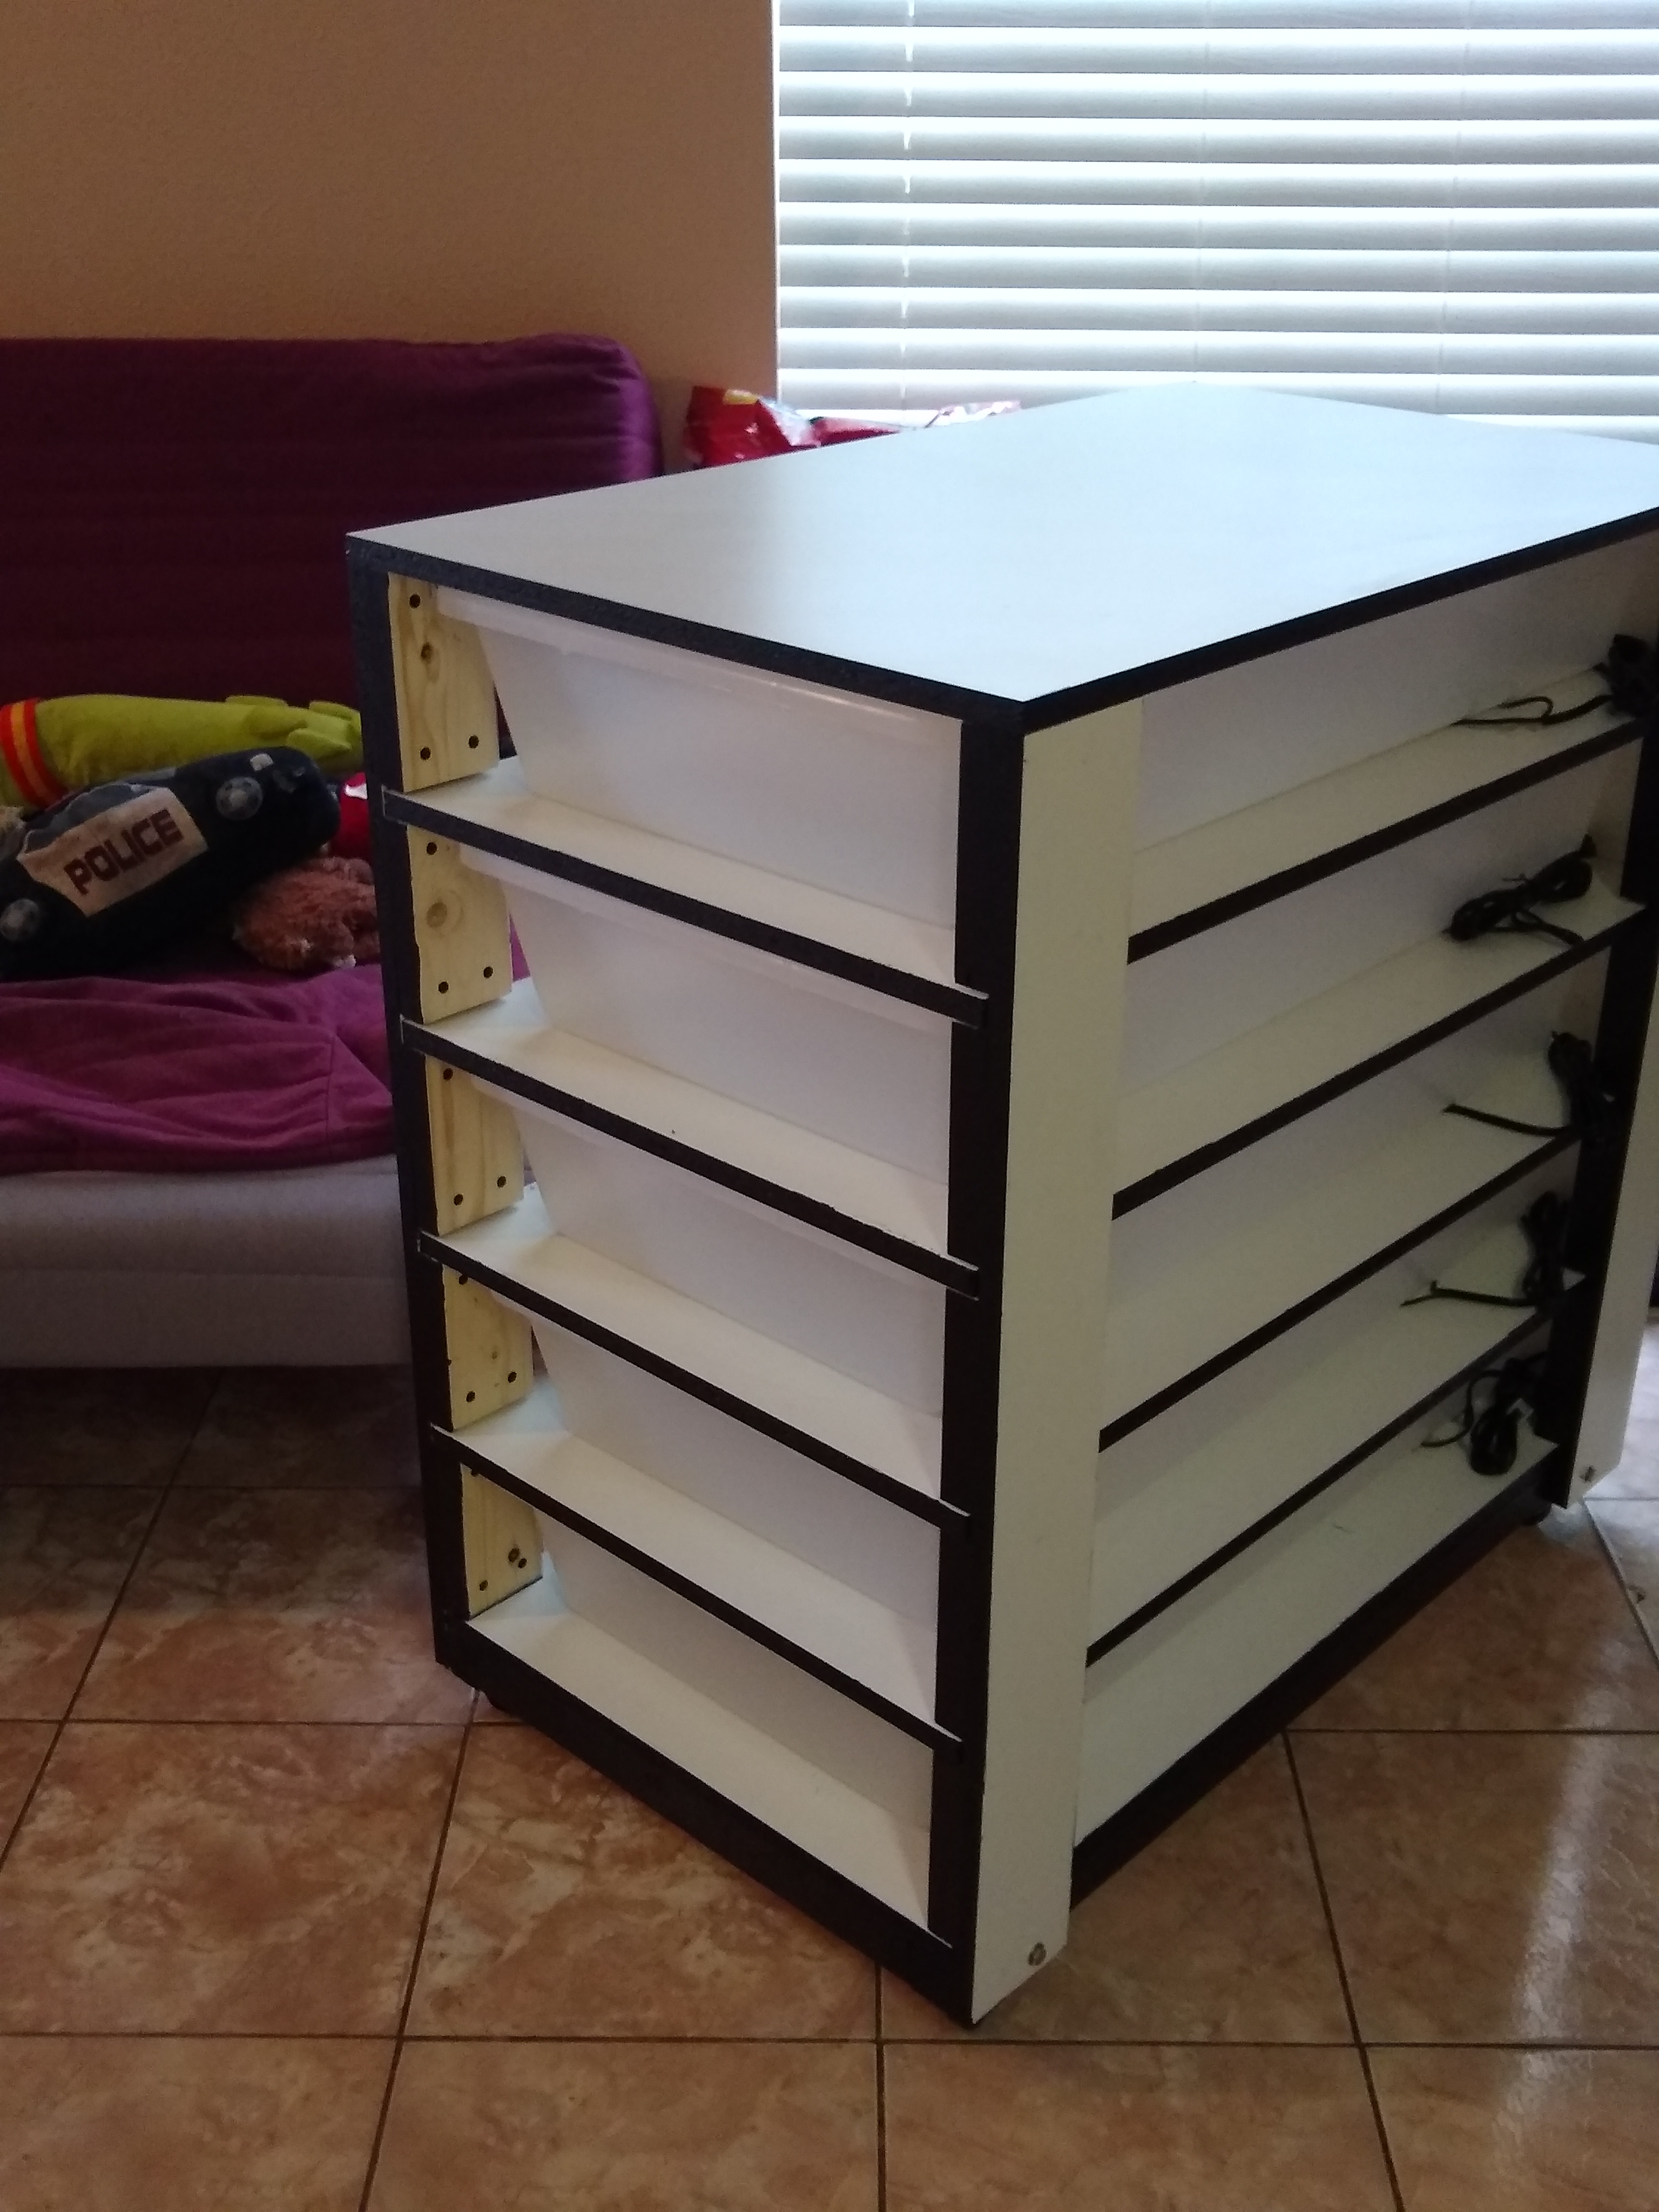
While this is probably not super exciting to the more experienced keepers who have seen every type of rack known to man, I just wanted to show off my new build since it’s pretty cool.
I wanted an reptile basics rack but they were a little out of my grad student budget, so we took the design and made one out of melamine/MDF and jazzed it up a little bit to make it look nicer.
It holds 5 FB-70 tubs and each layer has its own plug in since I don’t want to heat the entire rack if it’s not full (I’m building my collection very slowly). I have a Herpstat 1 arriving tomorrow and then it’s good to go!
It’s a little different than most melamine racks in that it’s modular, so it’s designed to be easily dismantled, transported and put back together, basically the IKEA of snake racks. Each of the shelves slide out instead of being drilled into the side panels.
Advice? Critiques?
24 Likes
I love it. You have done a amazing job, It looks completely professional 
4 Likes
You did well, I remember the days I made my own too, and it did not look as good as yours.
Looks great! did you recess the heat tape?
I did not unfortunately, that would have been much better
You may have issues with your heat tape later from constant rubbing when pull the tub in and out. Just keep an eye on it.
1 Like
Looks great! When I saw it I thought it may have been a new commercial grade rack I hadn’t seen before. Other than the recessed heat tape that was brought up I dont see anything I would critique or change. Awsome job again! Especially for a first build!
Thank you all so much! I am definitely going to look into making the heat tape recessed so I don’t have to worry about rubbing, that would definitely improve the design!
2 Likes
If you’re near a harbour freight or have those near you,. You can get a router for 20 -30 bucks
1 Like
ooh, ok. That’s not bad at all, I wasn’t even sure what tool would be needed to do that. My dad actually did all the wood work part of this for me in Pennsylvania, and I brought it all back to Texas to assemble and paint
2 Likes
Sweet rack! if it fits as tight as it looks that took some woodworking skill! I am impressed.
1 Like
I use a planer that I bought off Amazon for recessing heat tape. It’s a WEN 6534. It cuts 4 3/8" wide and just under and 1/8" deep in one pass. I mostly use 4 inch heat tape so it works perfectly. Much faster and easier than a router.
4 Likes
Is there instructions on how to build this I really need one for my snakes
If you have difficulty building one of these you can actually buy just a single rack from a few companies.
Very impressed! I’ve built my own racks for 15-20 years and I really love this. Especially the black and white color. It looks really really good, nice job!
It looks very nice. I would agree with the others about recessing the heat tape. The only other suggestion I might make is to add another vertical brace on each side in the center. Over time the shelves may begin to sag without that support. Other than that, congrats and good luck with your projects.
1 Like
If you foil taped your heat down, clear packing tape over the edges of the foil will help keep the tub from rolling the foil tape back. Nice rack too.
2 Likes
Thank you all so much! They are taped down with clear packing tape!
@graysnake I agree about another vertical support and that was in the original plans, however the store near home didn’t have the larger melamine sheets, only the smaller, and we ended up only having enough to do the four supports at the time. They were also the most time consuming because the vertical supports are not drilled directly into the melamine “levels”, but rather there are small wooden blocks attacked to the supports and carefully spaced so that the levels can slide in and out. So all that to say, I agree and it will be something we’ll get around to adding
3 Likes
There aren’t any official blueprints, but it’s based off of this guide from American Made Exotics - https://www.americanmadeexotics.com/41-quart-rack.html
The main difference is that it’s modular, we built it “Ikea style” so it’s easy to take apart and put back together when I move.
2 Likes