-
This list is nowhere near a complete encyclopedia of every single problem out there, just the basics and a little beyond.
-
This is not to help you treat your animal but rather to help you identify any problems.
-
It is down to you as a keeper to have any illness or issues confirmed by a licensed vet.
-
This is a community “wiki”, meaning it is editable by certain TL users.
Please add any images or information you have.
This list is nowhere near a complete encyclopedia of every single problem out there, just the basics and a little beyond.
This is not to help you treat your animal but rather to help you identify any problems.
It is down to you as a keeper to have any illness or issues confirmed by a licensed vet.
This is a community “wiki”, meaning it is editable by certain TL users.
Please add any images or information you have.
A lot of the issues below can be passed through a whole collection a lot faster than you would believe, which is why it is highly recommended you read the Lets talk about quarantine! thread also.
Lumps and bumps
Burns
Burns
What to look for:
Red, not pink scales
Non uniform
Scale damage
Scabbing and flaking
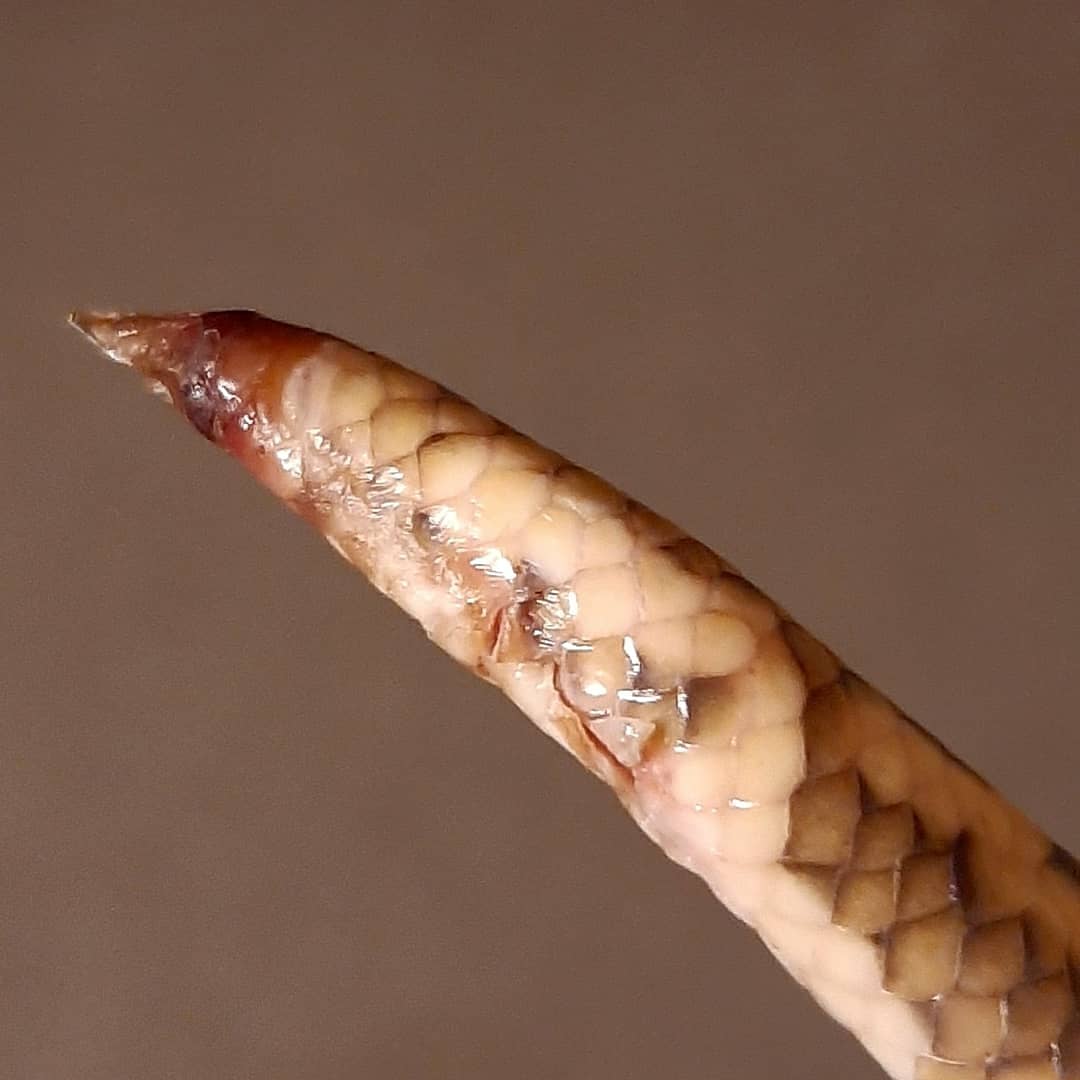
Burns are an caused by unregulated, unsuitable, or malfunctioning heat sources. It is extremely important that your heat sources be hooked up to a reliable thermostat (not thermometer) to keep the heated area at a safe and suitable temperature.
You must have a way of testing surface temperatures and double checking that the reading on the thermostat is correct. Un-regulated heat mats can reach temps of 120+ degrees, enough to melt plastic enclosures and potentially start fires in addition to the damage it will cause to your pet.
If your snake suffers a burn, a vet trip is needed as soon as possible. Burns can become infected easily and, if left untreated, can kill your snake. Burned snakes should be housed in a simplified enclosure while they are being treated. A substrate of newsprint or paper towels should be used to keep the wound free from debris.

Recommended Topics:
Urgent burn care advice
Burn Injury Progress!
Heat tape, narrowly avoided disaster
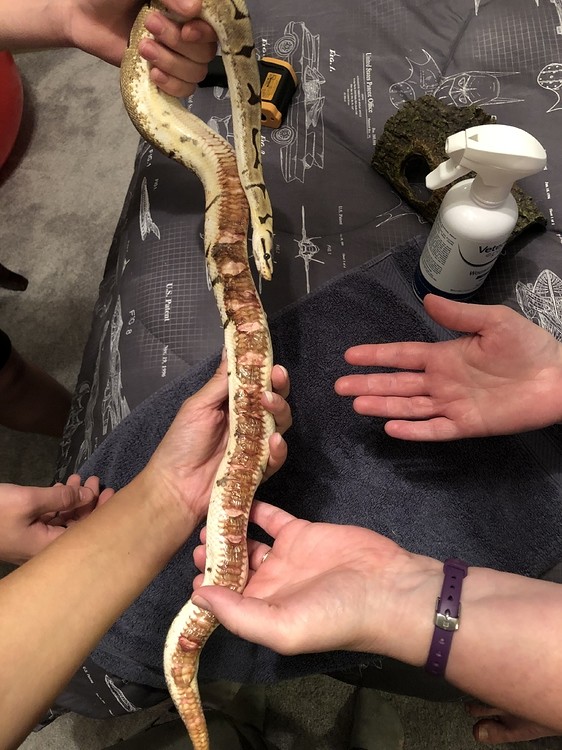
Scale Rot
Scale rot
Scale rot is caused by moisture issues. Wet or soiled substrate creates a perfect environment for bacteria to grow.
If your enclosure is too humid you will need to add more air flow to the enclosure by making small holes, or exposing more screen if you are using a screen top enclosure.
Mild scale rot will clear with husbandry corrections within a shed or two. Worse cases will require a vet visit for treatment.
Suggested Topics:
Options for raising humidity/decreasing humidity in snakes and lizards enclosures
Rescued Ball Python…is this scale rot?
Flaked Scales
Flaked scales
Sometimes you will notice dull patches of scales on your reptile. These patches are caused by the top layer of scales becoming dettached from the old skin during shed.
This can happen because a reptile was too enthusiastic when rubbing against enclosures furniture while shedding, causing a slight abrasion. These dull spots are no cause for alarm and will resolve themselves within a shed. If necessary adjust your humidity to ideal levels.
Split belly scales
Split belly scales
This is no cause for alarm. What you are seeing is where it absorbed it’s yolk while inside the egg. This slit is generaly more obvious in young snakes and will fade with age.
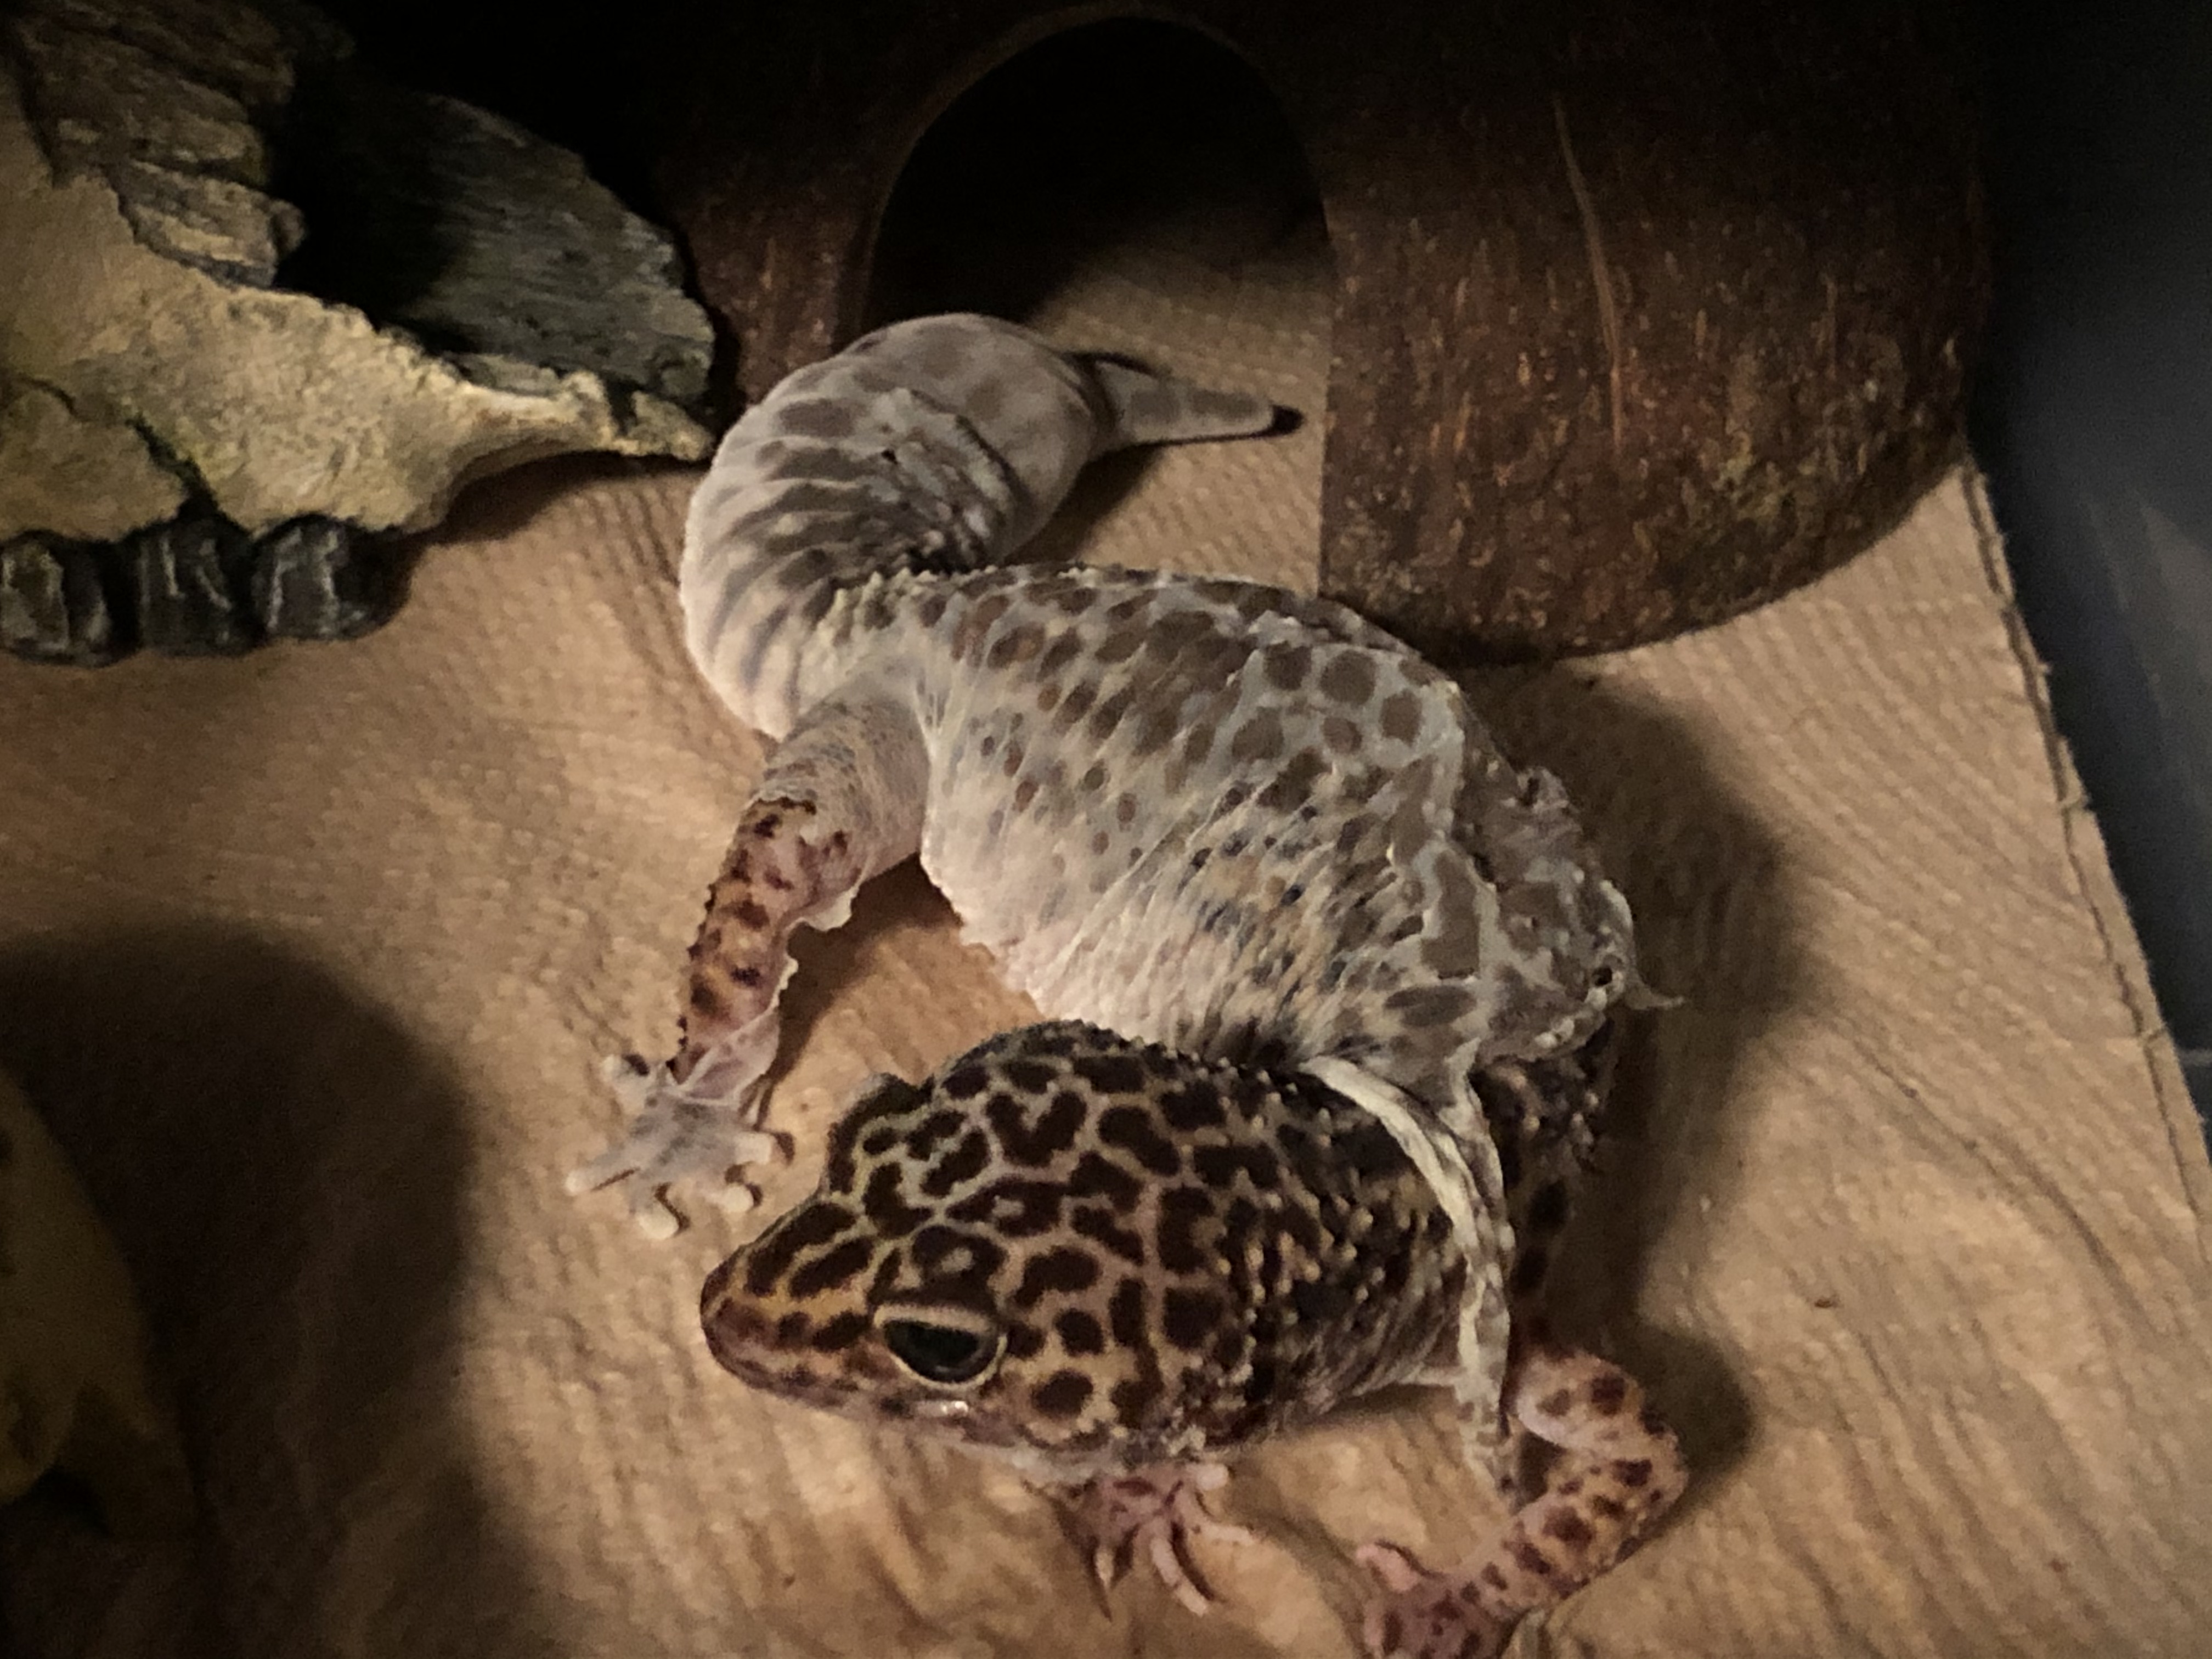
Vent swelling
Vent swelling
Blockages and swelling is not normal and require vet attention. Common issues are Prolapse, Scale Rot, and Constipation and Egg blockages.
Swelling near the vent, if unaccompanied by redness or crust could just be a sign on impeding poop. If your reptile stops feeding or doesn’t poop after a few days, the reptile could be blocked up. Warm moist compresses can help loosen things up, but if that doesn’t work a vet is needed.
Prolapse

Dented eyes
Dented eyes
If your humidity is too low, your reptile can have issues shedding fully, resulting in retained eye caps amongst other things.
If you notice your reptile is having a patchy shed, or that its eye caps are still in place, you need to check to be sure your humidity is correct at all times (not just when you notice they are going into shed).
While a retained eye cap itself is not an emergency, it is indicative of husbandry issues that need to be assessed for the health of the animal.
Usually eye caps will be fully shed with the next cycle, or, you may opt to provide a humid hide for your reptile to “soak” in to help the cap slough off. If done extremely gently and if your animal tolerates it, you can dampen a cotton swab and gently rub the area to help loosen the cap.
Shedding
Shedding
Pre-shed
What to look for:
Uniform Blushing.
Smooth, Undamaged Scales.
If you spend a lot of time around your snakes you will notice that just before they slip out of their old shed, to reveal their new beautiful skin, they often look a bit off. A whole shade different.
This pre-shed cycle is a completely normal part of their shedding process and can often be confused with a health issue if unaware.
During this part of the process their bellys can become blushed pinky shade and their overall appearance has a blue/grey tone to it.
As long as your temperatures and humidity are accurately measured to be where they need to be then you should have no reason to worry going into the shedding stage.
Suggested Topics:
To Shed, Or Not To Shed
Before/After shed pics
Normal shed
Untreated shed
Mouth issues
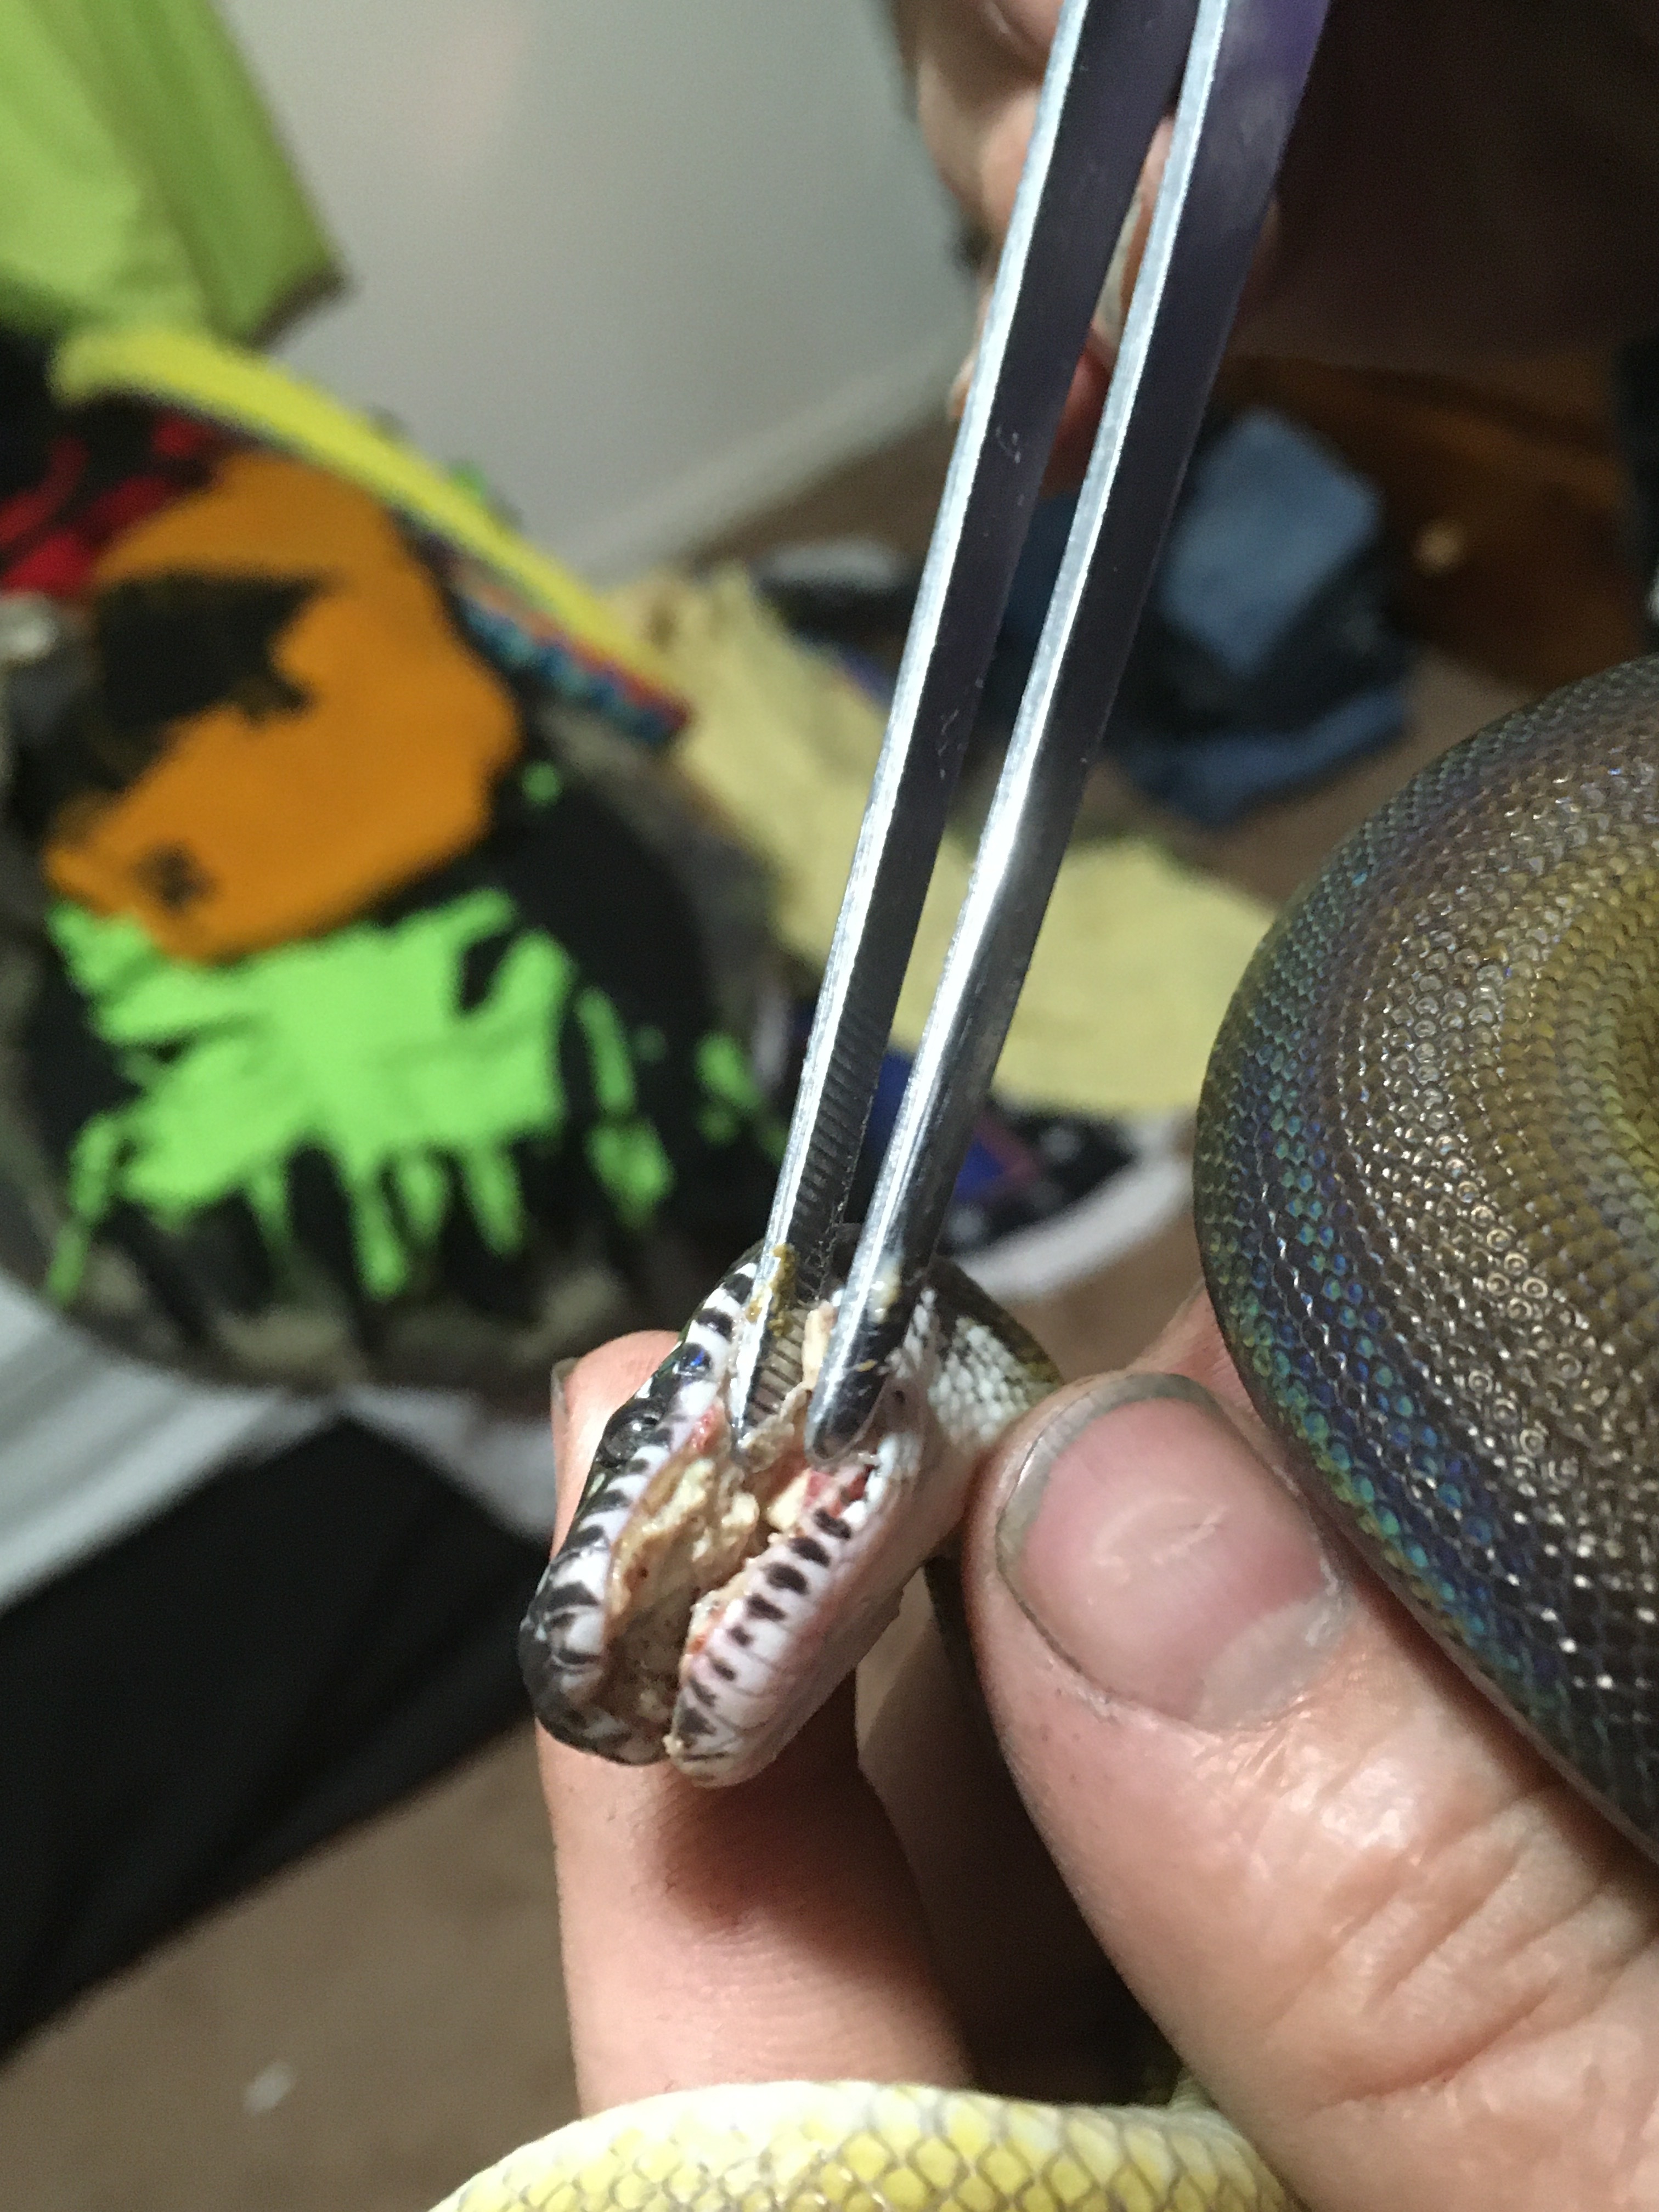
Mouth Rot
Mouth Rot
Visible Indicators:
Pasty, cheesy white or yellow build up in and around mouth and gums
Swelling and discharge
Gaping or unable to fully close mouth
Notes:
Mouth Rot can also be caused as a secondary infection to another health issue such as a Respiratory Infection. So if you take your animal to the vet for mouth rot, also have them check for RI.
Mouth rot, or Ulcerative Stomatitis is caused by an infection from cuts or stuck food. If not treated promptly, the infection will spread into the digestive tract and can cause other issues.
Mouth rot treatment requires vet care and a course of antibiotics.
Help with Mouth Rot
Mucus
Phlegm/mucus
Visible Indicators:
Open mouth breathing
Bubbles inside and outside of the mouth
Popping and gurgling sounds
Gaping
Notes:
Snakes presenting with an excess of mucus are usually suffering from Respiratory Infections (or RI). Incorrect husbandry such as wet substrate, and low temps can contribute to this infection. A vet visit is necessary to treat this illness.
Viruses
Parasites
Ticks
Ticks
Just like mammals, reptiles can also get ticks. Ticks can be hard to spot when small and can be mistaken for a raised scale.
If you are comfortable removing ticks you may do so, but as with any tick removal, it’s important to get all of the tick to prevent infection. A dab of antibiotic ointment can be placed on the wound, but be sure the ointment contains no pain killing agents as these are harmful to reptiles.
Mites
Mites
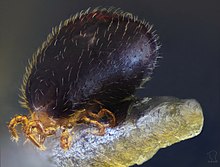
Ophionyssus natricis, the reptile mite, is a parasitic mite most commonly found on snakes, but also occurring on captive lizards, turtles, crocodiles, and other reptiles.[1] The parasites feed on snakes, which cause the bodies of the mites to be engorged with blood and fluids from the snake. Once the mites feed by puncturing through the snake skin, the snake usually shows symptoms of irritation and discomfort. - Wikipedia
Mites look like small dark bits of sand and are sometimes mistaken for freckles or bits of substrate.
Mites will often lodge themselves in your snake’s scales, making them more difficult to see and remove. Severe infestations can take over entire collections and cause and spread other issues.
If proper quarantine practices are taken when obtaining a new reptile, you can significantly lower your risk of a mite infestation.
Use of the predatory mite Hypoaspis miles (now Stratiolaelaps scimitus) is advocated by some herpetologists as a nontoxic means of eradicating a population of O. natricis.
When dealing with a scorched earth policy situation I have found the following to be the best course of action:
- Acquire your mite killer of choice (Frontline spray, Prevent-A-Mite, Nix, whatever)
- Spray the inside of four times the number of bags as animals you are having to treat and allow them to dry
- Grab a few simple holding bins
- Take every animal out of its enclosure and tie it inside a bag
- Set the bags in the bins to keep them out of the way.
- Strip EVERYTHING from inside the enclosure and throw it away
- If you are working with cages, take them outside. If you are working with a rack, take the bins outside
- Hose everything down and scrub with dishsoap
- Let dry
- While drying, return to room and:
a. If only dealing with cages - lightly spray entire floor area, with special attention to along the baseboards and corners, with your mite killer of choice
b. If dealing with racks - spray the floor as above but also spray inside each shelf of the rack, with special attention to the corners and the underside (e.g., the “top” to each bin) of each shelf - Go back outside and lightly spray the inside and outside of each enclosure/cage/bin with your mite killer of choice
- Go back inside and, now that the floor is dry, vacuum everywhere
- Take out the full trash bag that is probably teaming with mites
- Spray the inside of the trashcan with mite killer of choice
- Go outside and get your enclosures
- Put everything back in the room
- Take the bin of bagged animals outside
- One at a time, remove an animal from its bag and gently wipe down with a rag lightly sprayed with mite killer of choice. One rag per animal
- Put wiped-down animal in a new bag (from step 2)
- Put newly bagged animals into a new holding bin
- Take the bin back inside
- Go and strip down, bag your clothes, and take a shower
- Put on new, clean clothes
- Return to snake room
- Outfit enclosures with simple furnishing/bedding. I prefer paper and generic hides. If you must use some kind of organic bedding, make sure it is dry
- Lightly spray furnishing/bedding with mite killer of choice
- Let dry
- One by one, return animals to enclosures.
- DO NOT place water bowls in enclosures!!
- After 2-3 days, you can return water bowls
- Monitor a minimum of weekly. If you are using paper, you will likely see dead mites. A dust buster is a great tool for removal
- After 4 weeks, place the animals in one of the unused sets of bags from step 2
- Empty and dispose of all items in enclosures
- Repeat steps 25-33
- Hopefully by this point you have broken the reproductive cycle of the mites
- Set up enclosures however you like and return to status quo
Travis Wyman - Snake mites and how to spot them - #4 by t_h_wyman